FLine examples (Field graphics)
FLine is Field’s core geometry container type: it’s basically an ordered list of drawing instructions (moveTo, lineTo, cubicTo, close) plus style properties (color, thickness, filled, stroked, pointed, and so on). This isn’t a new idea — it’s essentially a “path” like you’ll find in SVG, PDF, and PostScript. Unlike those formats, Field stores points in 3D when that makes sense.
The examples below run inside a box in Field. Many use lines(...) to show what they've drawn;
others use a 3D viewer or build on an earlier example.
If you're new to FLines, start with seeing one, then try building a path and changing its style. There is much more here to return to when you need it. To draw a stroke by hand and have code read it, continue to Drawing and Notation.
Every example on this page is also in the document below; click a box to read its code.
Some syntax, before we get started
In Field sketches you’ll often see fline { ... }. It’s a small helper around Kotlin’s apply { ... }: create an FLine, run setup code on it, and return the line. A comparison:
:::static
// 1) Preferred in Field: build inside `fline { ... }`.
val f1 = fline {
    moveTo(20, 20)
    lineTo(120, 20)
    lineTo(120, 120)
    close()

    filled = true
    stroked = true
    thickness = 1.0
    color = vec(1.0, 1.0, 1.0, 0.25)
}

// 2) The explicit style: make a var and reuse it.
val f3 = FLine()
f3.moveTo(20, 20)
f3.lineTo(120, 20)
f3.lineTo(120, 120)
f3.close()
f3.filled = true
f3.stroked = true
f3.thickness = 1.0
f3.color = vec(1.0, 1.0, 1.0, 0.25)

// Show they really are the same geometry (offset so you can see them).
lines(f1 + vec(0, 0, 0), f3 + vec(180, 0, 0), w = 320.0, h = 170.0, fitToSize = true)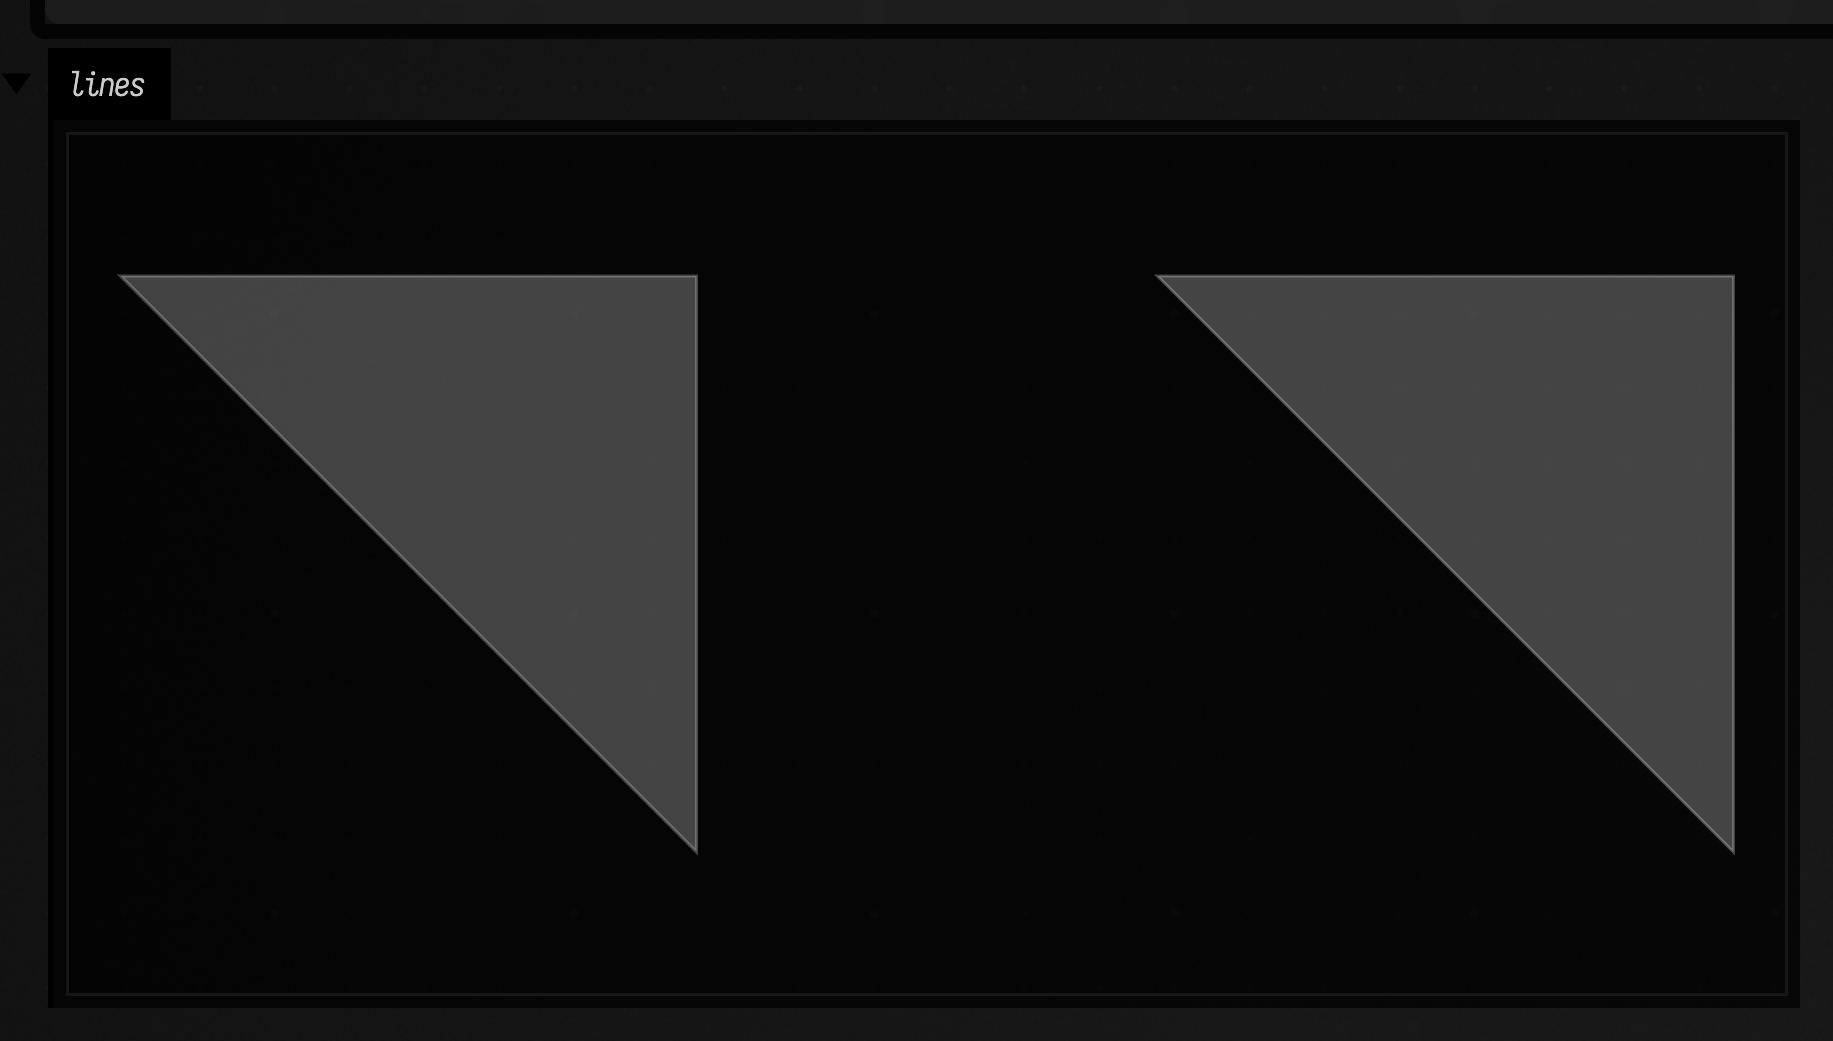
Seeing an FLine: static and editable viewers
There are two main ways to inspect FLine geometry in Field:
lines(...)renders an SVG-style 2D view in an output area.threeLines(...)renders the same geometry in the Three.js viewer.
Both accept editable = true, which lets you change the underlying FLine in the view.
2D output: lines(...)
Use plain lines(...) when you want the usual fast 2D display: diagrams, plotted curves, path debugging, anything that lives in screen space.
:::static
fun Box.lines(
    vararg m: FLine,
    channel: String = "lines",
    w: Double = -1.0,
    h: Double = -1.0,
    fitToSize: Boolean = false,
    editable: Boolean = false,
)
:::static
val wave = fline {
moveTo(40, 170)
cubicTo(120, 40, 180, 40, 250, 170)
cubicTo(320, 300, 380, 300, 460, 170)
thickness = 2.0
color = vec(0.98, 0.88, 0.28, 1.0)
}
val fill = fline {
moveTo(40, 170)
cubicTo(120, 40, 180, 40, 250, 170)
cubicTo(320, 300, 380, 300, 460, 170)
lineTo(460, 300)
lineTo(40, 300)
close()
filled = true
stroked = false
color = vec(0.32, 0.82, 1.0, 0.18)
}
val nodes = wave.copy().apply {
stroked = false
pointed = true
pointSize = 4.0
color = vec(1.0, 0.5, 0.25, 1.0)
}
lines(fill, wave, nodes, w = 520.0, h = 320.0, fitToSize = true)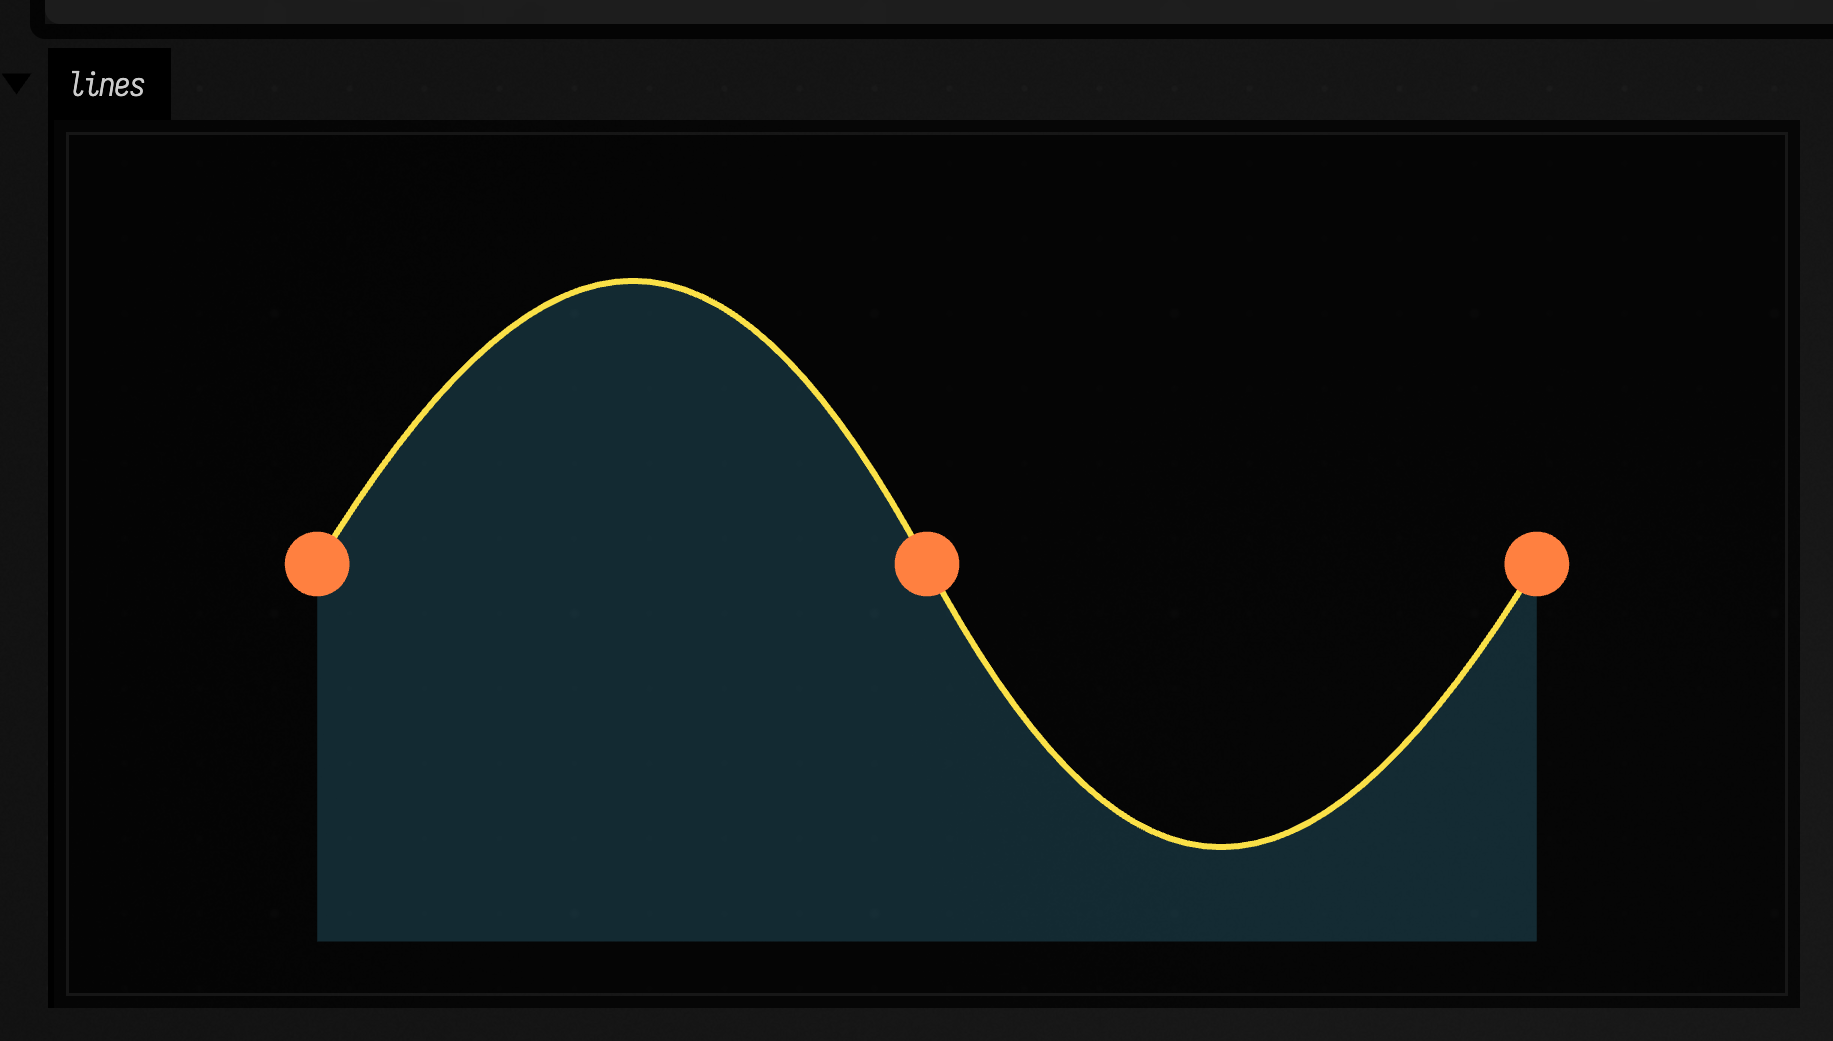
If you switch on editable = true, the same output becomes an editor. You can click points, edges, or filled regions, drag a selection, marquee-select, and press e to hide or reveal the edit UI.
:::static
val petal = fline {
    moveTo(0, -120)
    cubicTo(90, -100, 140, -20, 0, 120)
    cubicTo(-140, -20, -90, -100, 0, -120)
    close()
    filled = true
    stroked = true
    thickness = 1.0
    color = vec(0.95, 0.42, 0.6, 0.34)
}

val stem = fline {
    moveTo(0, 120)
    cubicTo(10, 180, -20, 230, 0, 300)
    thickness = 1.0
    color = vec(0.45, 0.95, 0.62, 1.0)
}

lines(petal, stem, w = 420.0, h = 420.0, fitToSize = true, editable = true)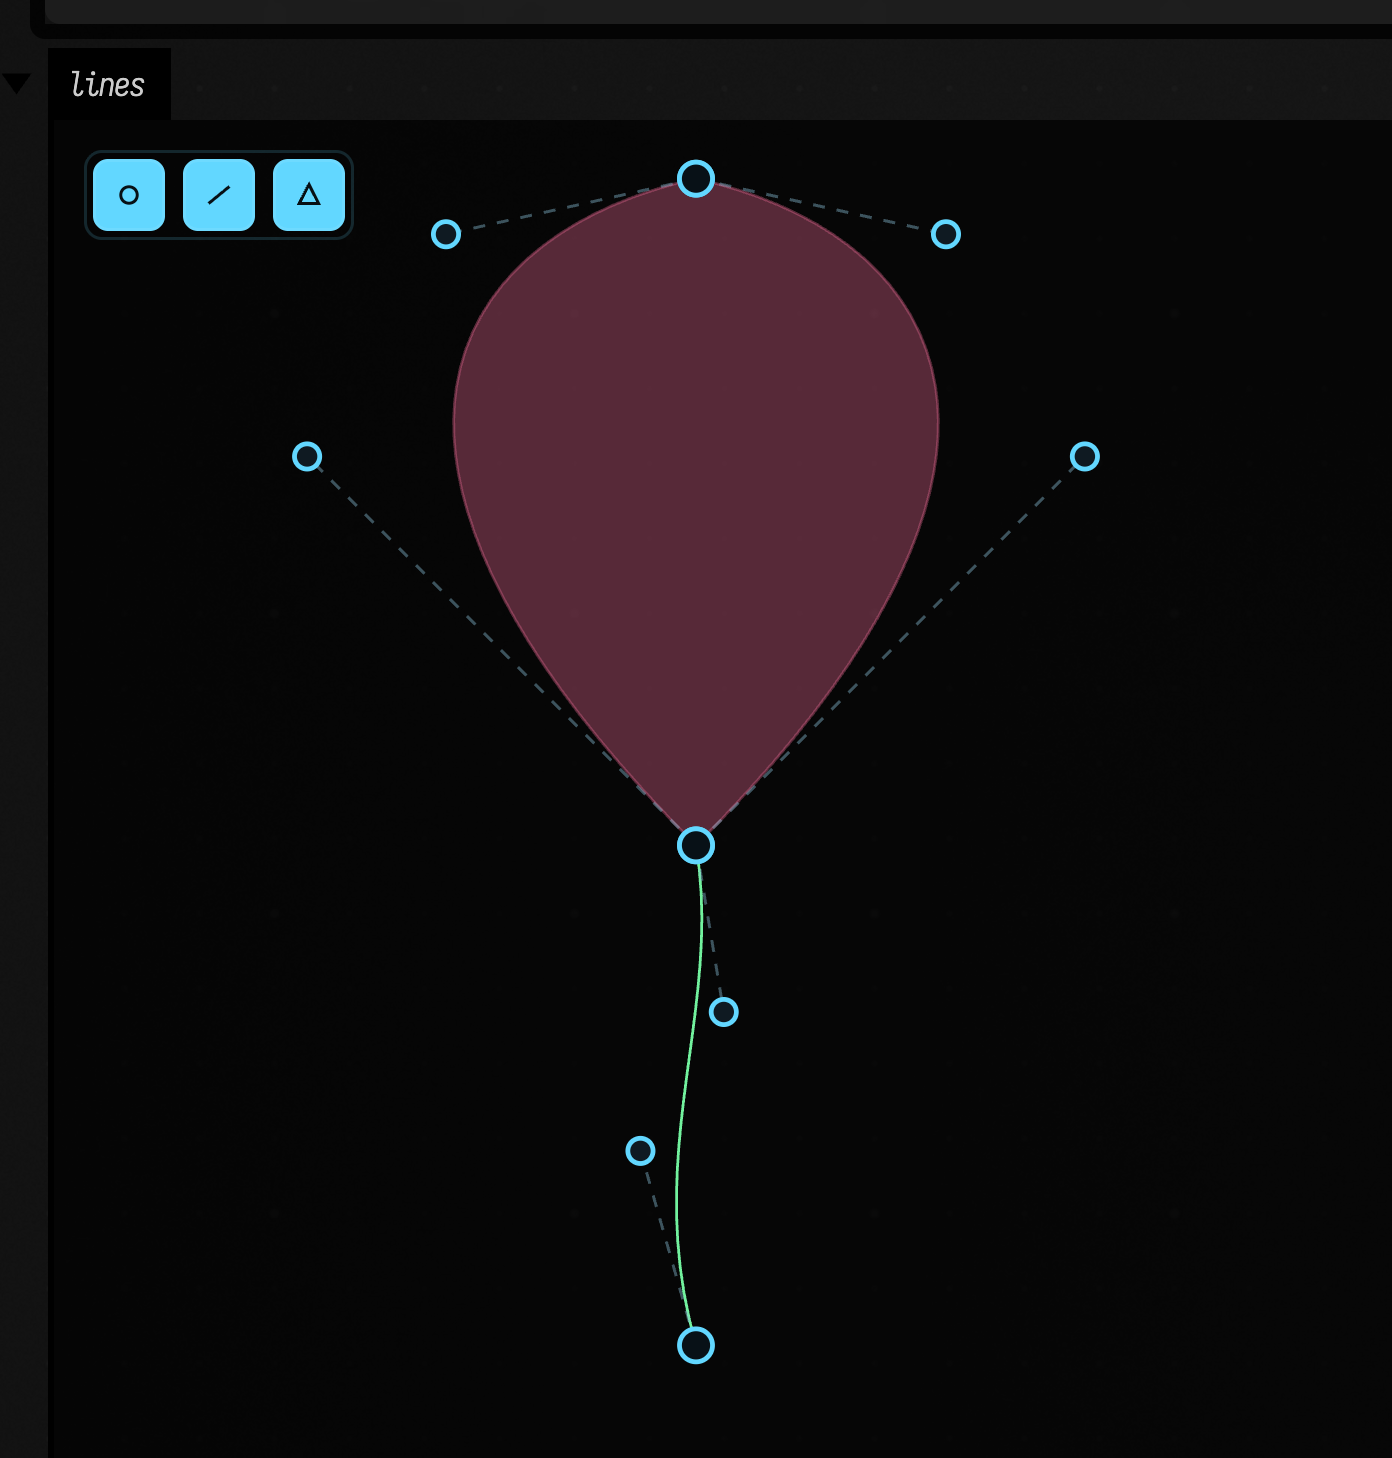
The editor changes the FLine you passed in. Use it as a geometry sketchpad, a control-shape
editor, or a quick way to bring a hand-tuned curve back into your code.
3D output: threeLines(...)
Use threeLines(...) when depth matters or when you want to orbit around the geometry instead of looking at a projected SVG. It draws ordinary 2D paths too, and takes 3D points directly.
:::static
fun Box.threeLines(
    lines: Collection<FLine>,
    channel: String = "debug",
    name: String = "threejs",
    height: Int = 420,
    samplesPerCubic: Int = 48,
    autoFrame: Boolean = true,
    editable: Boolean = false,
): ThreeGeometryViewState
:::static
val rings =
(0 until 14).map { i ->
val radius = 60.0 + i * 11.0
val z = -90.0 + i * 14.0
fline {
val steps = 80
breakNext()
for (s in 0..steps) {
val t = s / steps.toDouble() * Math.PI * 2.0
val p = vec(Math.cos(t) * radius, Math.sin(t) * radius, z)
lineTo(p)
}
close()
color = vec(0.35 + i / 20.0, 0.85, 1.0 - i / 18.0, 0.7)
thickness = 1.8
}
}
threeLines(rings, channel = "rings3d", height = 430, editable = false)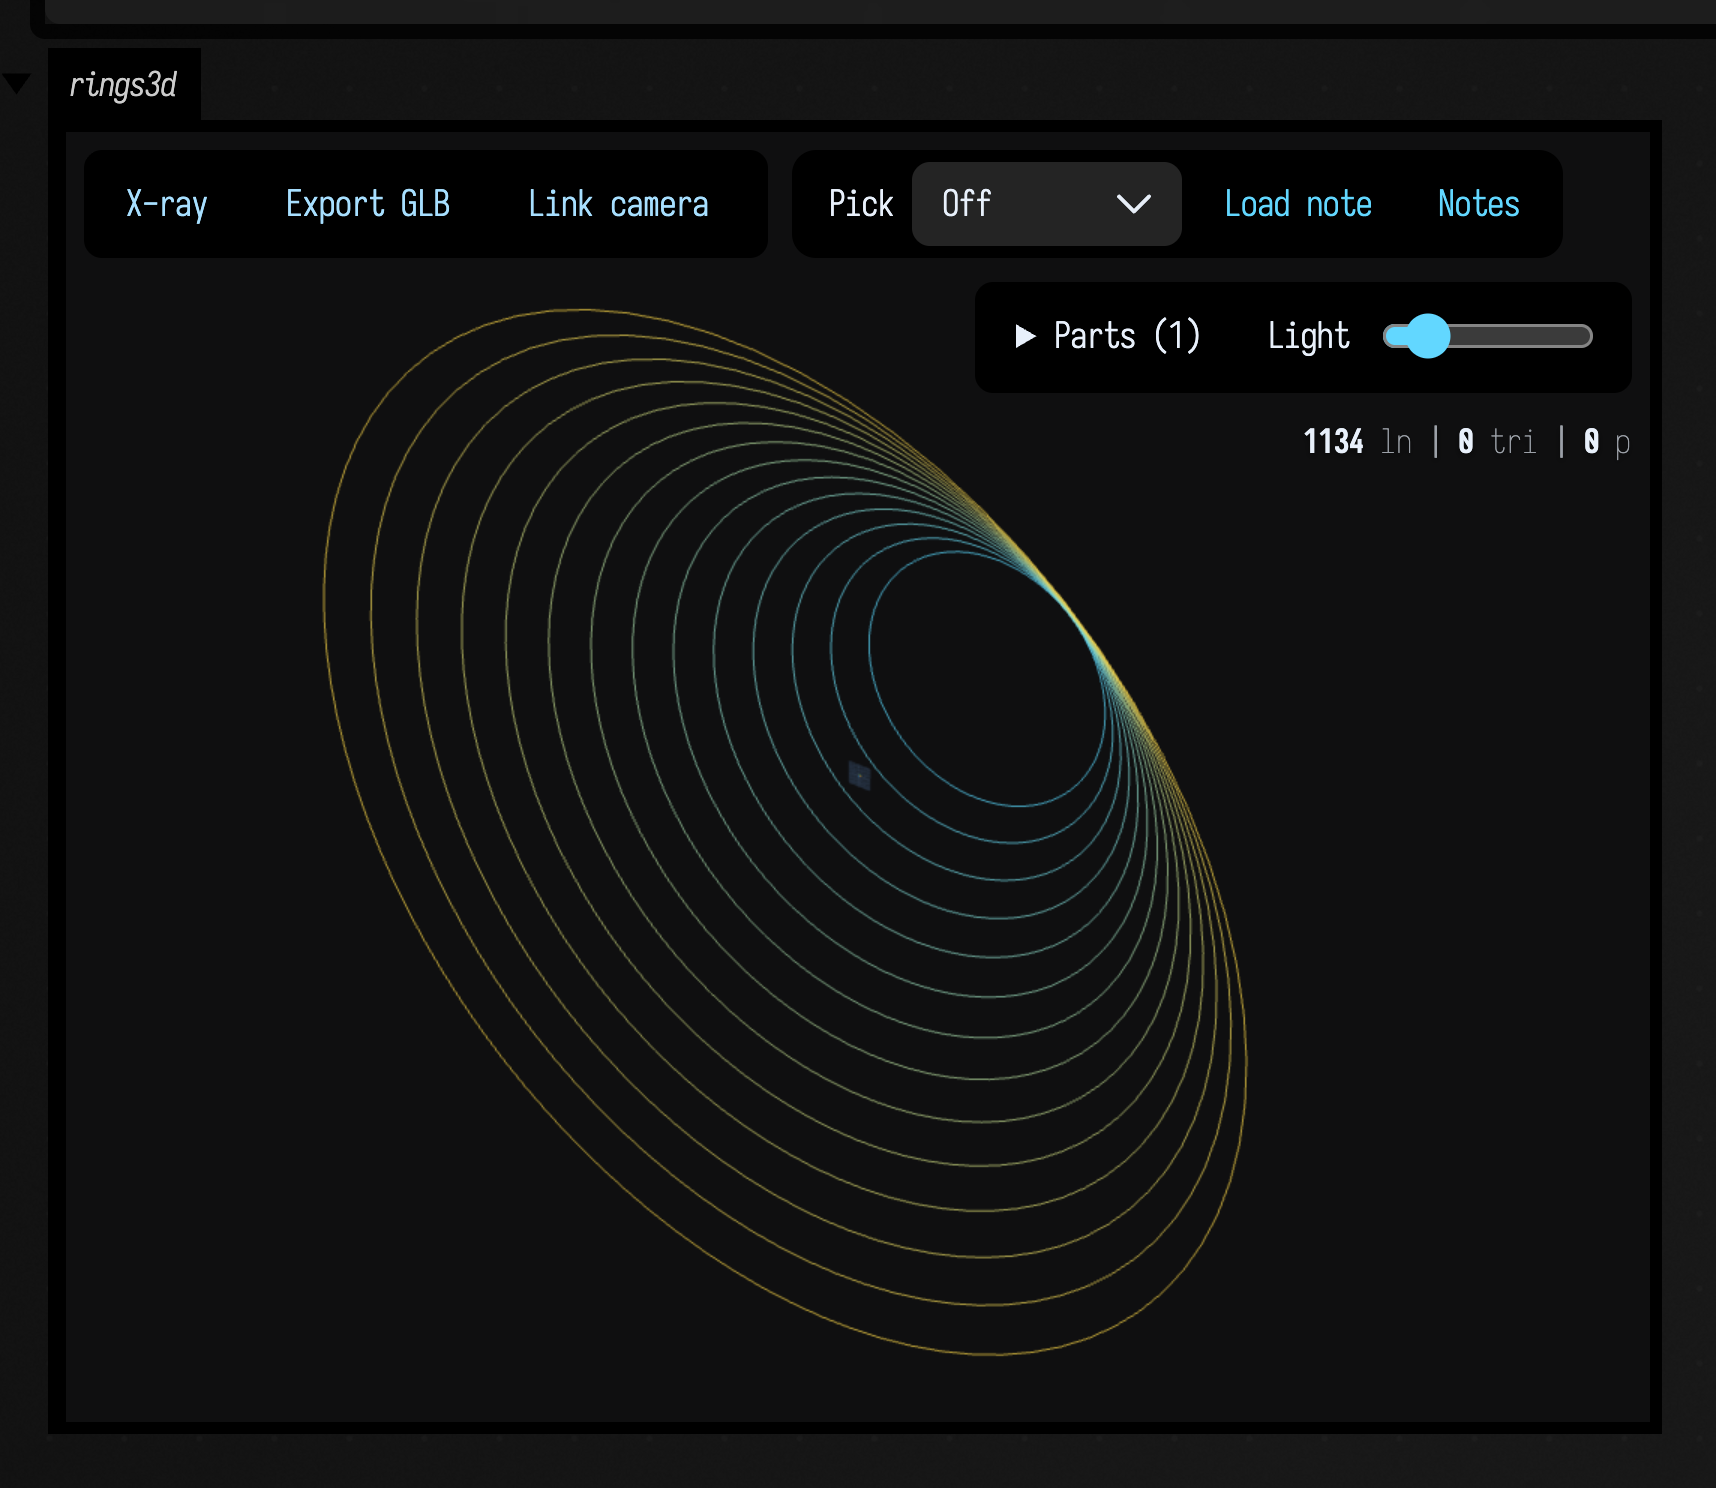
If you pass editable = true, the Three.js viewer grows an edit mode alongside camera control. In camera mode you orbit as usual. In edit mode you can select and drag points, edges, and faces; press e to hide or reveal the edit chrome without leaving the view.
:::static
fun ribbon(z: Double, phase: Double, color: Vec4): FLine = fline {
    val steps = 42
    breakNext()
    for (i in 0..steps) {
        val t = i / steps.toDouble()
        val x = -220.0 + t * 440.0
        val y = Math.sin(t * Math.PI * 2.0 + phase) * 70.0
        val edge = Math.cos(t * Math.PI * 4.0 + phase) * 24.0
        lineTo(x, y - edge, z)
    }
    for (i in steps downTo 0) {
        val t = i / steps.toDouble()
        val x = -220.0 + t * 440.0
        val y = Math.sin(t * Math.PI * 2.0 + phase) * 70.0
        val edge = Math.cos(t * Math.PI * 4.0 + phase) * 24.0
        lineTo(x, y + edge, z)
    }
    close()
    filled = true
    stroked = true
    thickness = 1.4
    this.color = color
}

val ribbons = [
    ribbon(-50.0, 0.0, vec(1.0, 0.6, 0.24, 0.32)),
    ribbon(0.0, 0.8, vec(0.4, 0.92, 1.0, 0.28)),
    ribbon(55.0, 1.6, vec(0.72, 0.58, 1.0, 0.28)),
]

threeLines(ribbons, channel = "editable3d", height = 430, editable = true)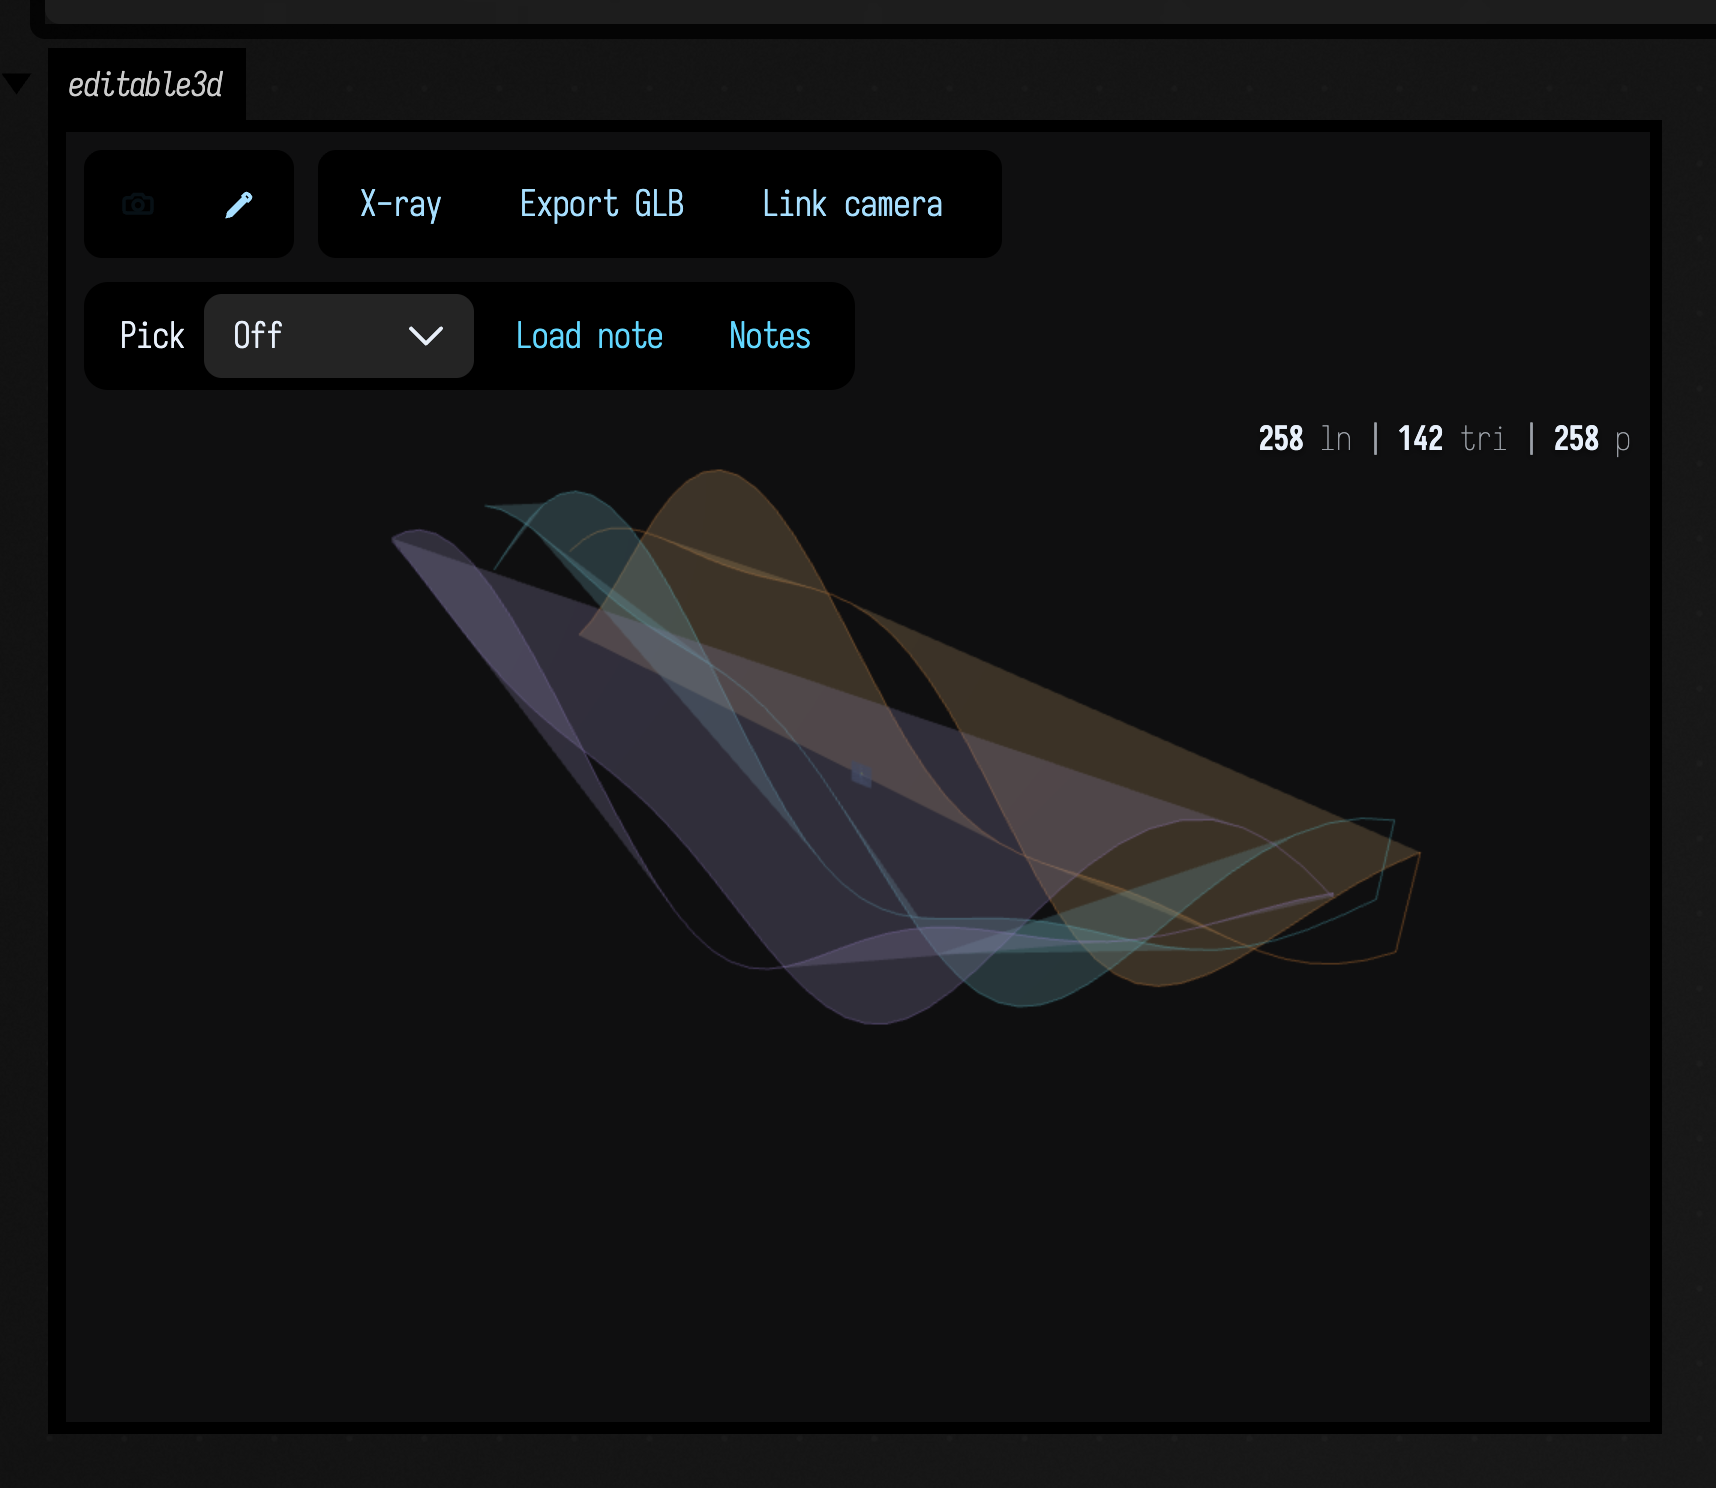
Use lines(...) for 2D inspection and editing, and threeLines(...) when you want to orbit or
work with geometry in depth. The controls are similar across both views.
The 3D output area as an instrument: threeInspect(...)
How far apart are two parts? What does the assembly look like in section, or with its pieces
pulled apart? threeInspect(...) adds measurement, section and explode controls to the
threeLines(...) view. You can adjust them live without rerunning the box.
:::static
fun Box.threeInspect(
    lines: Collection<FLine>,
    channel: String = "debug",
    name: String = "inspector",
    height: Int = 520,
    samplesPerCubic: Int = 48,
    autoFrame: Boolean = true,
    groupBy: (FLine) -> String = { it.label ?: "" },
    explode: ThreeExplode = ThreeExplode(),
    section: ThreeSection = ThreeSection(),
    measurements: List<ThreeMeasurement> = emptyList(),
    units: String = "",
    decimals: Int = 2,
    pickToMeasure: Boolean = true,
): ThreeInspectorView
groupBy decides what counts as one part of the assembly, and it defaults to the FLine's label — so a figure that already labels its pieces explodes sensibly with no extra work.
Measuring
To put a dimension on the drawing, pass measurements. Each ThreeMeasurement names two elements (a face, a segment) and draws the shortest distance between them as a number with a line to each element, so it turns with the figure. The example below dimensions a wall's thickness and a conduit's clearance.
:::static
// A wall detail in millimetres, plus a conduit run threaded through it.
fun skin(name: String, x: Double, c: Vec4) = fline {
    moveTo(x, 0.0, 0.0)
    lineTo(x, 1600.0, 0.0)
    lineTo(x, 1600.0, 1800.0)
    lineTo(x, 0.0, 1800.0)
    close()
    label = name
    filled = true
    stroked = true
    thickness = 1.4
    color = c
}

val wall = [
    skin("sheathing", 0.0, vec(0.36, 0.46, 0.58, 0.5)),
    skin("studs", 90.0, vec(0.85, 0.62, 0.32, 0.28)),
    skin("services", 140.0, vec(0.35, 0.72, 0.86, 0.28)),
    skin("lining", 152.0, vec(0.90, 0.92, 0.96, 0.4)),
]

val conduit = fline {
    moveTo(120.0, 1300.0, 1500.0)
    lineTo(120.0, 500.0, 1500.0)
    label = "conduit"
    stroked = true
    thickness = 5.0
    color = vec(1.0, 0.45, 0.30, 1.0)
}

threeInspect(
    wall + conduit,
    channel = "wall-measured",
    height = 520,
    units = "mm",
    measurements = [
        // the build-up: sheathing face to lining face, which is 152 by construction
        ThreeMeasurement(
            ThreeMeasureElement.face(wall[0]),
            ThreeMeasureElement.face(wall[3]),
            "build-up ",
        ),
        // and the clearance from the conduit to the inside face of the lining,
        // which is 152 - 120 = 32 and is nowhere written down in the figure
        ThreeMeasurement(
            ThreeMeasureElement.segment(120.0, 1300.0, 1500.0, 120.0, 500.0, 1500.0),
            ThreeMeasureElement.face(wall[3]),
            "clear ",
        ),
    ],
)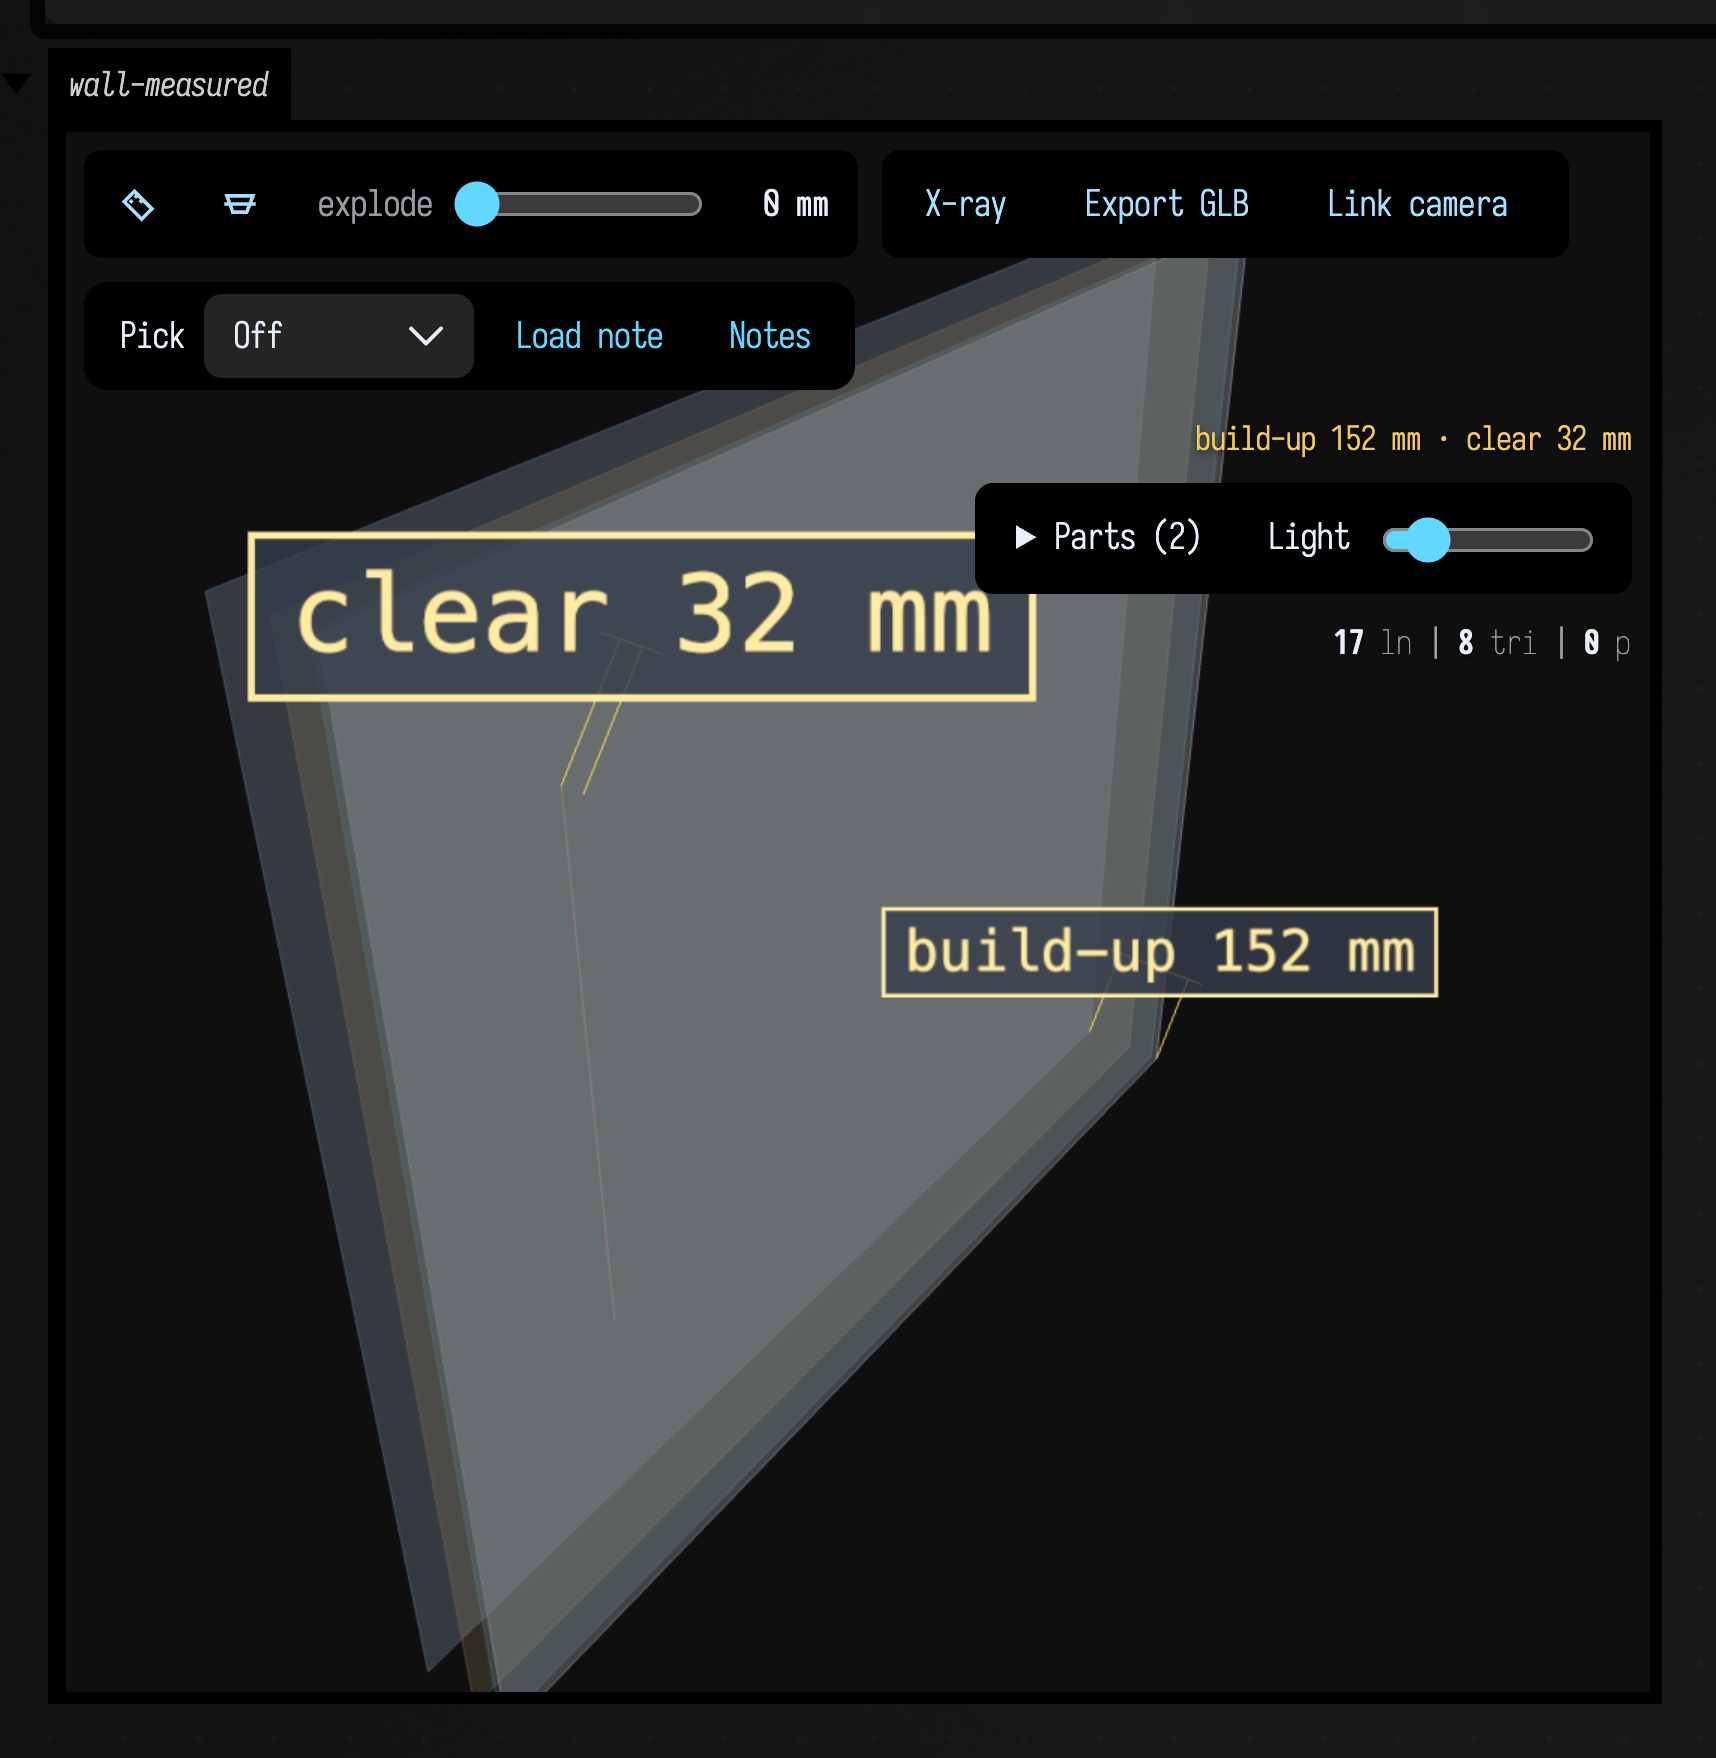
The distance is closest approach, not centre to centre, which on a panel drawing is a different number. It is measured on the unexploded geometry, so the explode slider does not change it; scrub the explode back to zero to read a dimension against what it dimensions. You can also click the ruler in the viewer's toolbar and pick two elements yourself.
Exploding
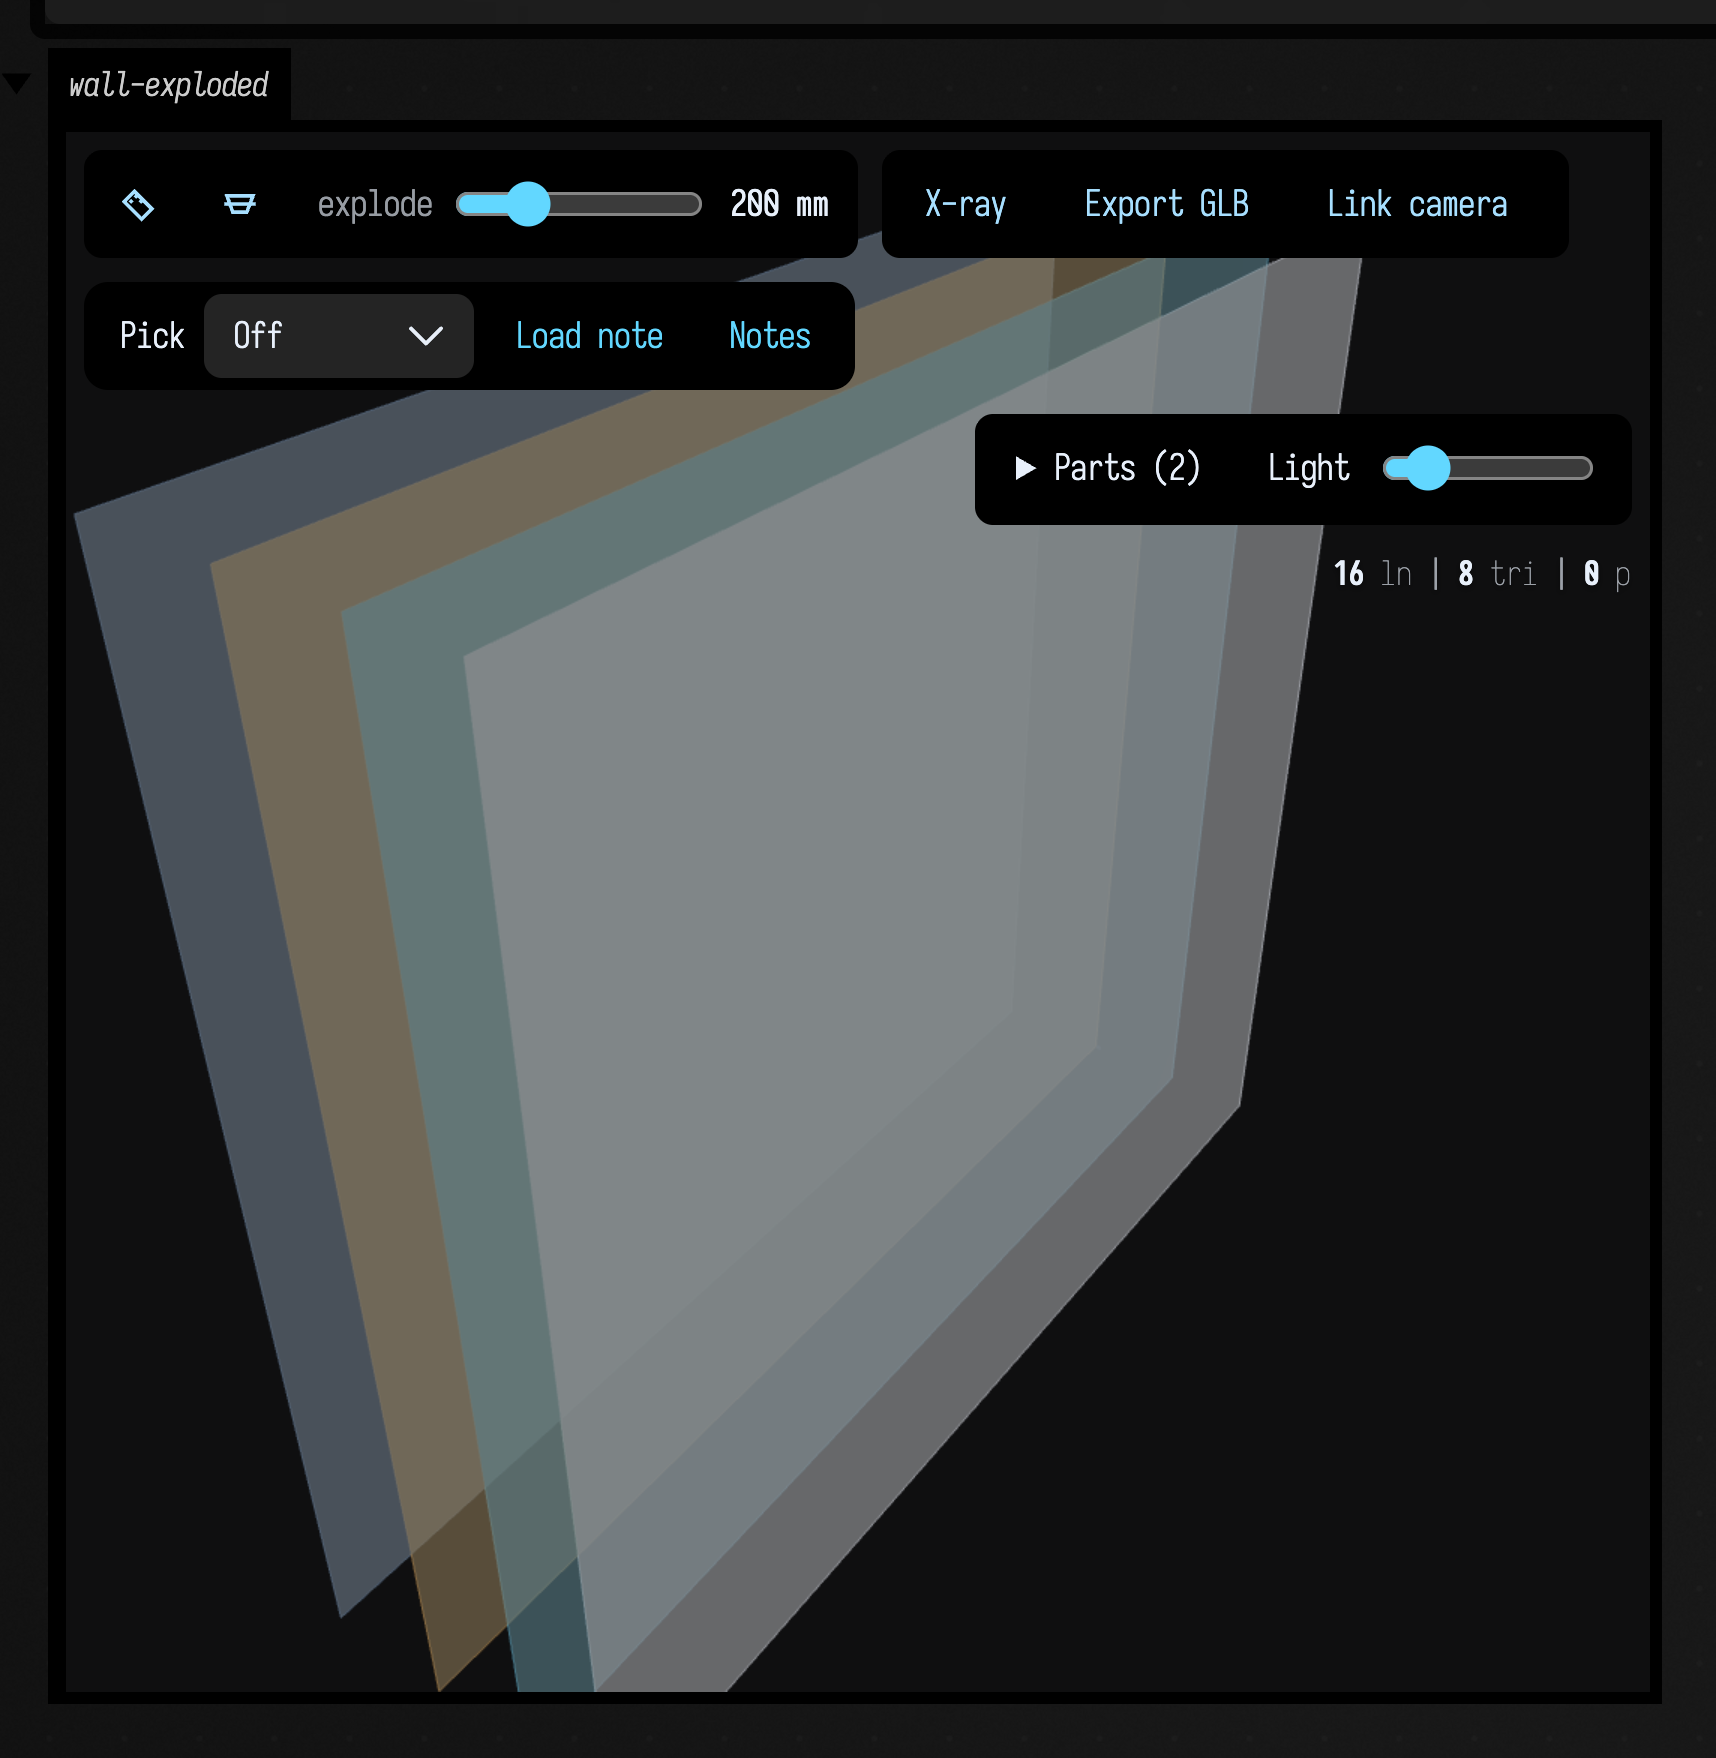
Exploding pulls the parts of an assembly apart with a slider, so you can see the layers hidden inside it. ThreeExplode has two modes:
radialmoves each part away from the figure's centre. It suits an irregular assembly, like a routed conduit run.axismoves the parts along one direction, evenly spaced in their order along it rather than in proportion to their distance. A layered wall needs this: with proportional spacing, four skins 12 mm apart stay in a clump while the far one leaves the frame.
The spacing is centred on the middle part, so the assembly stays in view as the slider moves.
:::static
fun skin(name: String, x: Double, c: Vec4) = fline {
    moveTo(x, 0.0, 0.0)
    lineTo(x, 2400.0, 0.0)
    lineTo(x, 2400.0, 2600.0)
    lineTo(x, 0.0, 2600.0)
    close()
    label = name
    filled = true
    stroked = true
    thickness = 1.4
    color = c
}

val wall = [
    skin("sheathing", 0.0, vec(0.36, 0.46, 0.58, 0.75)),
    skin("studs", 90.0, vec(0.85, 0.62, 0.32, 0.6)),
    skin("services", 140.0, vec(0.35, 0.72, 0.86, 0.6)),
    skin("lining", 152.0, vec(0.90, 0.92, 0.96, 0.7)),
]

val view = threeInspect(
    wall,
    channel = "wall-exploded",
    height = 520,
    units = "mm",
    explode = ThreeExplode(
        amount = 200.0,
        mode = "axis",
        axis = floatArrayOf(1f, 0f, 0f),
        sliderMax = 800.0,
    ),
)

/*
`amount` is a parameter, not a literal you retype: the view can be driven again.
view.explode(800.0)
view.explodeAlong(0.0, 0.0, 1.0, 600.0)
*/
Sectioning
ThreeSection cuts the figure at a fraction of its own bounds measured along the section normal, so 0.42 means the same thing on a 3 m wall and a 30 mm bracket and the slider is meaningful without knowing the model's scale.
The viewer draws the cut outline brightly over the clipped figure, finding where the plane crosses each filled triangle and line segment. Hiding the front half reveals the inside; the outline shows where the section passes through it.
:::static
fun skin(name: String, x: Double, c: Vec4) = fline {
    moveTo(x, 0.0, 0.0)
    lineTo(x, 2400.0, 0.0)
    lineTo(x, 2400.0, 2600.0)
    lineTo(x, 0.0, 2600.0)
    close()
    label = name
    filled = true
    stroked = true
    thickness = 1.4
    color = c
}

val wall = [
    skin("sheathing", 0.0, vec(0.36, 0.46, 0.58, 0.7)),
    skin("studs", 90.0, vec(0.85, 0.62, 0.32, 0.5)),
    skin("services", 140.0, vec(0.35, 0.72, 0.86, 0.5)),
    skin("lining", 152.0, vec(0.90, 0.92, 0.96, 0.6)),
]

val conduit =
    (0 until 5).map { i ->
        fline {
            val y = 300.0 + i * 450.0
            moveTo(120.0, y, 0.0)
            lineTo(120.0, y, 2600.0)
            label = "conduit $i"
            stroked = true
            thickness = 4.0
            color = vec(1.0, 0.45, 0.30, 1.0)
        }
    }

threeInspect(
    wall + conduit,
    channel = "wall-sectioned",
    height = 520,
    units = "mm",
    section = ThreeSection(
        enabled = true,
        normal = floatArrayOf(0f, 0f, 1f),
        fraction = 0.62,
    ),
)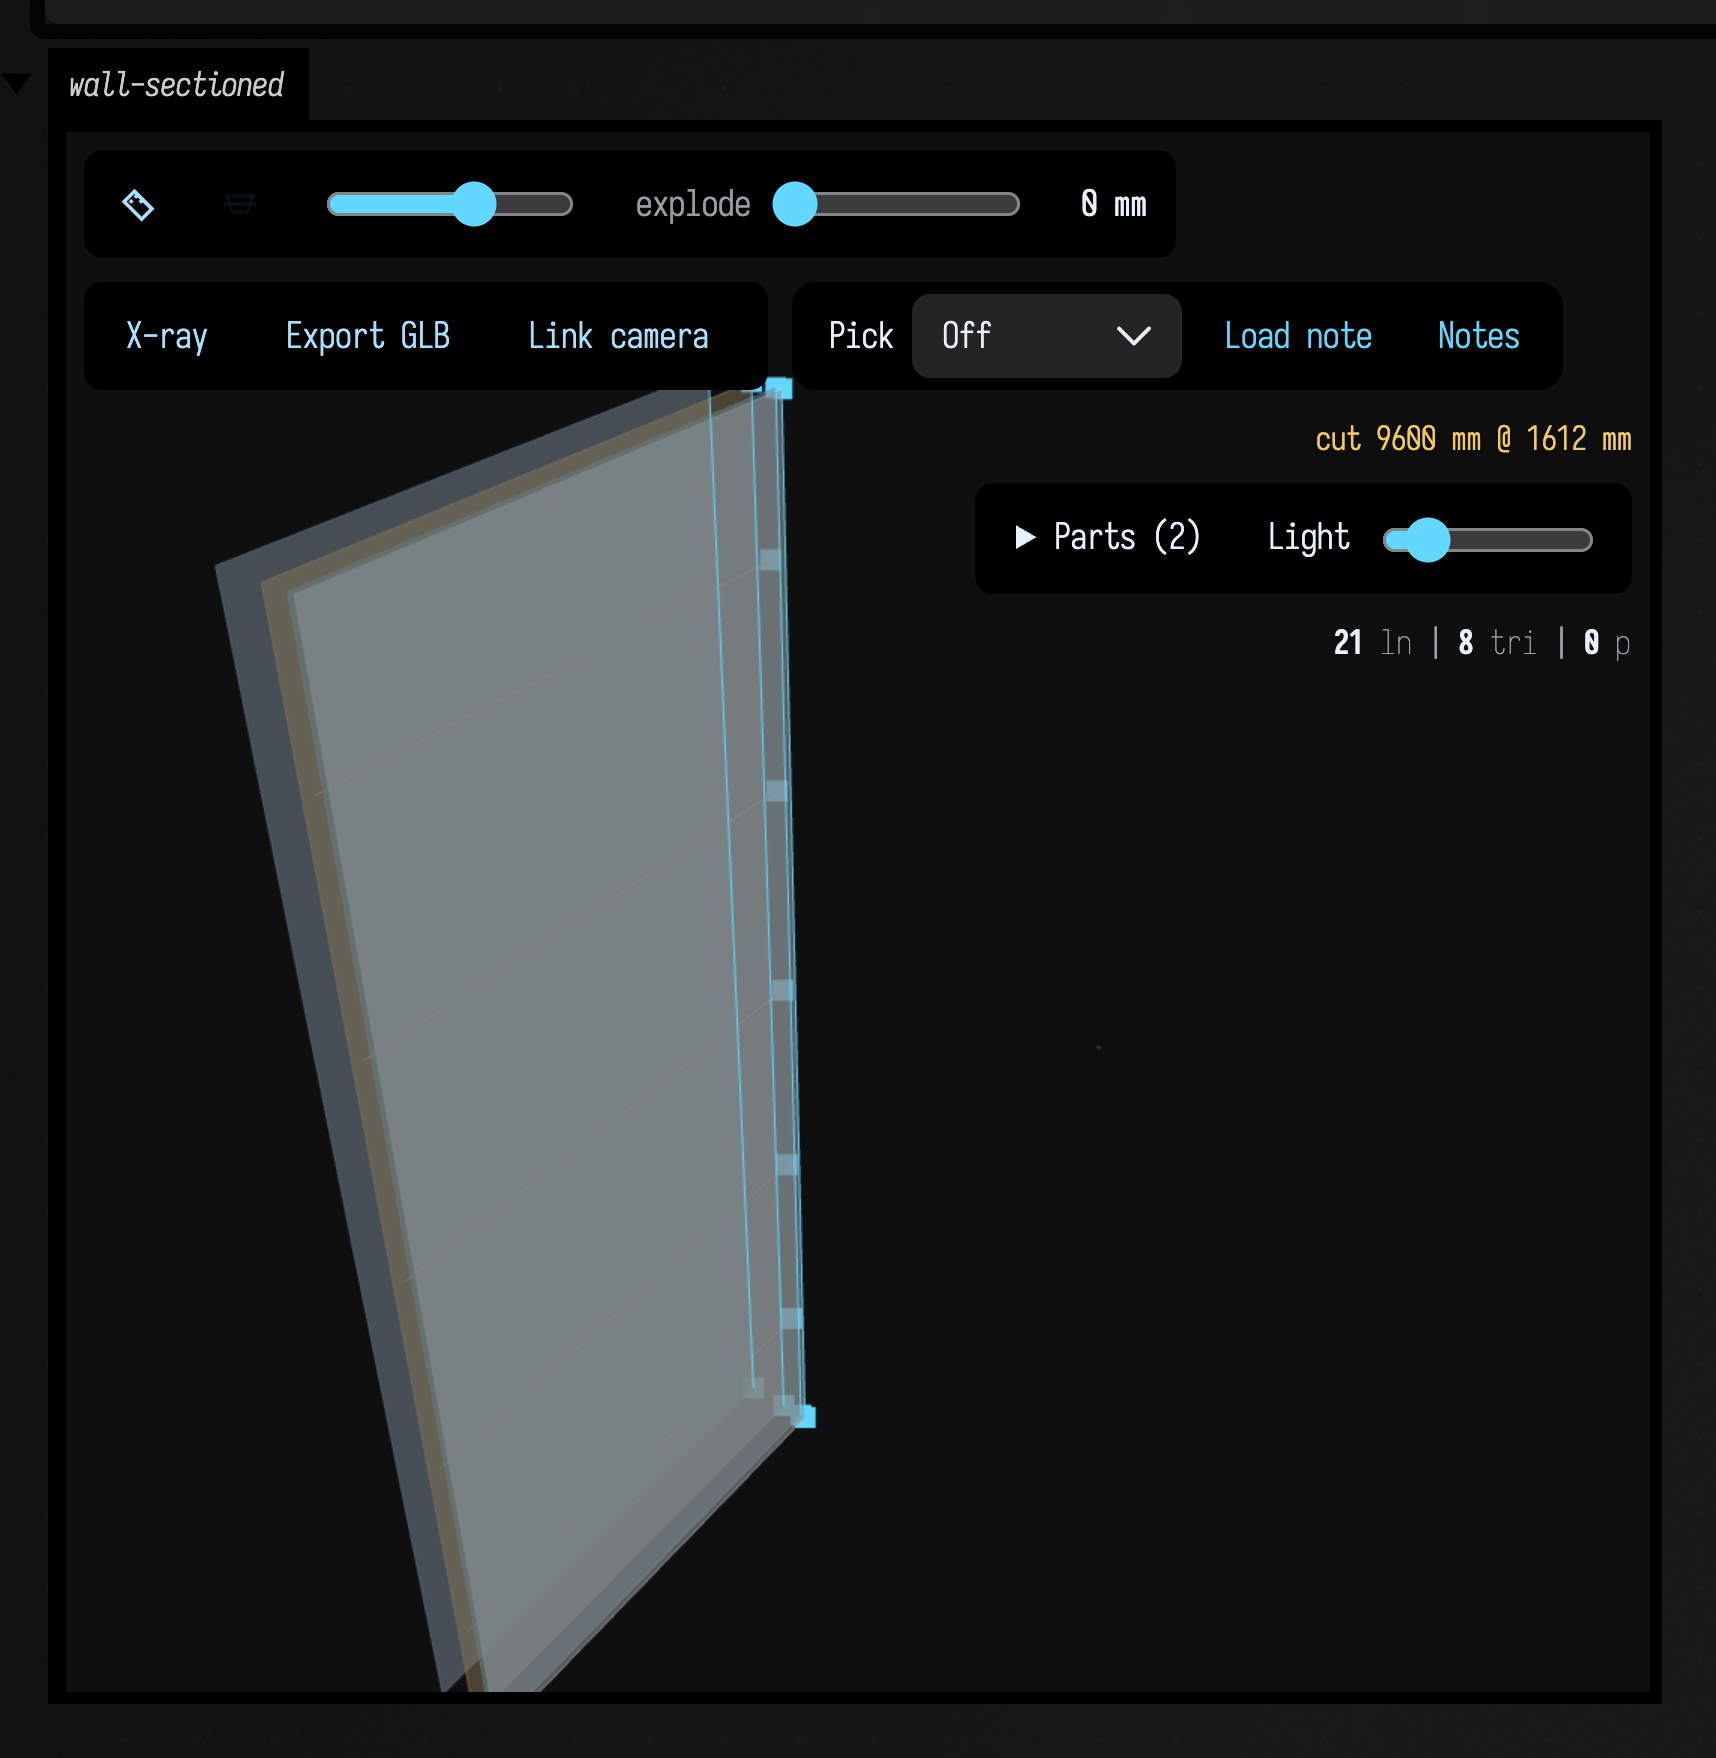
The status line reports the total length of the cut and where the plane sits, both in the figure's own units — cut 9600 mm above is exactly four 2400-wide skins.
The section clips everything: fills, strokes and points.
A complete example
This box draws a wall detail with four skins and five conduit runs, two dimensions, and all three controls live. Run it and drag the explode slider. The same box is the three_inspector_wall starting point on the welcome screen.
:::static
/*
The three.js output area as an INSTRUMENT.

Run this box. A wall detail appears -- four skins and five conduit runs -- and
the viewer's toolbar has three things a 3D preview never had before:

  [ruler]    click it, then click two things in the scene. The CLOSEST APPROACH
             between them is drawn as a dimension, in millimetres. Not centroid
             to centroid: on a panel drawing those are different numbers, and
             only one of them is the one you would take to a saw. Click a third
             time to start over.

  [section]  turn it on and a second slider appears. The fills clip -- and the
             CUT is drawn over them in cyan, with a dot wherever a conduit
             crosses the plane. The status line, top right, reports the total
             length of the cut and where the plane sits. Hiding the front half
             shows you the inside of a shell; the cut line is the section.

  explode    drag it and the four skins come apart, spaced evenly by their
             ORDER through the wall rather than by how far apart they actually
             are -- 90, 50 and 12 mm, which under a distance-proportional
             explode would leave three of them in a clump. Drag it back to 0
             and the geometry is exactly what the server sent, bit for bit.

The two dimensions below are authored from Kotlin, so the figure carries them
from the moment it is drawn. `ThreeMeasureElement.face(line)` names a whole
panel; `.segment(...)` and `.point(...)` name the other two shapes a hit can
resolve to, which is not a coincidence -- a measurement you pick in the viewer
produces exactly these.
*/

fun skin(name: String, x: Double, c: Vec4) = fline {
    moveTo(x, 0.0, 0.0)
    lineTo(x, 1600.0, 0.0)
    lineTo(x, 1600.0, 1800.0)
    lineTo(x, 0.0, 1800.0)
    close()
    label = name
    filled = true
    stroked = true
    thickness = 1.4
    color = c
}

// x is the depth through the wall, in millimetres. 152 mm of build-up.
val wall = [
    skin("sheathing", 0.0, vec(0.36, 0.46, 0.58, 0.5)),
    skin("studs", 90.0, vec(0.85, 0.62, 0.32, 0.28)),
    skin("services", 140.0, vec(0.35, 0.72, 0.86, 0.28)),
    skin("lining", 152.0, vec(0.90, 0.92, 0.96, 0.4)),
]

val conduits =
    (0 until 5).map { i ->
        fline {
            val y = 200.0 + i * 320.0
            moveTo(120.0, y, 80.0)
            lineTo(120.0, y, 1720.0)
            label = "conduit $i"
            stroked = true
            thickness = 4.0
            color = vec(1.0, 0.45, 0.30, 1.0)
        }
    }

/*
`groupBy` decides what counts as one PART of the assembly. It defaults to the
FLine's label, which is why the five conduits fan out separately here; group
them together with `groupBy = { if (it.label?.startsWith("conduit") == true) "conduits" else it.label ?: "" }`.
*/
val view = threeInspect(
    wall + conduits,
    channel = "wall",
    height = 560,
    units = "mm",
    explode = ThreeExplode(mode = "axis", axis = floatArrayOf(1f, 0f, 0f), sliderMax = 1400.0),
    measurements = [
        // the build-up: 152 by construction, and the figure now says so
        ThreeMeasurement(
            ThreeMeasureElement.face(wall[0]),
            ThreeMeasureElement.face(wall[3]),
            "build-up ",
        ),
        // the clearance from the second conduit to the inside of the lining: 152 - 120 = 32,
        // which is written down nowhere in the geometry
        ThreeMeasurement(
            ThreeMeasureElement.segment(120.0, 520.0, 80.0, 120.0, 520.0, 1720.0),
            ThreeMeasureElement.face(wall[3]),
            "clear ",
        ),
    ],
)

/*
And because the explosion is a PARAMETER rather than a literal you retype, the
box can drive it. Uncomment any of these and re-run -- no rebuild of the
geometry, just a new question:

view.explode(700.0)                                  // pull it apart
view.explodeAlong(0.0, 0.0, 1.0, 500.0)              // ...along z instead
view.section(0.0, 0.0, 1.0, fraction = 0.55)         // cut it
view.clearSection()
view.measureFaces(wall[1], wall[2], "cavity ")       // one more dimension
view.clearMeasurements()
*/

println("wall: ${view.inspector().groups.size} assembly groups, ${view.inspector().measurements.size} dimensions")
println("drag the explode slider; press the ruler and click two things")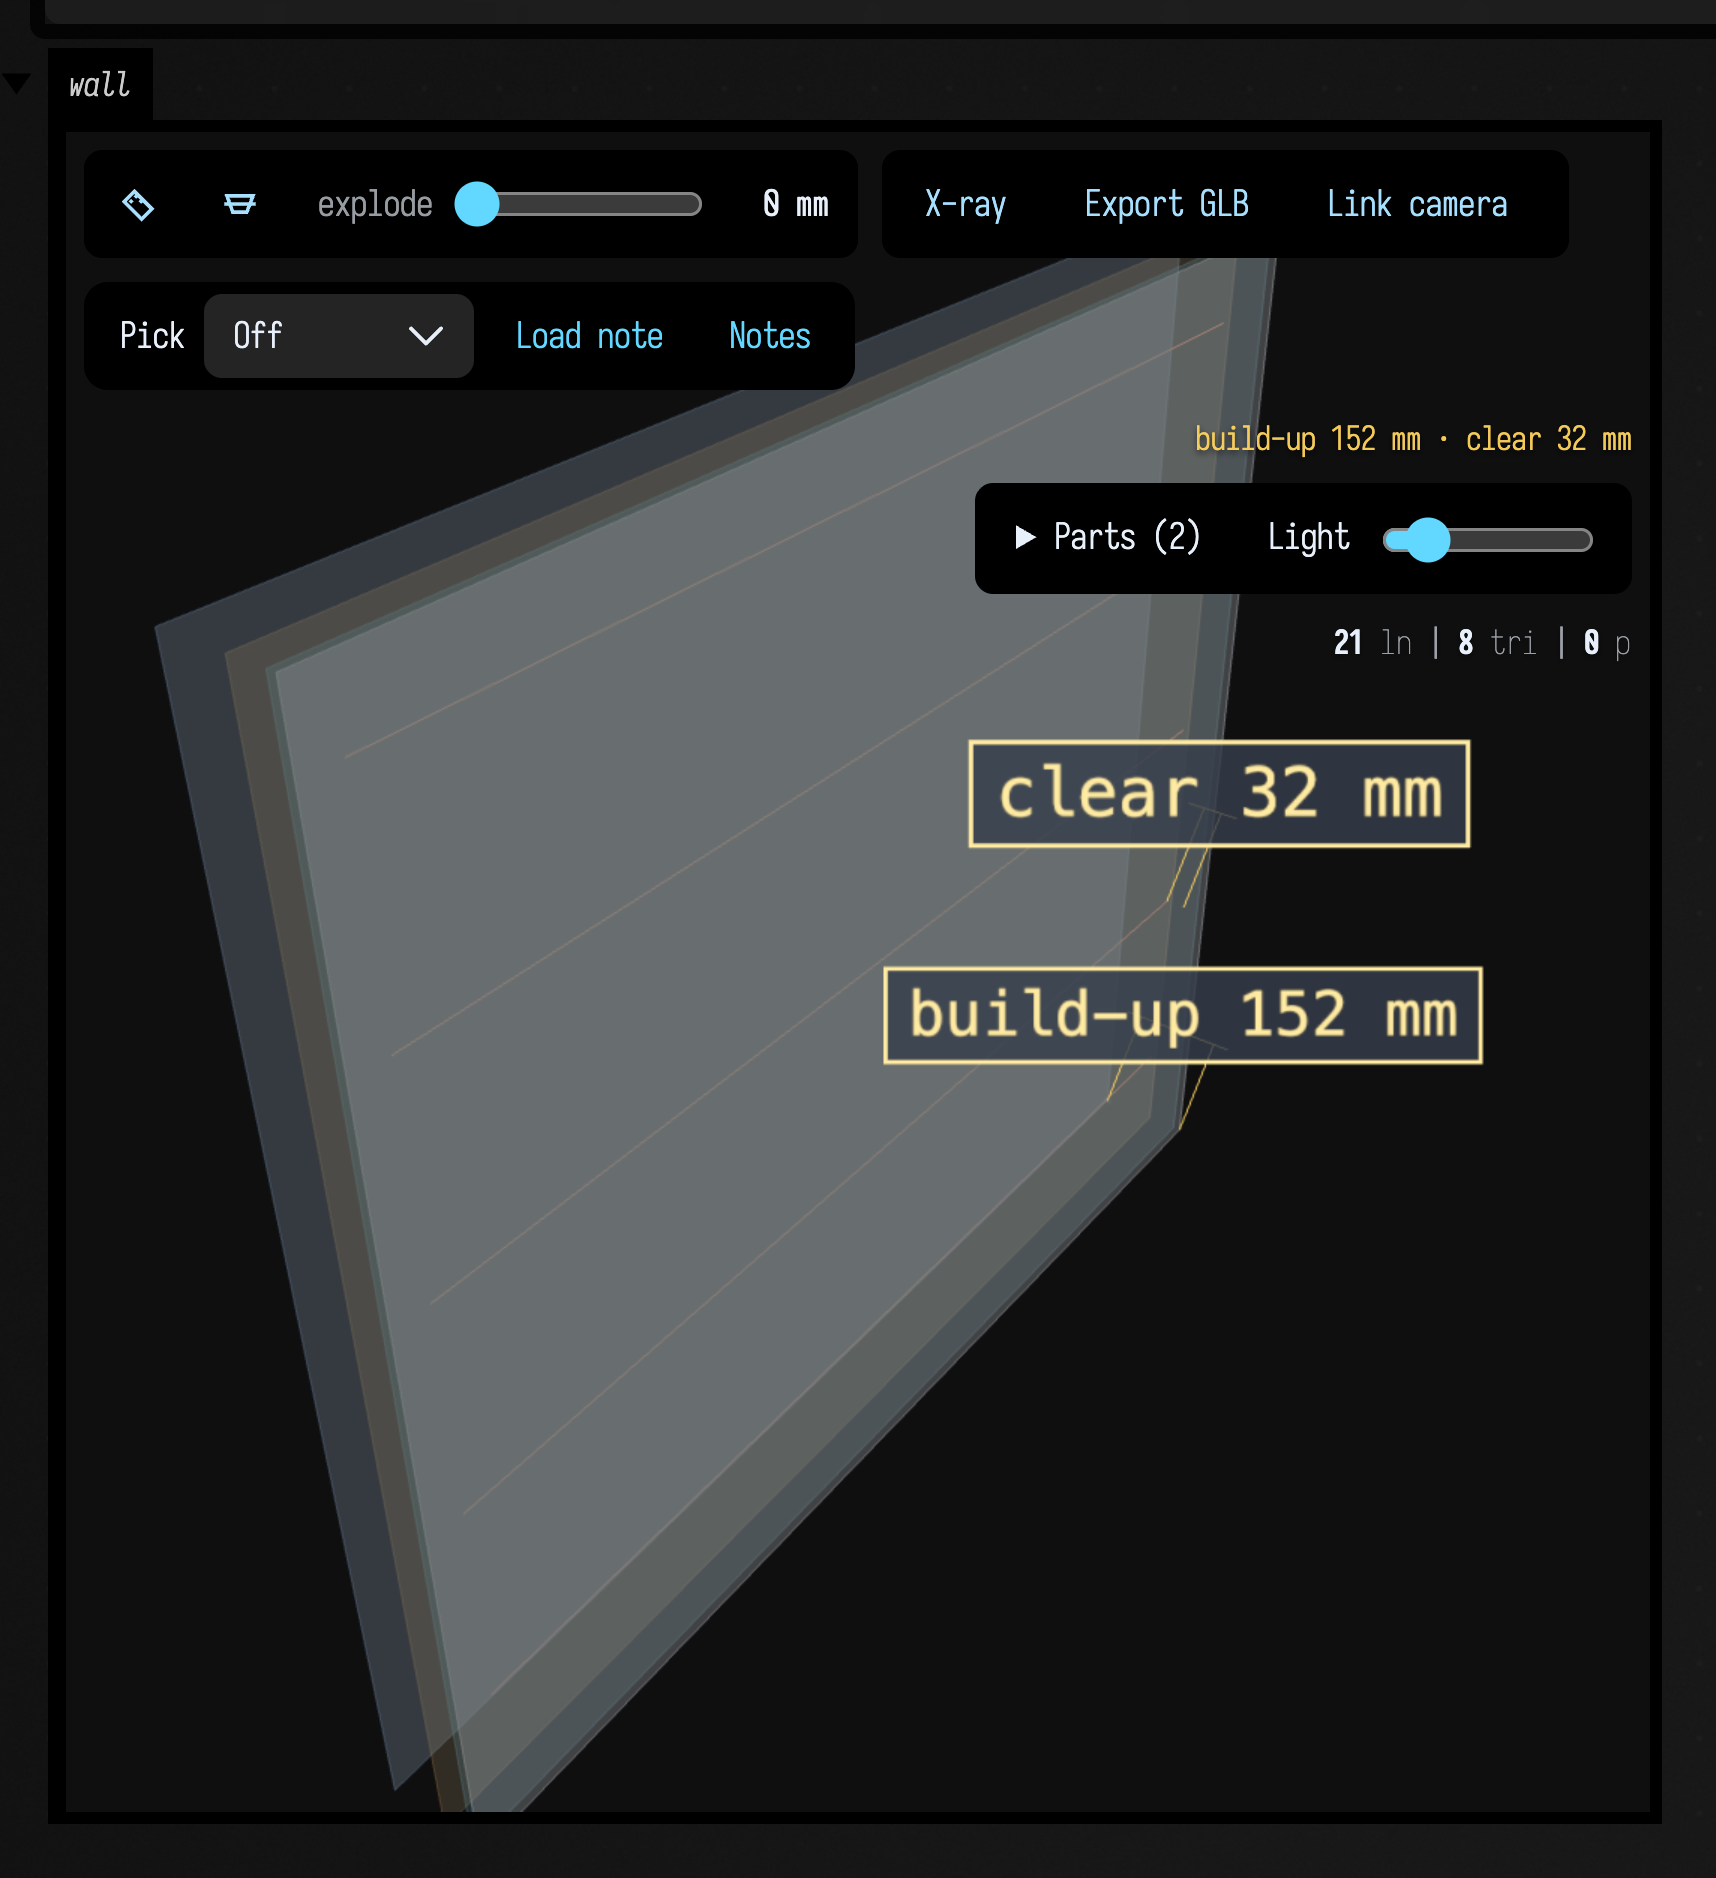
Callbacks: onClick and hoverColor
FLine can also be interactive without being editable. If you set onClick, Field registers a callback for that line. If you set hoverColor, the line brightens or changes color when the pointer moves over it.
The callback receives an FLineIntersection, a record of what was clicked: which line, which part of it (a node, a segment, or the inside of a closed shape), and where. Most callbacks only need closestVertexIndex or label:
:::static
enum class FLineHitKind {
    POINT,
    EDGE,
    FACE,
    UNKNOWN,
}

data class FLineIntersection(
    val closestVertexIndex: Int,
    val position: Vec3,
    val kind: FLineHitKind = FLineHitKind.UNKNOWN,
    val lineIndex: Int = -1, // which line of the ones you drew
    val label: String? = null, // that line's FLine.label
    val nodeIndex: Int = -1, // the node that IS the element
    val subPathIndex: Int = -1,
    val elementIndex: Int = -1, // edge 0, 1, 2... / face 0, 1...
    val u: Double = Double.NaN, // along the edge, or across the face
    val v: Double = Double.NaN, // up the face
    val onElement: Vec3? = null, // the point on the element, z included
)

enum class FLineFaceCoordinates {
    NONE,
    BILINEAR,
    BOUNDING_BOX,
}

var FLine.onClick: ((FLineIntersection) -> Unit)?
var FLine.hoverColor: Vec4?
var FLine.label: String?
This works in both the 2D lines(...) renderer and the Three.js threeLines(...) renderer.
2D callbacks
This draws a triangle and a closed curve. Hover over either to see it brighten, and click it to print its name and the nearest vertex below the drawing.
:::static
val status: (String) -> Unit = { message ->
    markdown("callback-log", "2D callback: ${message.md}")
}

status("click a shape")

val triangle = fline {
    moveTo(70, 250)
    lineTo(200, 40)
    lineTo(330, 250)
    close()
    filled = true
    stroked = true
    thickness = 1.5
    color = vec(1.0, 0.63, 0.24, 0.30)
    hoverColor = vec(1.0, 0.82, 0.42, 0.92)
    onClick = { hit -> status("triangle @ ${hit.closestVertexIndex}") }
}

val blob = fline {
    moveTo(420, 150)
    cubicTo(470, 30, 620, 40, 650, 150)
    cubicTo(620, 290, 470, 300, 420, 150)
    close()
    filled = true
    stroked = true
    thickness = 1.5
    color = vec(0.34, 0.88, 1.0, 0.24)
    hoverColor = vec(0.48, 1.0, 1.0, 0.92)
    onClick = { hit -> status("blob @ ${hit.closestVertexIndex}") }
}

lines(triangle, blob, channel = "callbacks2d", w = 760.0, h = 340.0, fitToSize = true)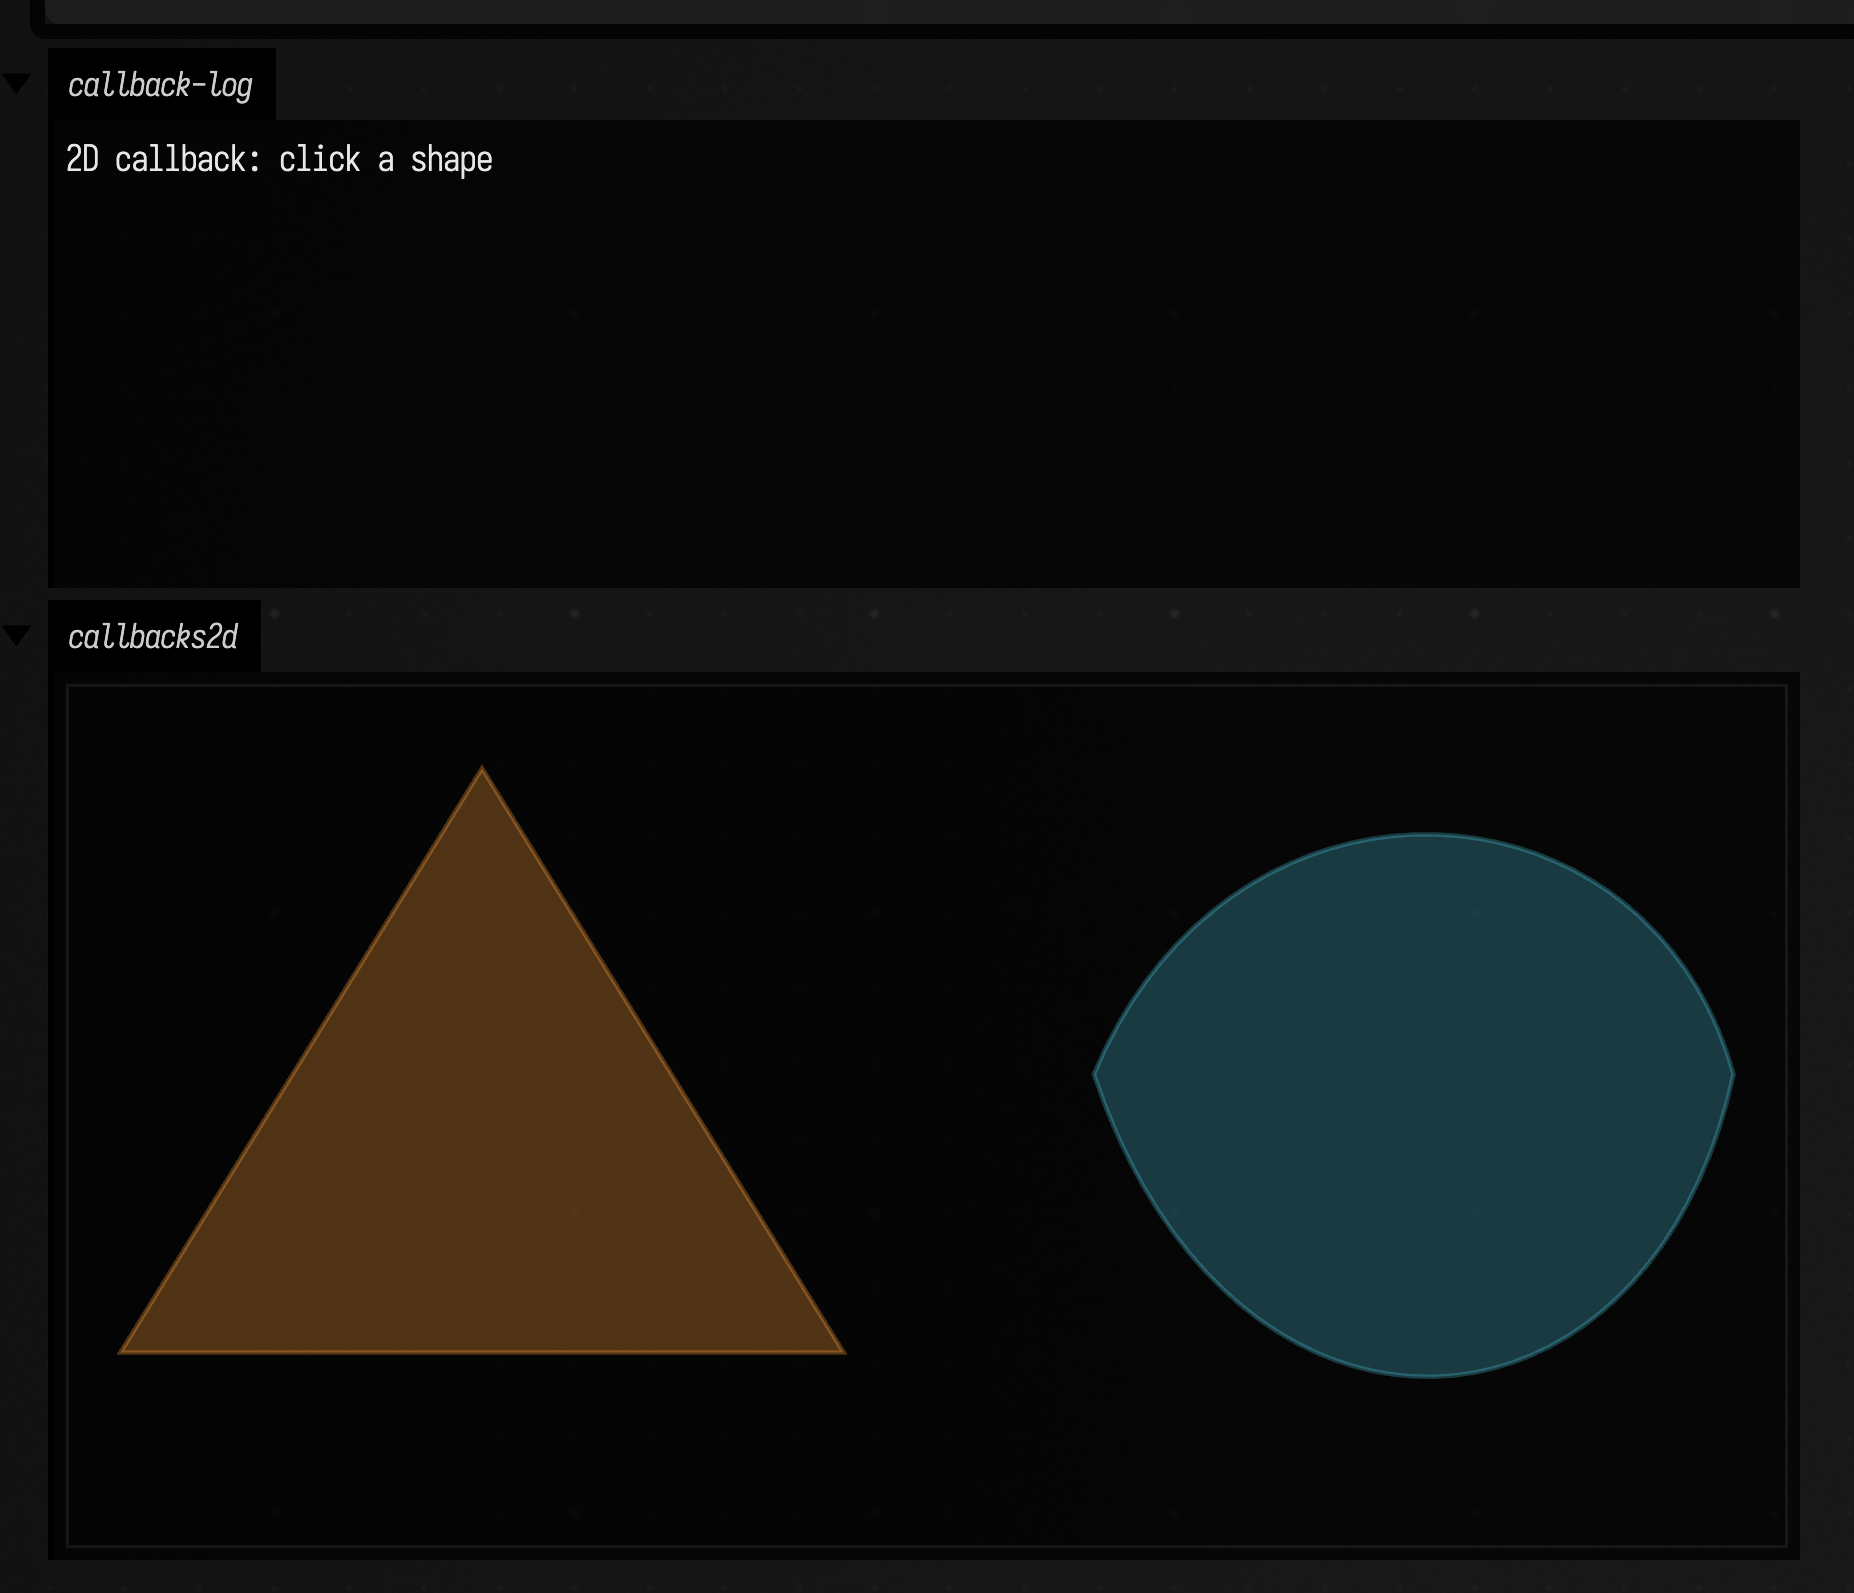
In practice this is useful for picking diagram elements, selecting generated forms, or turning a sketch into a tiny control surface without writing separate HTML.
3D callbacks
This stacks three rings at different depths in the Three.js viewer. Orbit the view, then click a ring to print which one you hit.
:::static
val status: (String) -> Unit = { message ->
    markdown("callback-log-3d", "3D callback: ${message.md}")
}

status("orbit, hover, then click")

fun ring(radius: Double, z: Double, color: Vec4, hover: Vec4, name: String): FLine = fline {
    val steps = 72
    breakNext()
    for (i in 0..steps) {
        val t = i / steps.toDouble() * Math.PI * 2.0
        val p = vec(Math.cos(t) * radius, Math.sin(t) * radius, z)
        lineTo(p)
    }
    close()
    thickness = 1.0
    this.color = color
    hoverColor = hover
    onClick = { hit -> status("$name @ ${hit.closestVertexIndex}") }
}

val stack = [
    ring(90.0, -80.0, vec(1.0, 0.58, 0.22, 0.70), vec(1.0, 0.82, 0.42, 1.0), "front ring"),
    ring(130.0, 0.0, vec(0.42, 0.92, 1.0, 0.70), vec(0.72, 1.0, 1.0, 1.0), "middle ring"),
    ring(170.0, 90.0, vec(0.74, 0.60, 1.0, 0.70), vec(0.92, 0.82, 1.0, 1.0), "back ring"),
]

threeLines(stack, channel = "callbacks3d", height = 430, editable = false)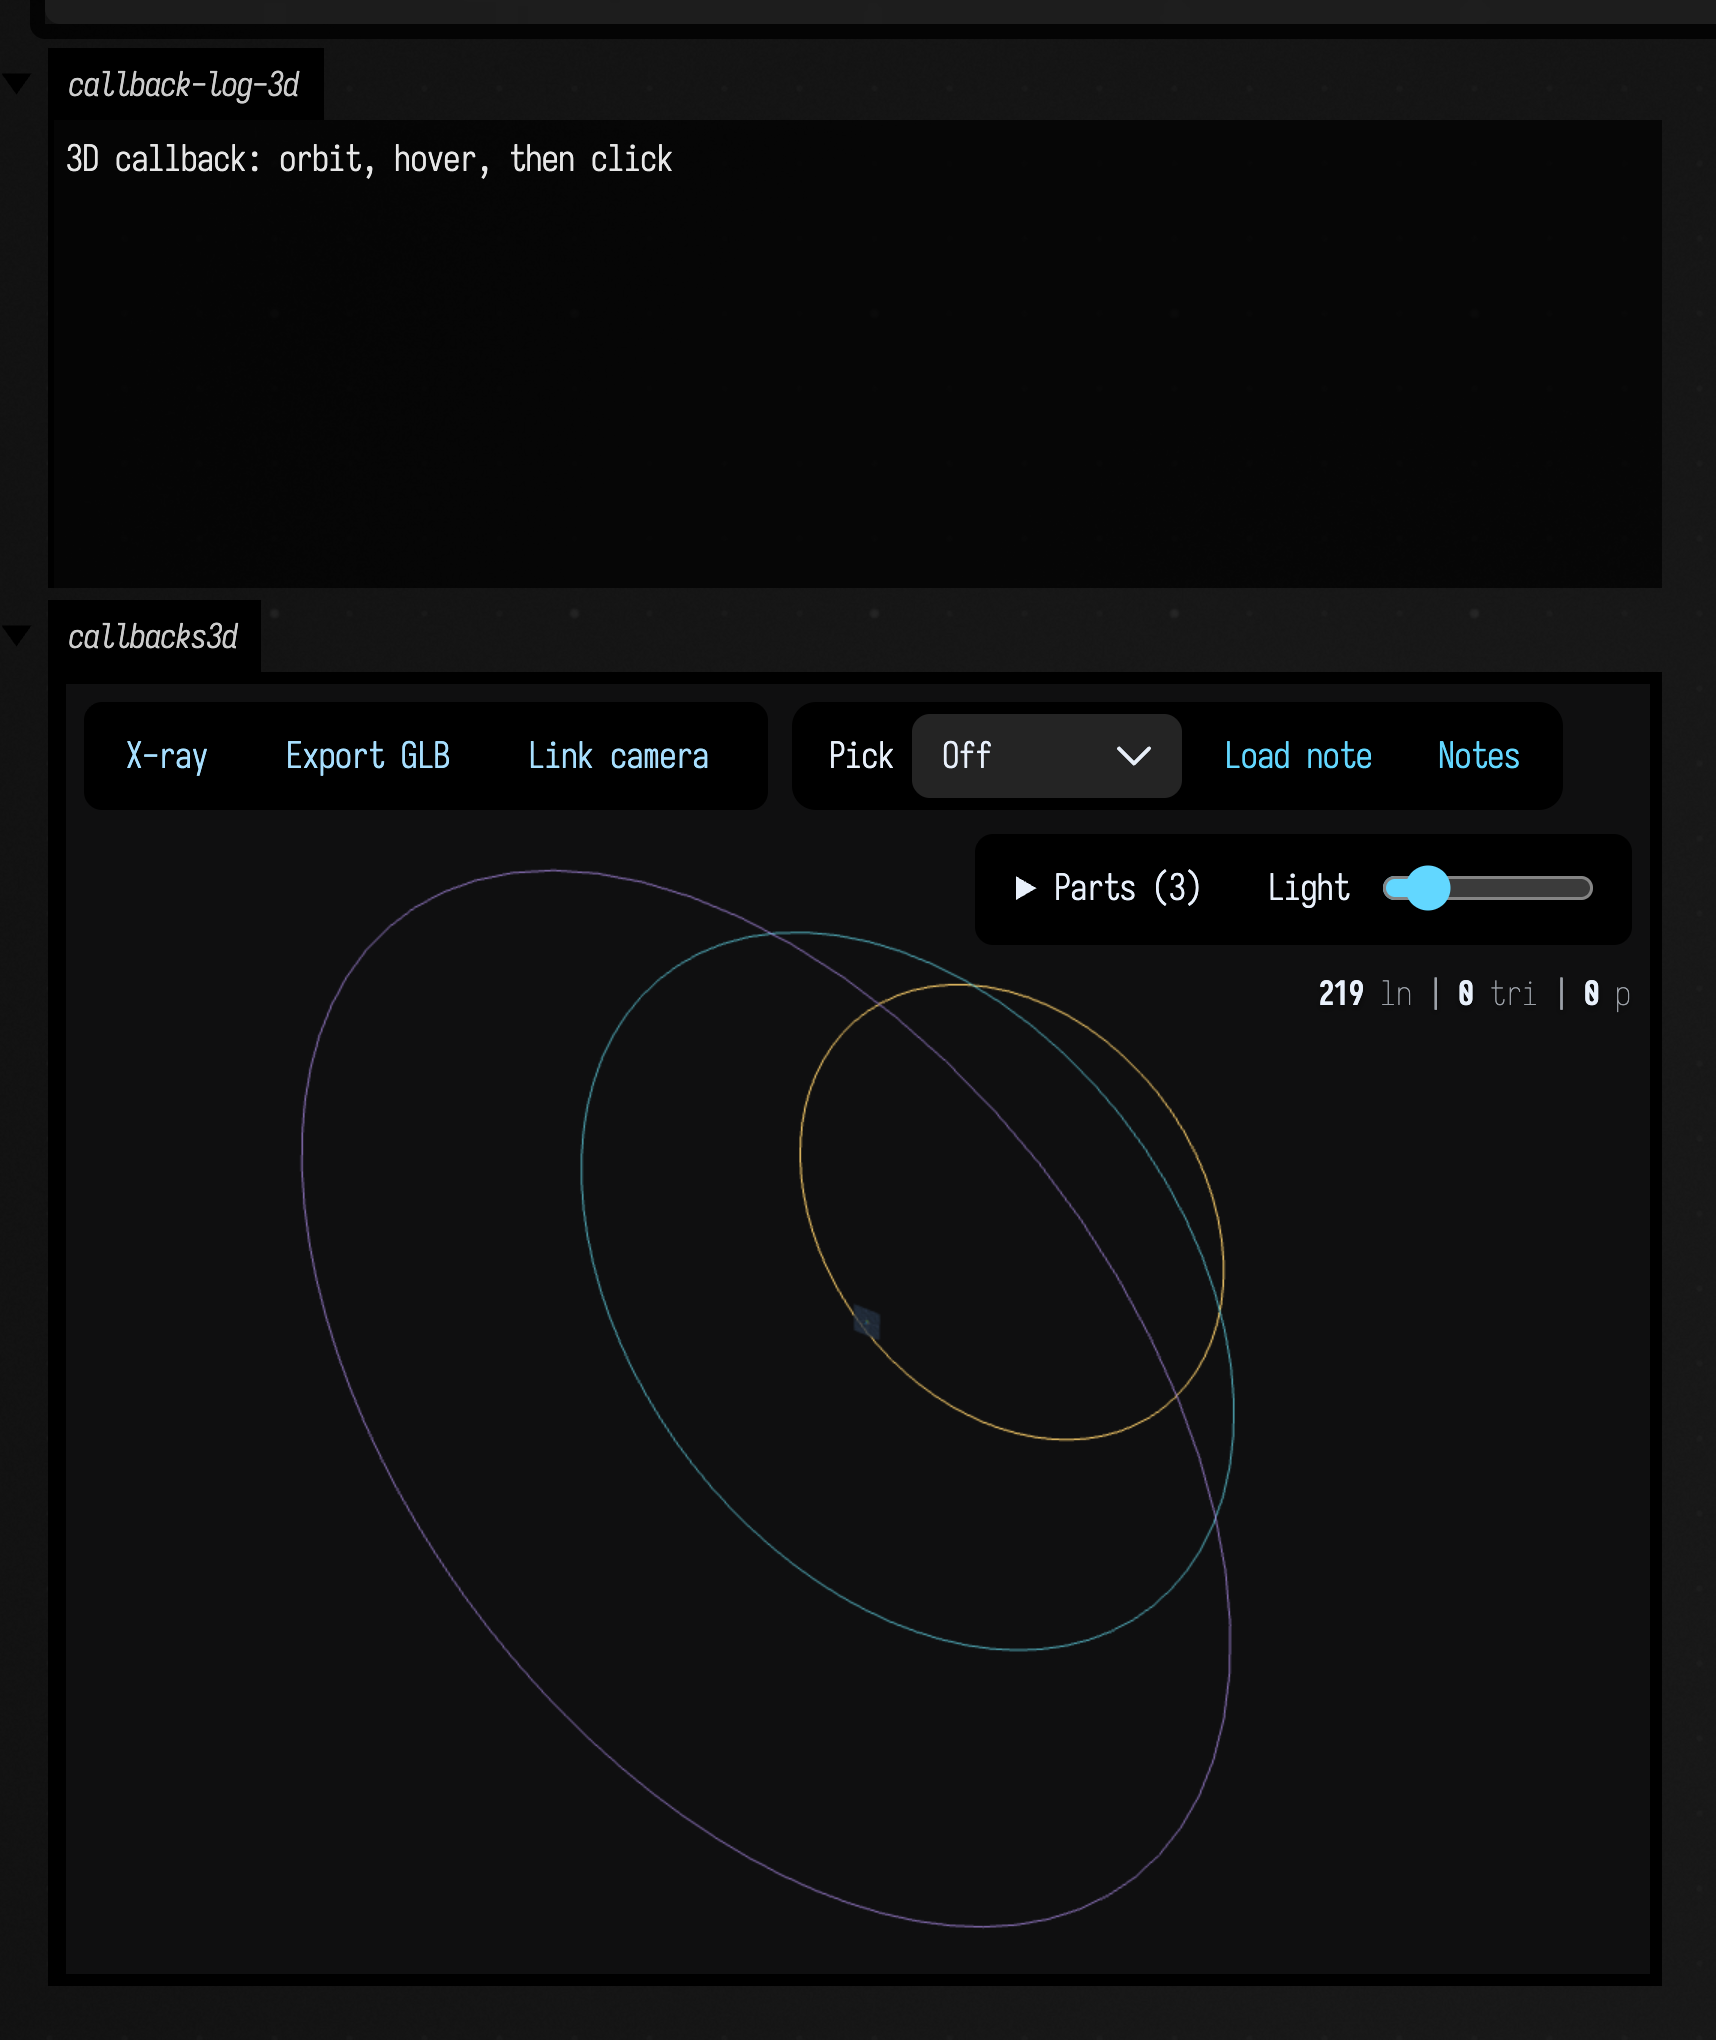
The 3D version is the same idea, just with ray-picking instead of SVG hit testing. That makes it useful for picking generated layers, debugging spatial structures, or attaching lightweight behavior to procedural geometry.
Where on the element you clicked
Both renderers fill in the whole FLineIntersection. Past closestVertexIndex and position it says
where on the element you clicked: u runs along a segment (for a cubic, the curve parameter), and
(u, v) runs across a face. onElement is the point on the element itself rather than under the
pointer, so its z is interpolated along the element: a 3D line drawn into the flat 2D output still
reports a depth. Every field past position is defaulted, so a two-field callback still compiles.
Two cautions before you read a number off it. u on a cubic is the Bézier parameter, not
arc length, and on a curve whose control points crowd its start the two can be far apart: u = 0.5
can sit well short of halfway along. And (u, v) means different things on different faces, so the
record's faceCoordinates says which. It is BILINEAR for a four-corner face, where (u, v) is a
position on that panel (Field checks the solve, and falls back if it fails); BOUNDING_BOX for any
other face, where it is a position in the face's bounding box; and NONE (with NaN) for a face with
no plane.
lineIndex and label let one closure serve a whole figure instead of one closure per
part. Box.inspect(lines) is that pattern packaged: it renders exactly what lines(...) renders and
names whatever you click. The fline_hit_records starting
point is a wall of panels to try it on.
Styling: color, stroked, filled, pointed
FLine geometry (where the points are) is separate from FLine styling (how it’s drawn). You’ll use these properties constantly:
:::static
// from afield.graphics.render.StandardDrawing
var FLine.color: Vec4
var FLine.thickness: Double
var FLine.filled: Boolean
var FLine.stroked: Boolean
var FLine.pointed: Boolean

var FLine.pointSize: Double
var FLine.Node.pointSize: Double
color is RGBA in sRGB (vec(r,g,b,a) with numbers between 0 and 1). Setting stroked to true draws the outline (the default), filled fills closed shapes (not the default), and pointed draws a dot at every node (useful for debugging, or for
particle systems, whose debug view is built
out of exactly this).
:::static
val shape = fline {
    moveTo(60, 60)
    cubicTo(120, 20, 300, 240, 360, 180)
    lineTo(360, 240)
    lineTo(60, 240)
    close()
}

val strokedOnly = shape.copy().apply {
    stroked = true
    filled = false
    thickness = 1.0
    color = vec(1.0, 1.0, 1.0, 1.0)
}

val filledOnly = shape.copy().apply {
    stroked = false
    filled = true
    color = vec(0.4, 1.0, 0.6, 0.25)
}

val debugPoints = shape.copy().apply {
    stroked = false
    filled = false
    pointed = true
    pointSize = 4.0
    color = vec(1.0, 0.5, 0.2, 1.0)
}

// side by side: each property alone, then all three together
lines(
    strokedOnly,
    filledOnly + vec(400, 0),
    debugPoints + vec(800, 0),
    filledOnly + vec(1200, 0),
    strokedOnly + vec(1200, 0),
    debugPoints + vec(1200, 0),
    w = 1000.0,
    h = 260.0,
    fitToSize = true,
)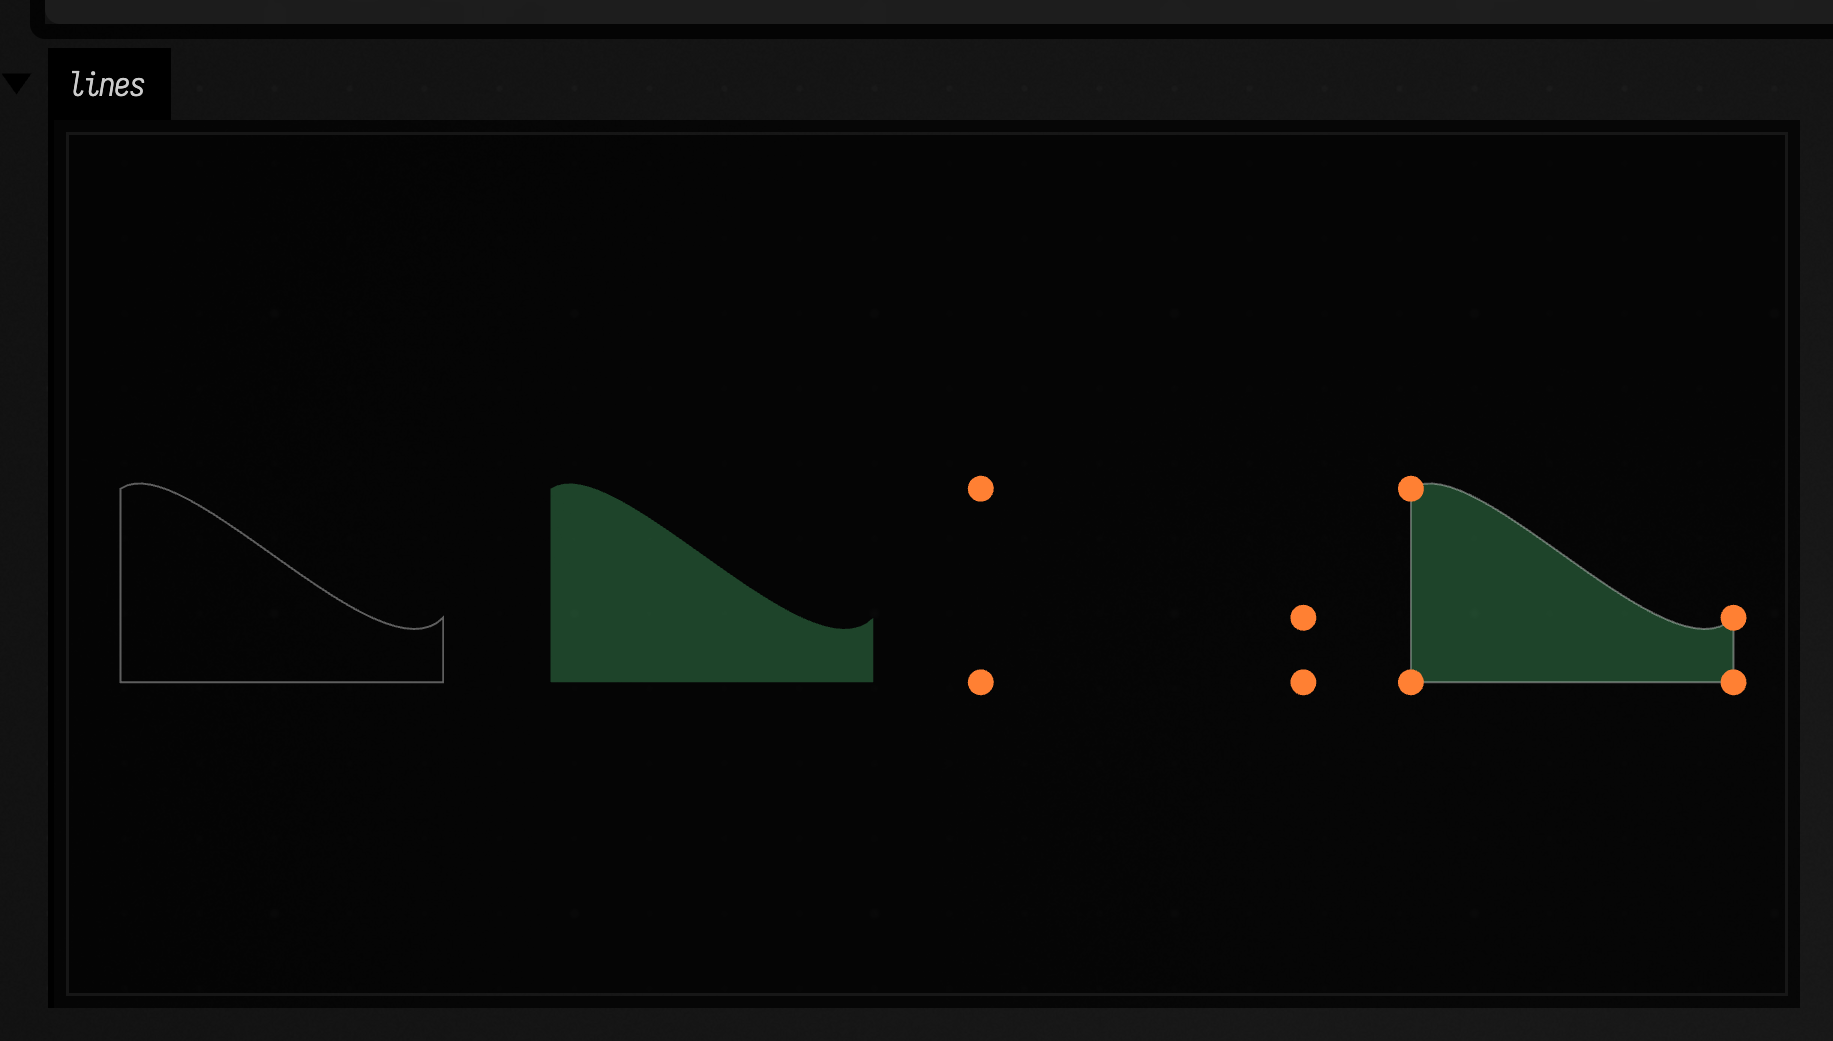
Left to right: stroked alone, filled alone, pointed alone, and all three drawn together.
Building paths: moveTo, lineTo, cubicTo, close
These four calls are the core of FLine: you moveTo to place the pen, then add segments (lineTo / cubicTo), and optionally close() to seal a shape. Most other helpers ultimately build on these four calls.
moveTo(...) overloads
Moves the pen without drawing; starts a new subpath when followed by segments.
:::static
fun FLine.moveTo(x: Number, y: Number, z: Number = 0): FLine.Node
fun FLine.moveTo(v: Vec3): FLine.Node
fun FLine.moveTo(v: Vec2): FLine.Node
:::static
val a = vec(50, 50)
val b = vec(350, 200)
val f = fline {
moveTo(a) // Vec2
lineTo(b.x, b.y) // Numbers
thickness = 1.0
color = vec(0.9, 0.9, 1.0, 1.0)
}
lines(f, w = 400.0, h = 250.0, fitToSize = true)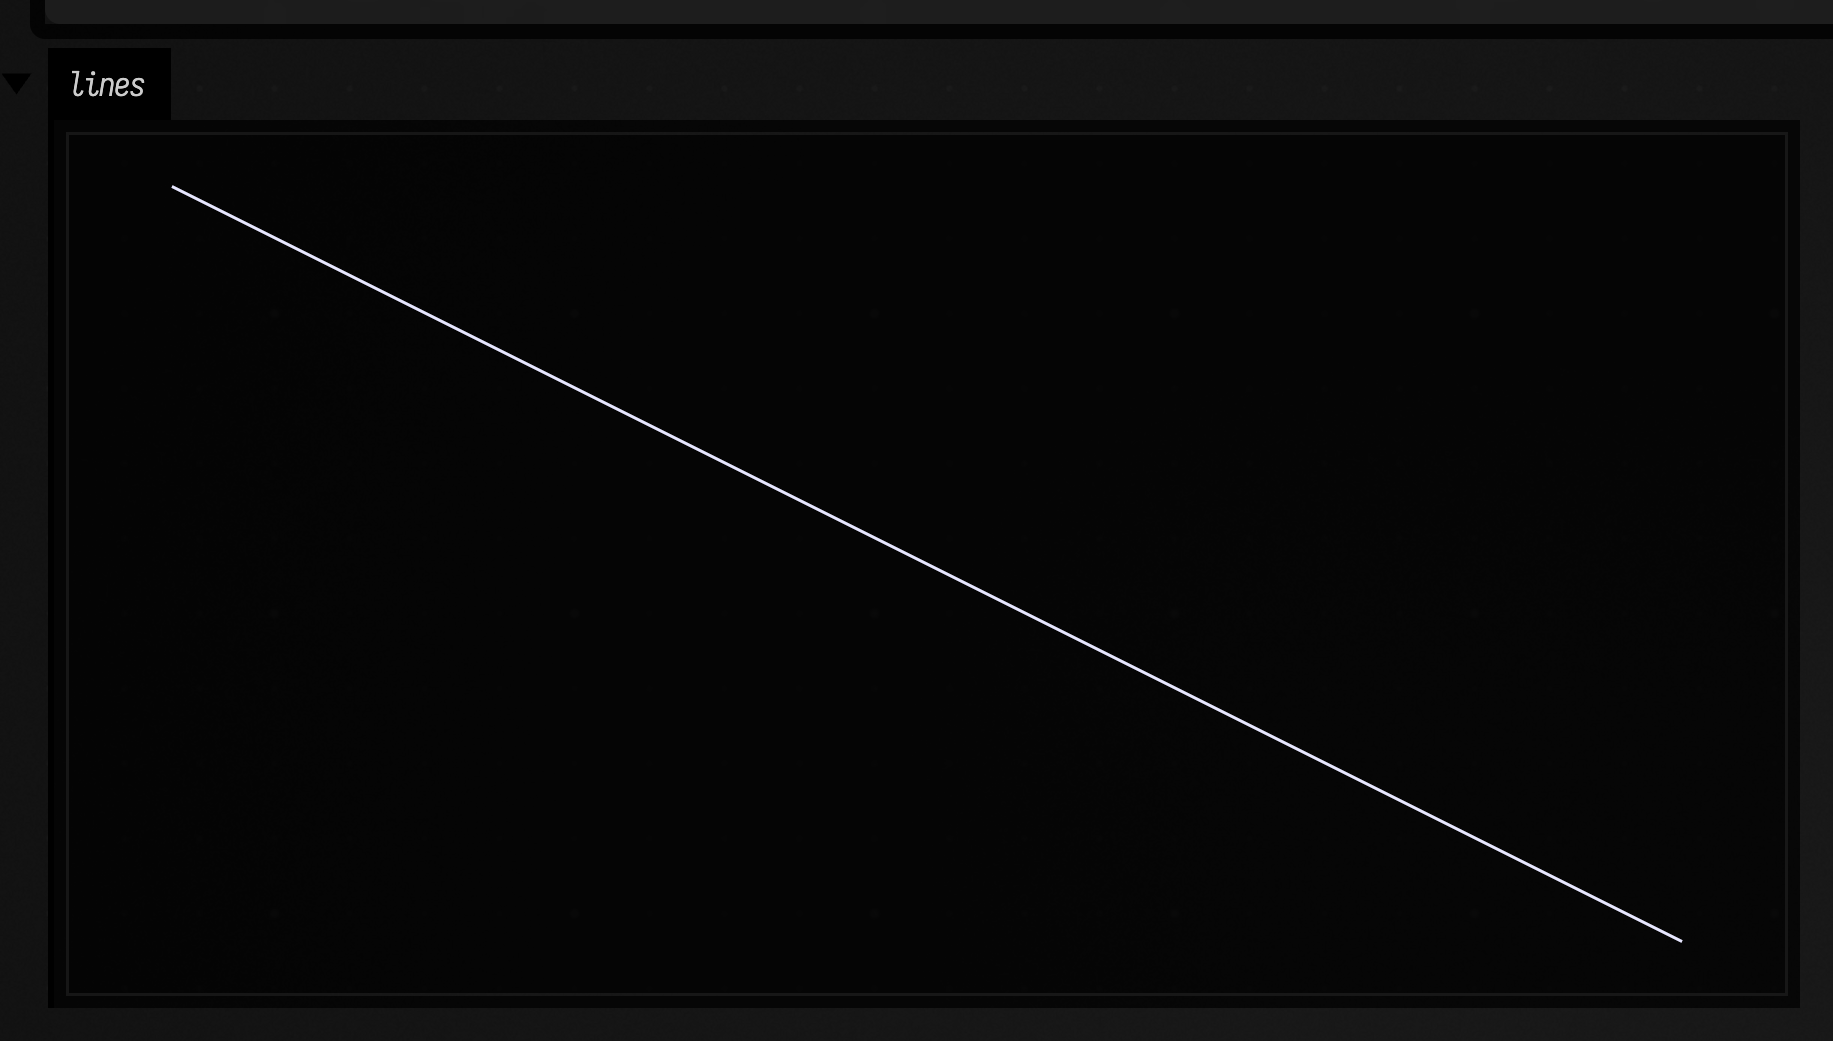
lineTo(...) overloads
Adds a straight segment from the current point to the new point. Equivalent to .moveTo( ... ) if there isn't a current point.
:::static
fun FLine.lineTo(x: Number, y: Number, z: Number = 0): FLine.Node
fun FLine.lineTo(v: Vec3): FLine.Node
fun FLine.lineTo(v: Vec2): FLine.Node
:::static
val poly = fline {
moveTo(50, 50)
lineTo(350, 50)
lineTo(350, 200)
lineTo(50, 200)
close()
stroked = true
filled = true
thickness = 3.0
color = vec(0.2, 0.9, 0.6, 0.35)
}
lines(poly, w = 420.0, h = 260.0, fitToSize = true)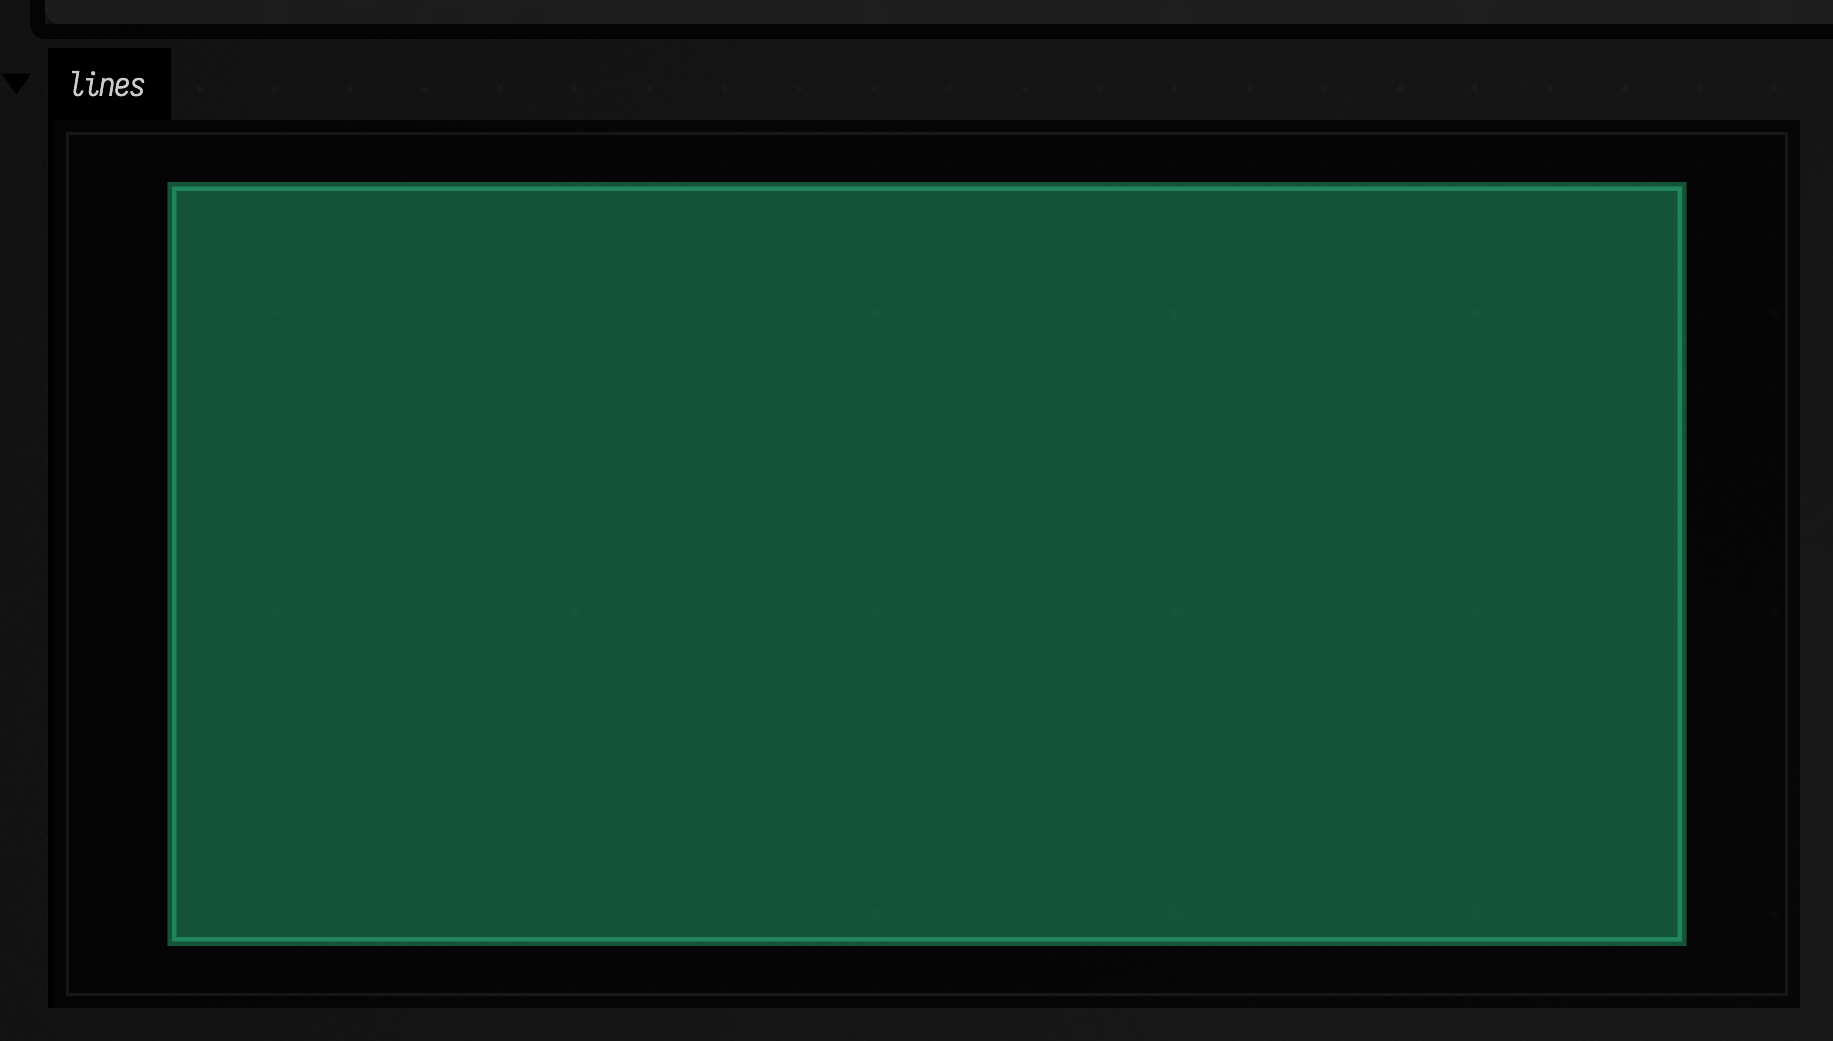
cubicTo(...) (Bézier curves)
Adds a cubic Bézier curve segment (two control points plus an end point). Most smooth vector shapes are made of cubics.
:::static
fun FLine.cubicTo(
    x0: Number,
    y0: Number,
    z0: Number = 0,
    x1: Number,
    y1: Number,
    z1: Number = 0,
    x: Number,
    y: Number,
    z: Number = 0,
): FLine.Node

fun FLine.cubicTo(x0: Number, y0: Number, x1: Number, y1: Number, x: Number, y: Number): FLine.Node
fun FLine.cubicTo(v0: Vec3, v1: Vec3, v: Vec3): FLine.Node
:::static
// We'll draw the curve AND its control handles.
val p0 = vec(50, 160)
val c1 = vec(150, 20)
val c2 = vec(250, 300)
val p3 = vec(350, 160)
val curve = fline {
moveTo(p0)
cubicTo(c1.v3, c2.v3, p3.v3)
thickness = 5.0
color = vec(1.0, 0.8, 0.2, 1.0)
}
// The "handle lines" show how tangents are determined.
val handles = [
seg(p0, c1, pointed = false, color = vec(1.0, 1.0, 1.0, 0.35)).apply { thickness = 2.0 },
seg(p3, c2, pointed = false, color = vec(1.0, 1.0, 1.0, 0.35)).apply { thickness = 2.0 },
]
// Dots for endpoints and control points.
fun dot(p: Vec2, color: Vec4) = fline {
moveTo(p.x, p.y)
lineTo(p.x + 0.001, p.y + 0.001)
pointed = true
pointSize = 4.5
stroked = false
filled = true
this.color = color
}
val pts = [
dot(p0, vec(1.0, 1.0, 1.0, 1.0)),
dot(p3, vec(1.0, 1.0, 1.0, 1.0)),
dot(c1, vec(0.4, 1.0, 0.6, 1.0)),
dot(c2, vec(0.4, 1.0, 0.6, 1.0)),
]
val curveLines: List<FLine> = [curve]
lines(handles + curveLines + pts, w = 420.0, h = 320.0, fitToSize = true)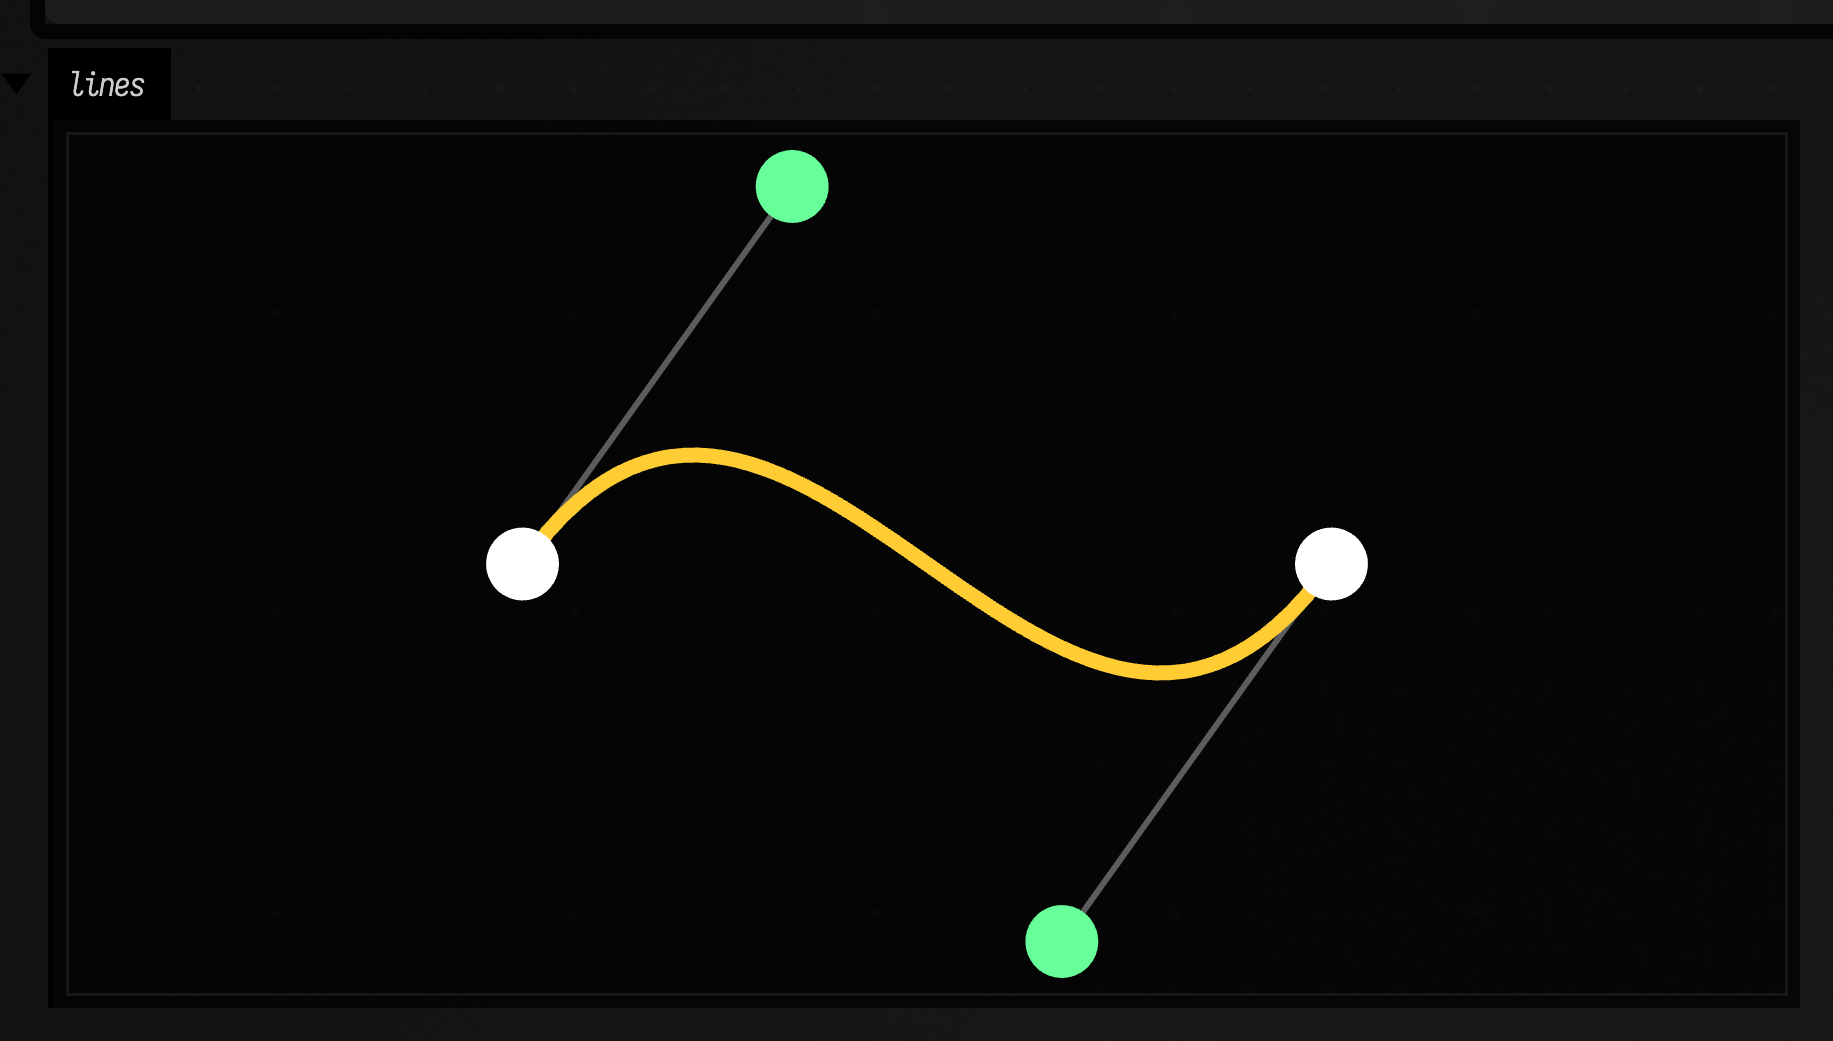
close()
Closes the current subpath by drawing a segment back to the last moveTo.
:::static
fun FLine.close(): FLine.Node
:::static
val tri = fline {
moveTo(200, 40)
lineTo(360, 240)
lineTo(40, 240)
close()
filled = true
stroked = true
thickness = 2.0
color = vec(0.9, 0.4, 0.9, 0.35)
}
lines(tri, w = 420.0, h = 300.0, fitToSize = true)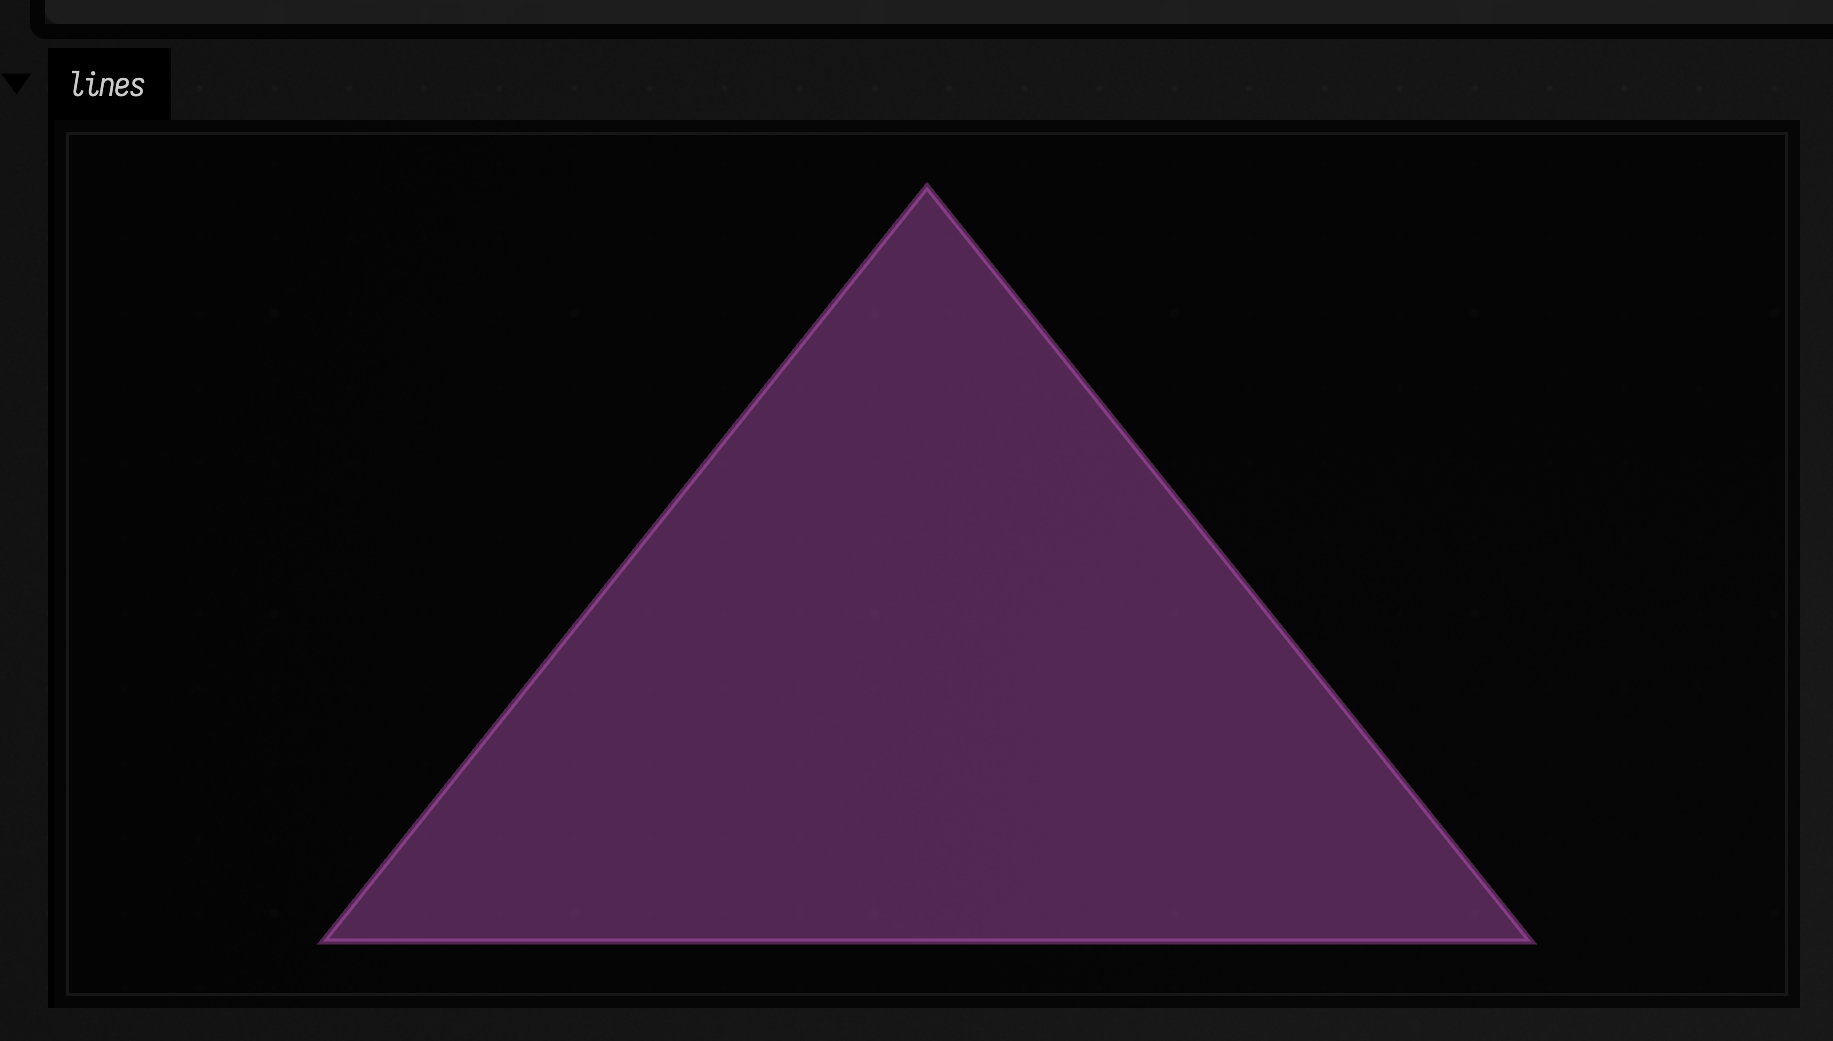
Terser construction: pen operators, literals, and the data mini-language
For quick sketches, you can also use a shorter vocabulary. These forms build the same path
instructions as moveTo, lineTo and cubicTo, so you can mix them freely.
:::static
/*
1) FLine.of — a polyline through the points (first point -> moveTo, the
   rest -> lineTo). Elements may be a mix of Number runs, Vec2 and Vec3.
*/
val poly = FLine.of(vec(0, 0), vec(1, 0), vec(1, 1))
val square = FLine.of(0, 0, 1, 0, 1, 1, 0, 1)

// 2) Pen operators — MEMBERS of FLine, so they only light up when an FLine is the
//    receiver, i.e. inside `fline { }`, `copy { }`. `-v` draws, `+v` lifts the pen.
operator fun Vec3.unaryMinus(): FLine // -v : lineTo (a dash looks like a segment); moveTo if the line is empty
operator fun Vec2.unaryMinus(): FLine
operator fun Vec3.unaryPlus(): FLine // +v : moveTo — pen up, start a new subpath
operator fun Vec2.unaryPlus(): FLine

// 3) A segment as a range, plus point/line appends
operator fun Vec3.rangeTo(other: Vec3): FLine // vec(a)..vec(b)  == a two-point line
operator fun Vec2.rangeTo(other: Vec2): FLine
operator fun FLine.plusAssign(p: Vec3) // f += vec(...)   appends a lineTo
operator fun FLine.plusAssign(p: Vec2) // (FLine += FLine still concatenates paths)

// 4) Node-scoped styling — style the node you just added, inline
fun FLine.moveTo(v: Vec3, style: FLine.Node.() -> Unit): FLine
fun FLine.lineTo(v: Vec3, style: FLine.Node.() -> Unit): FLine
fun FLine.cubicTo(c1: Vec3, c2: Vec3, to: Vec3, style: FLine.Node.() -> Unit): FLine

// 5) The `data` string mini-language (now variadic — no hand-rolled list)
fun FLine.data(format: String, vararg parameters: Any): FLine
The data format is a tiny path grammar: m moveTo, l lineTo, c cubicTo (3 points), s smoothTo, z close, ( ) groups, and a trailing + that greedily repeats a group over the remaining points. Parameters are packed into points (a run of numbers becomes x,y[,z]; Vec2/Vec3 pass through). So data("m l+", 0,0, 1,0, 1,1) is “move to the first point, then line to every point after it”.
:::static
// Pen operators inside fline { }: `-` draws, `+` lifts the pen to a new subpath.
val zig = fline {
    -vec(40, 40) // first point -> promoted to moveTo
    -vec(140, 40) // lineTo
    -vec(140, 140)
    +vec(200, 40) // pen up: a second subpath starts here
    -vec(300, 140)
    thickness = 3.0
    color = vec(0.98, 0.88, 0.28, 1.0)
}

// FLine.of: first point is a moveTo, the rest lineTo.
val tri = FLine.of(vec(60, 220), vec(180, 300), vec(300, 220))
tri.apply {
    close()
    thickness = 2.0
    color = vec(0.4, 1.0, 0.6, 1.0)
}

// `..` makes a segment; `+=` extends it with another point.
val seg = (vec(340, 40)..vec(460, 40)).apply {
    thickness = 2.0
    color = vec(1.0, 0.5, 0.25, 1.0)
}
seg += vec(460, 160)

// The `data` mini-language, driven variadically, with per-node styling on the box.
val box = FLine().data("m l l l z", 340, 200, 460, 200, 460, 300, 340, 300).apply {
    stroked = true
    color = vec(0.34, 0.82, 1.0, 1.0)
}

lines(zig, tri, seg, box, w = 520.0, h = 340.0, fitToSize = true)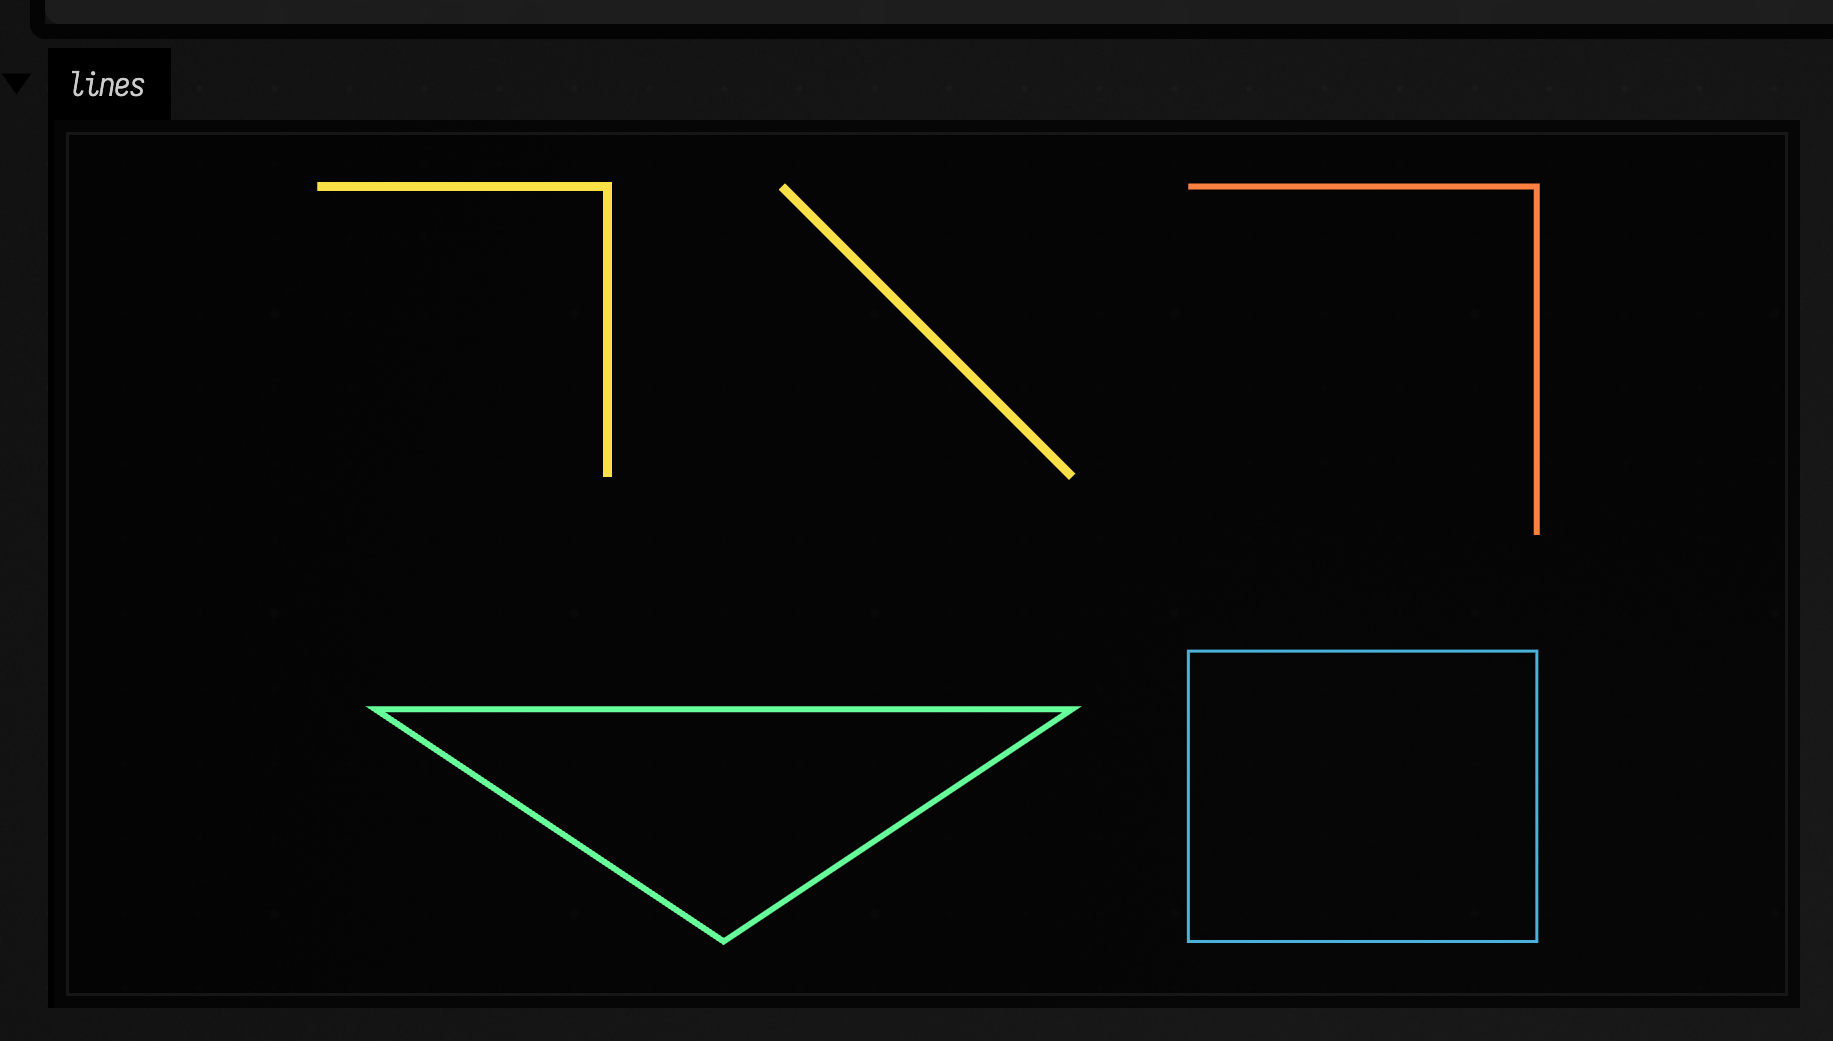
Because + repeats a group over whatever points remain, one short format can stamp a whole pattern. Here m c+ z turns a list of points into a flower of cubic petals, with each c taking three of them:
:::static
// A little "flower" made from repeated cubic petals.
val f = fline {
    val petalPoints: List<Vec3> = [
        vec(200, 130, 0),

        // Each repetition of `c` consumes 3 points: c1, c2, end.
        vec(260, 40, 0),
        vec(340, 80, 0),
        vec(300, 130, 0),
        vec(340, 180, 0),
        vec(260, 220, 0),
        vec(200, 190, 0),
        vec(140, 220, 0),
        vec(60, 180, 0),
        vec(100, 130, 0),
        vec(60, 80, 0),
        vec(140, 40, 0),
        vec(200, 130, 0),
    ]
    data(format = "m c+ z", parameters = petalPoints)

    filled = true
    stroked = true
    thickness = 3.0
    color = vec(1.0, 0.7, 0.2, 0.35)
}

lines(f, w = 420.0, h = 260.0, fitToSize = true)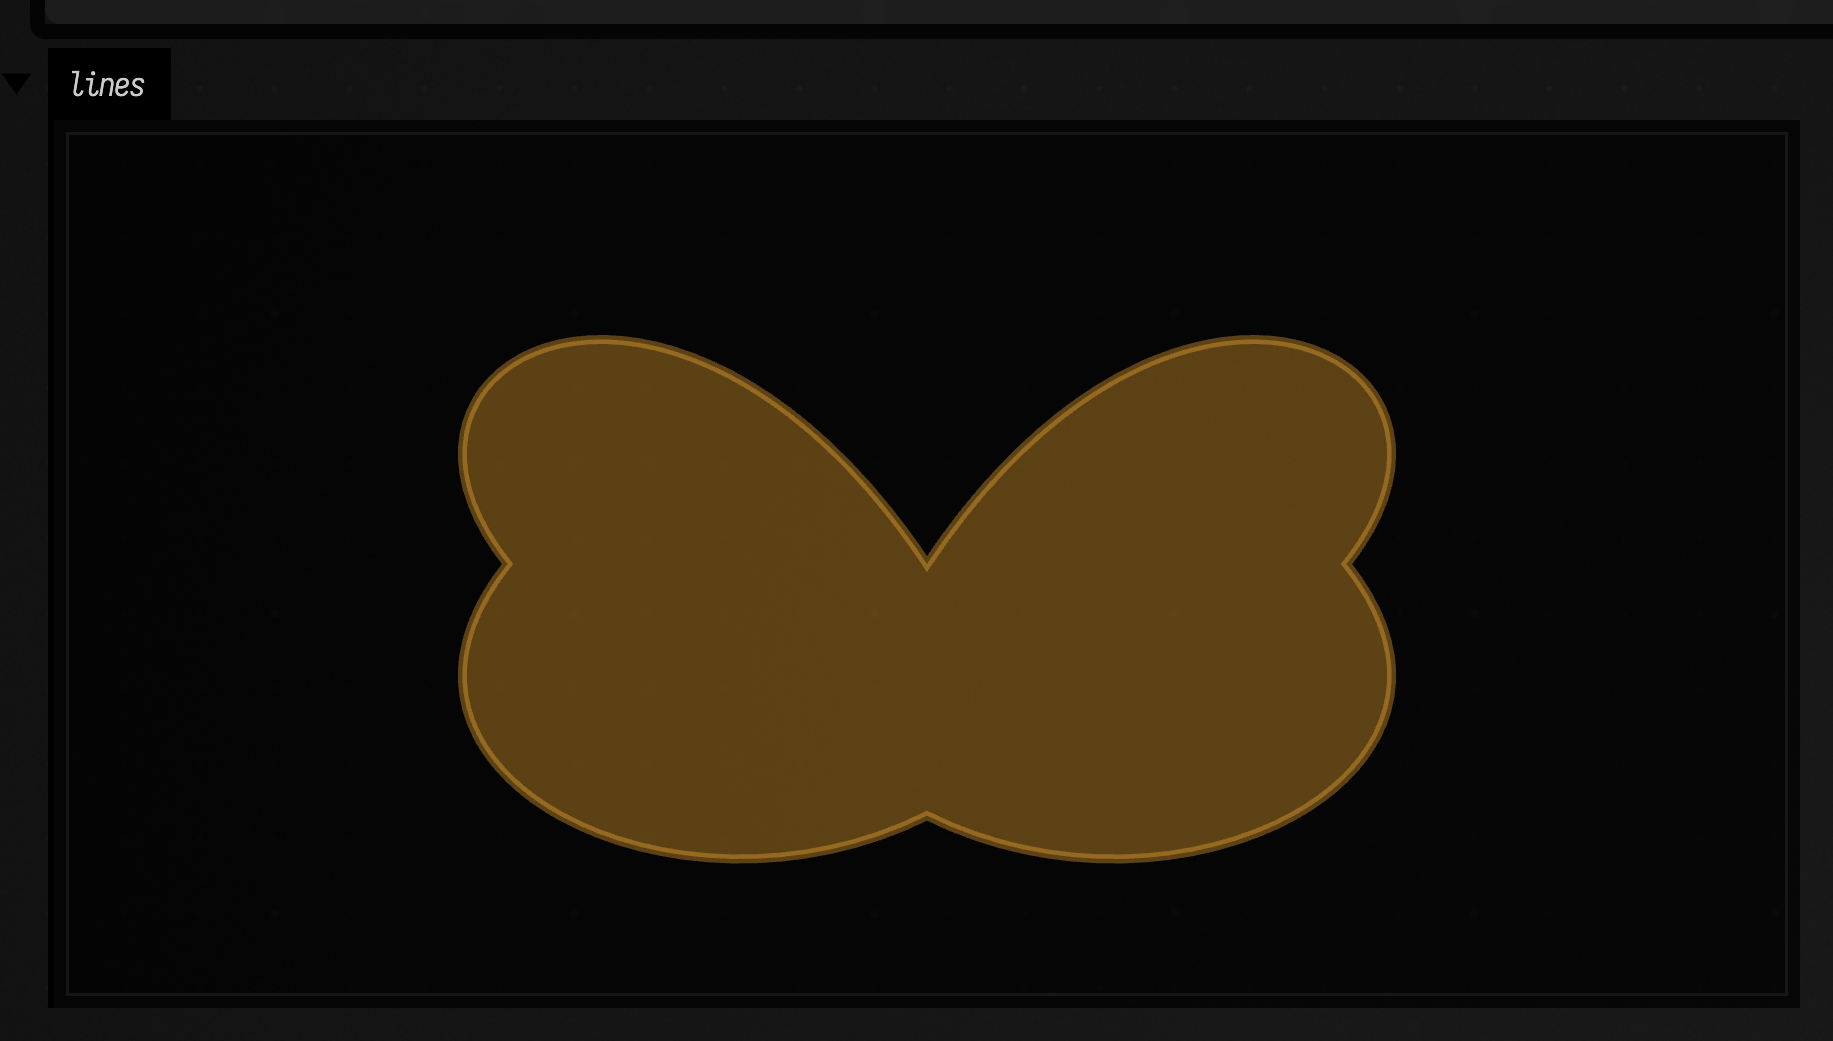
Node-scoped styling is handy when a single node needs to stand out — for example a colored, larger point at the end of a stroke:
:::static
fline {
    moveTo(vec(0, 0, 0))
    lineTo(vec(100, 0, 0)) {
        color = vec(1, 0.5, 0.2, 1)
        pointSize = 6.0
    }
    pointed = true
}
A note on scope: the +/- pen operators and the style-lambda overloads only resolve when an FLine is the receiver, which in practice means inside fline { } (or copy { }). FLine.of, .., and += work anywhere.
Multiple subpaths: breakNext() and pieces()
One FLine can contain several separate strokes, each beginning with a moveTo. Use breakNext
to start another stroke while building a line, or pieces to split an existing line into separate
FLines.
breakNext()
Forces the next segment call (lineTo, cubicTo) to start a new subpath (internally inserts a moveTo). Use it to build an FLine out of several separate strokes.
:::static
fun FLine.breakNext()
:::static
val f = fline {
moveTo(50, 50)
lineTo(350, 50)
breakNext()
lineTo(50, 200) // starts a new subpath
lineTo(350, 200)
thickness = 1.0
color = vec(1.0, 1.0, 1.0, 1.0)
}
lines(f, w = 420.0, h = 260.0, fitToSize = true)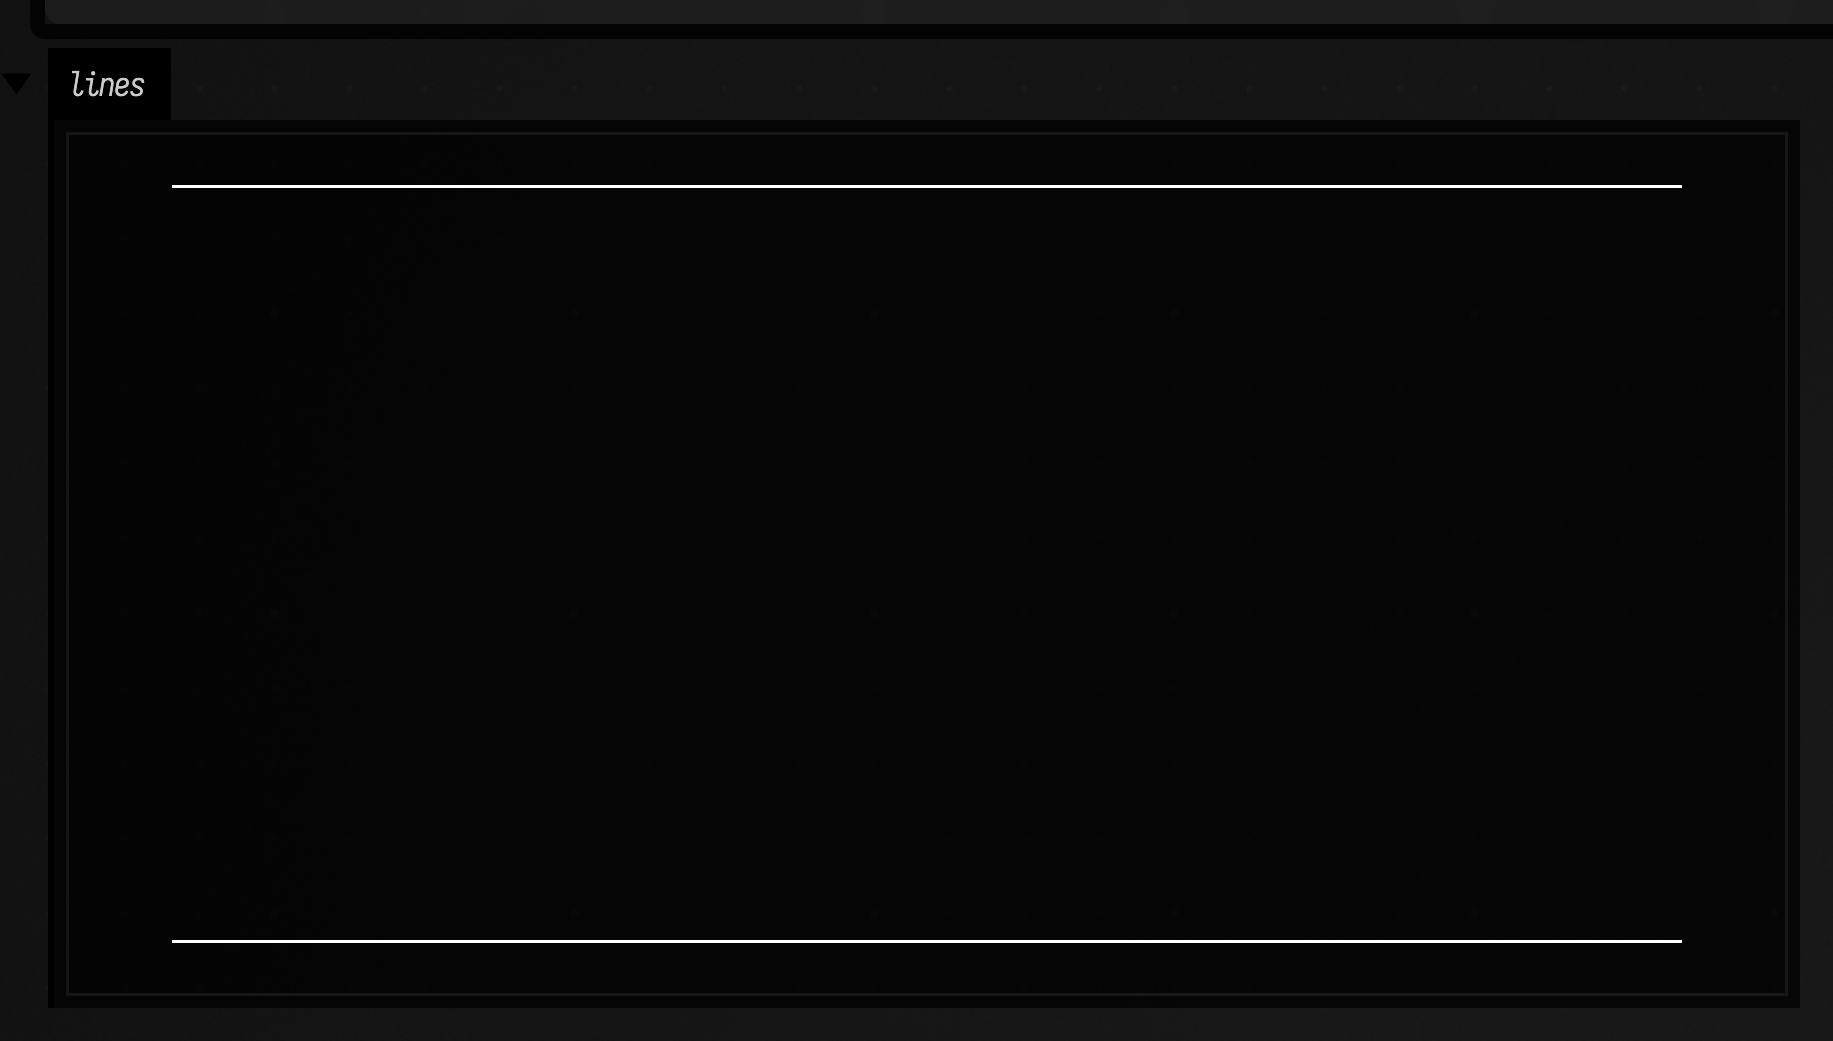
pieces()
Splits an FLine into separate FLines at each moveTo.
:::static
fun FLine.pieces(): List<FLine>
:::static
val f = fline {
moveTo(50, 50)
lineTo(350, 50)
moveTo(50, 200)
lineTo(350, 200)
thickness = 5.0
color = vec(0.7, 0.9, 1.0, 1.0)
}
// Each piece is its own FLine; colour them separately to show the split.
val colors = [vec(1.0, 0.5, 0.25, 1.0), vec(0.4, 1.0, 0.6, 1.0)]
val ps = f.pieces().mapIndexed { i, p -> p.apply { color = colors[i % colors.size] } }
lines(ps, w = 420.0, h = 260.0, fitToSize = true)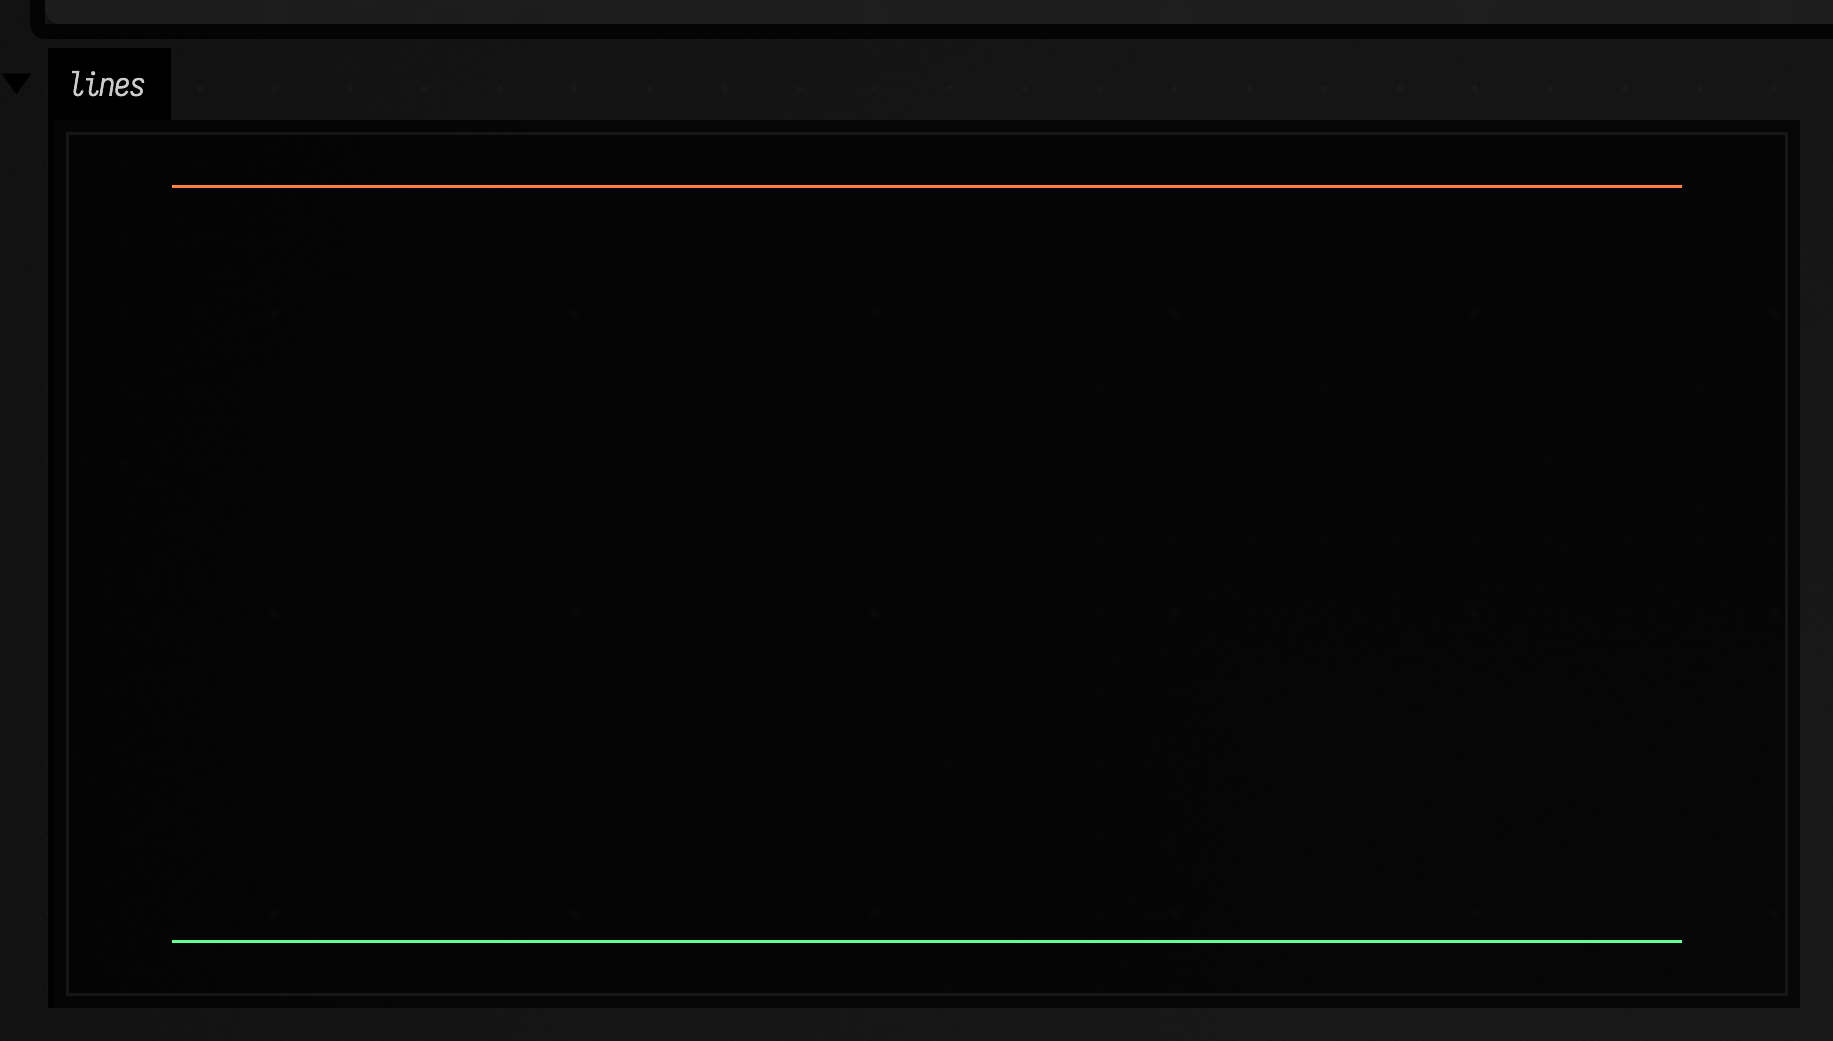
Copying and transforms
These are the everyday tools for reusing a shape without rebuilding it: copy() duplicates geometry, transform {} maps every node through a function, and the operator overloads (+, *, etc.) make common transforms concise.
copy() and transform(...)
| Operation | Behavior |
|---|---|
fun FLine.copy(): FLine |
Returns a new line with copied nodes and properties. |
fun FLine.transform(by: (Vec3) -> Vec3): FLine |
Returns a new line by applying by to every stored point, including Bézier control points. The original geometry is unchanged and drawing properties are copied. |
copy() duplicates the geometry. transform maps every control point through a function (translate, scale, warp, …).
:::static
val base = fline {
    moveTo(60, 60)
    cubicTo(120, 20, 240, 200, 320, 140)
    thickness = 2.0
    color = vec(1.0, 1.0, 1.0, 0.35)
    pointed = true
    pointSize = 3.0
}

// Every stored point, control points included, goes through the function:
// here each one moves 60 down and spreads 20% wider.
val moved =
    base
        .transform { p -> vec(p.x * 1.2f, p.y + 60, p.z) }
        .apply {
            thickness = 4.0
            color = vec(1.0, 0.4, 0.4, 1.0)
        }

lines(base, moved, w = 420.0, h = 260.0, fitToSize = true)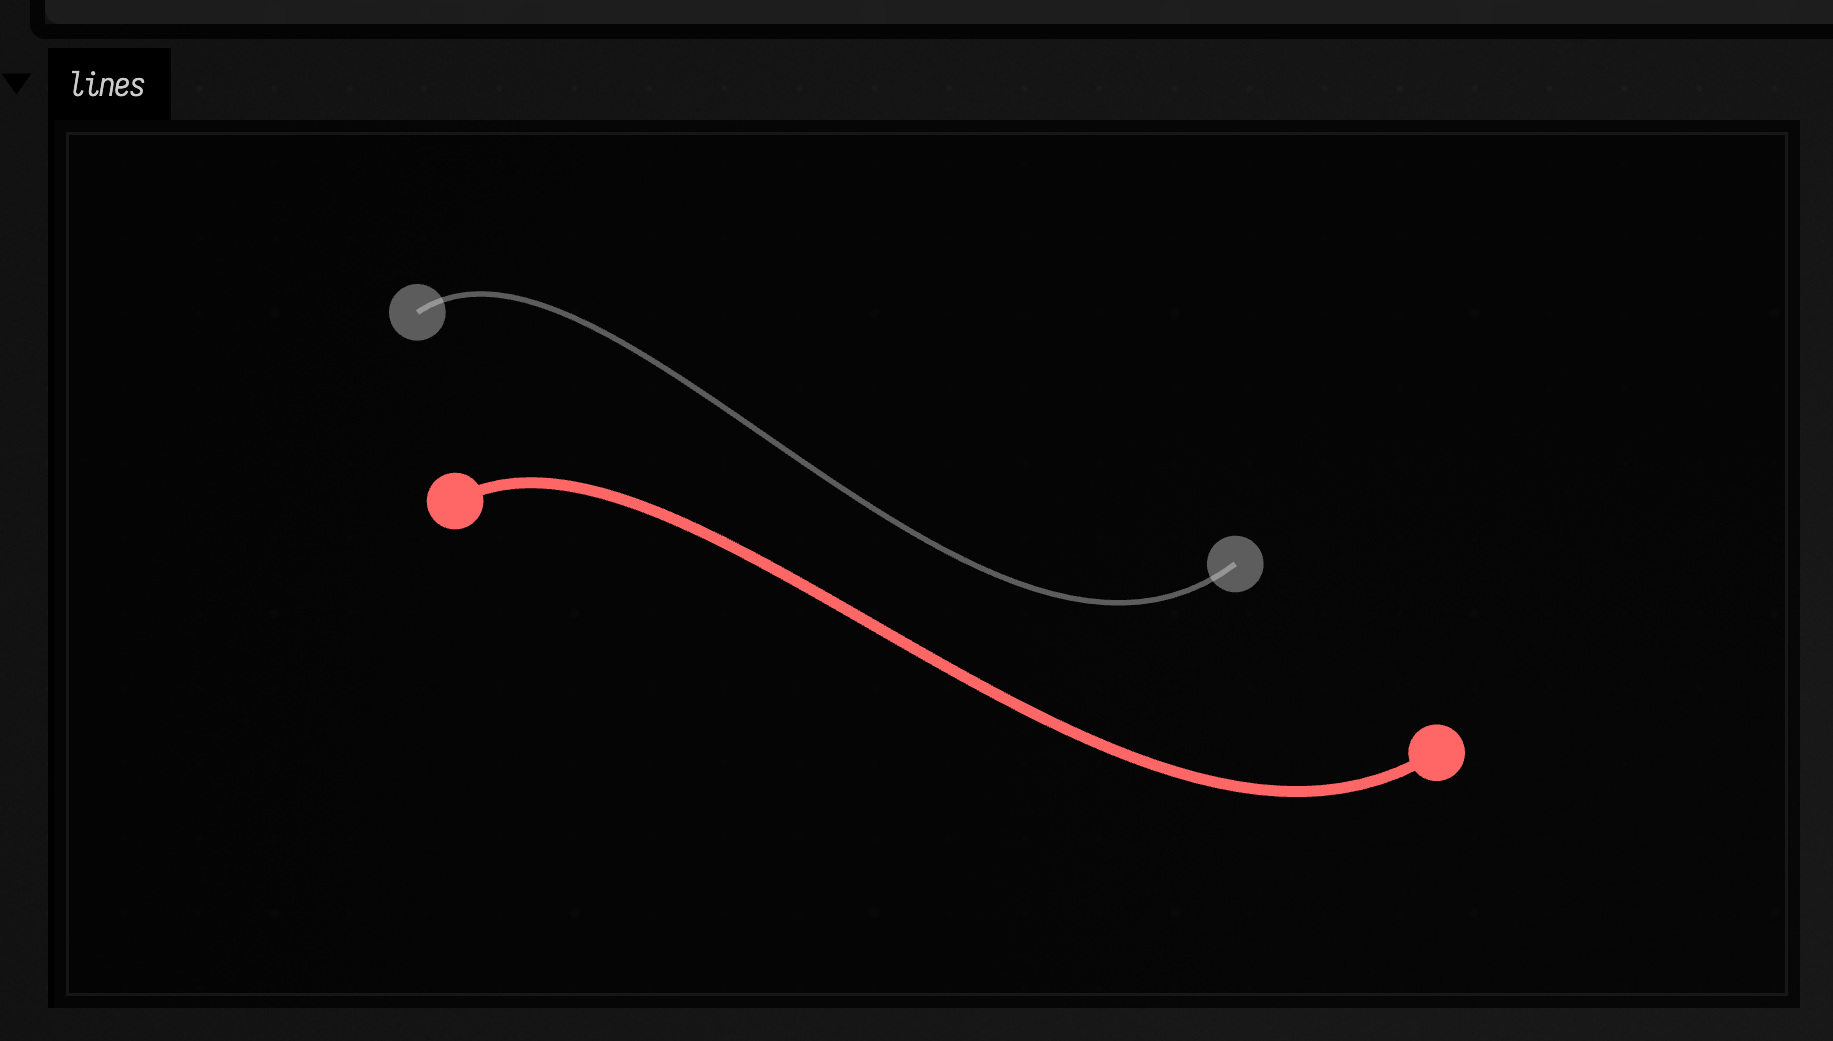
Operator transforms: +, -, *
These are convenience transforms: translate (+/-), scale (* with a Number or Vec3), and rotate (* with a Quat).
:::static
operator fun FLine.plus(n: Vec3): FLine
operator fun FLine.minus(n: Vec3): FLine
operator fun FLine.times(n: Vec3): FLine
operator fun FLine.times(n: Quat): FLine
operator fun FLine.times(n: Number): FLine

operator fun List<FLine>.plus(offset: Vec3): List<FLine>
operator fun List<FLine>.times(scale: Number): List<FLine>
:::static
val square = fline {
rect(0, 0, 100, 100)
thickness = 3.0
filled = true
color = vec(0.3, 0.8, 1.0, 0.35)
}
val a = square + vec(20, 60, 0) // moved only
val b = ((square * 1.4) + vec(150, 40, 0)).apply { color = vec(0.4, 1.0, 0.6, 0.35) } // scaled 1.4x, then moved
val c = ((square * 0.7) + vec(320, 75, 0)).apply { color = vec(1.0, 0.7, 0.2, 0.35) } // scaled 0.7x, then moved
lines(a, b, c, w = 420.0, h = 260.0, fitToSize = true)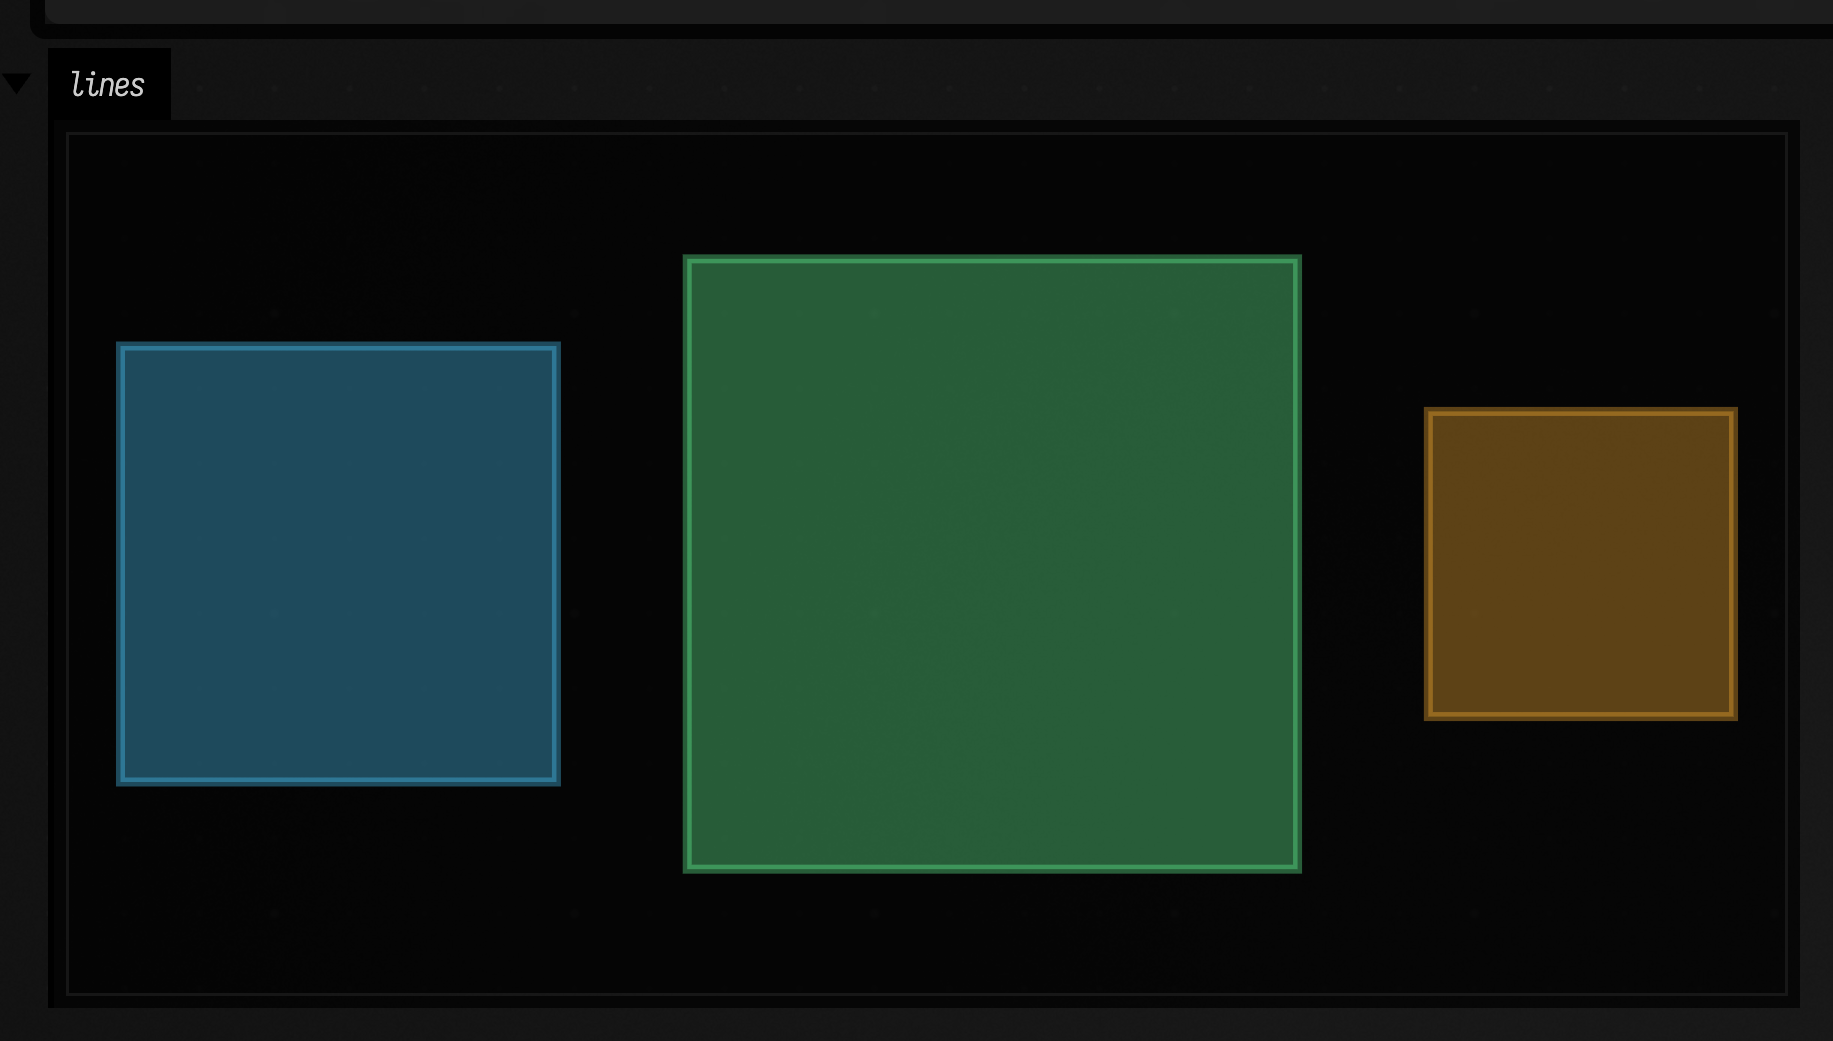
Quick path construction helpers
When you already have points (samples, mouse input, a polyline) or you want a specific primitive (like an arc), these helpers get you to an FLine quickly and readably.
Polylines: polylineFrom(...) and byAppendingPolyline(...)
Builds a line strip from points. Great for samples, plots, and quick geometry.
:::static
fun polylineFrom(points: List<Vec3>, closed: Boolean = false): FLine
fun polylineFrom(points: List<Vec2>, z: Number = 0, closed: Boolean = false): FLine

fun FLine.byAppendingPolyline(points: Iterable<Vec3>, closed: Boolean = false): FLine
fun FLine.byAppendingPolyline(points: Iterable<Vec2>, z: Number = 0, closed: Boolean = false): FLine
:::static
val pts =
(0..80).map { i ->
val x = 20 + i * 5
val y = 120 + 60 * kotlin.math.sin(i * 0.2)
vec(x, y)
}
val wave = polylineFrom(pts, closed = false).apply {
thickness = 3.0
color = vec(1.0, 1.0, 1.0, 1.0)
}
lines(wave, w = 420.0, h = 260.0, fitToSize = true)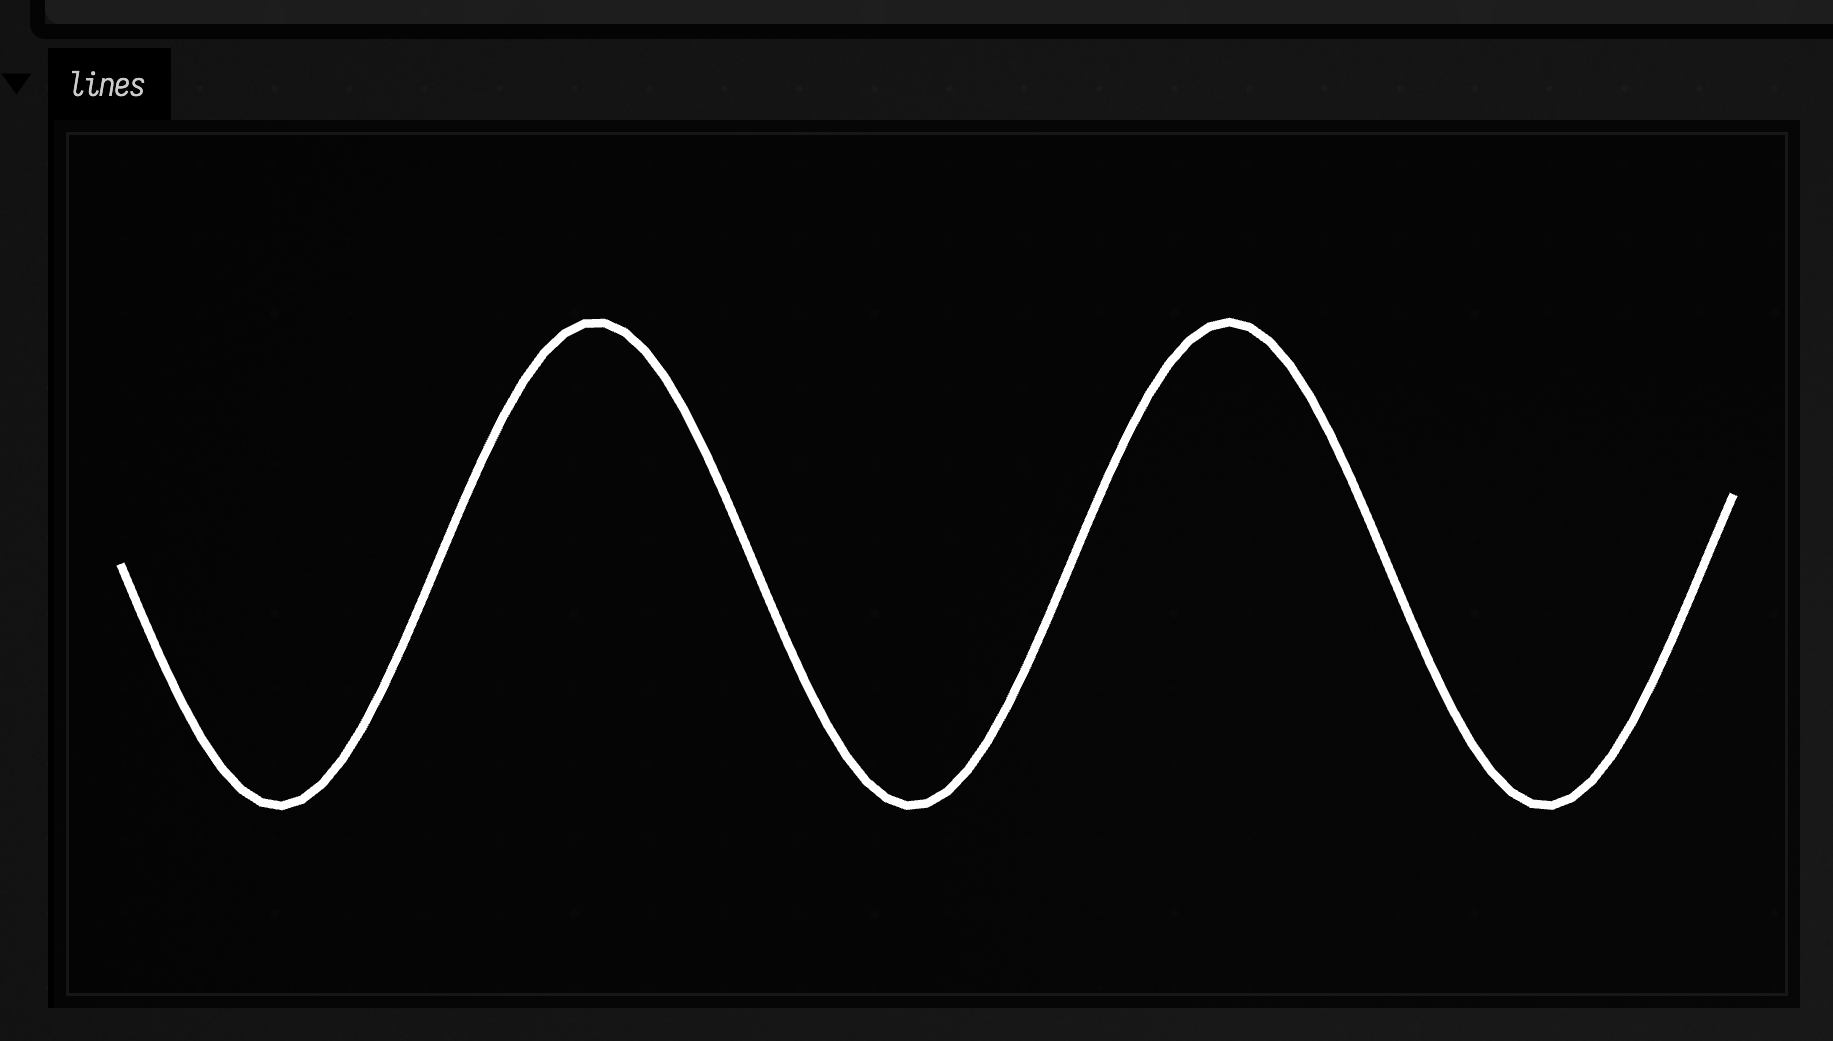
Arrows: arrow(...)
arrow(...) builds a real shaft plus one or two arrowheads, so it reads better in diagrams and annotations than faking direction with a fat point at the end of a line.
:::static
fun arrow(
    x0: Double,
    y0: Double,
    x1: Double,
    y1: Double,
    color: Vec4 = vec(1.0, 1.0, 1.0, 1.0),
    thickness: Double = 2.0,
    headLength: Double = Double.NaN,
    headWidth: Double = Double.NaN,
    startHead: Boolean = false,
    endHead: Boolean = true,
): FLine

fun arrow(
    from: Vec2,
    to: Vec2,
    color: Vec4 = vec(1.0, 1.0, 1.0, 1.0),
    thickness: Double = 2.0,
    headLength: Double = Double.NaN,
    headWidth: Double = Double.NaN,
    startHead: Boolean = false,
    endHead: Boolean = true,
): FLine
:::static
fun card(x: Double, y: Double, tint: Vec4) = fline {
rect(x, y, 72, 54)
filled = true
stroked = true
thickness = 2.0
color = tint
}
val left = card(24.0, 102.0, vec(0.32, 0.84, 1.0, 0.18))
val top = card(174.0, 42.0, vec(1.0, 0.72, 0.24, 0.18))
val right = card(324.0, 152.0, vec(0.48, 1.0, 0.66, 0.18))
val flow = arrow(
96.0,
129.0,
174.0,
69.0,
color = vec(0.92, 0.96, 1.0, 0.95),
thickness = 3.0,
)
val feedback = arrow(
vec(246.0, 69.0),
vec(324.0, 179.0),
color = vec(1.0, 0.72, 0.24, 0.95),
thickness = 4.0,
headLength = 22.0,
headWidth = 16.0,
)
val sync = arrow(
vec(324.0, 194.0),
vec(96.0, 144.0),
color = vec(0.46, 1.0, 0.72, 0.92),
thickness = 2.6,
headLength = 16.0,
headWidth = 12.0,
startHead = true,
endHead = true,
)
lines(left, top, right, flow, feedback, sync, w = 420.0, h = 260.0, fitToSize = true)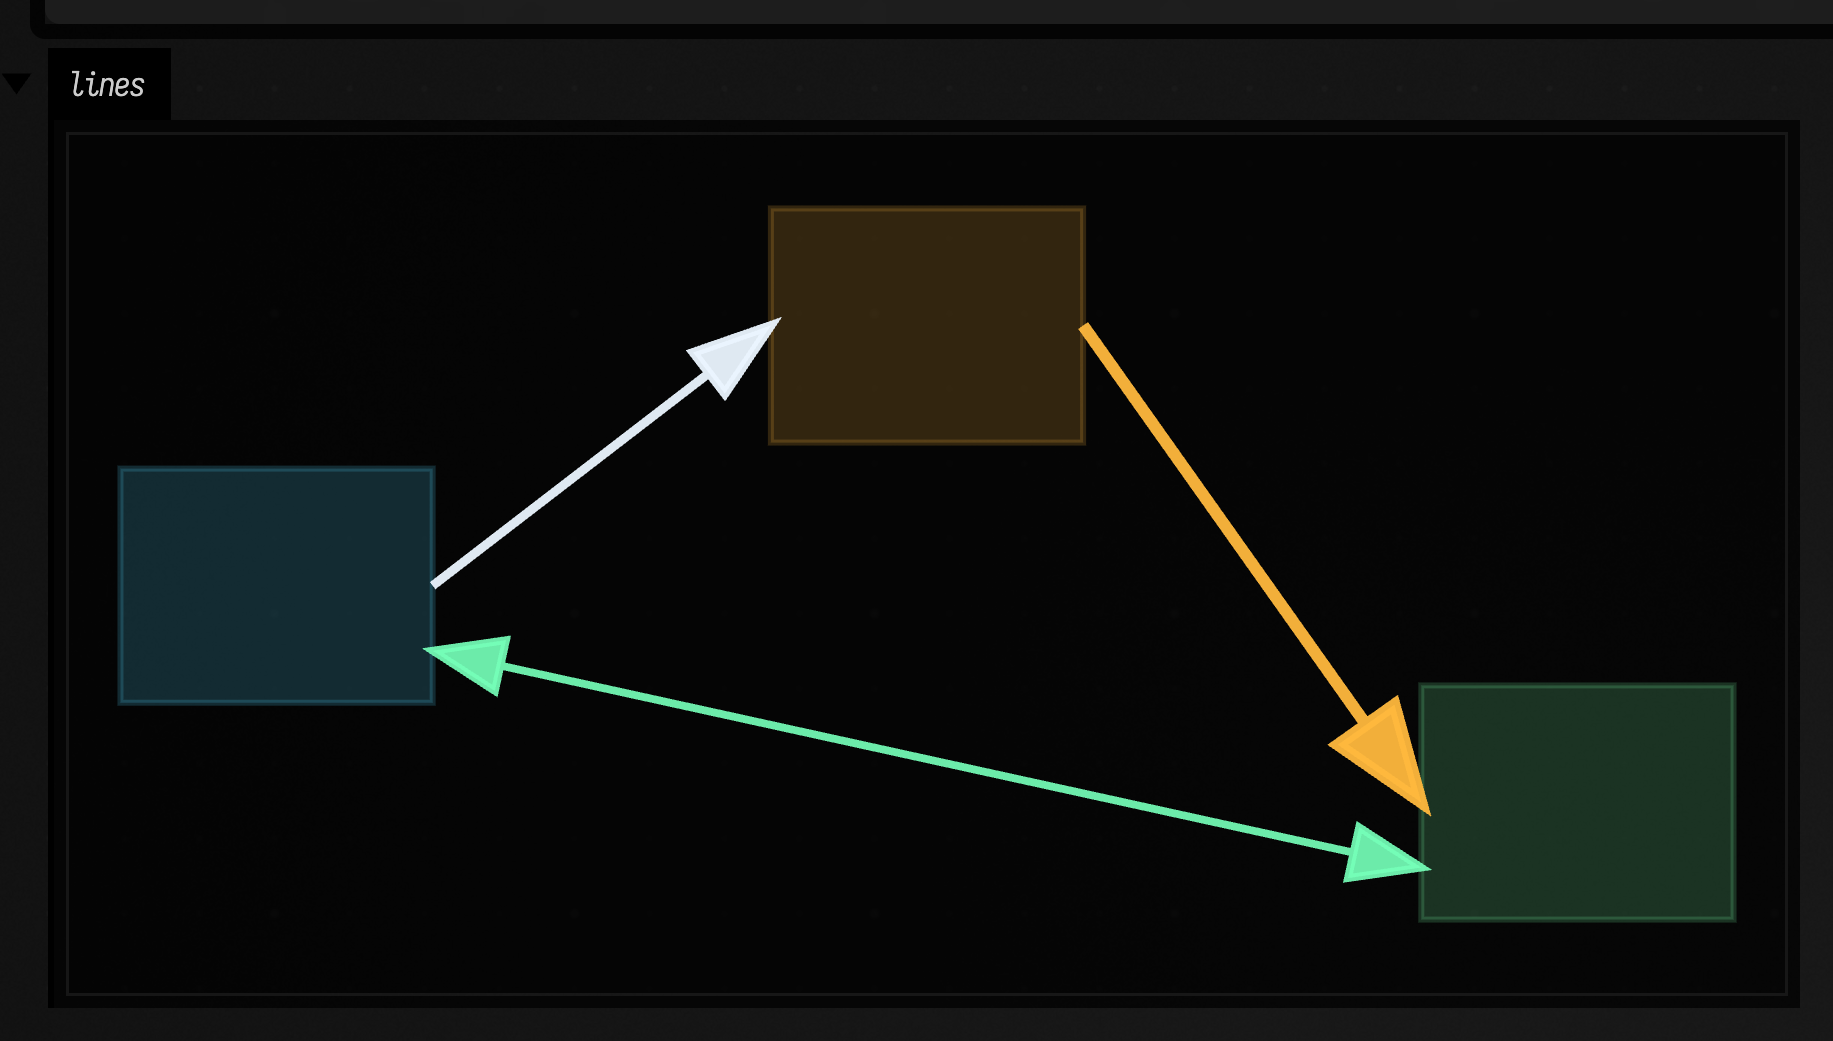
Smooth polylines: cubic splines
This turns a list of points into a smooth cubic spline (Catmull–Rom spline, approximately). Reach for it first when you have gesture data and want a smooth curve through it.
:::static
fun cubicSplineFrom(points: List<Vec3>, closed: Boolean = false, tension: Float = 1f): FLine
fun cubicSplineFrom(points: List<Vec2>, z: Number = 0, closed: Boolean = false, tension: Float = 1f): FLine
:::static
val pts2 =
(0..10).map { i ->
val x = 40 + i * 34
val y = 130 + 70 * kotlin.math.sin(i * 0.8)
vec(x, y)
}
val poly2 = polylineFrom(pts2, closed = false).apply {
thickness = 2.0
color = vec(1.0, 1.0, 1.0, 0.25)
pointed = true
pointSize = 3.0
}
val spline = cubicSplineFrom(pts2, closed = false, tension = 1f).apply {
thickness = 5.0
color = vec(0.7, 0.9, 1.0, 1.0)
}
lines(poly2, spline, w = 420.0, h = 260.0, fitToSize = true)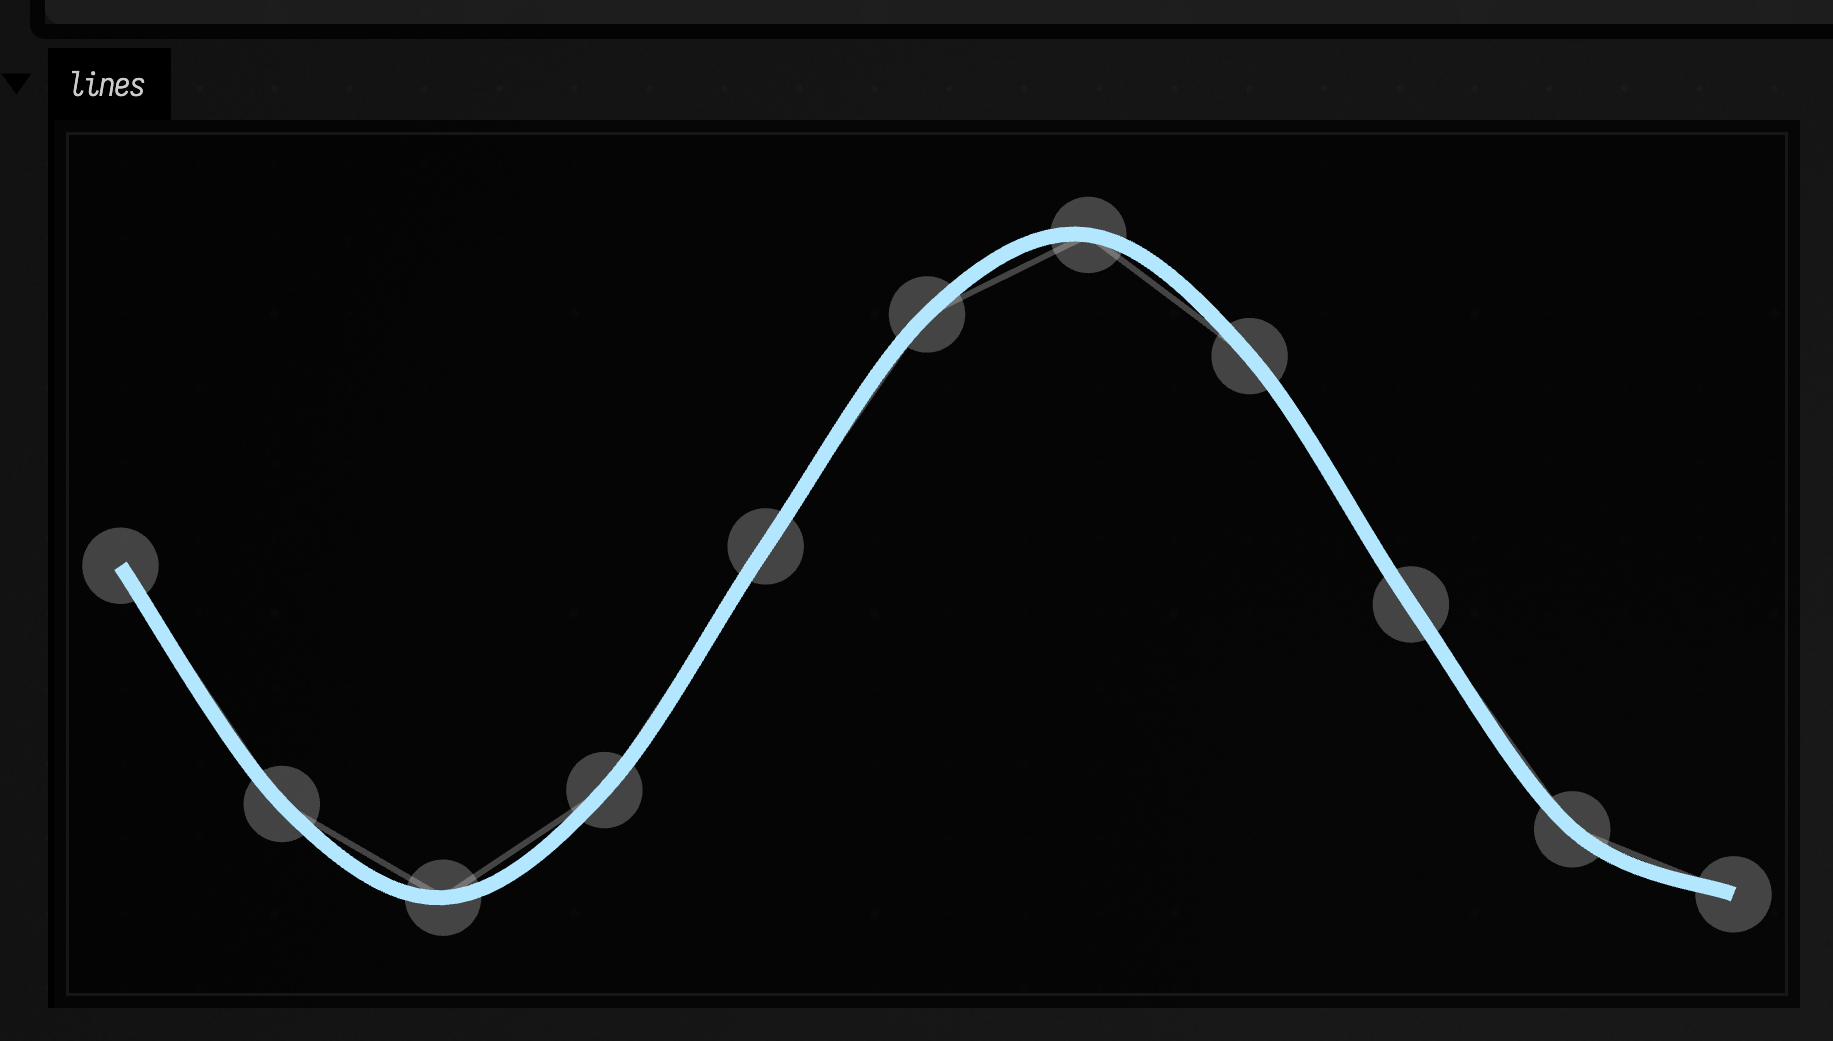
Incremental smoothing: smoothTo(...) and tcbTo(...)
You call these builders point-by-point (like lineTo), but they try to maintain smooth tangents. tcbTo gives you explicit control over the feel of the spline via Kochanek–Bartels (TCB) spline parameters.
:::static
fun FLine.smoothTo(endPoint: Vec3, smoothness: Float = 1f): FLine.Node
fun FLine.smoothTo(x: Number, y: Number, z: Number = 0, smoothness: Float = 1f): FLine.Node
fun FLine.smoothTo(v: Vec2, smoothness: Float = 1f): FLine.Node

fun FLine.tcbTo(endPoint: Vec3, tension: Float = 0f, continuity: Float = 0f, bias: Float = 0f): FLine.Node
fun FLine.tcbTo(
    x: Number,
    y: Number,
    z: Number = 0,
    tension: Float = 0f,
    continuity: Float = 0f,
    bias: Float = 0f,
): FLine.Node
fun FLine.tcbTo(v: Vec2, tension: Float = 0f, continuity: Float = 0f, bias: Float = 0f): FLine.Node
:::static
val s1 = fline {
moveTo(60, 200)
smoothTo(120, 60)
smoothTo(220, 240)
smoothTo(360, 120)
thickness = 5.0
color = vec(1.0, 0.7, 0.2, 0.9)
}
val s2 = fline {
moveTo(60, 200)
tcbTo(vec(120, 60), tension = 0.0f, continuity = -0.8f, bias = 0.0f)
tcbTo(vec(220, 240), tension = 0.0f, continuity = -0.8f, bias = 0.0f)
tcbTo(vec(360, 120), tension = 0.0f, continuity = -0.8f, bias = 0.0f)
thickness = 5.0
color = vec(0.4, 1.0, 0.6, 0.9)
}
// The four points both curves pass through.
val knots = polylineFrom([vec(60, 200), vec(120, 60), vec(220, 240), vec(360, 120)]).apply {
thickness = 1.0
color = vec(1.0, 1.0, 1.0, 0.25)
pointed = true
pointSize = 4.0
}
lines(knots, s1, s2, w = 420.0, h = 260.0, fitToSize = true)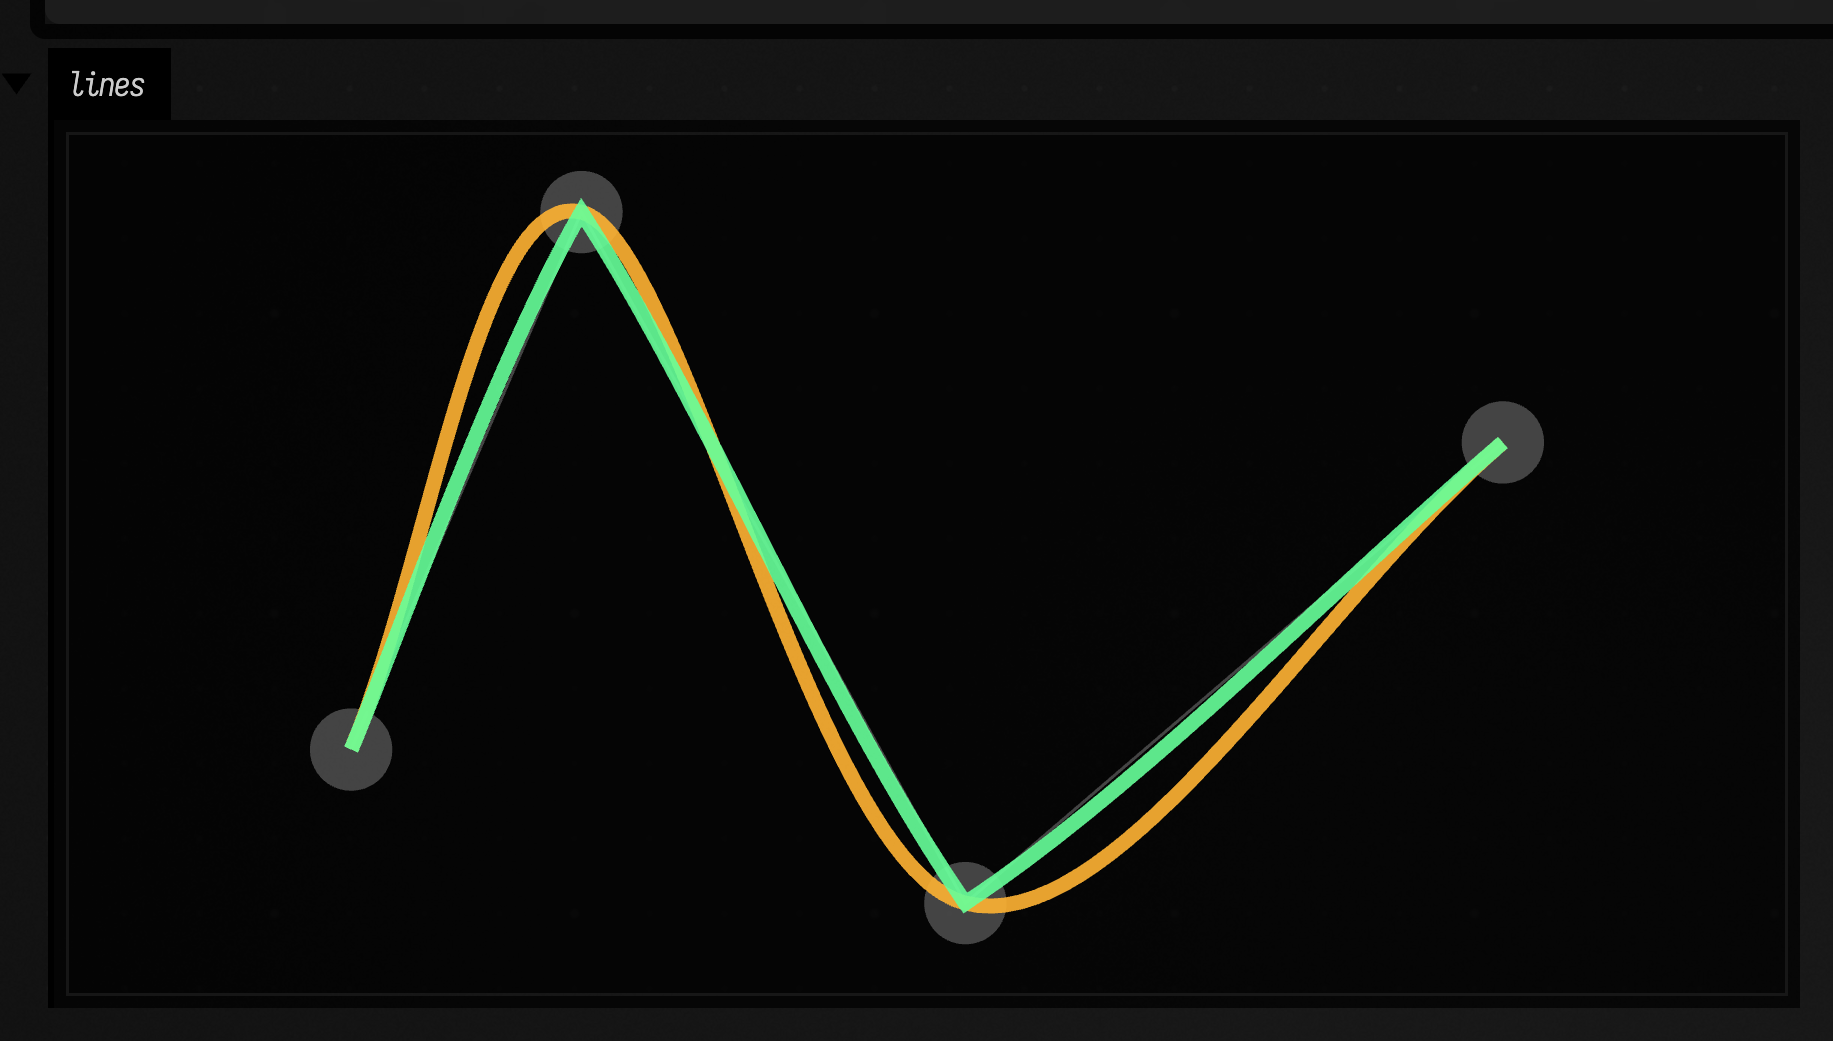
Negative continuity pulls the green tcbTo curve toward a corner at each point; smoothTo (orange) stays rounded.
Biarcs: biarcTo(...) and biarcBetween(...)
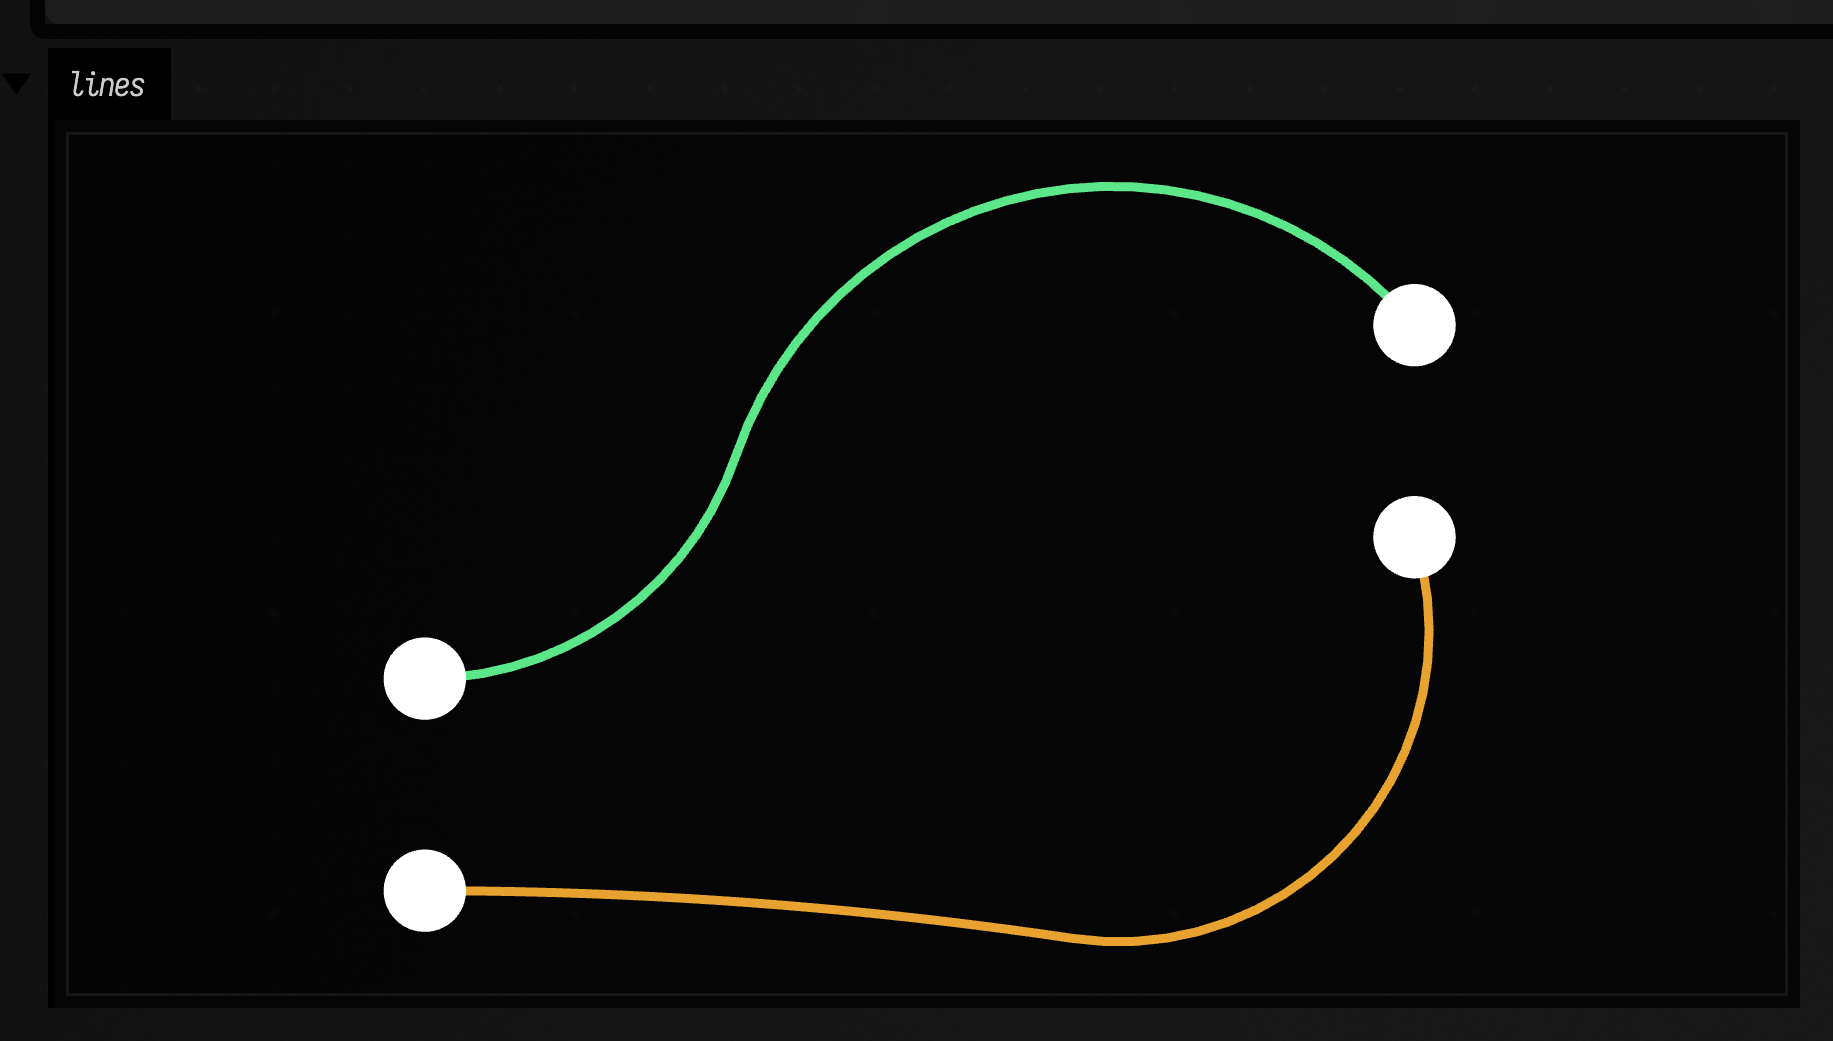
A biarc is two circular arcs joined together. Use one when you want the smoothness of circular arcs without a cubic Bézier.
:::static
fun FLine.biarcTo(
    endPoint: Vec3,
    startTangent: Vec3? = null,
    endTangent: Vec3? = null,
    join: Float = 0.5f,
    joinTangentMix: Float = 0.5f,
    bulge: Float = 0f,
    segments: Int = 32,
    planeNormal: Vec3? = null,
    joinTangent: Vec3? = null,
): FLine.Node

fun FLine.biarcTo(
    endPoint: Vec2,
    startHeading: Float? = null,
    endHeading: Float? = null,
    join: Float = 0.5f,
    joinTangentMix: Float = 0.5f,
    bulge: Float = 0f,
    segments: Int = 32,
): FLine.Node

fun biarcBetween(
    start: Vec3,
    end: Vec3,
    startTangent: Vec3,
    endTangent: Vec3,
    join: Float = 0.5f,
    joinTangentMix: Float = 0.5f,
    bulge: Float = 0f,
    segments: Int = 32,
    planeNormal: Vec3? = null,
    joinTangent: Vec3? = null,
): FLine
:::static
val a = vec(70, 190)
val b = vec(350, 90)
val f1 = fline {
moveTo(a)
// Headings are in radians in the current drawing plane. With the default join this is the
// classic biarc: two circular arcs, meeting both headings exactly.
biarcTo(b, startHeading = 0.0f, endHeading = (-1.2f), segments = 40)
thickness = 3.0
color = vec(1.0, 0.7, 0.2, 0.9)
}
val f2 = fline {
moveTo(a.x, a.y - 60)
// Moving the join and bulging it sideways reshapes the pair; the join stays smooth.
biarcTo(vec(b.x, b.y - 60), startHeading = 0.0f, endHeading = (-1.2f), join = 0.35f, bulge = -0.10f, segments = 40)
thickness = 3.0
color = vec(0.4, 1.0, 0.6, 0.9)
}
// Endpoints as dots
fun dot(p: Vec2, c: Vec4) = fline {
moveTo(p)
lineTo(p.x + 0.001, p.y + 0.001)
pointed = true
pointSize = 4.0
stroked = false
filled = true
color = c
}
val white = vec(1, 1, 1, 1)
lines(
f1,
f2,
dot(a, white),
dot(b, white),
dot(vec(a.x, a.y - 60), white),
dot(vec(b.x, b.y - 60), white),
w = 420.0,
h = 260.0,
fitToSize = true,
)
Arcs: arcTo(...)
Creates a circular arc that smoothly rounds the corner between the current point → p1 → p2 with a given radius.
:::static
fun FLine.arcTo(p1: Vec3, p2: Vec3, radius: Float, segments: Int = 32): FLine.Node
fun FLine.arcTo(p1: Vec2, p2: Vec2, radius: Number, segments: Int = 32): FLine.Node
fun FLine.arcTo(p1x: Number, p1y: Number, p2x: Number, p2y: Number, radius: Number, segments: Int = 32): FLine.Node
:::static
// The sharp path we are rounding, drawn faintly with its corners marked.
val sharp = fline {
moveTo(60, 200)
lineTo(60, 60)
lineTo(360, 60)
lineTo(360, 200)
thickness = 1.0
color = vec(1.0, 1.0, 1.0, 0.3)
pointed = true
pointSize = 4.0
}
// arcTo(corner, next, radius): a line toward `corner`, then an arc turning toward `next`.
val rounded = fline {
moveTo(60, 200)
arcTo(vec(60, 60), vec(360, 60), radius = 40)
arcTo(vec(360, 60), vec(360, 200), radius = 40)
lineTo(360, 200)
thickness = 4.0
color = vec(1.0, 0.9, 0.5, 1.0)
}
lines(sharp, rounded, w = 420.0, h = 260.0, fitToSize = true)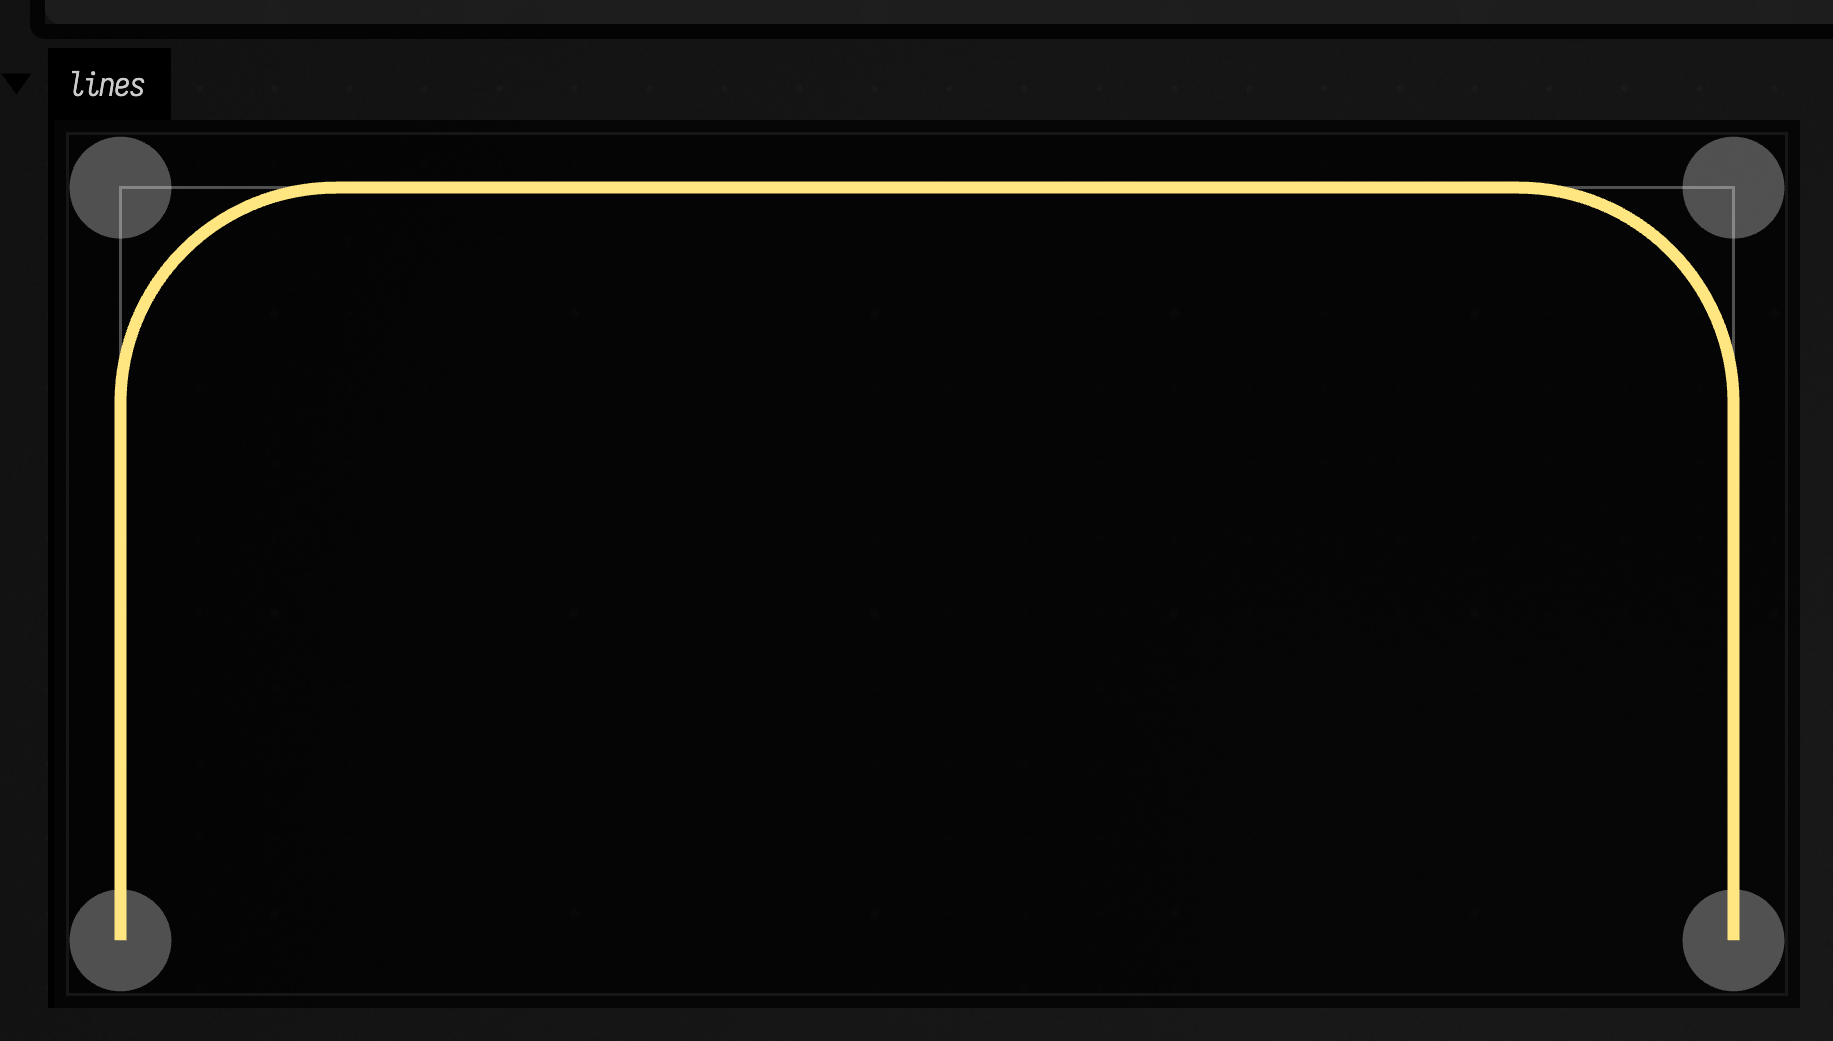
Circular arc through a point: circleThroughTo(...)
Creates an arc that passes through a given point and ends at end.
:::static
fun FLine.circleThroughTo(through: Vec3, end: Vec3, segments: Int = 32): FLine.Node
fun FLine.circleThroughTo(through: Vec2, end: Vec2, segments: Int = 32): FLine.Node
fun FLine.circleThroughTo(
    throughX: Number,
    throughY: Number,
    endX: Number,
    endY: Number,
    segments: Int = 32,
): FLine.Node
:::static
val f = fline {
moveTo(60, 200)
circleThroughTo(through = vec(220, 40), end = vec(360, 200), segments = 48)
thickness = 5.0
color = vec(0.6, 0.9, 1.0, 1.0)
}
// The three points that define the arc: start, through, end.
val defining = polylineFrom([vec(60, 200), vec(220, 40), vec(360, 200)]).apply {
stroked = false
pointed = true
pointSize = 5.0
color = vec(1.0, 1.0, 1.0, 1.0)
}
lines(f, defining, w = 420.0, h = 260.0, fitToSize = true)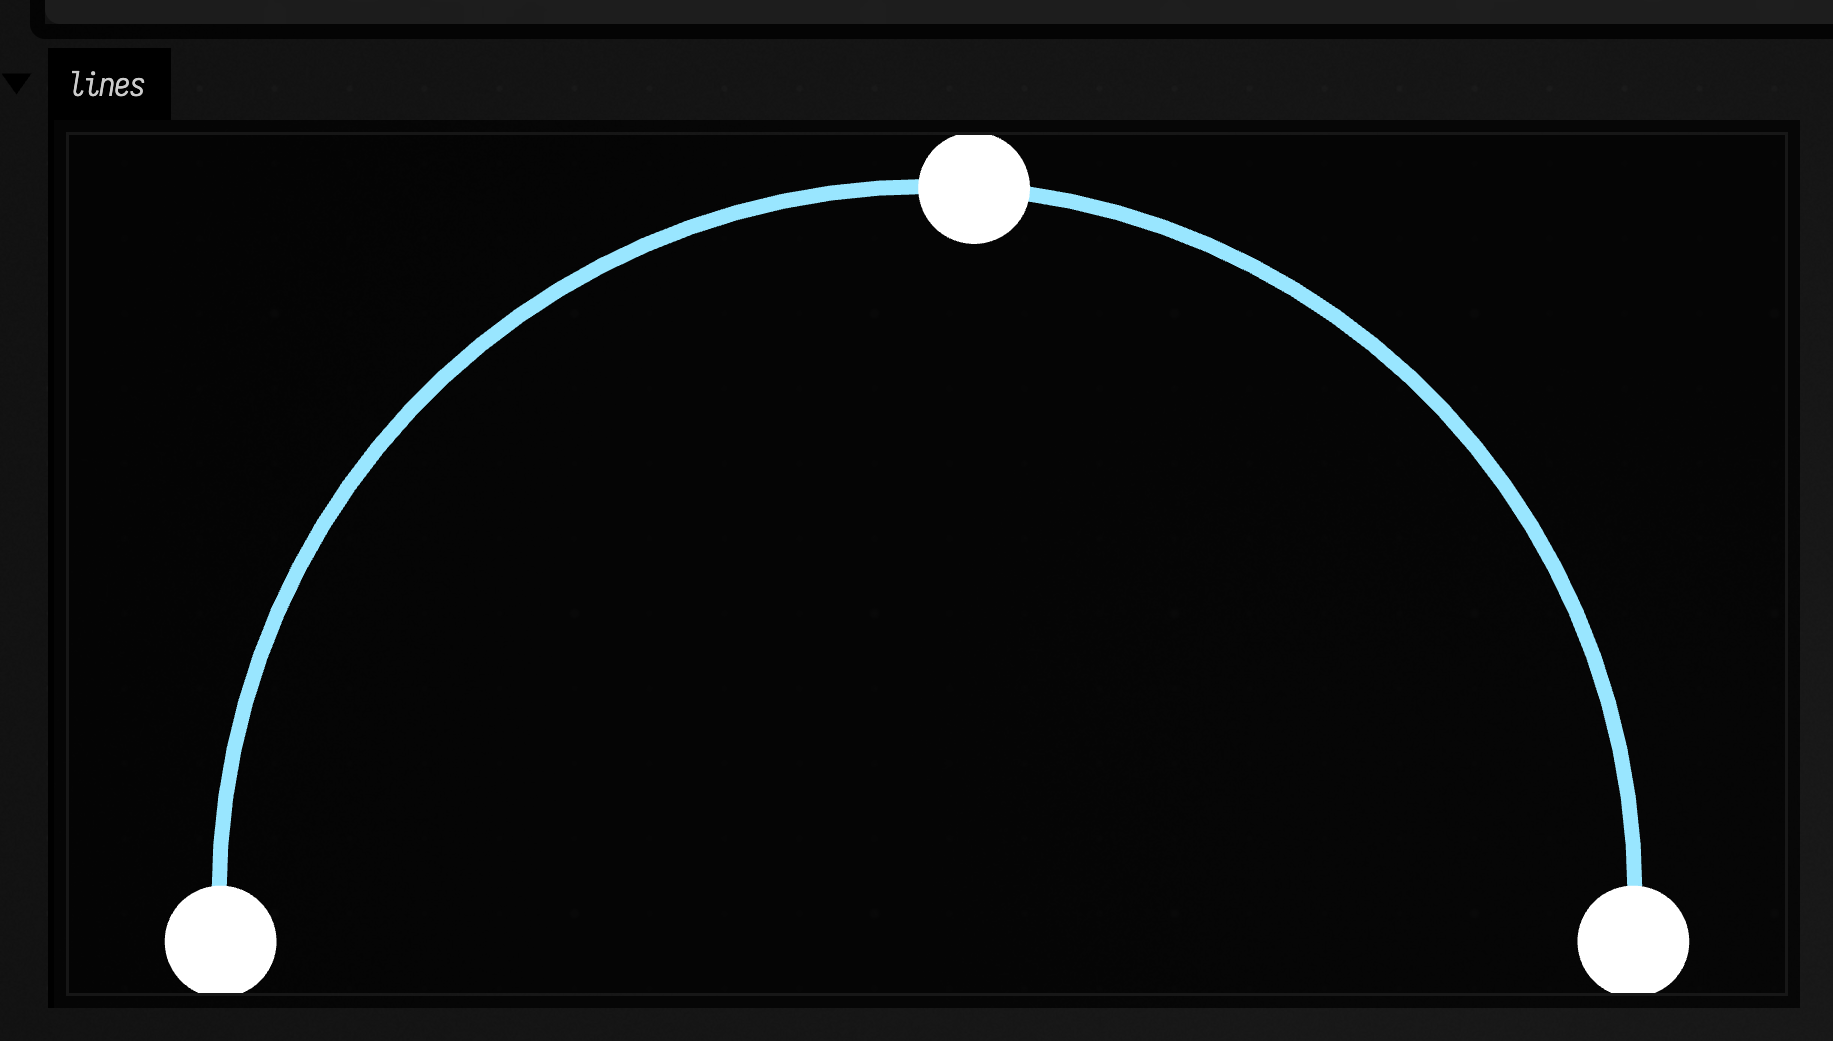
2D transformations (geometry-aware)
These transforms are for 2D shapes in the XY plane: rotate around a centre, reflect across a line, shear. They save writing a custom transform { p -> ... }.
Rotate / scale / reflect / shear
| Operation | Behavior |
|---|---|
fun FLine.byRotating2D(angle: Float, center: Vec2 = vec(0f, 0f)): FLine |
Rotates the XY geometry around center by an angle in radians, preserving Z. The default center is the origin; the result is a new line. |
fun FLine.byScaling2D(scale: Float, center: Vec2 = vec(0f, 0f)): FLine |
Scales XY positions uniformly about center, leaving Z unchanged. |
fun FLine.byScaling2D(scaleX: Float, scaleY: Float, center: Vec2 = vec(0f, 0f)): FLine |
Scales X and Y by separate factors about center, to stretch the shape. Z is unchanged. |
fun FLine.byReflecting2D(linePoint1: Vec2, linePoint2: Vec2): FLine |
Mirrors XY positions across the infinite line through two distinct points. It preserves Z and returns a new line. |
fun FLine.byShearing2D(shearX: Float, shearY: Float): FLine |
Adds shearX * y to X and shearY * x to Y, preserving Z. This skews the shape about the origin without changing the input line. |
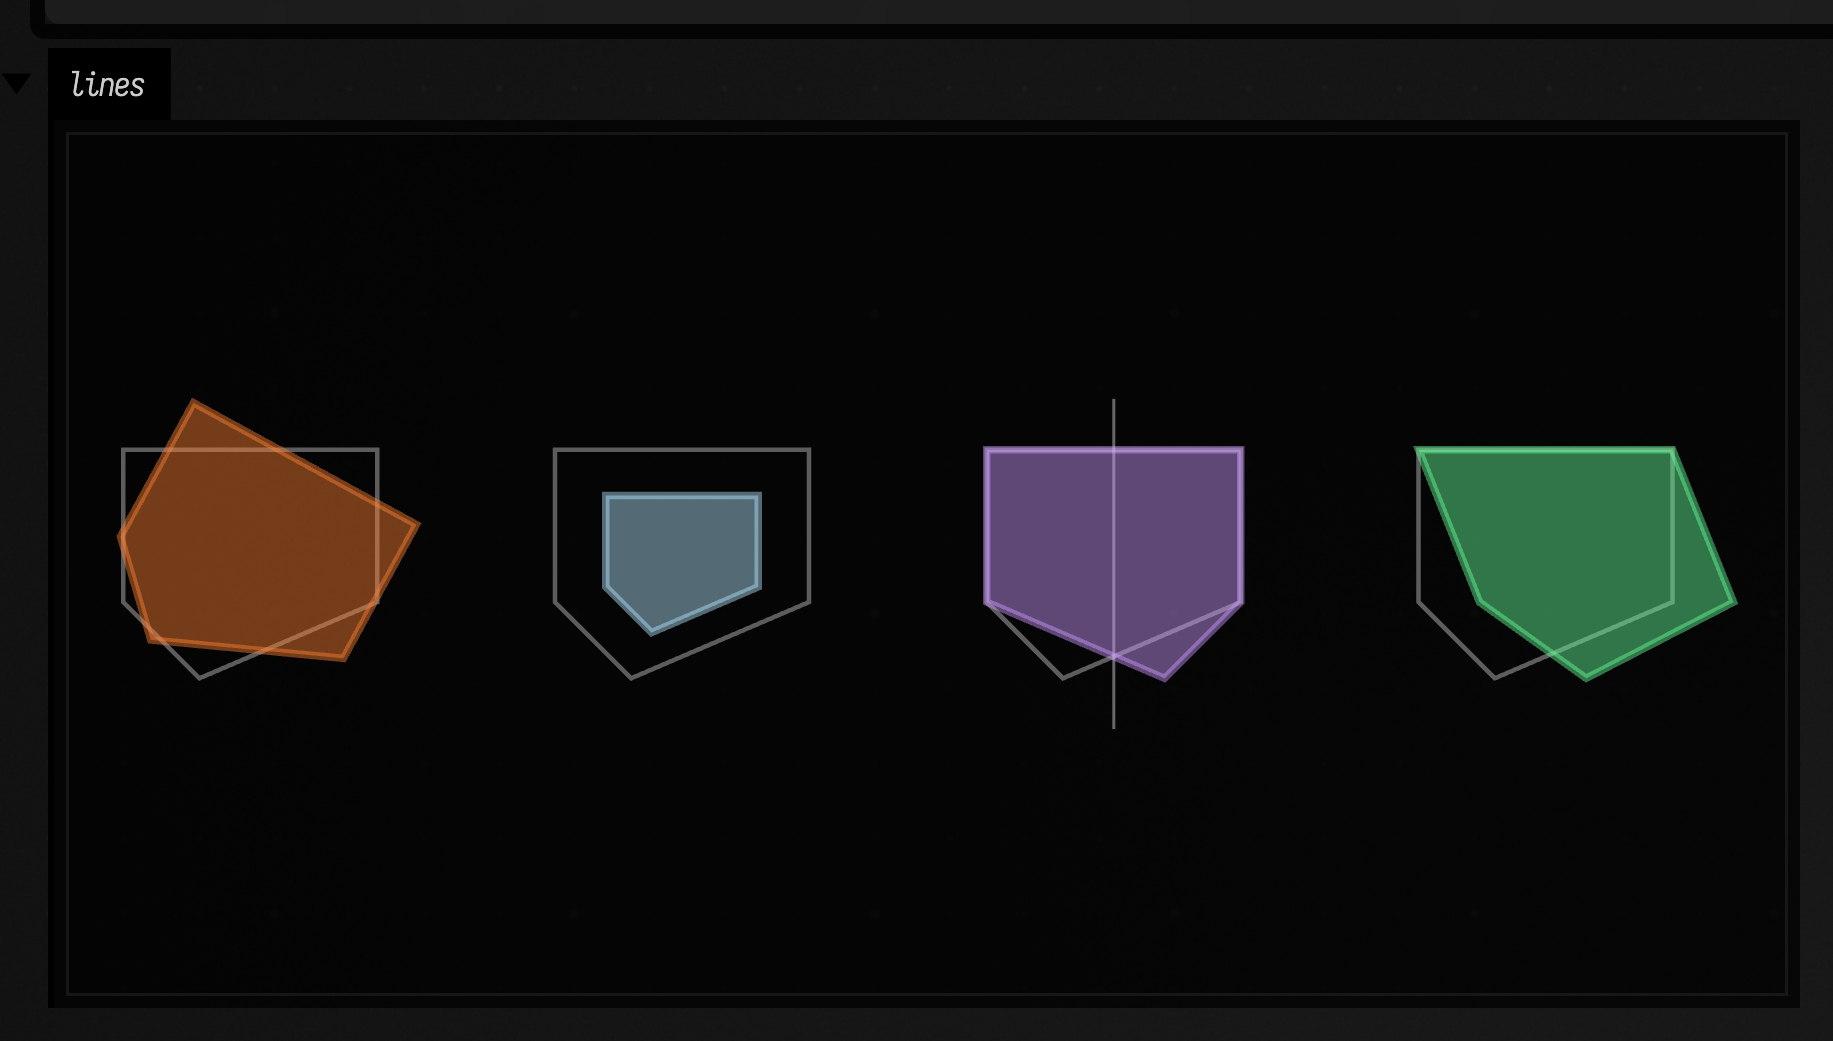
Each panel below draws the original house faintly with the result over it. From left to right: rotate by 0.5 rad about its centre, scale by 0.6, mirror across the vertical line x = 50 (drawn), and shear by shearX = 0.4.
:::static
// An asymmetric "house" (the roof peak is off-centre), so every transform shows which way it went.
fun house() = fline {
    moveTo(0, 0)
    lineTo(100, 0)
    lineTo(100, 60)
    lineTo(30, 90)
    lineTo(0, 60)
    close()
}

fun ghost(dx: Double) = (house() + vec(dx, 0.0)).apply {
    stroked = true
    filled = false
    thickness = 1.5
    color = vec(1.0, 1.0, 1.0, 0.35)
}

fun styled(f: FLine, dx: Double, c: Vec4) = (f + vec(dx, 0.0)).apply {
    stroked = true
    filled = true
    thickness = 2.5
    color = c
}

val center = vec(50f, 45f)

val rot = styled(house().byRotating2D(angle = 0.5f, center = center), 0.0, vec(1.0, 0.5, 0.2, 0.45))
val scaled = styled(house().byScaling2D(scale = 0.6f, center = center), 170.0, vec(0.7, 0.9, 1.0, 0.45))
val mirror = fline {
    moveTo(50 + 340, -20)
    lineTo(50 + 340, 110)
    thickness = 1.0
    color = vec(1.0, 1.0, 1.0, 0.5)
}
val reflected = styled(house().byReflecting2D(vec(50f, 0f), vec(50f, 100f)), 340.0, vec(0.8, 0.6, 1.0, 0.45))
val sheared = styled(house().byShearing2D(shearX = 0.4f, shearY = 0f), 510.0, vec(0.4, 1.0, 0.6, 0.45))

lines(
    ghost(0.0),
    rot,
    ghost(170.0),
    scaled,
    ghost(340.0),
    mirror,
    reflected,
    ghost(510.0),
    sheared,
    w = 720.0,
    h = 220.0,
    fitToSize = true,
)
3D transforms and projections
| Operation | Behavior |
|---|---|
fun FLine.byRotating3D(angle: Float, axis: Vec3, center: Vec3 = vec(0f, 0f, 0f)): FLine |
Rotates the geometry about the chosen axis through center, using radians. Returns a new line so the source can be drawn alongside the rotated result. |
fun FLine.byPerspectiveProjecting(cameraPos: Vec3, planePoint: Vec3 = vec(0f, 0f, 0f), planeNormal: Vec3 = vec(0f, 0f, 1f)): FLine |
Projects points along rays from cameraPos onto the plane defined by a point and normal. Points whose intersection is behind the camera are kept at their original positions. |
fun FLine.byOrthographicProjecting(planePoint: Vec3 = vec(0f, 0f, 0f), planeNormal: Vec3 = vec(0f, 0f, 1f)): FLine |
Projects every point onto the plane along its normal. The default plane is Z = 0, and the result is a new line. |
Field’s FLine nodes are 3D, so you can transform them in 3D and then project down into 2D for drawing.
:::static
// A little 3D helix, projected onto the Z=0 plane.
val helix = fline {
    moveTo(330, 130, -80)
    for (i in 1..160) {
        val t = i / 160.0
        val a = t * kotlin.math.PI * 6.0
        val r = 120.0
        val x = 210 + r * kotlin.math.cos(a)
        val y = 130 + r * kotlin.math.sin(a)
        val z = -80 + 160 * t
        lineTo(x, y, z)
    }
}

val rotated = helix.byRotating3D(angle = 0.7f, axis = vec(0f, 1f, 0f), center = vec(210f, 130f, 0f))

val ortho = rotated.byOrthographicProjecting(planePoint = vec(0f, 0f, 0f), planeNormal = vec(0f, 0f, 1f)).apply {
    thickness = 3.0
    color = vec(1.0, 1.0, 1.0, 0.45)
}

val persp = rotated.byPerspectiveProjecting(cameraPos = vec(210f, 130f, -320f)).apply {
    thickness = 4.5
    color = vec(1.0, 0.7, 0.2, 0.9)
}

lines(ortho, persp, w = 420.0, h = 260.0, fitToSize = true)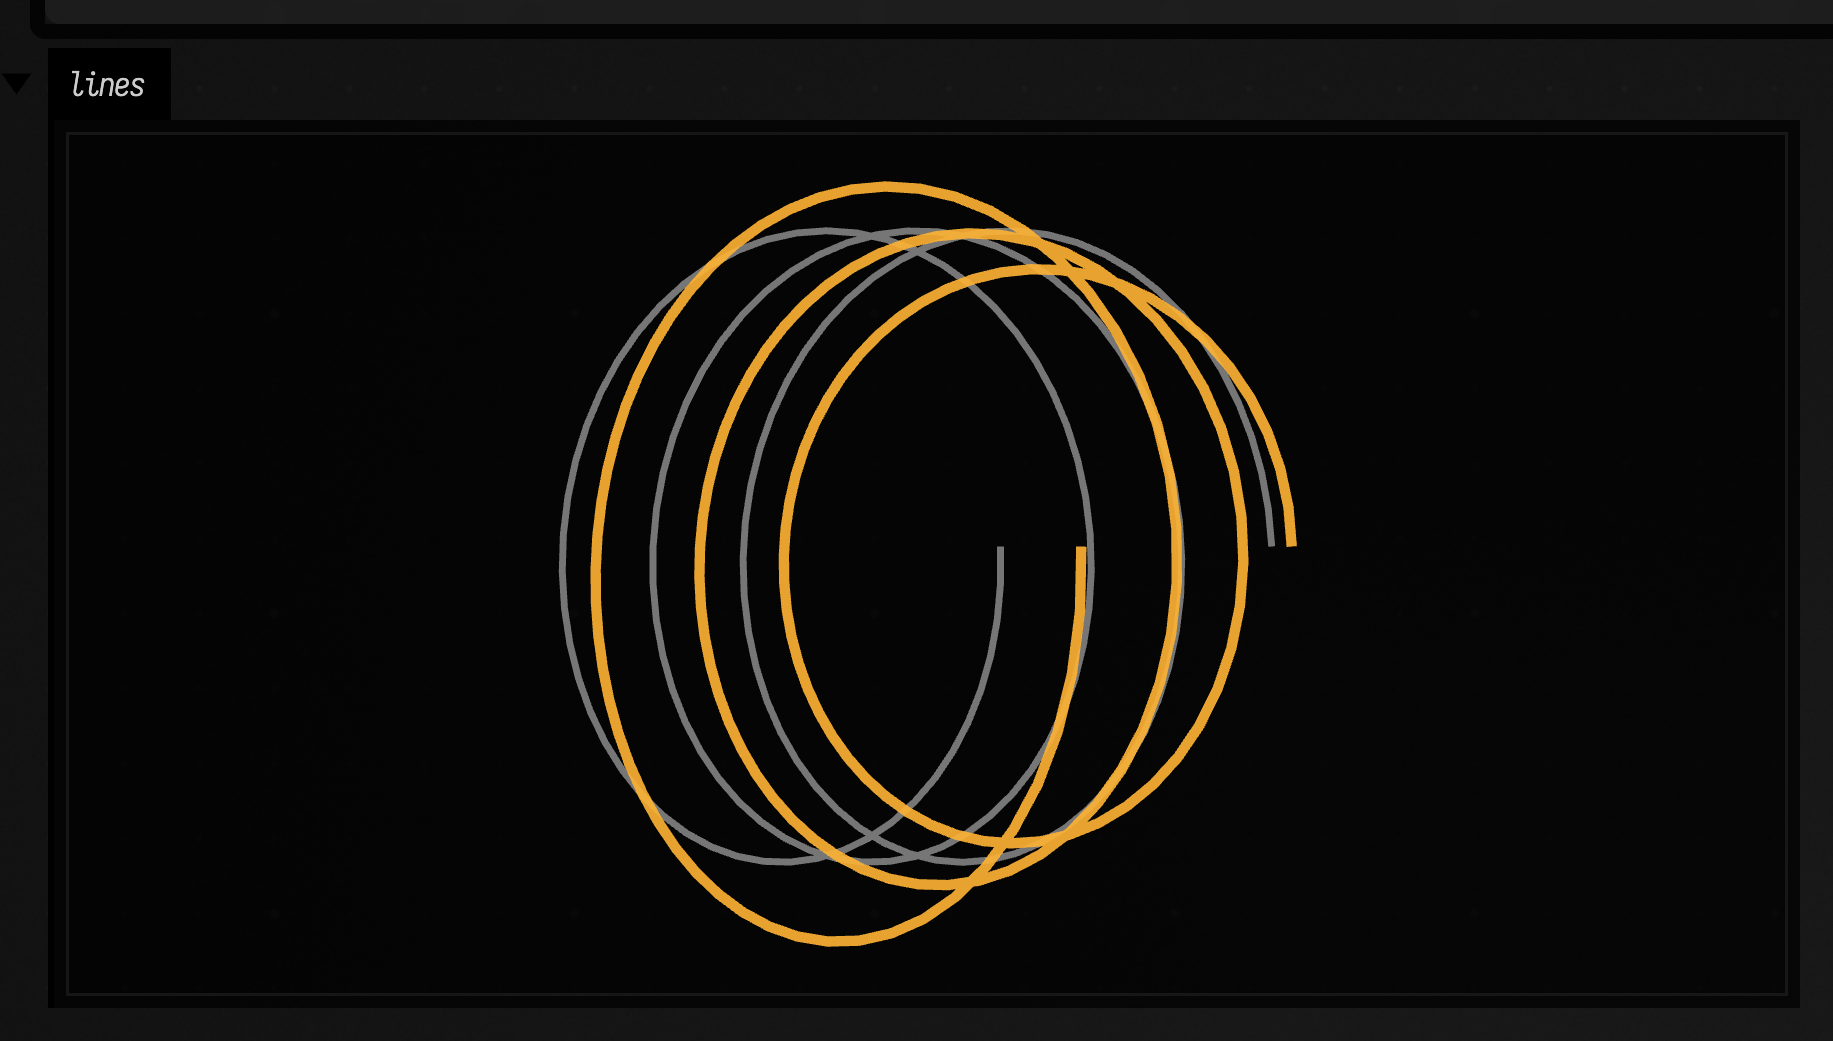
Sampling and traversal
Sample a path to get points you can use for animation, particle emission, evenly spaced markers
or measurement. Cursor lets you walk the path directly; sampleBy... provides shorter calls
for common sampling jobs.
Cursor: continuous traversal over segments
A Cursor walks along an FLine by node index (t) or arc-length distance (d). Sampling at a fixed distance, and many other geometry operations, are built on it.
:::static
fun FLine.cursor(tol: Float = 0.01f): afield.geometry.path.java2d.FLinesAndJavaShapes.Cursor
fun FLine.cursor(closestTo: Vec3): afield.geometry.path.java2d.FLinesAndJavaShapes.Cursor
Use Cursor to step by distance with setD, or to read the tangent, normal and curvature as
you move along a curve.
:::static
// In afield.geometry.path.java2d.FLinesAndJavaShapes.Cursor
class Cursor {
    fun reset()

    fun hasNext(): Boolean

    // Parameterization
    val t: Float

    fun setT(q: Float): Cursor

    val d: Float

    fun setD(d: Float): Cursor

    fun lengthT(): Int

    fun lengthD(): Float

    // Geometry at current position
    fun position(): Vec3

    fun location(): FLineLocation? // everything below, at once

    fun tangent(): Vec3? // unit length

    fun normal(): Vec3? // principal normal, towards the centre; null on straight runs

    fun binormal(): Vec3? // tangent x normal; null on straight runs

    fun curvature(): Float // unsigned, 3D

    fun normal2D(): Vec2? // unit, (tangent.y, -tangent.x)

    fun signedCurvature2D(): Float // positive bending towards normal2D

    fun radiusOfCurvature(): Vec3? // from here to the centre of the osculating circle

    fun setNearest(point: Vec3): Cursor

    // Analysis helpers (mostly for cubics)
    fun extremalInnerPoints(): List<Float>

    fun tangentBreaks(): List<Float>

    fun inflectionPointsXY(): List<Float>

    // Editing / splitting
    fun split(): Pair<FLine?, FLine?>

    fun splitD(d: List<Float>): List<FLine>

    fun splitT(t: List<Float>): List<FLine>

    fun segment(): FLine.Node?
}
This example uses a Cursor to space dots by distance, and also draws short tangent tick-marks so you can see direction:
:::static
val f = fline {
    moveTo(50, 180)
    cubicTo(120, 20, 300, 280, 350, 120)
    thickness = 4.0
    color = vec(1.0, 1.0, 1.0, 1.0)
}

val c = f.cursor(tol = 0.01f)
val total = c.lengthD()

val dots = mutableListOf<FLine>()
val ticks = mutableListOf<FLine>()

fun dot(p: Vec3, color: Vec4) = fline {
    moveTo(p.x, p.y)
    lineTo(p.x + 0.001, p.y + 0.001)
    pointed = true
    pointSize = 1.0
    stroked = false
    filled = true
    this.color = color
}

val step = 24f
var d = 0f
while (d <= total) {
    c.setD(d)
    val p = c.position()
    dots.add(dot(p, vec(1.0, 0.4, 0.3, 1.0)))

    val t = c.tangent()
    if (t != null && t.lengthSquared() > 1e-9) {
        val dir = Vec3(t).normalize()
        val a = Vec3(p).sub(Vec3(dir).mul(12f))
        val b = Vec3(p).add(Vec3(dir).mul(12f))
        ticks.add(
            fline {
                moveTo(a)
                lineTo(b)
                thickness = 1.5
                color = vec(0.7, 0.9, 1.0, 0.8)
            },
        )
    }

    d += step
}

lines([f] + ticks + dots, w = 420.0, h = 260.0, fitToSize = true)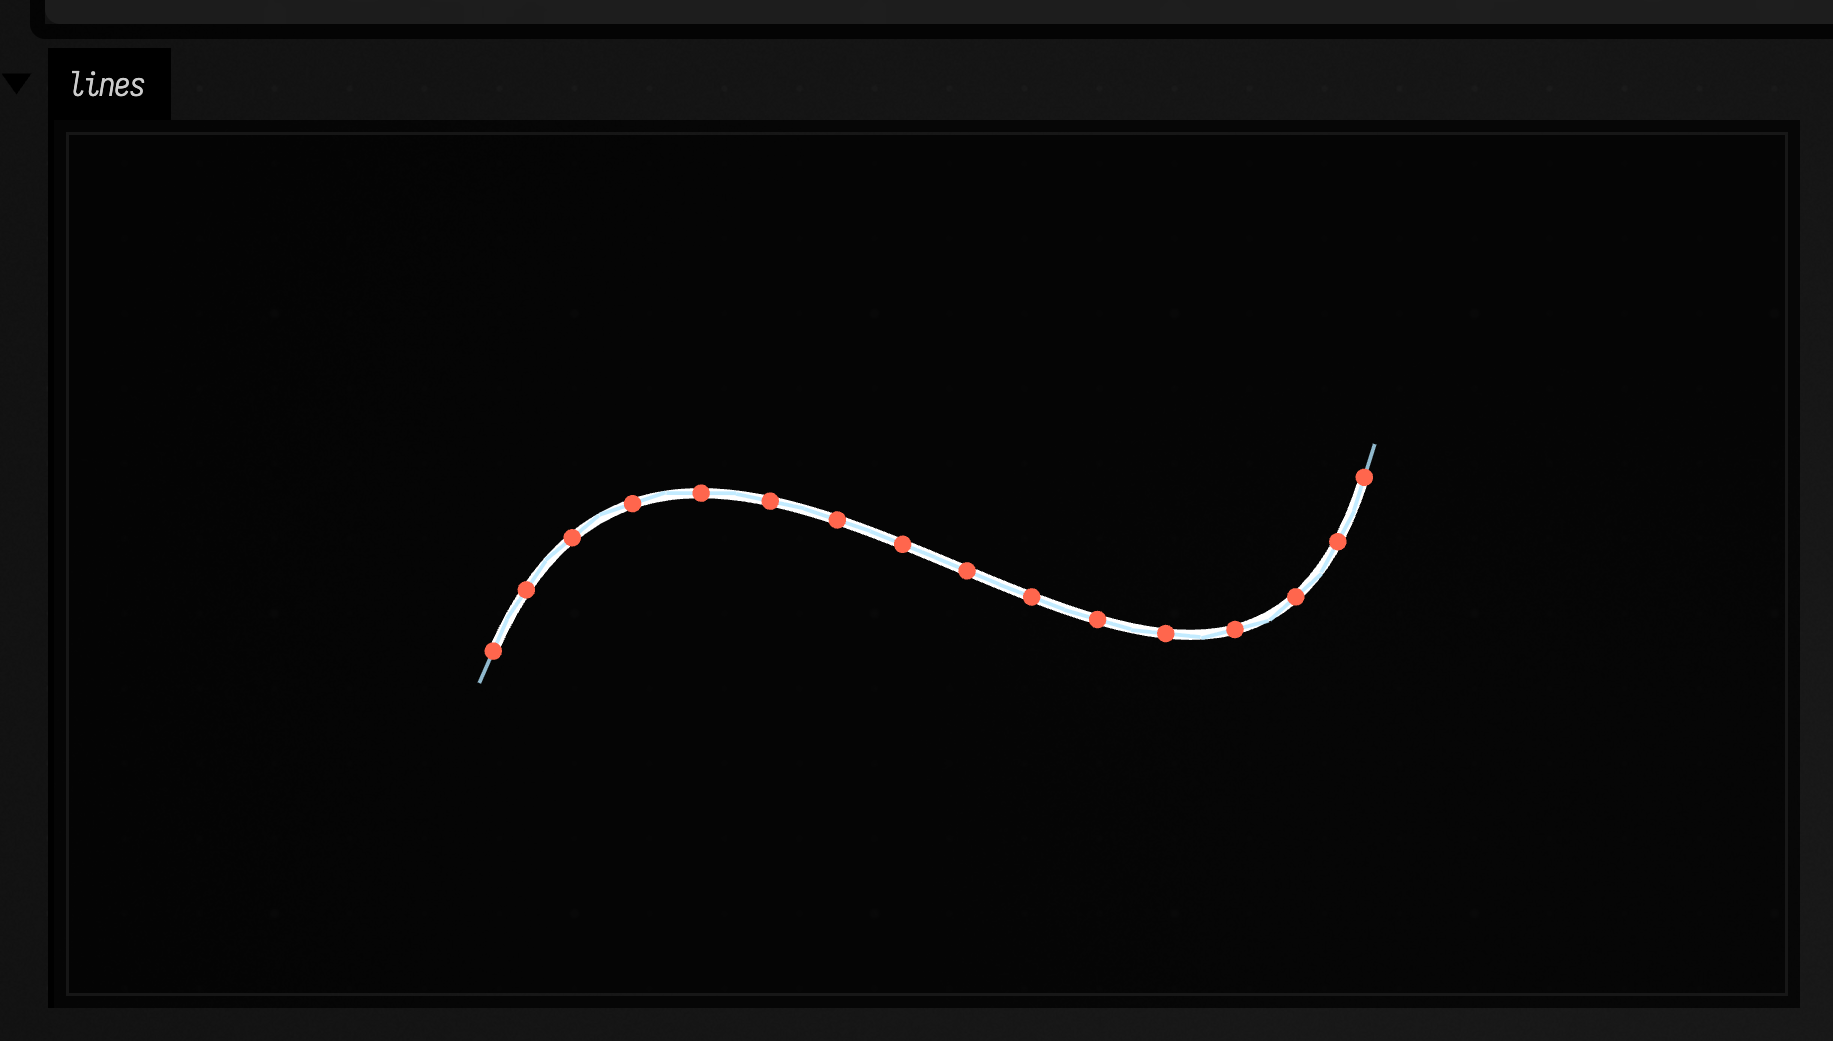
sampleByNumber(...) and sampleByDistance(...)
Samples points along the path either by count (steps) or by approximate arc-length spacing (distance).
:::static
fun FLine.sampleByNumber(steps: Int): List<Vec3>
fun FLine.sampleByDistance(distance: Float): List<Vec3>
:::static
fun curve(dy: Double) = fline {
moveTo(60, 150 + dy)
cubicTo(120, 20 + dy, 300, 260 + dy, 360, 120 + dy)
thickness = 2.0
color = vec(1.0, 1.0, 1.0, 0.4)
}
fun dot(p: Vec3, color: Vec4) = fline {
moveTo(p.x, p.y)
lineTo(p.x + 0.001, p.y + 0.001)
pointed = true
pointSize = 1.5
stroked = false
filled = true
this.color = color
}
// Top: exactly 12 points, both ends included.
val top = curve(0.0)
val byNumber = top.sampleByNumber(12).map { dot(it, vec(1.0, 0.5, 0.2, 1.0)) }
// Bottom: one point every 40 units; the end is only hit if the length divides evenly.
val bottom = curve(200.0)
val byDistance = bottom.sampleByDistance(40f).map { dot(it, vec(0.4, 1.0, 0.6, 1.0)) }
lines([top, bottom] + byNumber + byDistance, w = 420.0, h = 420.0, fitToSize = true)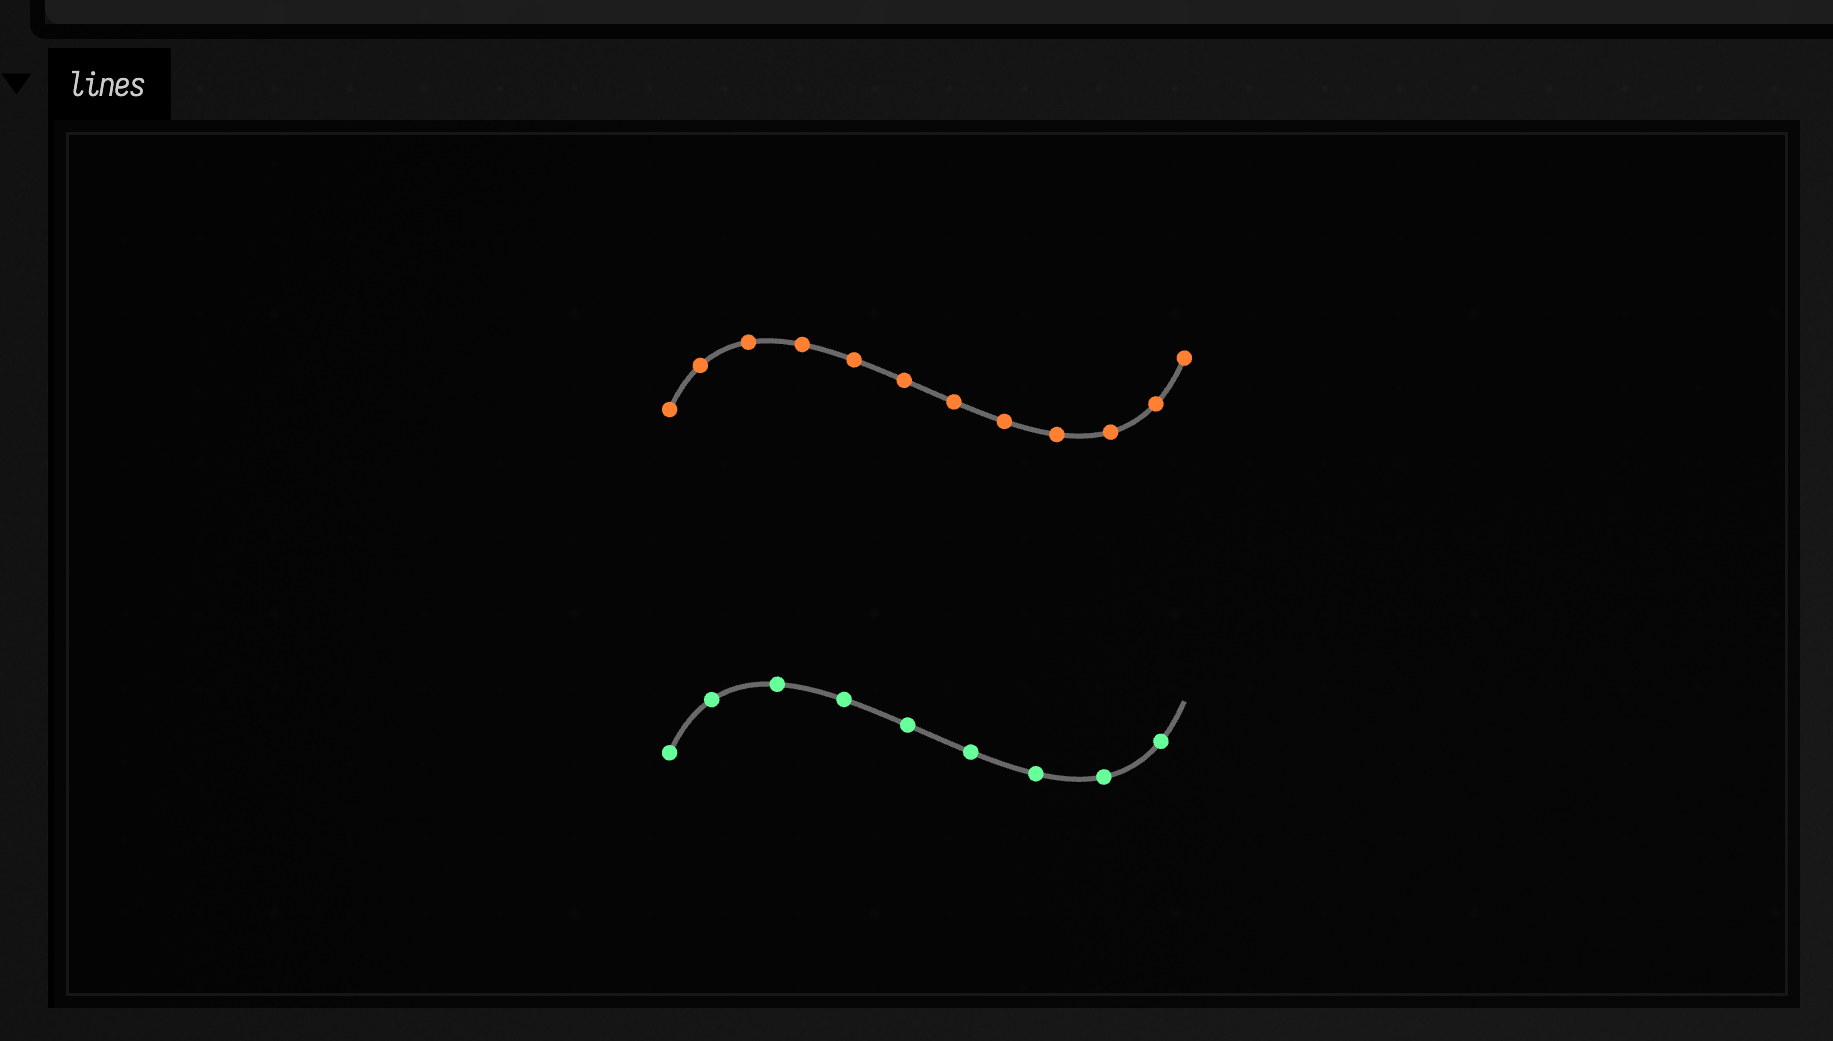
Both space their points evenly along the curve. sampleByNumber(12) (top) always lands on both ends; sampleByDistance(40f) (bottom) steps a fixed 40 units, so its last point can stop short of the end.
Geometry operations (simple → complex)
These functions take an existing FLine and return new geometry: smoothing/simplifying (cleanup), offsetting (stroke outlines), and dashing (segmenting). For all of the gesture-style filters (EMA / One Euro / alpha-beta / One-Dollar) and Gaussian-process interpolation, see Smoothing a hand-drawn stroke.
Simplify and smooth
Smoothing reduces jitter; simplifying removes points while keeping the shape within a tolerance. Together they turn a noisy polyline into a clean stroke.
:::static
fun FLine.byGaussianSmoothing(sigma: Float, samples: Int = 100): FLine
fun FLine.bySimplifying(epsilon: Float): FLine
:::static
val noisy = fline {
moveTo(20, 130)
for (i in 0..90) {
val x = 20 + i * 4
val y = 130 + 50 * kotlin.math.sin(i * 0.2) + 12 * kotlin.math.sin(i * 1.7)
lineTo(x, y)
}
thickness = 2.0
color = vec(1.0, 1.0, 1.0, 0.25)
}
val smooth = noisy.byGaussianSmoothing(sigma = 2.0f, samples = 120).apply {
thickness = 2.5
color = vec(0.4, 1.0, 0.6, 1.0)
}
// The red dots are the vertices that survive simplifying.
val simple = smooth.bySimplifying(epsilon = 2.0f).apply {
thickness = 1.5
pointed = true
pointSize = 1.2
color = vec(1.0, 0.4, 0.4, 1.0)
}
lines(noisy, smooth, simple, w = 420.0, h = 260.0, fitToSize = true)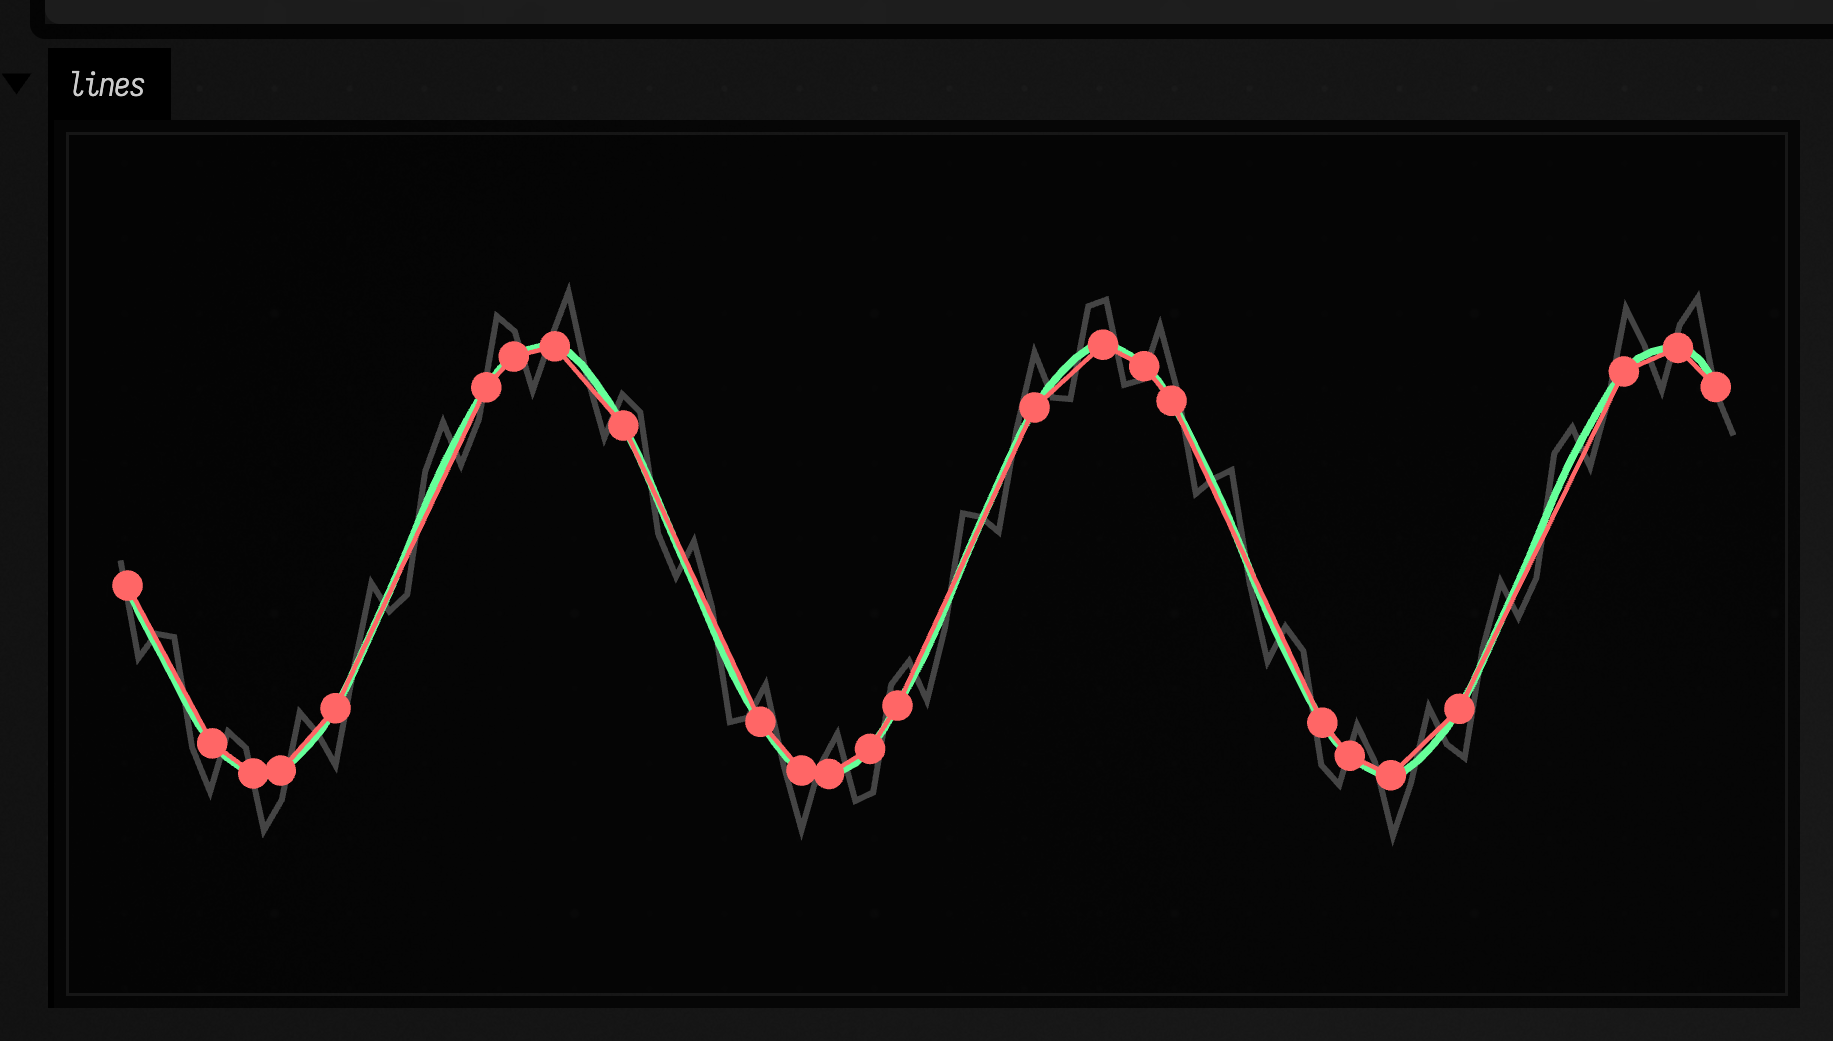
Cleanup and resampling
For raw input: simplify away redundant detail, then rebuild the line with evenly spaced samples along arc length. If you need the raw samples themselves, sampleByNumber(...) and sampleByDistance(...) expose them directly.
:::static
fun FLine.bySimplifying(epsilon: Float): FLine
fun FLine.byArcLengthParameterizing(spacing: Float): FLine
fun FLine.sampleByNumber(steps: Int): List<Vec3>
fun FLine.sampleByDistance(distance: Float): List<Vec3>
:::static
val raw = fline {
moveTo(40, 140)
for (i in 1..240) {
val t = i / 240.0
val x = 40 + t * 340
val y = 140 + 55 * kotlin.math.sin(t * 7.0 * kotlin.math.PI) + 8 * kotlin.math.sin(t * 60.0)
lineTo(x, y)
}
thickness = 2.0
color = vec(1.0, 1.0, 1.0, 0.25)
}
val simplified = raw.bySimplifying(epsilon = 1.5f).apply {
thickness = 3.0
color = vec(0.7, 0.9, 1.0, 0.75)
}
val resampled = simplified.byArcLengthParameterizing(spacing = 12f).apply {
thickness = 1.5
color = vec(1.0, 0.6, 0.2, 0.95)
pointed = true
pointSize = 1.0
stroked = true
filled = false
}
lines(raw, simplified, resampled, w = 420.0, h = 260.0, fitToSize = true)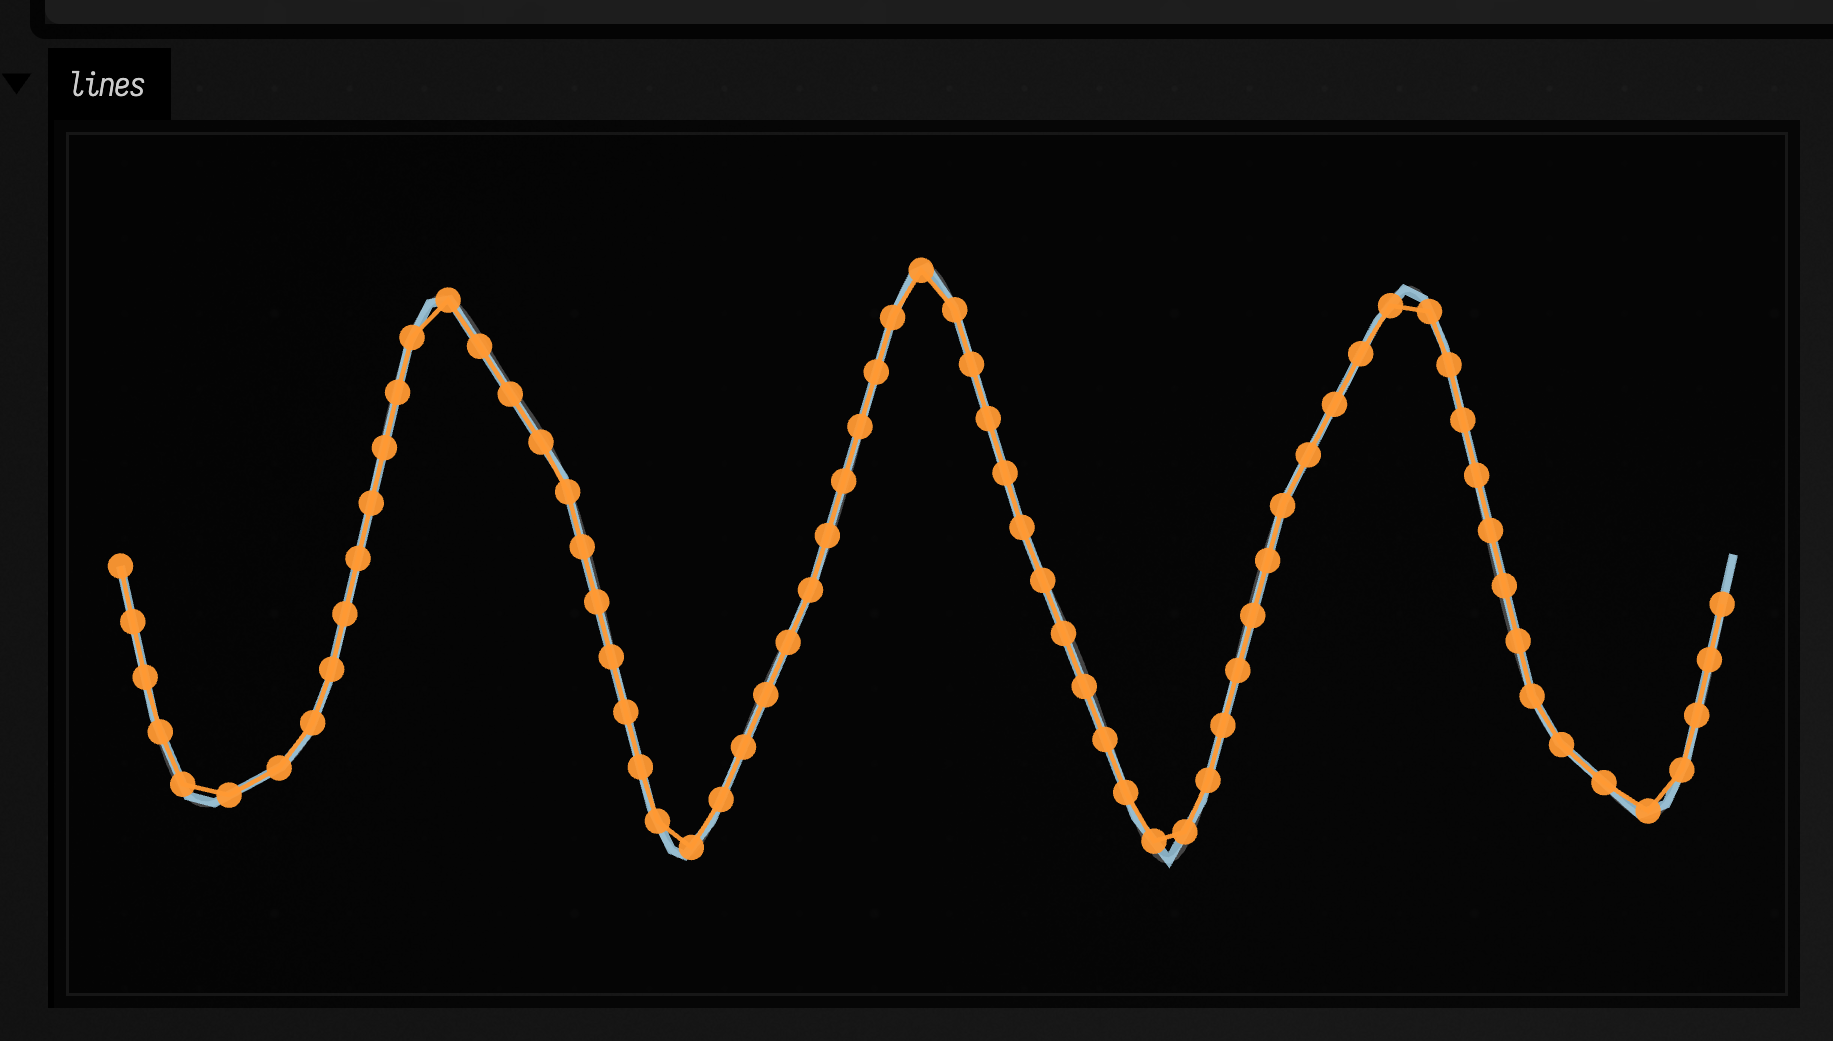
Noise utilities (make it organic)
These reconstruct a new polyline by sampling your curve, perturbing the samples, and stitching them back together. byOrientedGaussianNoising and byPerlinNoising try to push mostly along the curve’s normal, which often looks more hand-drawn.
:::static
fun FLine.byGaussianNoising(amplitude: Float, seed: Long = System.currentTimeMillis(), samples: Int = 100): FLine
fun FLine.byOrientedGaussianNoising(
    normalAmplitude: Float,
    tangentAmplitude: Float = 0f,
    seed: Long = System.currentTimeMillis(),
    samples: Int = 100,
): FLine
fun FLine.byPerlinNoising(
    amplitude: Float,
    frequency: Float = 1f,
    octaves: Int = 4,
    seed: Long = System.currentTimeMillis(),
    samples: Int = 100,
): FLine
:::static
fun base(dy: Double) = fline {
moveTo(0, dy)
cubicTo(80, dy - 60, 220, dy + 60, 300, dy)
}
fun ghost(dy: Double) = base(dy).apply {
thickness = 4.0
color = vec(1.0, 1.0, 1.0, 0.25)
}
// One row per kind of noise, each over a faint copy of the clean curve.
val gauss = base(0.0).byGaussianNoising(amplitude = 6f, seed = 1L, samples = 140).apply {
thickness = 2.5
color = vec(1.0, 0.6, 0.2, 0.9)
}
val oriented =
base(110.0)
.byOrientedGaussianNoising(normalAmplitude = 10f, tangentAmplitude = 1.5f, seed = 2L, samples = 140)
.apply {
thickness = 2.5
color = vec(0.4, 1.0, 0.6, 0.9)
}
val perlin = base(220.0).byPerlinNoising(amplitude = 12f, frequency = 0.02f, octaves = 4, seed = 3L, samples = 140).apply {
thickness = 2.5
color = vec(0.7, 0.9, 1.0, 0.9)
}
lines(ghost(0.0), gauss, ghost(110.0), oriented, ghost(220.0), perlin, w = 420.0, h = 340.0, fitToSize = true)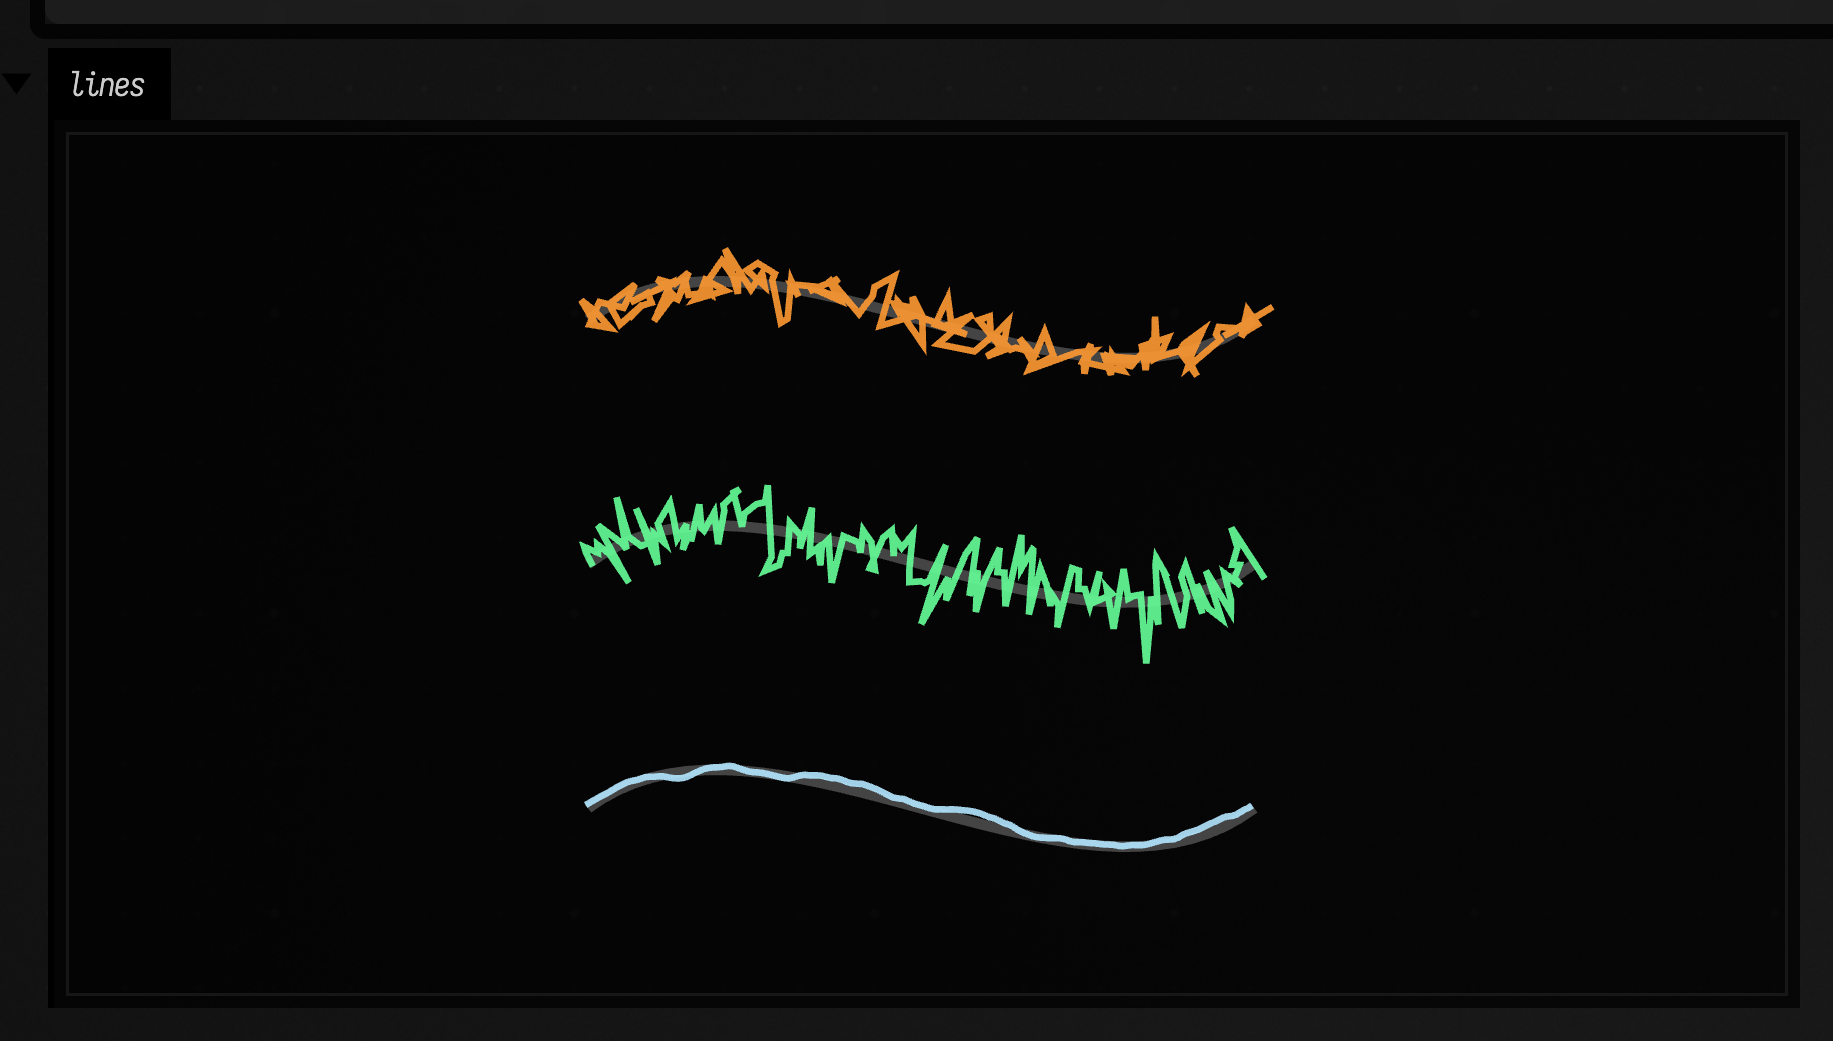
Top to bottom: byGaussianNoising, byOrientedGaussianNoising (mostly across the curve), byPerlinNoising.
Smoothing a hand-drawn stroke
These functions resample your path and return a smoothed polyline. byGaussianProcessInterpolating fits a smooth curve through samples of the path; byEmaFiltering averages each point with the ones before it (an exponential moving average); byOneEuroFiltering smooths slow parts of the stroke heavily and fast parts lightly, so it removes jitter without lagging behind quick movements; byAlphaBetaFiltering tracks position and velocity together; and byDriverSmoothing steers a point that follows the path, rounding off its corners.
:::static
fun FLine.byGaussianProcessInterpolating(
    trainingSamples: Int = 48,
    samples: Int = 200,
    lengthScale: Float = 0.15f,
    variance: Float = 1f,
    noise: Float = 1e-3f,
    dryWet: Float = 1f,
    wetModulator: ParameterFunction? = null,
    drawSamples: Boolean = false,
    seed: Long? = null,
): FLine

fun FLine.byEmaFiltering(
    alpha: Float = 0.18f,
    samples: Int = 200,
    dryWet: Float = 1f,
    wetModulator: ParameterFunction? = null,
): FLine

fun FLine.byOneEuroFiltering(
    minCutoffHz: Float = 1.5f,
    beta: Float = 0.03f,
    dCutoffHz: Float = 1f,
    fpsHint: Float = 60f,
    samples: Int = 200,
    dryWet: Float = 1f,
    wetModulator: ParameterFunction? = null,
): FLine

fun FLine.byAlphaBetaFiltering(
    alpha: Float = 0.25f,
    beta: Float = 0.08f,
    fpsHint: Float = 90f,
    samples: Int = 200,
    dryWet: Float = 1f,
    wetModulator: ParameterFunction? = null,
): FLine

enum class FLineDriverTargetUpdateMode {
    FORWARD_ONLY,
    WINDOWED_NEAREST,
    STICKY_WINDOWED_NEAREST,
}

data class FLineDriverSmoothingConfig(
    maxAngularVelocity: Float = 0.3f,
    maxAngularAcceleration: Float = 0.06f,
    lookaheadSamples: Int = 4,
    forwardSearchSamples: Int = 18,
    backwardSearchSamples: Int = 6,
    backwardRetargetHysteresis: Float = 0.15f,
    linearStepScale: Float = 1f,
    targetUpdateMode: FLineDriverTargetUpdateMode = FLineDriverTargetUpdateMode.STICKY_WINDOWED_NEAREST,
)

fun FLine.byDriverSmoothing(
    config: FLineDriverSmoothingConfig = FLineDriverSmoothingConfig(),
    samples: Int = 200,
    dryWet: Float = 1f,
    wetModulator: ParameterFunction? = null,
): FLine

fun FLine.byOneDollarFiltering(
    targetSamples: Int = 64,
    targetSize: Float = 200f,
    rotateToZero: Boolean = true,
    dryWet: Float = 1f,
    wetModulator: ParameterFunction? = null,
): FLinebyEmaFilteringis a simple exponential moving average (cheap, effective, but it lags).byOneEuroFilteringadapts smoothing based on speed (good for interactive cursors/gestures; see the 1€ filter).byAlphaBetaFilteringis a light constant-velocity tracker (good for jitter + latency tradeoffs; alpha-beta filter).byDriverSmoothingis a pursuit-style smoother: it samples the source, looks ahead on that sampled path, and steers a driver toward the target with bounded angular acceleration and bounded angular velocity. The search policy controls whether the driver can revisit earlier samples when they become closer.byGaussianProcessInterpolatingfits a GP along arc length and draws coherent whole-curve samples withdrawSamples=true. For posterior variances, full XYZ covariance, uncertainty bands, kernel choice, and scalar fields over 1D/2D/3D inputs, use the Gaussian processes tutorial andFLine.gaussianProcess.byOneDollarFilteringnormalizes a gesture (rotate + scale + resample; the $1 Recognizer) so noisy input becomes more comparable.
:::static
fun raw(dx: Double, dy: Double) = fline {
    moveTo(dx, dy)
    for (i in 1..240) {
        val t = i / 240.0
        lineTo(dx + t * 340, dy + 55 * kotlin.math.sin(t * 7.0 * kotlin.math.PI) + 11 * kotlin.math.sin(t * 70.0))
    }
}

fun ghost(dx: Double, dy: Double) = raw(dx, dy).apply {
    thickness = 1.5
    color = vec(1.0, 1.0, 1.0, 0.25)
}

fun styled(f: FLine, c: Vec4) = f.apply {
    thickness = 3.0
    color = c
}

// A grid: each filter over a faint copy of the same noisy input.
val ema = styled(raw(0.0, 0.0).byEmaFiltering(alpha = 0.10f, samples = 220), vec(0.7, 0.9, 1.0, 0.95))
val oneEuro = styled(
    raw(400.0, 0.0)
        .byOneEuroFiltering(minCutoffHz = 1.0f, beta = 0.05f, dCutoffHz = 1.0f, fpsHint = 60f, samples = 220),
    vec(0.4, 1.0, 0.6, 0.95),
)
val ab = styled(
    raw(0.0, 170.0).byAlphaBetaFiltering(alpha = 0.25f, beta = 0.08f, fpsHint = 60f, samples = 220),
    vec(1.0, 0.6, 0.2, 0.95),
)
val gpMean = styled(
    raw(400.0, 170.0)
        .byGaussianProcessInterpolating(
            trainingSamples = 44,
            samples = 220,
            lengthScale = 0.11f,
            variance = 1f,
            noise = 0.02f,
            drawSamples = false,
        ),
    vec(1.0, 0.4, 0.4, 0.95),
)
// One-Dollar normalizes the gesture around the origin (rotated, scaled to 220, resampled), so it gets its own cell.
val oneDollar = styled(
    raw(0.0, 0.0).byOneDollarFiltering(targetSamples = 64, targetSize = 220f, rotateToZero = true),
    vec(0.8, 0.6, 1.0, 0.95),
) + vec(370, 340, 0)

lines(
    ghost(0.0, 0.0),
    ema,
    ghost(400.0, 0.0),
    oneEuro,
    ghost(0.0, 170.0),
    ab,
    ghost(400.0, 170.0),
    gpMean,
    oneDollar,
    w = 720.0,
    h = 480.0,
    fitToSize = true,
)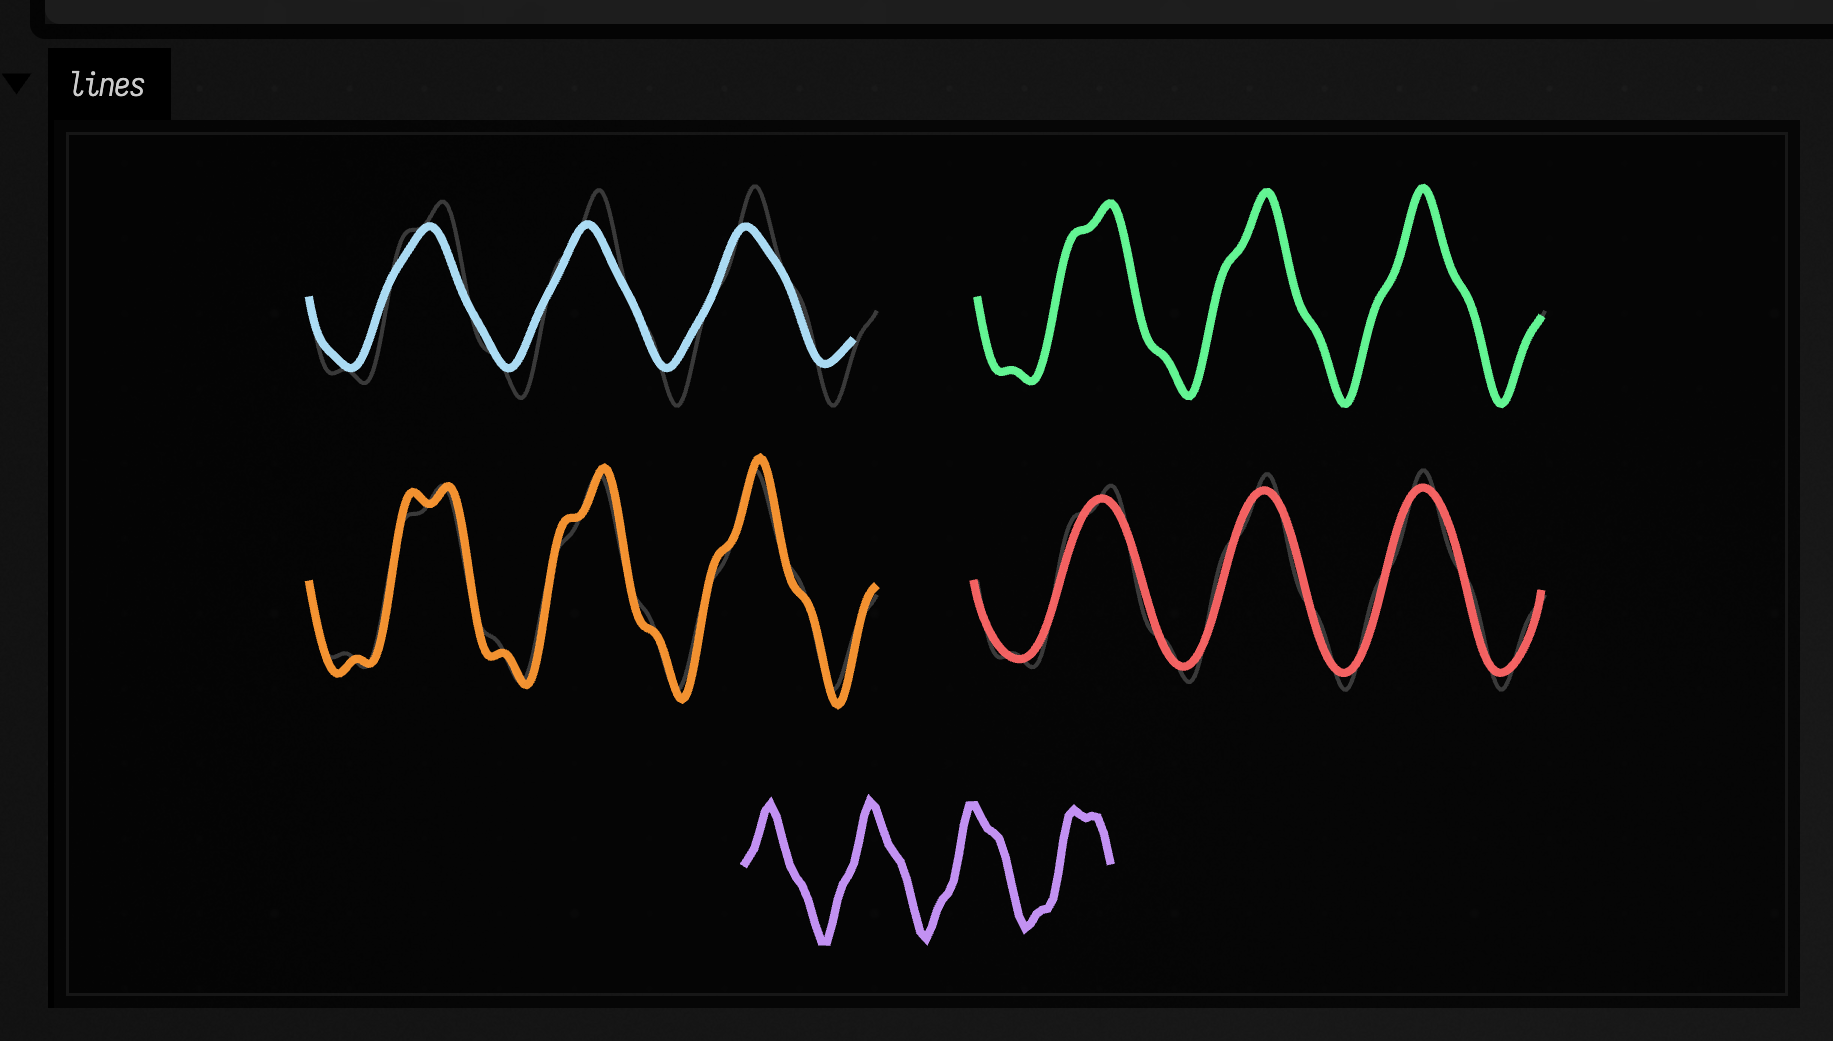
Row by row: EMA, One Euro; alpha-beta, the Gaussian-process mean; and below, the One-Dollar normalization of the same gesture.
Driver smoothing in 2D
:::static
val f = fline {
    moveTo(0, 0)
    cubicTo(10, 20, 30, 20, 20, 40)
    cubicTo(60, 20, 30, 20, 40, 20)
} * 3

val sweep =
    10.alphas { t ->
        f.byDriverSmoothing(
                config = FLineDriverSmoothingConfig(
                    maxAngularVelocity = 1f / (1f + t.f * 20f),
                    maxAngularAcceleration = 0.10f,
                    targetUpdateMode = FLineDriverTargetUpdateMode.FORWARD_ONLY,
                    forwardSearchSamples = 20,
                ),
                samples = 180,
            )
            .apply {
                filled = false
                stroked = true
                thickness = 3.0
                color = vec(
                    0.28 + t * 0.58,
                    0.94 - t * 0.24,
                    1.0 - t * 0.36,
                    0.90,
                )
            } + vec(t * 300.0, 0.0)
    }

lines(sweep, w = 720.0, h = 220.0, fitToSize = true)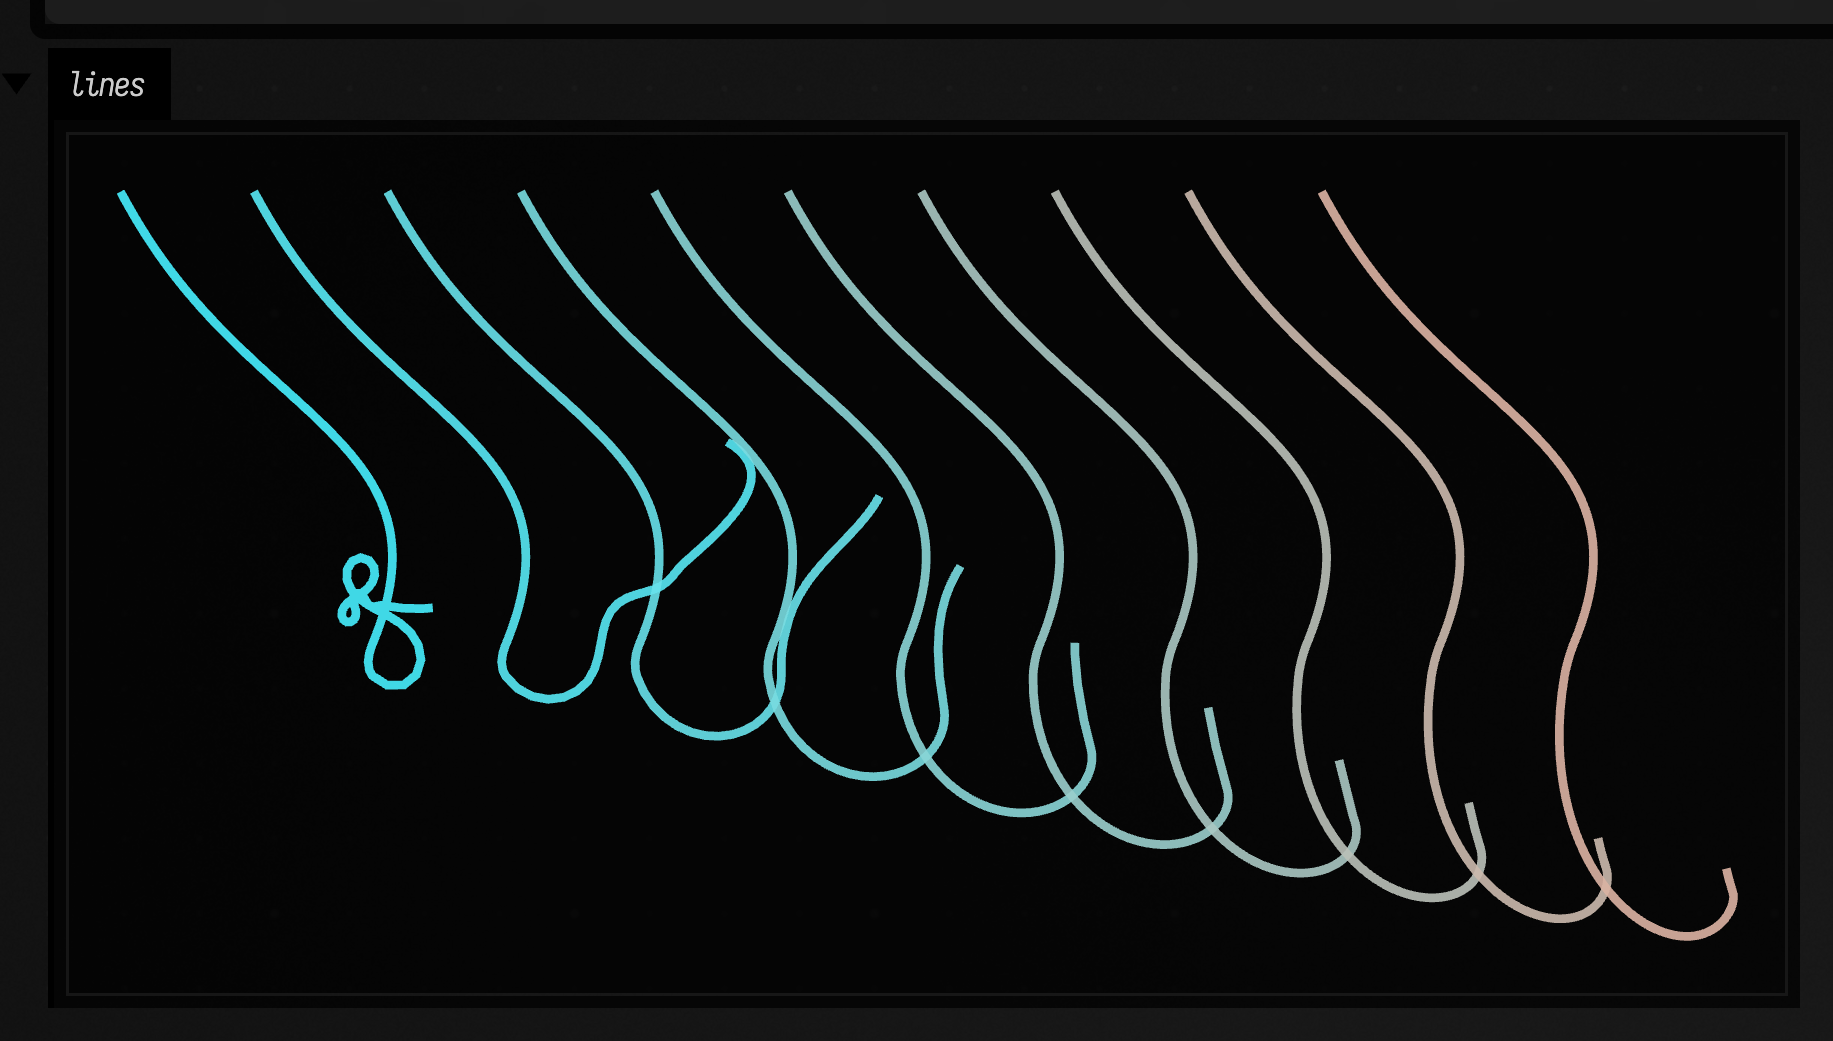
Here one path is chased with different turning limits. On the left the driver can turn quickly, so it hugs the source. As maxAngularVelocity drops, the chased line has to commit earlier and sweep wider.
Driver smoothing in 3D
:::static
val f = fline {
    moveTo(0, 0, 0)
    cubicTo(30, 10, 20, 2, 30, 20, 20, 40)
    cubicTo(20, 60, 20, 2, 30, -50, 40, 20)
} * 3

val sweep3d =
    10.alphas { t ->
        f.byDriverSmoothing(
                config = FLineDriverSmoothingConfig(
                    maxAngularVelocity = 1f / (1f + t.f * 20f),
                    maxAngularAcceleration = 0.10f,
                    targetUpdateMode = FLineDriverTargetUpdateMode.FORWARD_ONLY,
                    forwardSearchSamples = 20,
                ),
                samples = 180,
            )
            .apply {
                filled = false
                stroked = true
                thickness = 3.0
                color = vec(
                    0.32 + t * 0.54,
                    0.86 - t * 0.22,
                    1.0 - t * 0.26,
                    0.88,
                )
            } + vec(t * 300.0, 0.0, 0.0)
    }

threeLines(sweep3d, channel = "driver3d", height = 430, editable = false)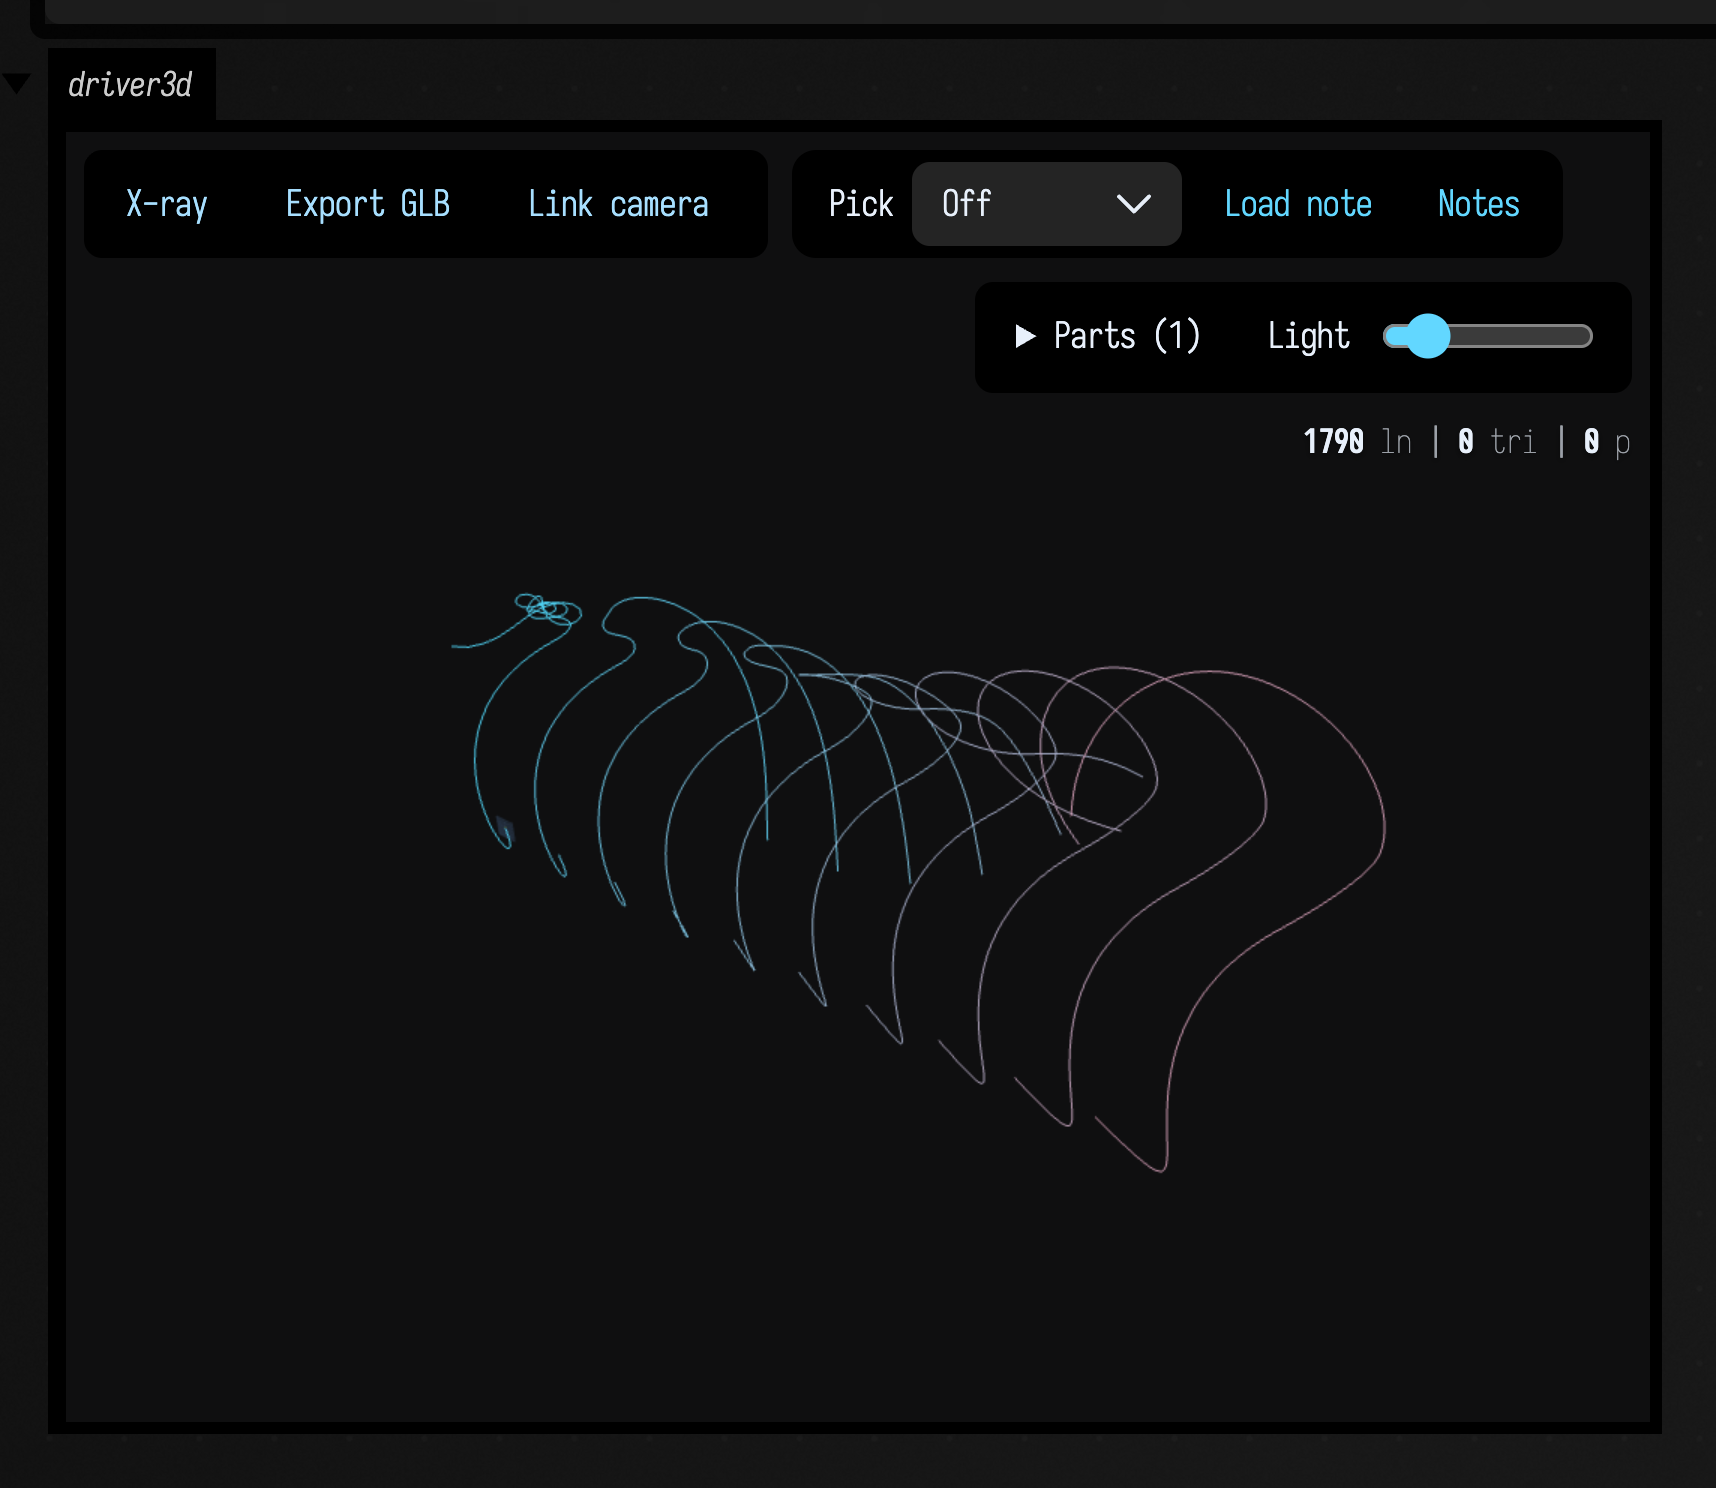
Here the source curve bends through depth, and the smoothed curves follow it in 3D. The driver uses quaternions to turn towards its lookahead target, with bounds on angular acceleration and velocity.
Offsetting / parallel curves
| Operation | Behavior |
|---|---|
fun FLine.byOffsetting(distance: Float, samples: Int = 50): FLine |
Samples the path and displaces each point along its XY normal by distance, returning a polyline of samples points per segment. |
fun FLine.byCreatingParallelCurves(distance: Float, samples: Int = 50): Pair<FLine, FLine> |
Returns two offsets, first at -distance and then at +distance. Use the pair as the two sides of a stroke or ribbon. |
Offsetting creates a curve parallel to the original at a given distance, for stroke outlines and tubes.
:::static
val base = fline {
    moveTo(60, 180)
    cubicTo(120, 20, 260, 280, 360, 120)
    thickness = 3.0
    color = vec(1.0, 1.0, 1.0, 1.0)
}

val (l, r) = base.byCreatingParallelCurves(distance = 12f, samples = 80)

val left = l.apply {
    color = vec(0.4, 1.0, 0.6, 1.0)
    thickness = 3.0
}
val right = r.apply {
    color = vec(1.0, 0.4, 0.4, 1.0)
    thickness = 3.0
}

lines(base, left, right, w = 420.0, h = 260.0, fitToSize = true)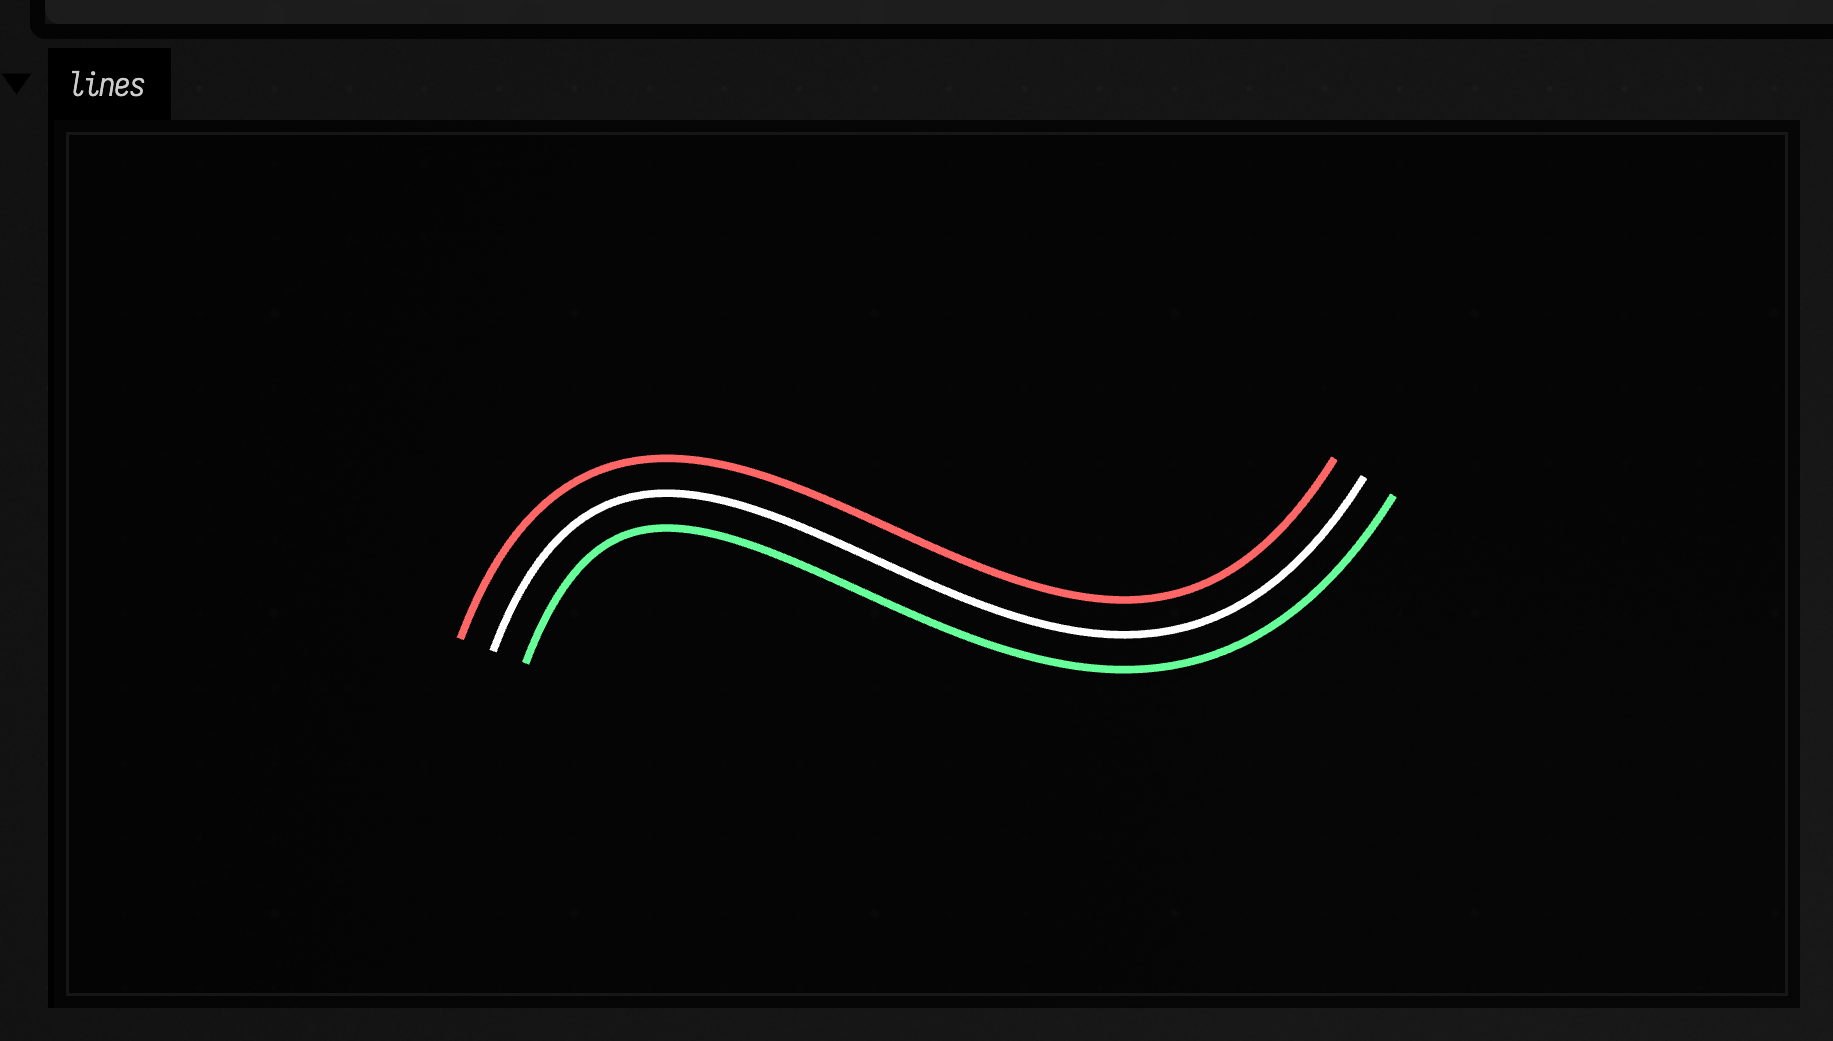
Dashing
Breaks a path into multiple FLines representing dash segments. Both lengths are measured along
the curve, and each dash follows the curve rather than cutting across it — resolution is the
longest straight piece used to do that, so lower it if a dash around a tight bend still looks
faceted.
:::static
fun FLine.byDashing(dashLength: Float, gapLength: Float, resolution: Float = 2f): List<FLine>
:::static
val f = fline {
moveTo(50, 180)
cubicTo(120, 20, 300, 280, 350, 120)
thickness = 1.0
color = vec(1.0, 1.0, 1.0, 1.0)
}
val dashes =
f.byDashing(dashLength = 18f, gapLength = 10f).mapIndexed { i, seg ->
seg.apply {
thickness = 1.0
color = if (i % 2 == 0) vec(1.0, 0.7, 0.2, 1.0) else vec(0.4, 1.0, 0.6, 1.0)
}
}
lines(dashes, w = 420.0, h = 260.0, fitToSize = true)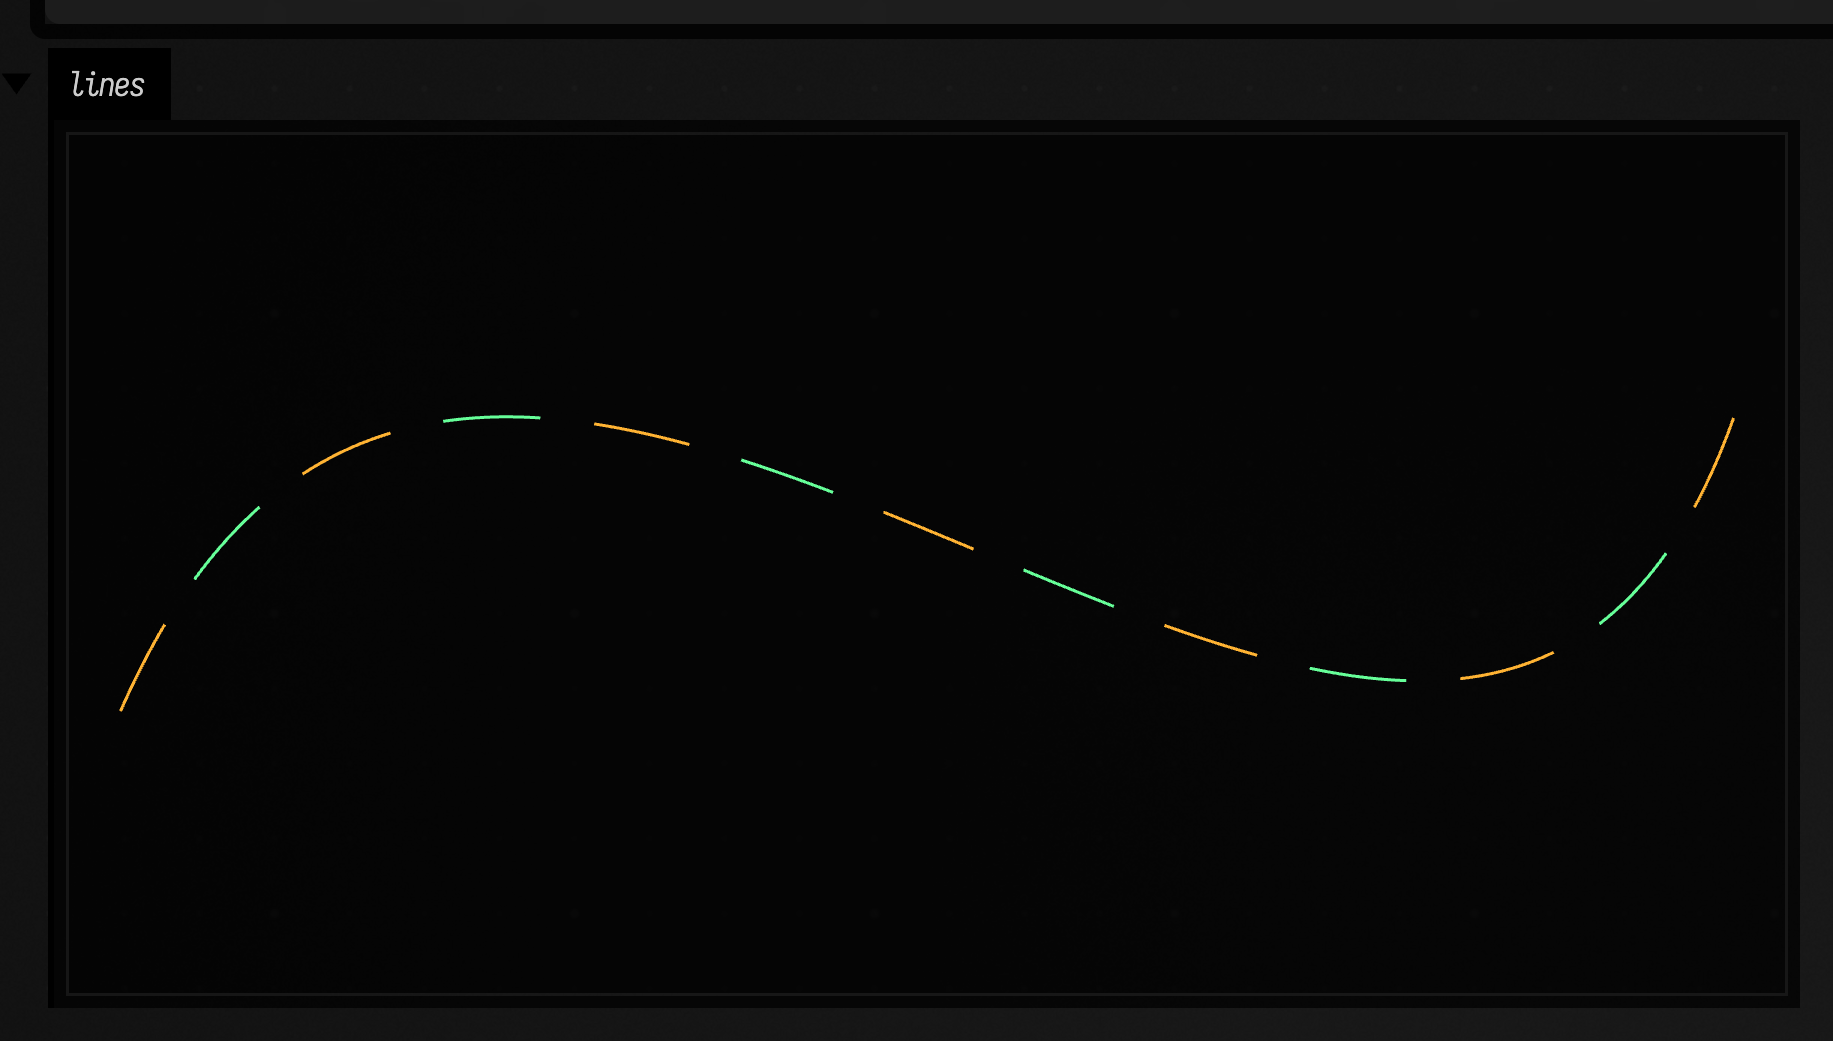
Intersections
To find where two curves cross in the xy plane, use crossings2D; selfCrossings2D finds loops and crossings inside a single stroke. Each hit has its point and its t on both lines; Crossings, bounds and orientation has the details.
:::static
fun FLine.crossings2D(other: FLine, tolerance: Float = 0.01f): List<FLineCrossing>
fun FLine.selfCrossings2D(tolerance: Float = 0.01f): List<FLineCrossing>
:::static
val a = fline {
moveTo(40, 130)
cubicTo(140, -40, 260, 300, 380, 130)
thickness = 4.0
color = vec(1.0, 1.0, 1.0, 1.0)
}
// A straight line that crosses the S three times.
val b = fline {
moveTo(40, 100)
lineTo(380, 160)
thickness = 3.0
color = vec(0.7, 0.9, 1.0, 0.9)
}
val hits = a.crossings2D(b, tolerance = 1f).map { it.point }
val hitDots = polylineFrom(hits.map { it.v2 }).apply {
pointed = true
pointSize = 2.0
stroked = false
filled = true
color = vec(1.0, 0.5, 0.2, 1.0)
}
lines(a, b, hitDots, w = 420.0, h = 260.0, fitToSize = true)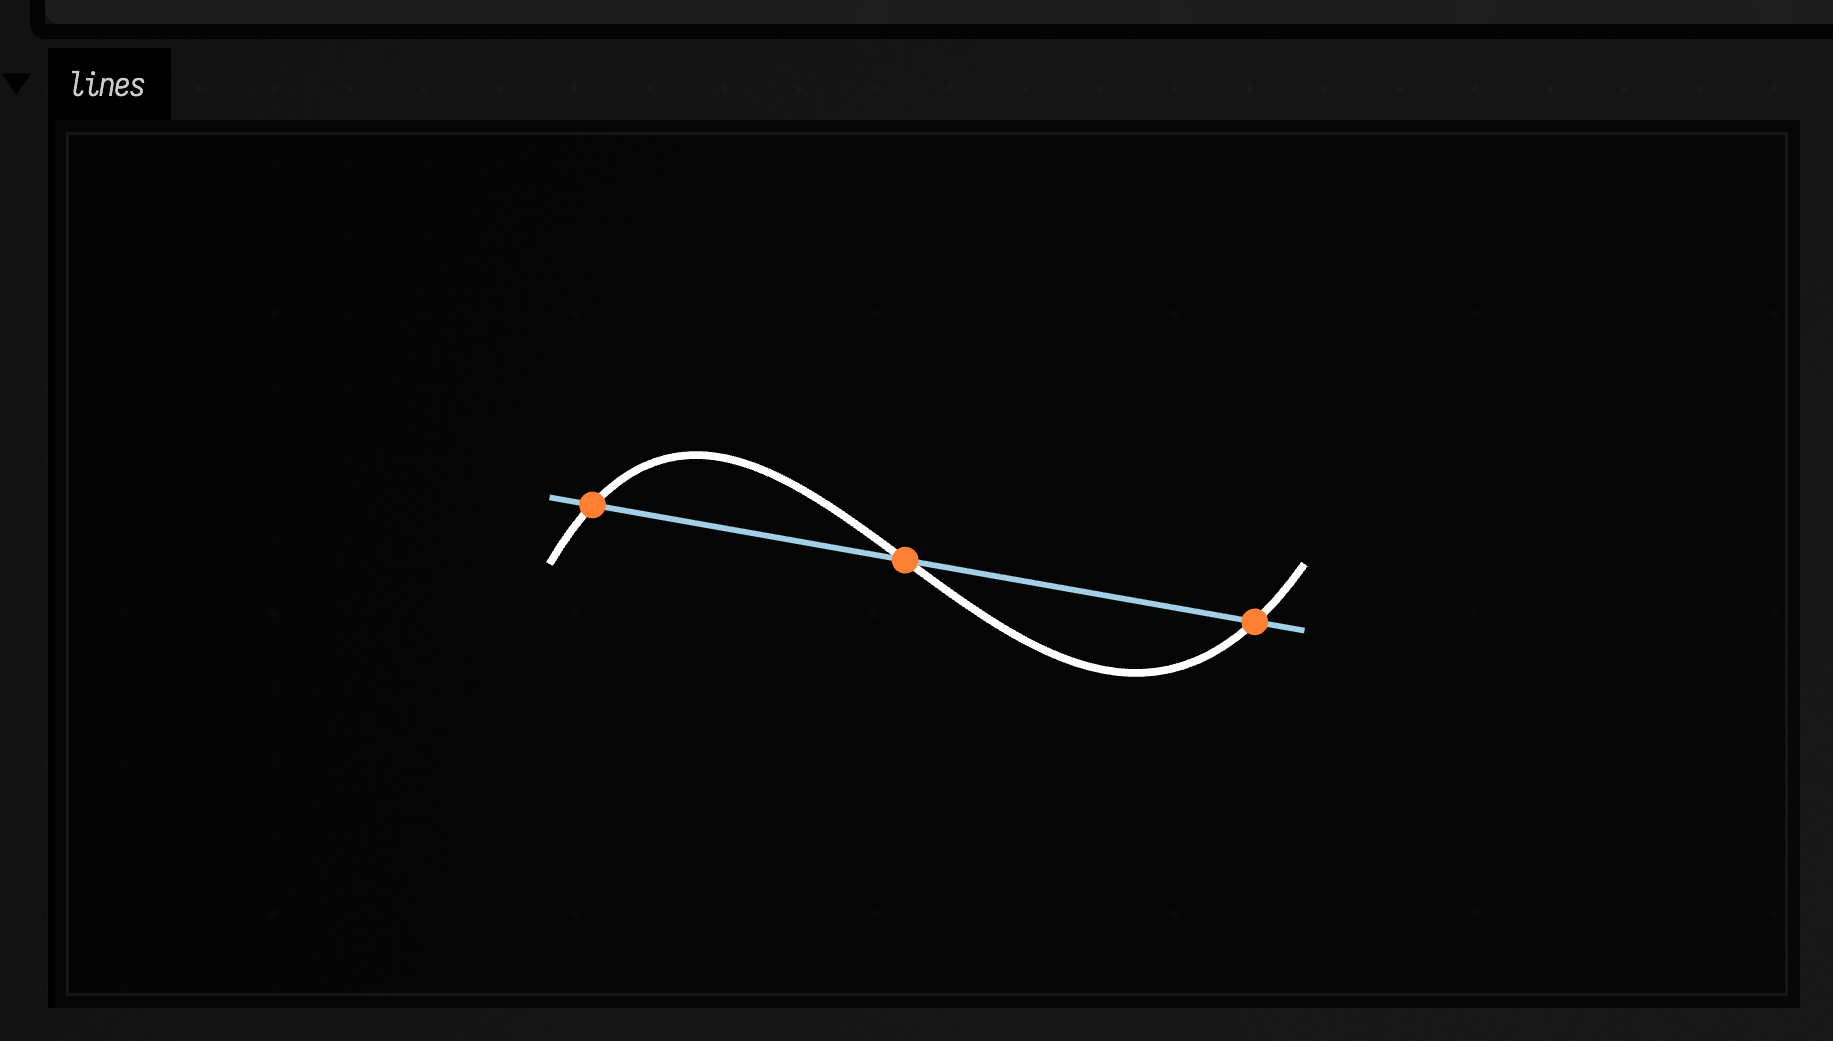
Curvature + tangents/normals
Curvature is how fast the direction is turning. These helpers find corners and other features, and are useful for debugging and stylization.
:::static
fun FLine.curvatureAnalysis(samples: Int = 100): List<Pair<Vec3, Float>>
fun FLine.findHighCurvaturePoints(threshold: Float = 0.1f, samples: Int = 100): List<Vec3>
fun FLine.byCurvatureAdaptiveSampling(minSamples: Int = 20, maxSamples: Int = 200): FLine

fun FLine.byCreatingTangentLines(samples: Int = 20, length: Float = 10f): List<FLine>
fun FLine.byCreatingNormalLines(samples: Int = 20, length: Float = 10f): List<FLine>
:::static
val f = fline {
moveTo(60, 190)
cubicTo(120, 20, 260, 280, 360, 120)
thickness = 2.0
color = vec(1.0, 1.0, 1.0, 1.0)
}
val tangents = f.byCreatingTangentLines(samples = 18, length = 22f).onEach {
it.thickness = 1.5
it.color = vec(0.7, 0.9, 1.0, 0.7)
}
val normals = f.byCreatingNormalLines(samples = 18, length = 18f).onEach {
it.thickness = 1.5
it.color = vec(0.4, 1.0, 0.6, 0.7)
}
val highCurvature = f.findHighCurvaturePoints(threshold = 0.02f, samples = 120)
val corners =
if (highCurvature.isEmpty()) emptyList()
else
[
polylineFrom(highCurvature.map { it.v2 }).apply {
pointed = true
pointSize = 1.2
stroked = false
filled = true
color = vec(1.0, 0.5, 0.2, 1.0)
},
]
lines([f] + tangents + normals + corners, w = 420.0, h = 260.0, fitToSize = true)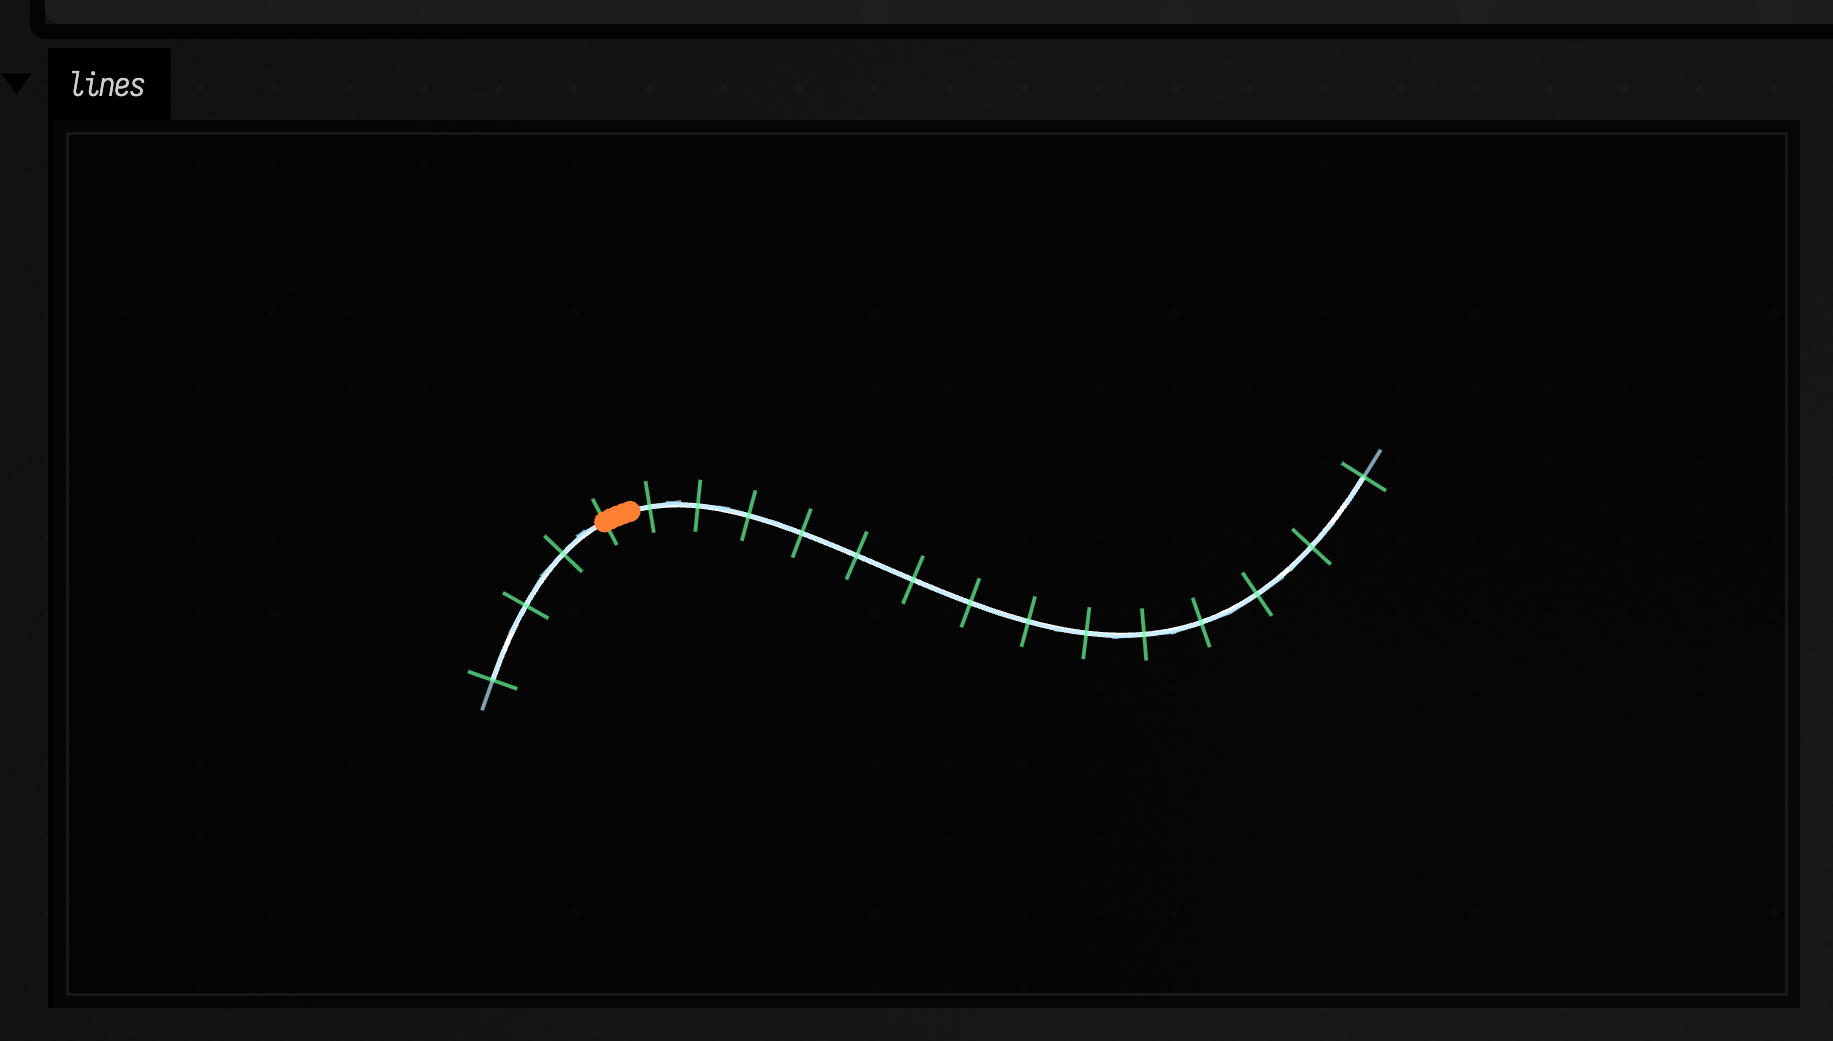
Convex hull + inflections
byConvexHull2D() wraps a stroke’s points with a tight convex polygon (useful for quick outlines and coarse collision). Splitting at inflections breaks a curve into pieces that each bend one way.
:::static
fun FLine.byConvexHull2D(): FLine
fun FLine.bySplittingAtInflections(): List<FLine>
:::static
val scribble = fline {
moveTo(60, 160)
cubicTo(120, 10, 160, 280, 220, 120)
cubicTo(280, -10, 320, 280, 360, 140)
thickness = 3.0
color = vec(1.0, 1.0, 1.0, 0.6)
}
val hull = scribble.byConvexHull2D().apply {
filled = true
stroked = true
thickness = 2.0
color = vec(0.4, 1.0, 0.6, 0.20)
}
val pieces =
scribble.bySplittingAtInflections().mapIndexed { i, p ->
p.apply {
thickness = 4.0
color = if (i % 2 == 0) vec(1.0, 0.5, 0.2, 0.65) else vec(0.7, 0.9, 1.0, 0.65)
}
}
// A dot where each piece begins: the inflections, plus the start.
val splits = pieces.map { p ->
val s = p.sampleByNumber(2).first()
fline {
moveTo(s.x, s.y)
lineTo(s.x + 0.001, s.y + 0.001)
pointed = true
pointSize = 1.5
stroked = false
color = vec(1.0, 1.0, 1.0, 1.0)
}
}
lines([hull] + pieces + splits, w = 420.0, h = 260.0, fitToSize = true)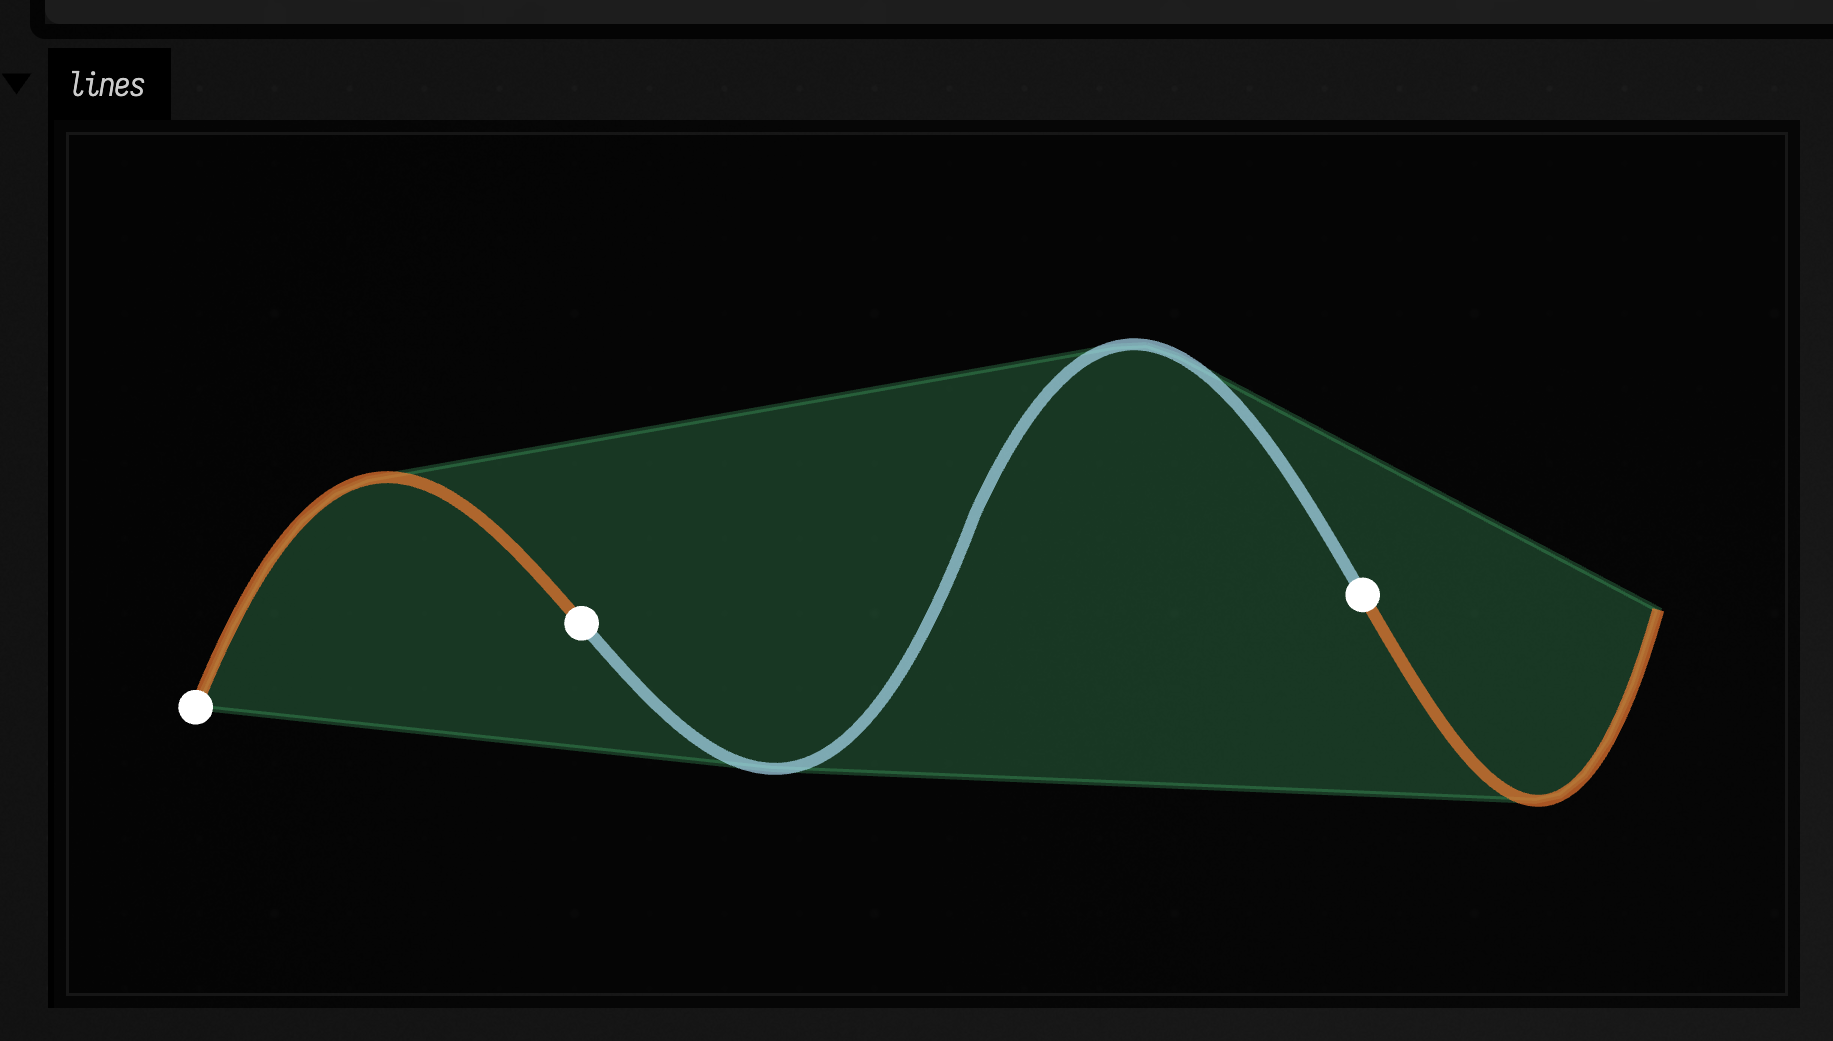
Parameterized operations (vary along the curve)
Sometimes you want an effect that changes along the path: offset more near one end, add noise only in the middle, or scale based on curvature. A ParameterFunction is a number that varies with position along the curve.
:::static
interface ParameterFunction {
    fun evaluate(t: Float, position: Vec3): Float
}

class ConstantParameter(val value: Float) : ParameterFunction
class LinearParameter(val start: Float, val end: Float) : ParameterFunction
class SineParameter(val amplitude: Float, val frequency: Float, val phase: Float = 0f, val offset: Float = 0f) :
    ParameterFunction
class DistanceParameter(val point: Vec3, val minValue: Float, val maxValue: Float, val maxDistance: Float) :
    ParameterFunction
class CurvatureParameter(val line: FLine, val minValue: Float, val maxValue: Float, val maxCurvature: Float = 1f) :
    ParameterFunction

fun parameterFromLambda(func: (t: Float, pos: Vec3) -> Float): ParameterFunction

fun FLine.byOffsettingParameterized(distanceFunc: ParameterFunction, samples: Int = 100): FLine
fun FLine.byNoisingParameterized(
    amplitudeFunc: ParameterFunction,
    seed: Long = System.currentTimeMillis(),
    samples: Int = 100,
): FLine
fun FLine.byScalingParameterized(scaleFunc: ParameterFunction, center: Vec2 = vec(0f, 0f), samples: Int = 100): FLine
This example varies a scale factor along the same base curve, about a fixed centre. A SineParameter makes the curve breathe in and out as you travel it, and a DistanceParameter makes it swell the farther a point sits from a chosen “quiet point”. (byOffsettingParameterized and byNoisingParameterized vary an offset or a jitter along the curve normal the same way; scaling is shown here because it reads cleanly in a single still.)
:::static
// A multi-segment base curve. byScalingParameterized samples along the whole
// path and scales each sample about a fixed centre by a per-position factor.
val base = fline {
    moveTo(60, 300)
    cubicTo(180, 40, 300, 40, 420, 300)
    cubicTo(520, 470, 660, 470, 760, 220)
}
val centre = vec(410f, 260f)

val clean = base.copy().apply {
    thickness = 4.0
    color = vec(1.0, 1.0, 1.0, 0.35)
}

// Scale oscillates along the path (0.72 .. 1.28): the curve breathes in and out.
val breathing =
    base
        .byScalingParameterized(
            scaleFunc = SineParameter(amplitude = 0.28f, frequency = 3.0f, phase = 0f, offset = 1.0f),
            center = centre,
            samples = 220,
        )
        .apply {
            thickness = 3.0
            color = vec(0.7, 0.9, 1.0, 0.9)
        }

// Scale grows with distance from a quiet point (0.9 near it .. 1.5 far away):
// the curve hugs the base near the point and swells away from it.
val quietPoint = vec(120, 120, 0)
val swell = DistanceParameter(point = quietPoint, minValue = 0.9f, maxValue = 1.5f, maxDistance = 620f)
val flared = base.byScalingParameterized(scaleFunc = swell, center = centre, samples = 220).apply {
    thickness = 4.5
    color = vec(1.0, 0.6, 0.2, 0.9)
}

val qp = fline {
    moveTo(quietPoint.x, quietPoint.y)
    lineTo(quietPoint.x + 0.001, quietPoint.y + 0.001)
    pointed = true
    pointSize = 6.0
    stroked = false
    filled = true
    color = vec(0.4, 1.0, 0.6, 1.0)
}

lines(clean, breathing, flared, qp, w = 900.0, h = 520.0, fitToSize = true)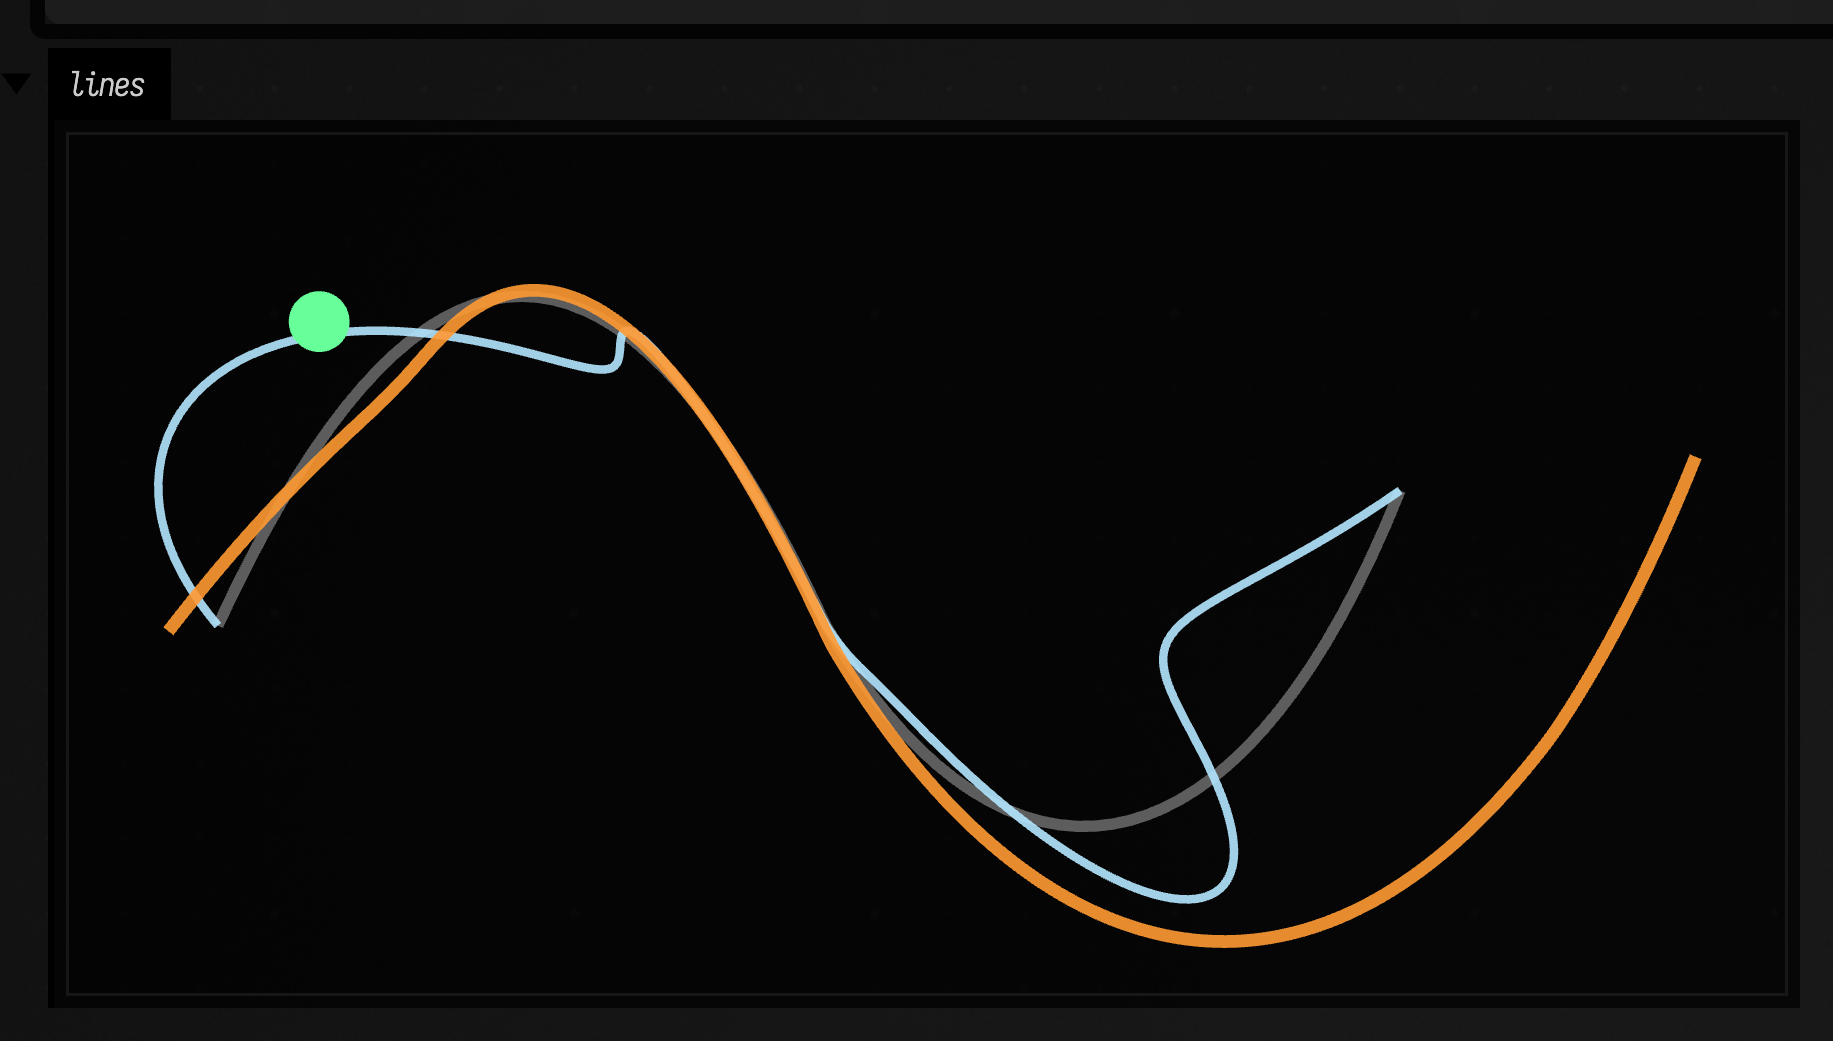
Curve combination utilities
These helpers sample two curves and combine their points, or map one curve onto another using closest-point projection.
:::static
fun FLine.byAddingWith(other: FLine, samples: Int = 100): FLine
fun FLine.bySubtractingWith(other: FLine, samples: Int = 100): FLine
fun FLine.byMultiplyingWith(other: FLine, samples: Int = 100): FLine

fun FLine.byProjectingOnto(other: FLine, samples: Int = 100): FLine
fun FLine.byInverting(center: Vec2 = vec(0f, 0f), radius: Float = 100f, samples: Int = 100): FLine
byInverting is geometric inversion; if you want the bigger picture, see inversive geometry.
:::static
// A smooth target curve (a circle-ish polyline)
val center = vec(210.0, 130.0)
val radius = 95.0

val circle = fline {
    breakNext()
    for (i in 0..140) {
        val a = (i / 140.0) * kotlin.math.PI * 2.0
        val p = vec(center.x + radius * kotlin.math.cos(a), center.y + radius * kotlin.math.sin(a))
        lineTo(p)
    }
    thickness = 8.0
    color = vec(1.0, 1.0, 1.0, 0.35)
}

// A “messy” version of it
val messy = circle.byPerlinNoising(amplitude = 26f, frequency = 0.03f, octaves = 4, seed = 10L, samples = 180).apply {
    thickness = 2.5
    color = vec(1.0, 0.6, 0.2, 0.65)
}

// Project the messy samples back onto the circle: the green dots land on the pale band.
val projected = messy.byProjectingOnto(circle, samples = 60).apply {
    thickness = 1.5
    pointed = true
    pointSize = 3.0
    color = vec(0.4, 1.0, 0.6, 1.0)
}

lines(circle, messy, projected, w = 420.0, h = 260.0, fitToSize = true)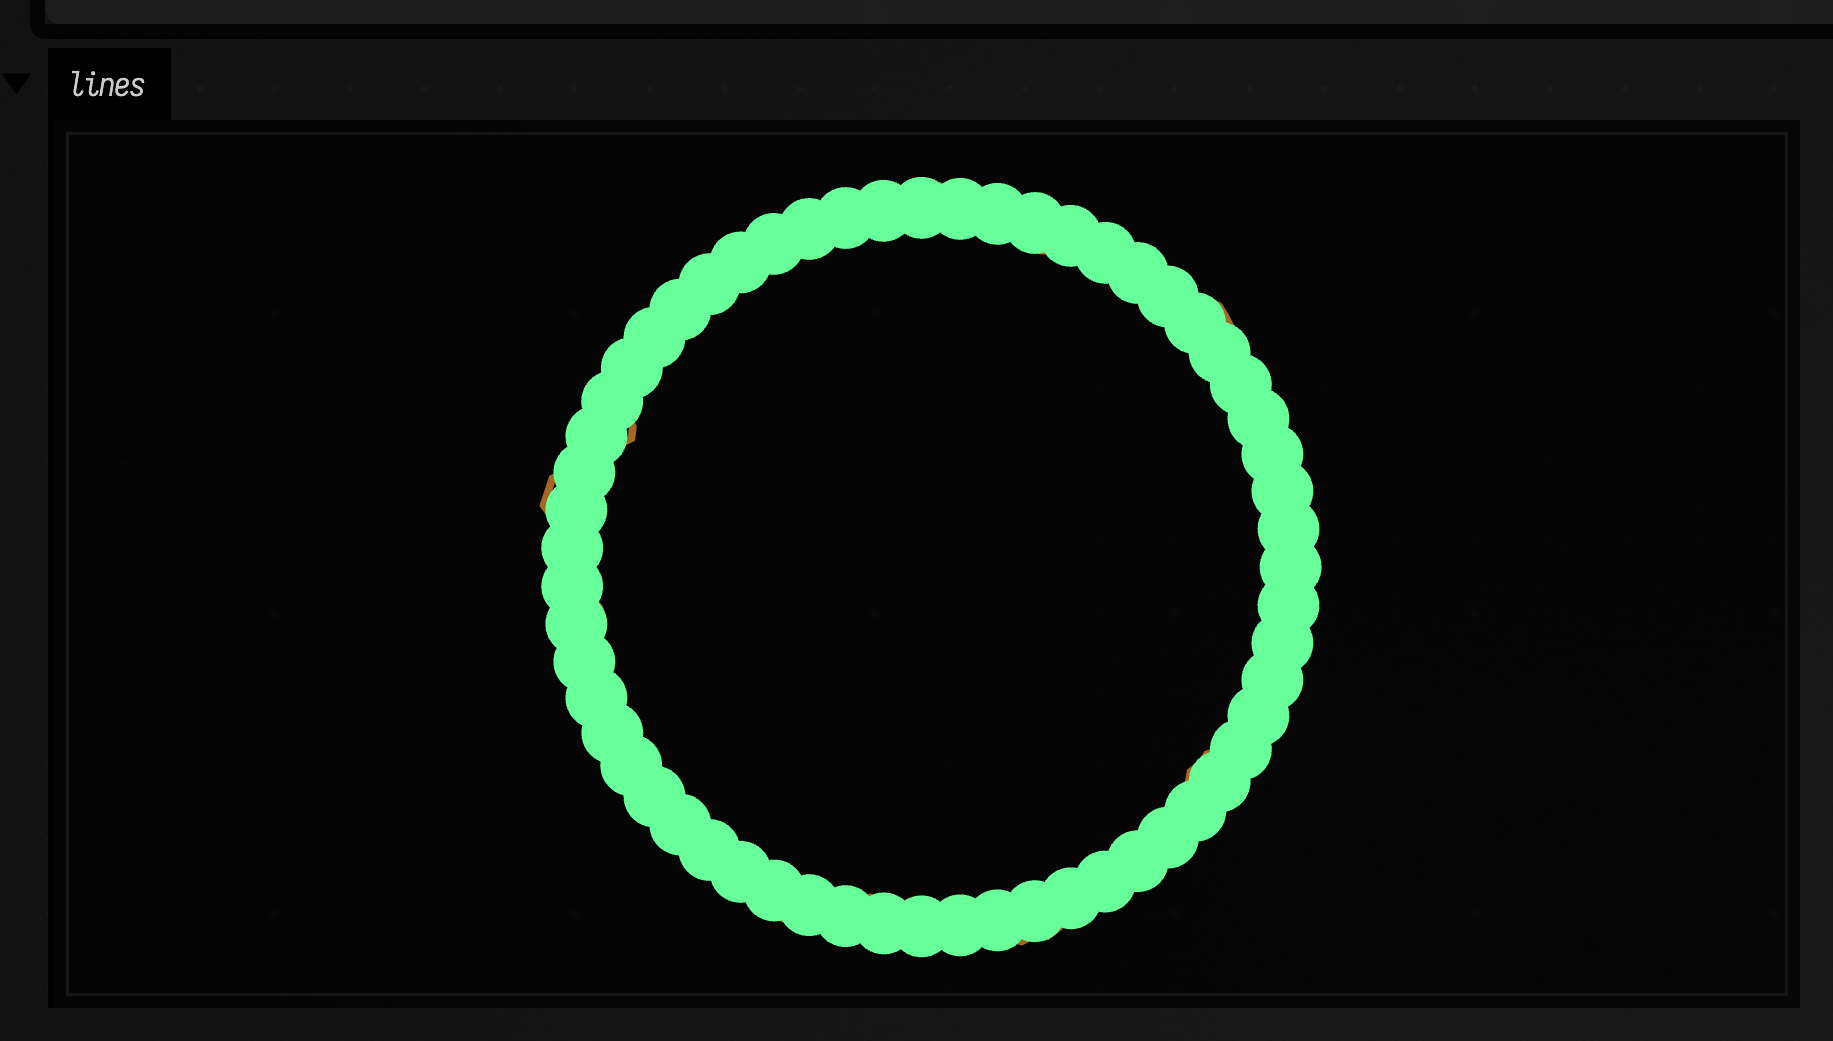
Wiggling one line along another: wiggledBy(...)
path.wiggledBy(wave) lays wave along path. The wave's x says how far along the path a point goes, and its y pushes the point out along the path's normal. A wave that doubles back in x doubles back along the path, so loops come through as loops.
:::static
fun FLine.wiggledBy(
    a: FLine,
    repeats: Int = 1,
    subtractChord: Boolean = true,
    amplitude: Number = 1.0,
    resolution: Int = 200,
    up: Vec3? = Vec3(0f, 0f, 1f),
): FLine

fun FLine.sweptFrames(samples: Int = 400, up: Vec3? = Vec3(0f, 0f, 1f)): SweptFrames?
repeats plays the wave back that many times, each copy over an equal share of the path. amplitude scales the sideways push. With subtractChord on (the default), the wave is read relative to the straight line from its start to its end, so a wave drawn on a slope wiggles just as well as a level one, and each copy starts and ends on the path. Turn it off and the wave is read in world axes: its y is measured from y = 0, so whatever height it gains by its end stays in the result.
Below, the same sloped wave goes along one curve three ways: once with the slope removed, eight times, and once with the slope kept (orange), which leaves the end of the line up off the curve.
:::static
// A wave drawn on a slope: two bumps and a little ripple.
val wave = fline {
    moveTo(0, 0)
    for (i in 1..120) {
        val x = i / 120.0
        lineTo(x, 0.6 * x + Math.sin(x * 4 * Math.PI) * 0.25 + Math.sin(x * 14 * Math.PI) * 0.05)
    }
}

val path = fline {
    moveTo(30, 60)
    cubicTo(160, -40, 260, 220, 400, 90)
    color = vec(1.0, 1.0, 1.0, 0.3)
}

val once = path.wiggledBy(wave, amplitude = 60).apply {
    color = vec(0.4, 0.9, 1.0, 0.9)
    thickness = 2.0
}
val eight = (path + vec(0.0, 110.0)).wiggledBy(wave, repeats = 8, amplitude = 25).apply {
    color = vec(0.5, 1.0, 0.6, 0.9)
    thickness = 2.0
}
val kept = (path + vec(0.0, 220.0)).wiggledBy(wave, subtractChord = false, amplitude = 60).apply {
    color = vec(1.0, 0.6, 0.2, 0.9)
    thickness = 2.0
}

lines(
    path,
    path + vec(0.0, 110.0),
    path + vec(0.0, 220.0),
    once,
    eight,
    kept,
    w = 440.0,
    h = 360.0,
    fitToSize = true,
)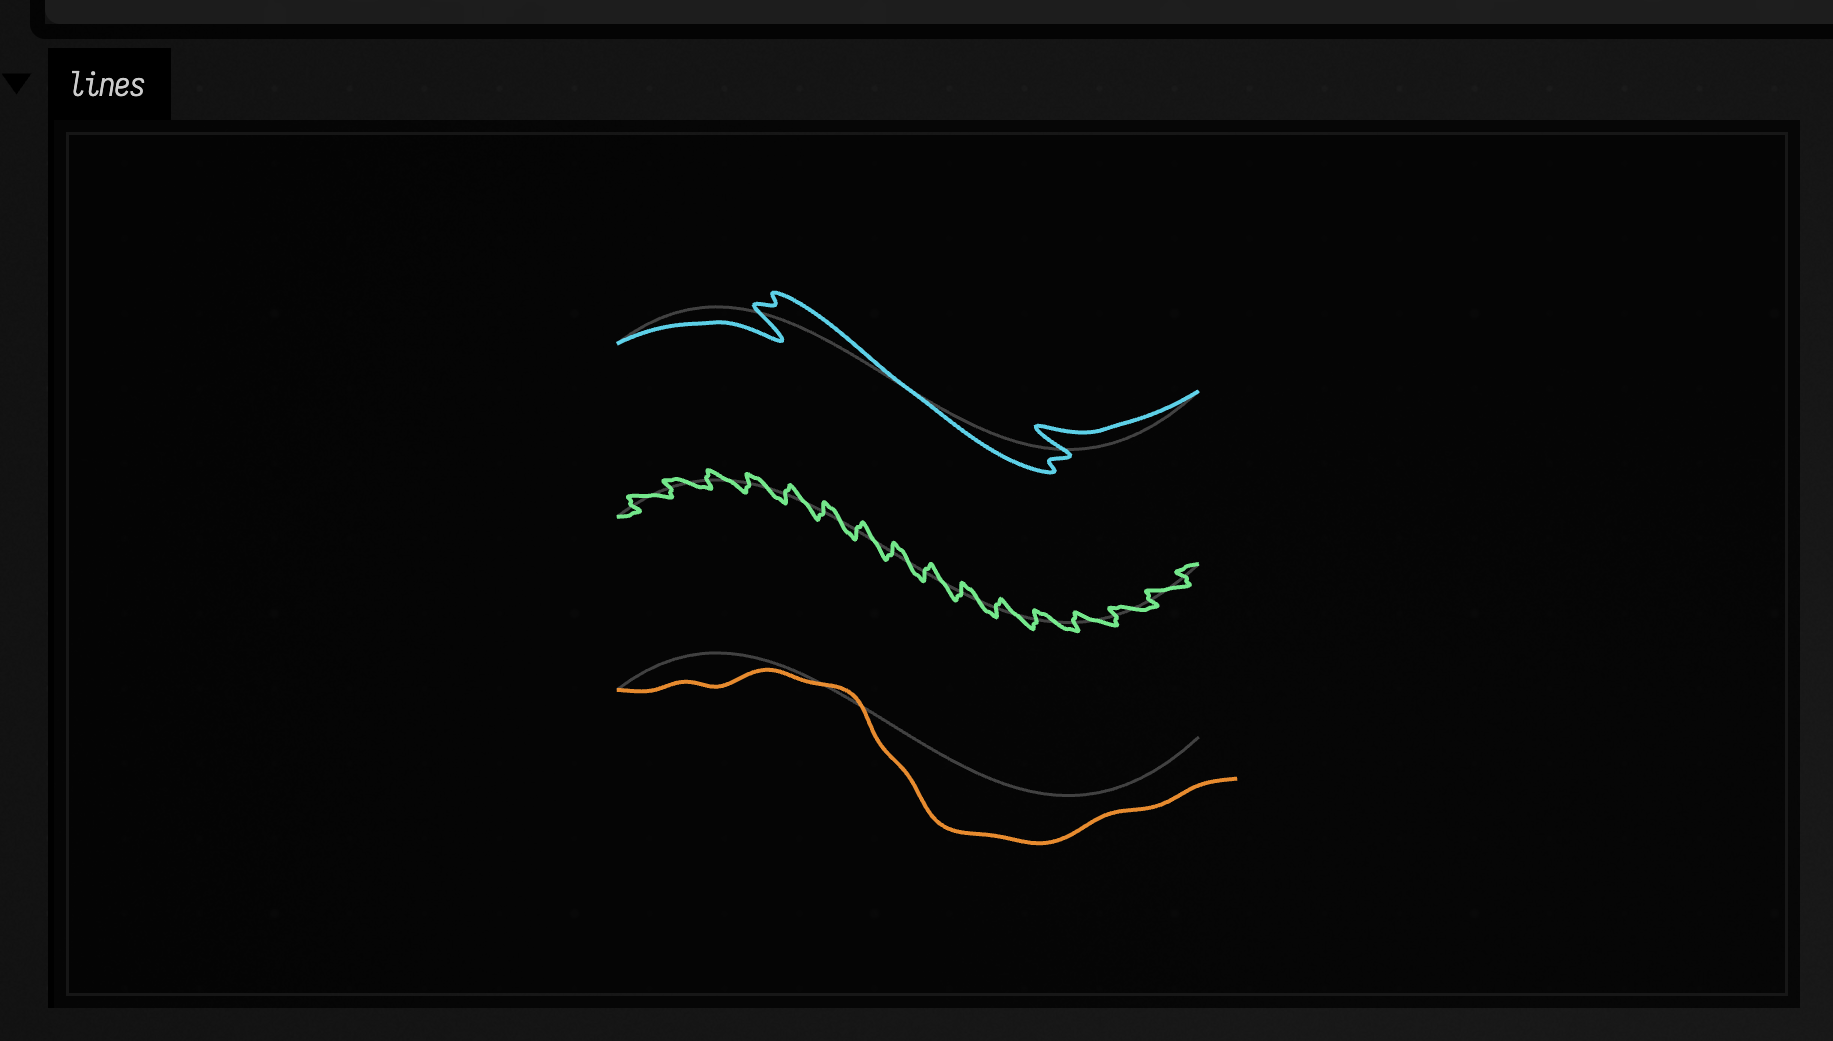
In 3D the wave's y follows the path's normal and its z the binormal. With subtractChord = false those offsets are measured from y = z = 0, so a circle drawn around the origin winds a coil centred on the path. The frames come from the path's own shape (they turn as little as the path forces them to, starting from the side the path bends toward), so rotating the path turns the coil with it and the coil never flips. Only a straight path, which bends toward no side, takes its starting normal from up. path.sweptFrames() gives you the frames themselves, and its strength (0 to 1) says how clearly the path's shape chose the starting side.
:::static
// One turn of a circle around y = z = 0, with x running along: a coil when laid on a path.
val turn = fline {
    moveTo(0, 1, 0)
    for (i in 1..60) {
        val a = i / 60.0 * 2 * Math.PI
        lineTo(i / 60.0, Math.cos(a), Math.sin(a))
    }
}

val path = fline {
    moveTo(-150, 0, -60)
    cubicTo(-60, 160, 120, 60, -160, -120, 150, 40, 80)
    color = vec(1.0, 1.0, 1.0, 0.4)
}

val coil = path.wiggledBy(turn, repeats = 30, subtractChord = false, amplitude = 14, resolution = 60).apply {
    color = vec(0.4, 0.9, 1.0, 0.9)
    thickness = 1.5
}

threeLines(path, coil, channel = "coil3d", height = 430, editable = false)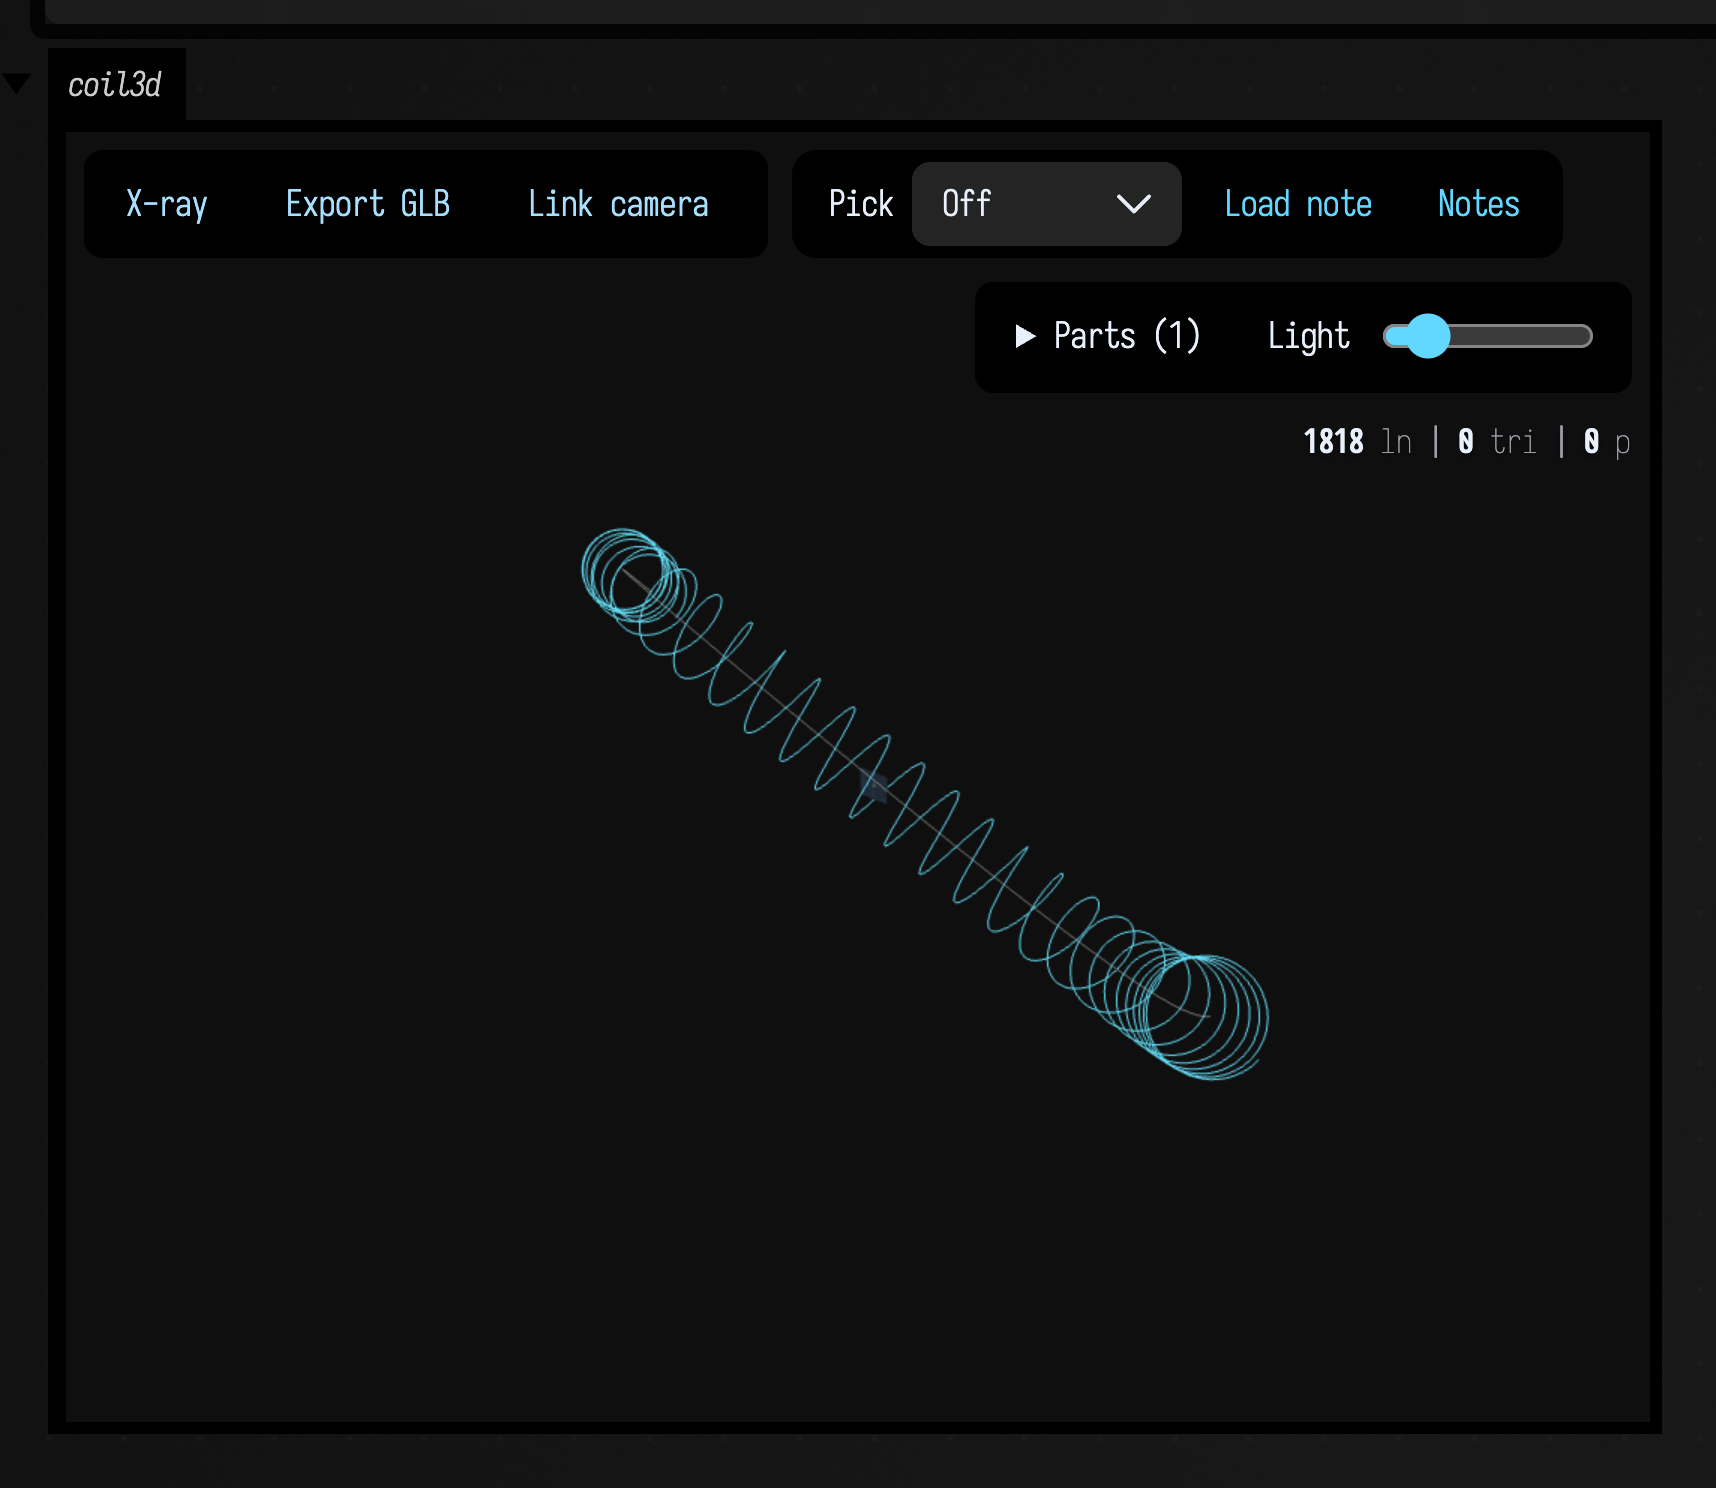
Path operations and fitting
These are higher-level operations that treat an FLine as something you can edit, split, reverse, or fit/smooth into a new representation.
Reverse / blend / extract
| Operation | Behavior |
|---|---|
fun FLine.byReversing(): FLine |
Reverses each subpath while preserving its closed or open status. Use it to change traversal direction without resampling the curve. |
fun FLine.byBlendingWith(other: FLine, t: Float): FLine |
Samples both curves and linearly blends corresponding positions into a polyline: t = 0 selects the first curve and t = 1 the second. Use FLineInterpolator below when contour matching and preserved structure matter. |
fun FLine.byExtracting(tStart: Float, tEnd: Float): FLine |
Returns the portion between two cursor parameters. These use segment coordinates, not a normalized fraction of total arc length; a start beyond the curve returns an empty line. |
:::static
val a = fline {
    moveTo(0, 150)
    cubicTo(40, 0, 160, 200, 200, 50)
    thickness = 1.0
    color = vec(1.0, 1.0, 1.0, 0.35)
}

// 1: reversed. The same shape; the dot marks where it now starts.
val b = a.byReversing().apply {
    thickness = 2.0
    color = vec(1.0, 0.4, 0.4, 1.0)
}
val bStart = b.sampleByNumber(2).first()
val startDot = fline {
    moveTo(bStart.x, bStart.y)
    lineTo(bStart.x + 0.001, bStart.y + 0.001)
    pointed = true
    pointSize = 5.0
    stroked = false
    color = vec(1.0, 0.4, 0.4, 1.0)
}

// 2: half way between a and a flat line.
val flat = fline {
    moveTo(0, 150)
    lineTo(200, 150)
    thickness = 1.0
    color = vec(1.0, 1.0, 1.0, 0.35)
}
val mid = a.byBlendingWith(flat, t = 0.5f).apply {
    thickness = 2.0
    color = vec(0.4, 1.0, 0.6, 1.0)
}

// 3: the piece of the cubic between t = 0.3 and t = 0.8
val snippet = a.byExtracting(tStart = 0.3f, tEnd = 0.8f).apply {
    thickness = 3.0
    color = vec(1.0, 0.7, 0.2, 1.0)
}

val dx = vec(260.0, 0.0)
val dx2 = vec(520.0, 0.0)
lines(
    a,
    b,
    startDot,
    a + dx,
    flat + dx,
    mid + dx,
    a + dx2,
    snippet + dx2,
    w = 720.0,
    h = 220.0,
    fitToSize = true,
)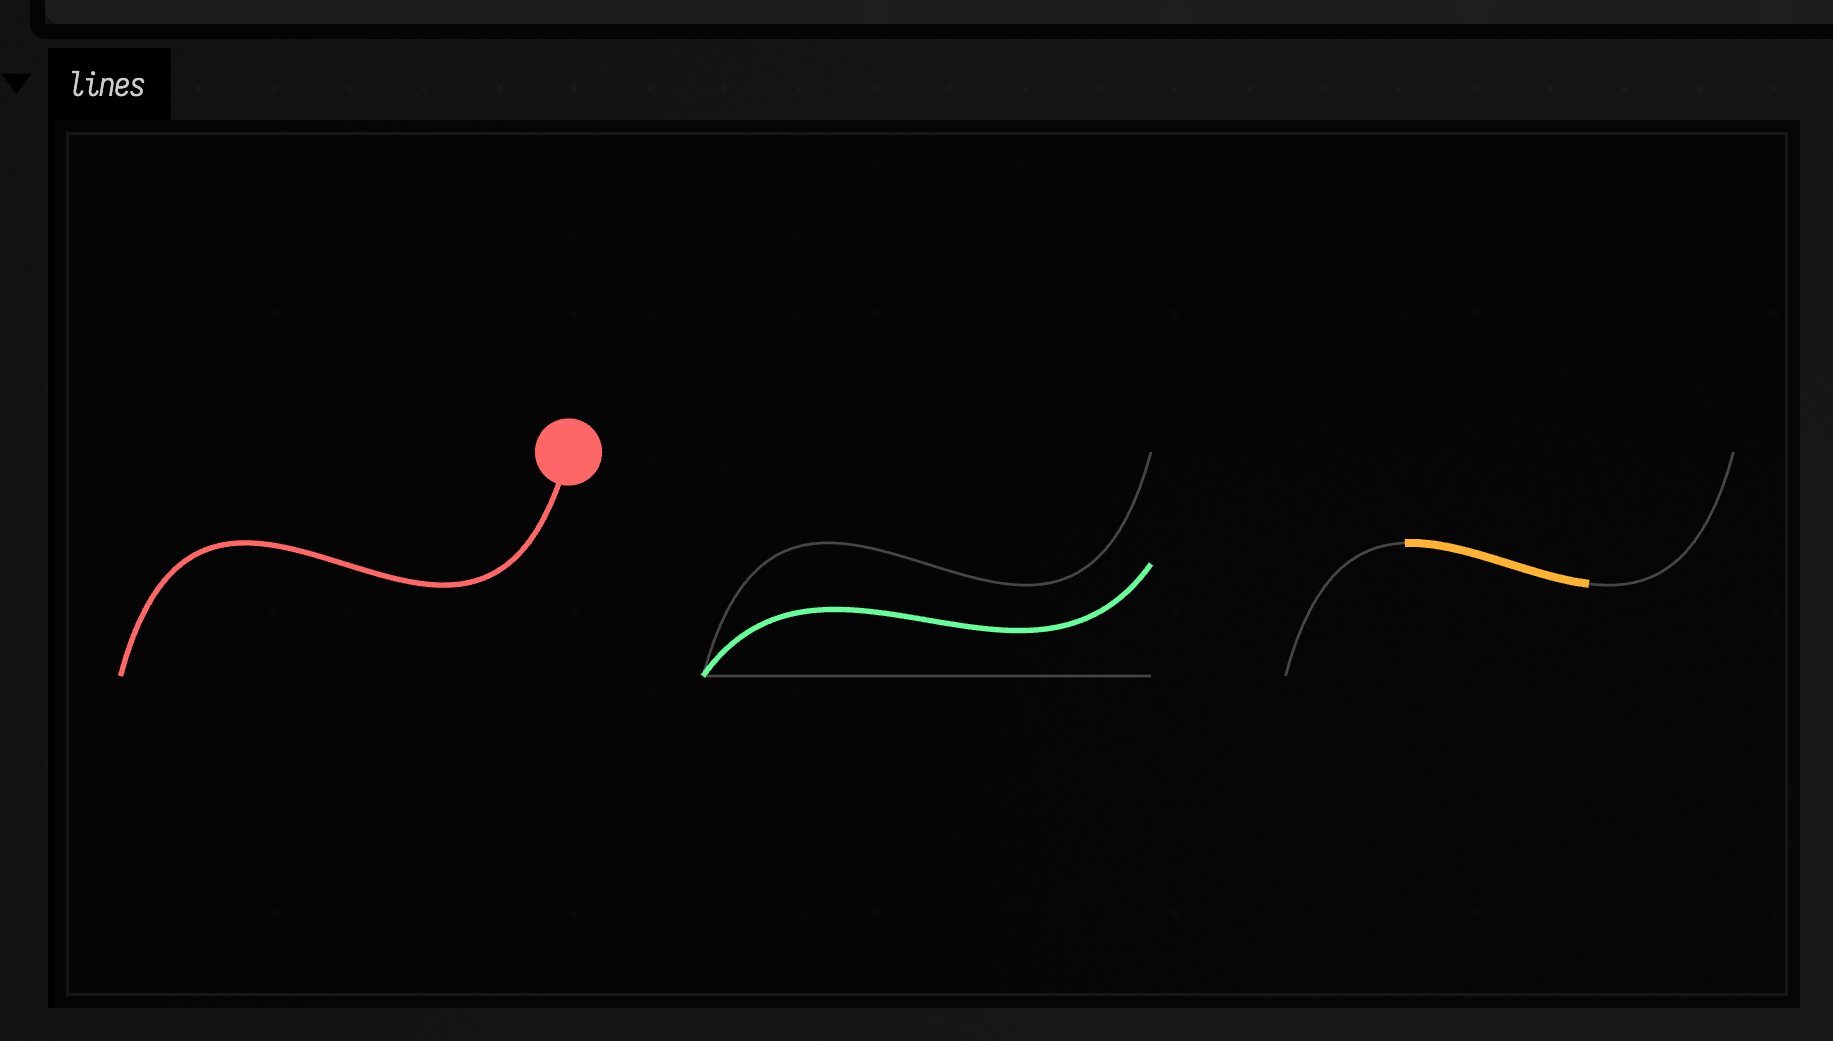
Left: the reversed line, starting at the dot. Middle: half way between the curve and a flat line. Right: the piece of the cubic between t = 0.3 and t = 0.8.
Contour-aware morphing: FLineInterpolator
FLineInterpolator resamples and matches two contours before morphing between them. This helps
when the shapes have different point counts or their outlines start in different places. It works
reliably on a single contour: one moveTo(...), with open contours as the safest default.
:::static
class FLineInterpolator(
    from: FLine,
    to: FLine,
    config: FLineInterpolationConfig = FLineInterpolationConfig(),
)

fun FLine.interpolatorTo(
    other: FLine,
    config: FLineInterpolationConfig = FLineInterpolationConfig(),
): FLineInterpolator

fun FLine.byInterpolatingTo(
    other: FLine,
    t: Float,
    config: FLineInterpolationConfig = FLineInterpolationConfig(),
    motion: FLineInterpolationMotion = config.motion,
): FLine

fun FLineInterpolator.lineAt(
    t: Float,
    motion: FLineInterpolationMotion = config.motion,
): FLine
Vanilla: one interpolator, several frames
:::static
// An S that morphs into a curl. They have different numbers of segments:
// the interpolator resamples both so that they can be matched point for point.
val f = fline {
    moveTo(0, 50)
    cubicTo(30, 0, 70, 100, 100, 50)
}

val f2 = fline {
    moveTo(0, 90)
    cubicTo(0, 0, 100, 0, 100, 60)
    cubicTo(100, 100, 45, 100, 45, 65)
}

fun ink(line: FLine, tint: Vec4, thick: Double) = line.apply {
    filled = false
    stroked = true
    thickness = thick
    color = tint
}

// blue at t = 0, through to orange at t = 1
fun tint(t: Float) = vec(0.4 + 0.6 * t, 0.85 - 0.25 * t, 1.0 - 0.75 * t, 1.0)

val n = 7
val step = 140.0

val ii = FLineInterpolator(f, f2)

// One frame per column, left to right, rather than all of them on top of each other.
val frames =
    (0 until n).map { i ->
        val t = i / (n - 1f)
        ink(ii.lineAt(t), tint(t), 3.0) + vec(i * step, 0.0)
    }

lines(frames, w = 720.0, h = 160.0, fitToSize = true)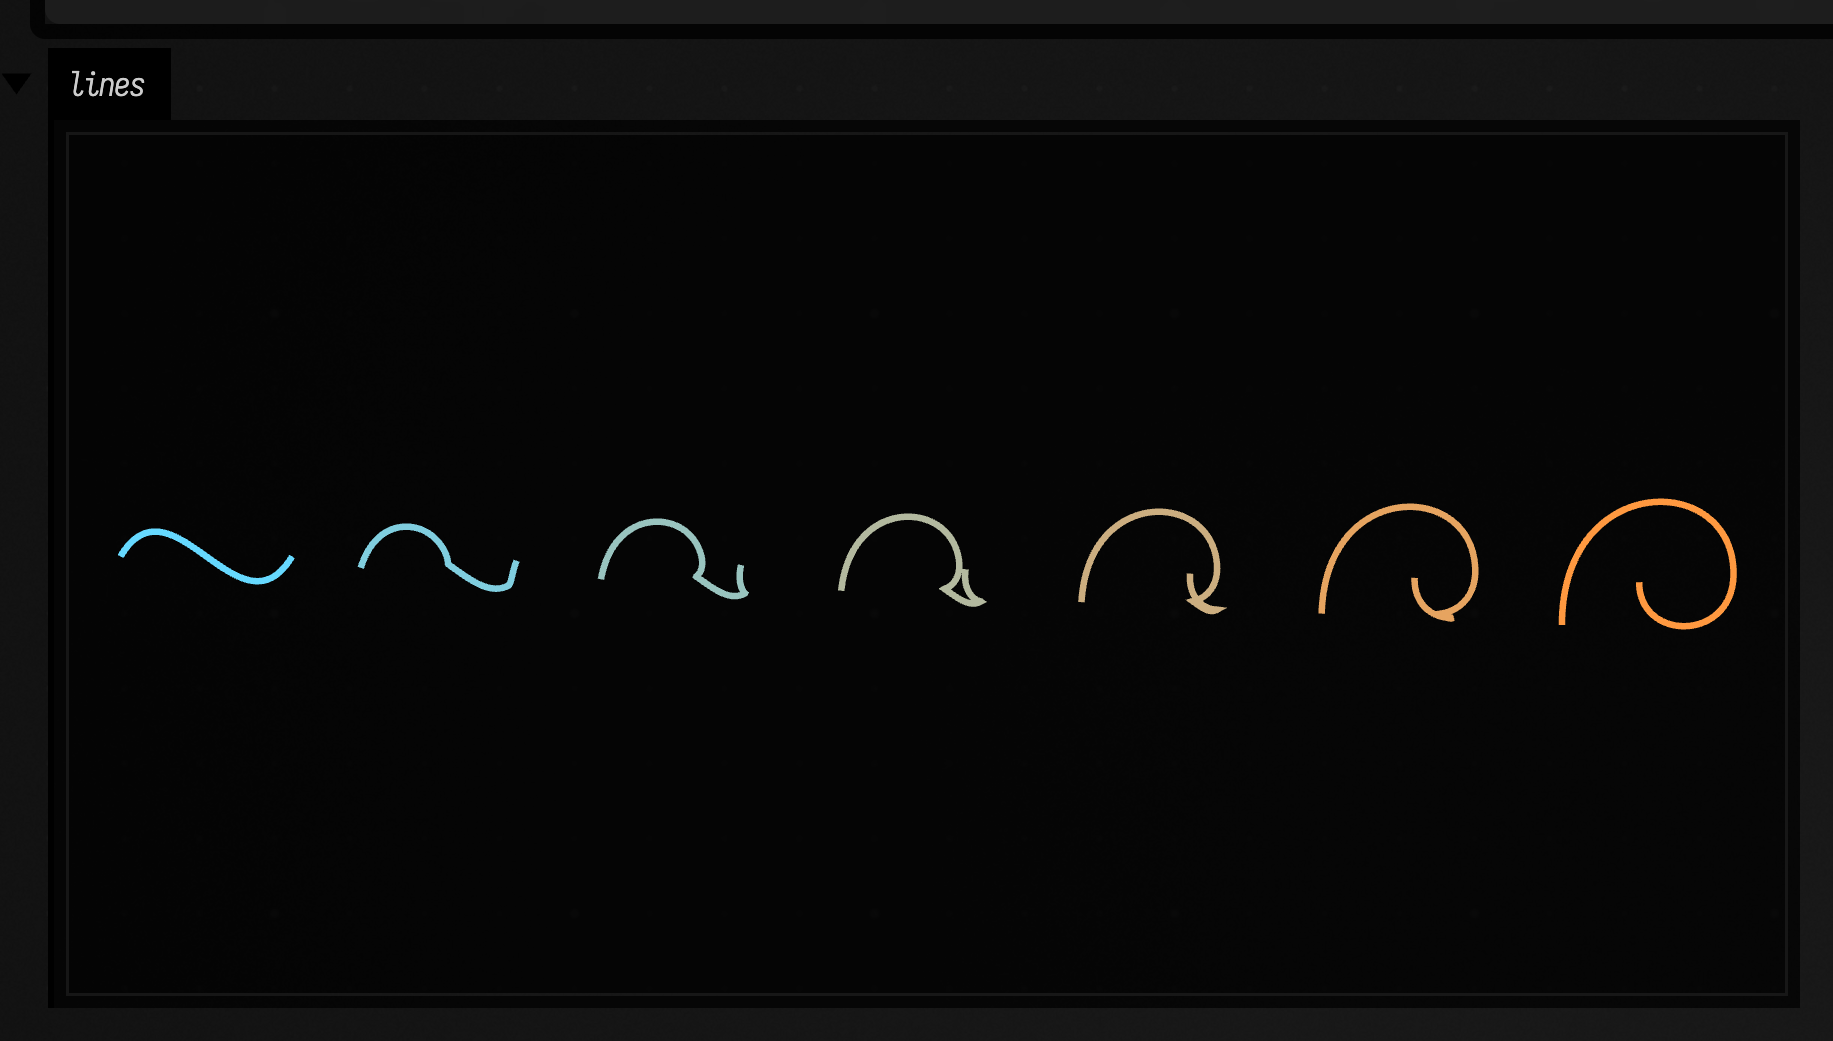
This is the basic pattern: two contours in, one reusable interpolator out, then sample lineAt(t) as many times as you want. The seven frames run from t = 0 (the S, blue) to t = 1 (the curl, orange).
Spicy 1: rotation-aware matching
:::static
fun asymmetricStroke() =
    polylineFrom(
            [
                vec(-150, 20),
                vec(-80, -110),
                vec(-10, -30),
                vec(35, 120),
                vec(90, 40),
                vec(150, -60),
            ],
        )
        .apply {
            filled = false
            stroked = true
            thickness = 2.0
        }

val start = asymmetricStroke()
val end =
    asymmetricStroke()
        .byRotating2D(1.7f, center = vec(0f, 0f))
        .byScaling2D(0.78f, 1.24f, center = vec(0f, 0f))
        .byShearing2D(0.18f, -0.08f)

val vanilla = start.interpolatorTo(end)
val aligned = start.interpolatorTo(
    end,
    config = FLineInterpolationConfig(
        alignment = FLineInterpolationAlignment(
            rotationMode = FLineInterpolationRotationMode.FIT_LINE_2D,
            scaleMode = FLineInterpolationScaleMode.BOUNDS_DIAGONAL,
        ),
    ),
)

// Nine in-between shapes, t = 0.1 ... 0.9, shaded from the start's blue to the end's orange.
fun sweep(interpolator: FLineInterpolator) = (1..9).map { i ->
    val t = i / 10f
    interpolator.lineAt(t).apply {
        filled = false
        stroked = true
        thickness = 1.6
        color = vec(0.45 + 0.55 * t, 0.75 - 0.2 * t, 1.0 - 0.75 * t, 0.85)
    }
}

fun ghost(line: FLine, tint: Vec4) = line.copy().apply {
    filled = false
    stroked = true
    thickness = 1.8
    color = tint
}

val leftShift = vec(-190, 0, 0)
val rightShift = vec(190, 0, 0)

val panels = [
    fline {
        rect(-330, -160, 300, 320)
        filled = true
        stroked = false
        color = vec(0.12, 0.15, 0.19, 0.28)
    },
    fline {
        rect(30, -160, 300, 320)
        filled = true
        stroked = false
        color = vec(0.15, 0.12, 0.09, 0.28)
    },
]

val alignedLines: List<FLine> = [
    ghost(start, vec(0.76, 0.9, 1.0, 0.20)) + leftShift,
    ghost(end, vec(1.0, 0.8, 0.5, 0.20)) + leftShift,
    ghost(start, vec(0.76, 0.9, 1.0, 0.20)) + rightShift,
    ghost(end, vec(1.0, 0.8, 0.5, 0.20)) + rightShift,
] + sweep(vanilla).map { it + leftShift } + sweep(aligned).map { it + rightShift }
val comparison = panels + alignedLines

lines(comparison, w = 720.0, h = 360.0, fitToSize = true)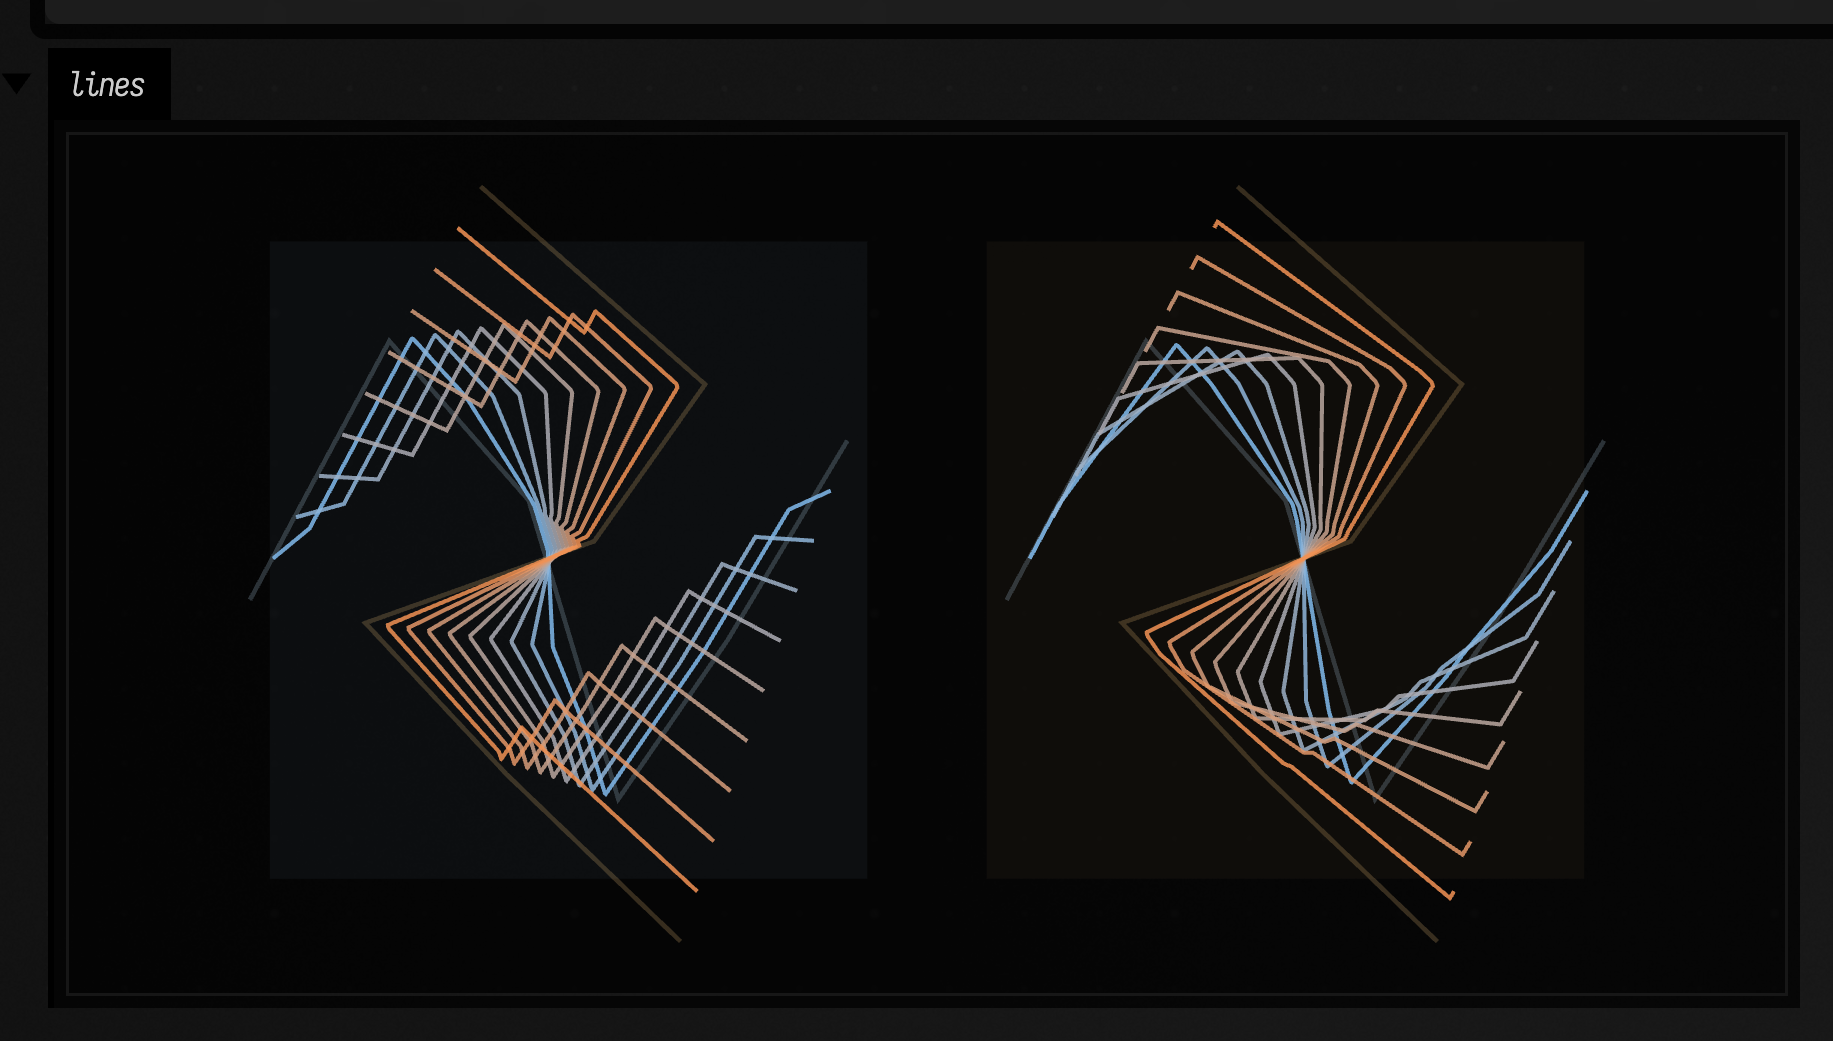
Both panels show nine in-between shapes from t = 0.1 (blue) to t = 0.9 (orange). On the left, the default interpolator moves each point straight to its partner, so the in-between shapes zigzag and collapse toward the centre as they cut across the rotation. On the right, FIT_LINE_2D aligns the shapes before matching points, so the in-between strokes sweep around more smoothly, though they still pinch near the centre.
Spicy 2: extra motion at evaluation time
:::static
// An S that morphs into a curl. They have different numbers of segments:
// the interpolator resamples both so that they can be matched point for point.
val f = fline {
    moveTo(0, 50)
    cubicTo(30, 0, 70, 100, 100, 50)
}

val f2 = fline {
    moveTo(0, 90)
    cubicTo(0, 0, 100, 0, 100, 60)
    cubicTo(100, 100, 45, 100, 45, 65)
}

fun ink(line: FLine, tint: Vec4, thick: Double) = line.apply {
    filled = false
    stroked = true
    thickness = thick
    color = tint
}

// blue at t = 0, through to orange at t = 1
fun tint(t: Float) = vec(0.4 + 0.6 * t, 0.85 - 0.25 * t, 1.0 - 0.75 * t, 1.0)

val n = 7
val step = 140.0

val plain = FLineInterpolator(f, f2)
val spun = FLineInterpolator(
    f,
    f2,
    FLineInterpolationConfig(
        motion = FLineInterpolationMotion(
            spatialSpinAngle = 1f,
            spatialSpinAxis = vec(0f, 1f, 0.25f),
            spatialSpinMode = FLineInterpolationSpinMode.MIDPOINT_RETURN,
        ),
    ),
)

// Both rows go through the same perspective camera, looking at the middle of the shapes.
fun seen(line: FLine) = line.byPerspectiveProjecting(cameraPos = vec(50f, 50f, -400f))

// Top row: the plain morph. Bottom row: the same morph with the spin.
val frames =
    (0 until n).flatMap { i ->
        val t = i / (n - 1f)
        val at = vec(i * step, 0.0)
        [
            ink(seen(plain.lineAt(t)), vec(1.0, 1.0, 1.0, 0.45), 2.0) + at,
            ink(seen(spun.lineAt(t)), tint(t), 3.0) + at + vec(0.0, 150.0),
        ]
    }

lines(frames, w = 720.0, h = 300.0, fitToSize = true)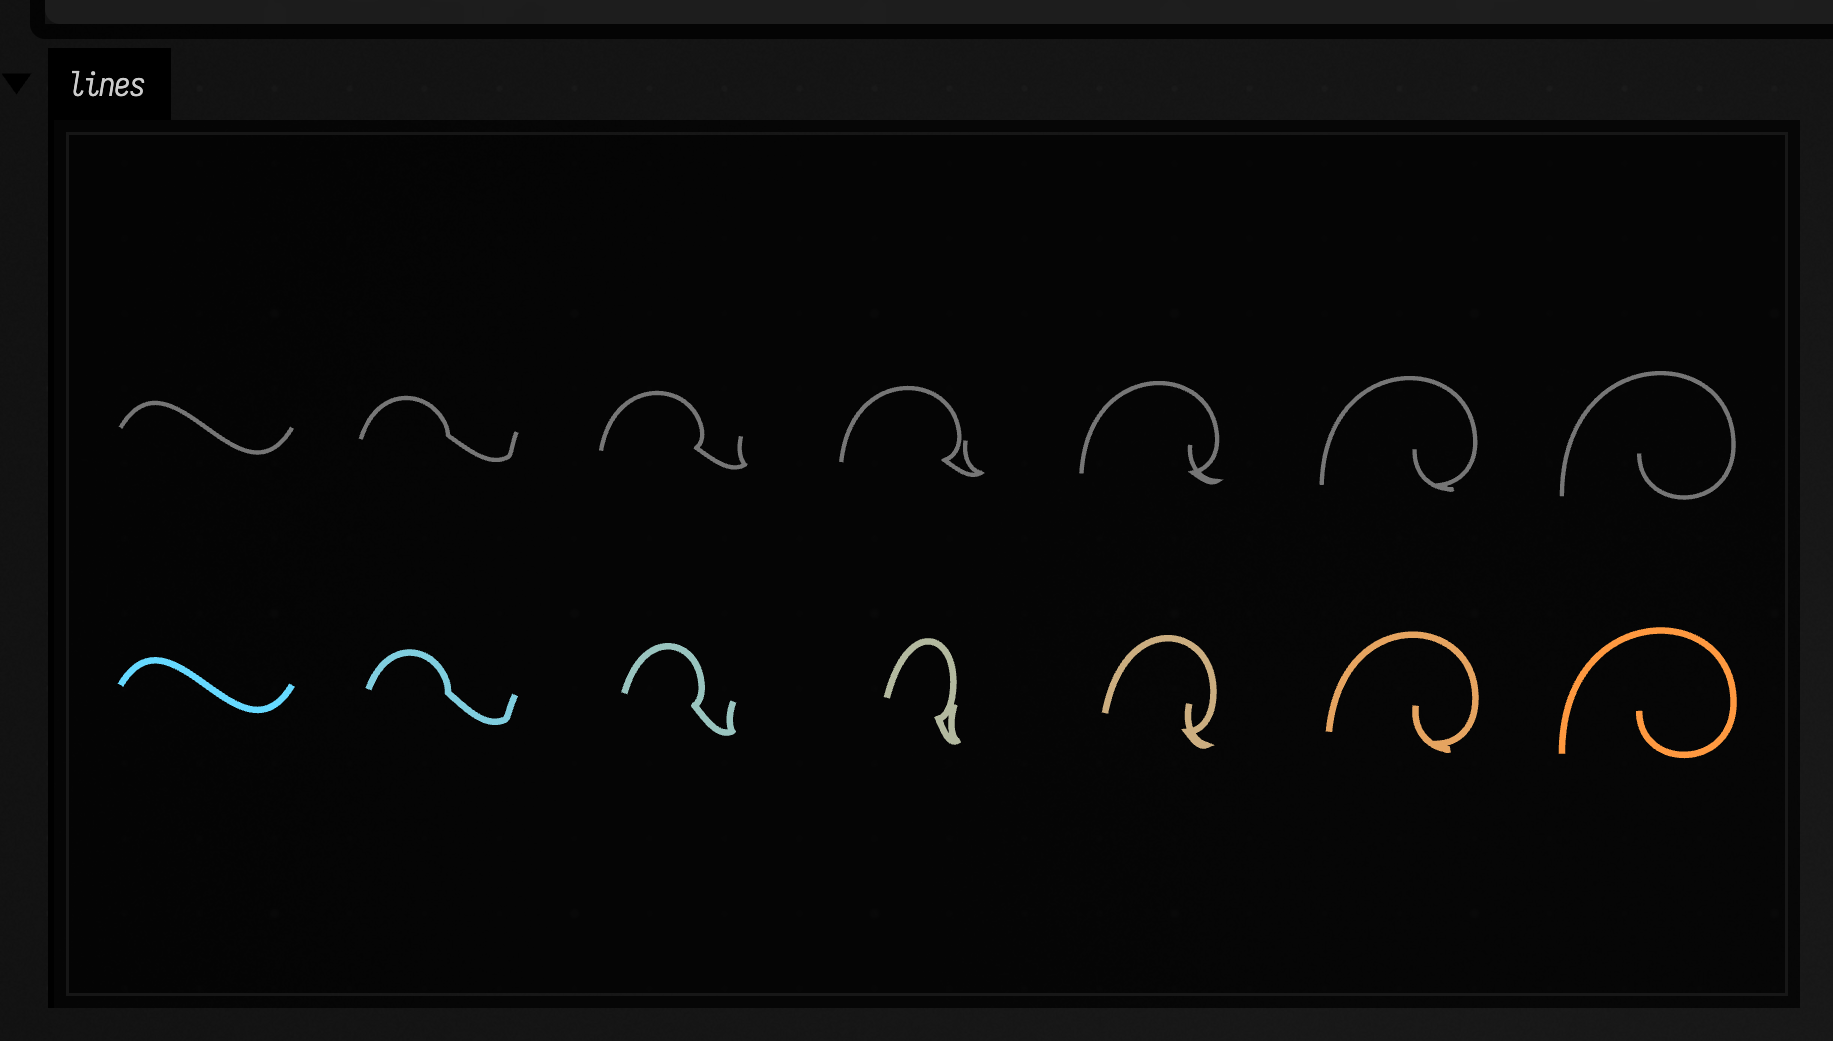
This is the same morph with spatialSpinAngle = 1f in the interpolator config, and both rows go through a perspective projection. The top row is the plain morph, for comparison. In the bottom row the first and last frames still match the source and target, and the spin turns the line away from the camera only in the middle of the morph.
Circle fitting + subdivision
| Operation | Behavior |
|---|---|
fun FLine.fitCircle(samples: Int = 20): Triple<Vec2, Float, Float> |
Fits a circle to samples of the XY curve and returns its center, radius and fitting error. This is an approximation rather than an exact recognition of circular arcs. |
fun FLine.bySubdividing(levels: Int = 1): FLine |
Splits each line or cubic segment in half for every level, while retaining subpath boundaries and closure. Cubics use De Casteljau subdivision, preserving the curve rather than replacing it with a polyline. |
Use fitting to summarize a shape, and subdivision when later editing needs more segments without changing its geometry.
Here a jittered ring is fitted, and one cubic is subdivided zero, one and two times, with its nodes drawn as dots:
// A rough, hand-drawn-looking circle: 40 points at a jittered radius around (60, 60).
val rnd = java.util.Random(4)
val rough = fline {
    for (i in 0..40) {
        val a = 2 * Math.PI * i / 40
        val r = 50 + 6 * rnd.nextGaussian()
        if (i == 0) moveTo(60 + r * Math.cos(a), 60 + r * Math.sin(a))
        else lineTo(60 + r * Math.cos(a), 60 + r * Math.sin(a))
    }
}
    .apply { color = vec(1.0, 1.0, 1.0, 0.8) }

val (centre, radius, error) = rough.fitCircle(samples = 80)
val fitted = FLine().circle(centre.x.toDouble(), centre.y.toDouble(), radius.toDouble()).apply {
    color = vec(1.0, 0.55, 0.2, 1.0)
    thickness = 2.0
}

// One cubic, subdivided 0, 1 and 2 times: the nodes multiply, the curve does not move.
val wave = fline {
    moveTo(0, 60)
    cubicTo(30, -10, 70, 130, 100, 60)
}
val levels =
    (0..2).flatMap { level ->
        val at = vec(170.0 + level * 150.0, 0.0)
        val sub = wave.bySubdividing(level)
        [
            sub.copy().apply { color = vec(0.32, 0.82, 1.0, 1.0) } + at,
            sub.copy().apply {
                stroked = false
                pointed = true
                pointSize = 1.2
                color = vec(1.0, 0.5, 0.25, 1.0)
            } + at,
        ]
    }

display(
    "fit",
    "fitCircle: centre (%.1f, %.1f), radius %.1f, error %.2f · bySubdividing levels 0, 1, 2"
        .format(centre.x, centre.y, radius, error),
)
lines([rough, fitted] + levels, w = 720.0, h = 220.0, fitToSize = true)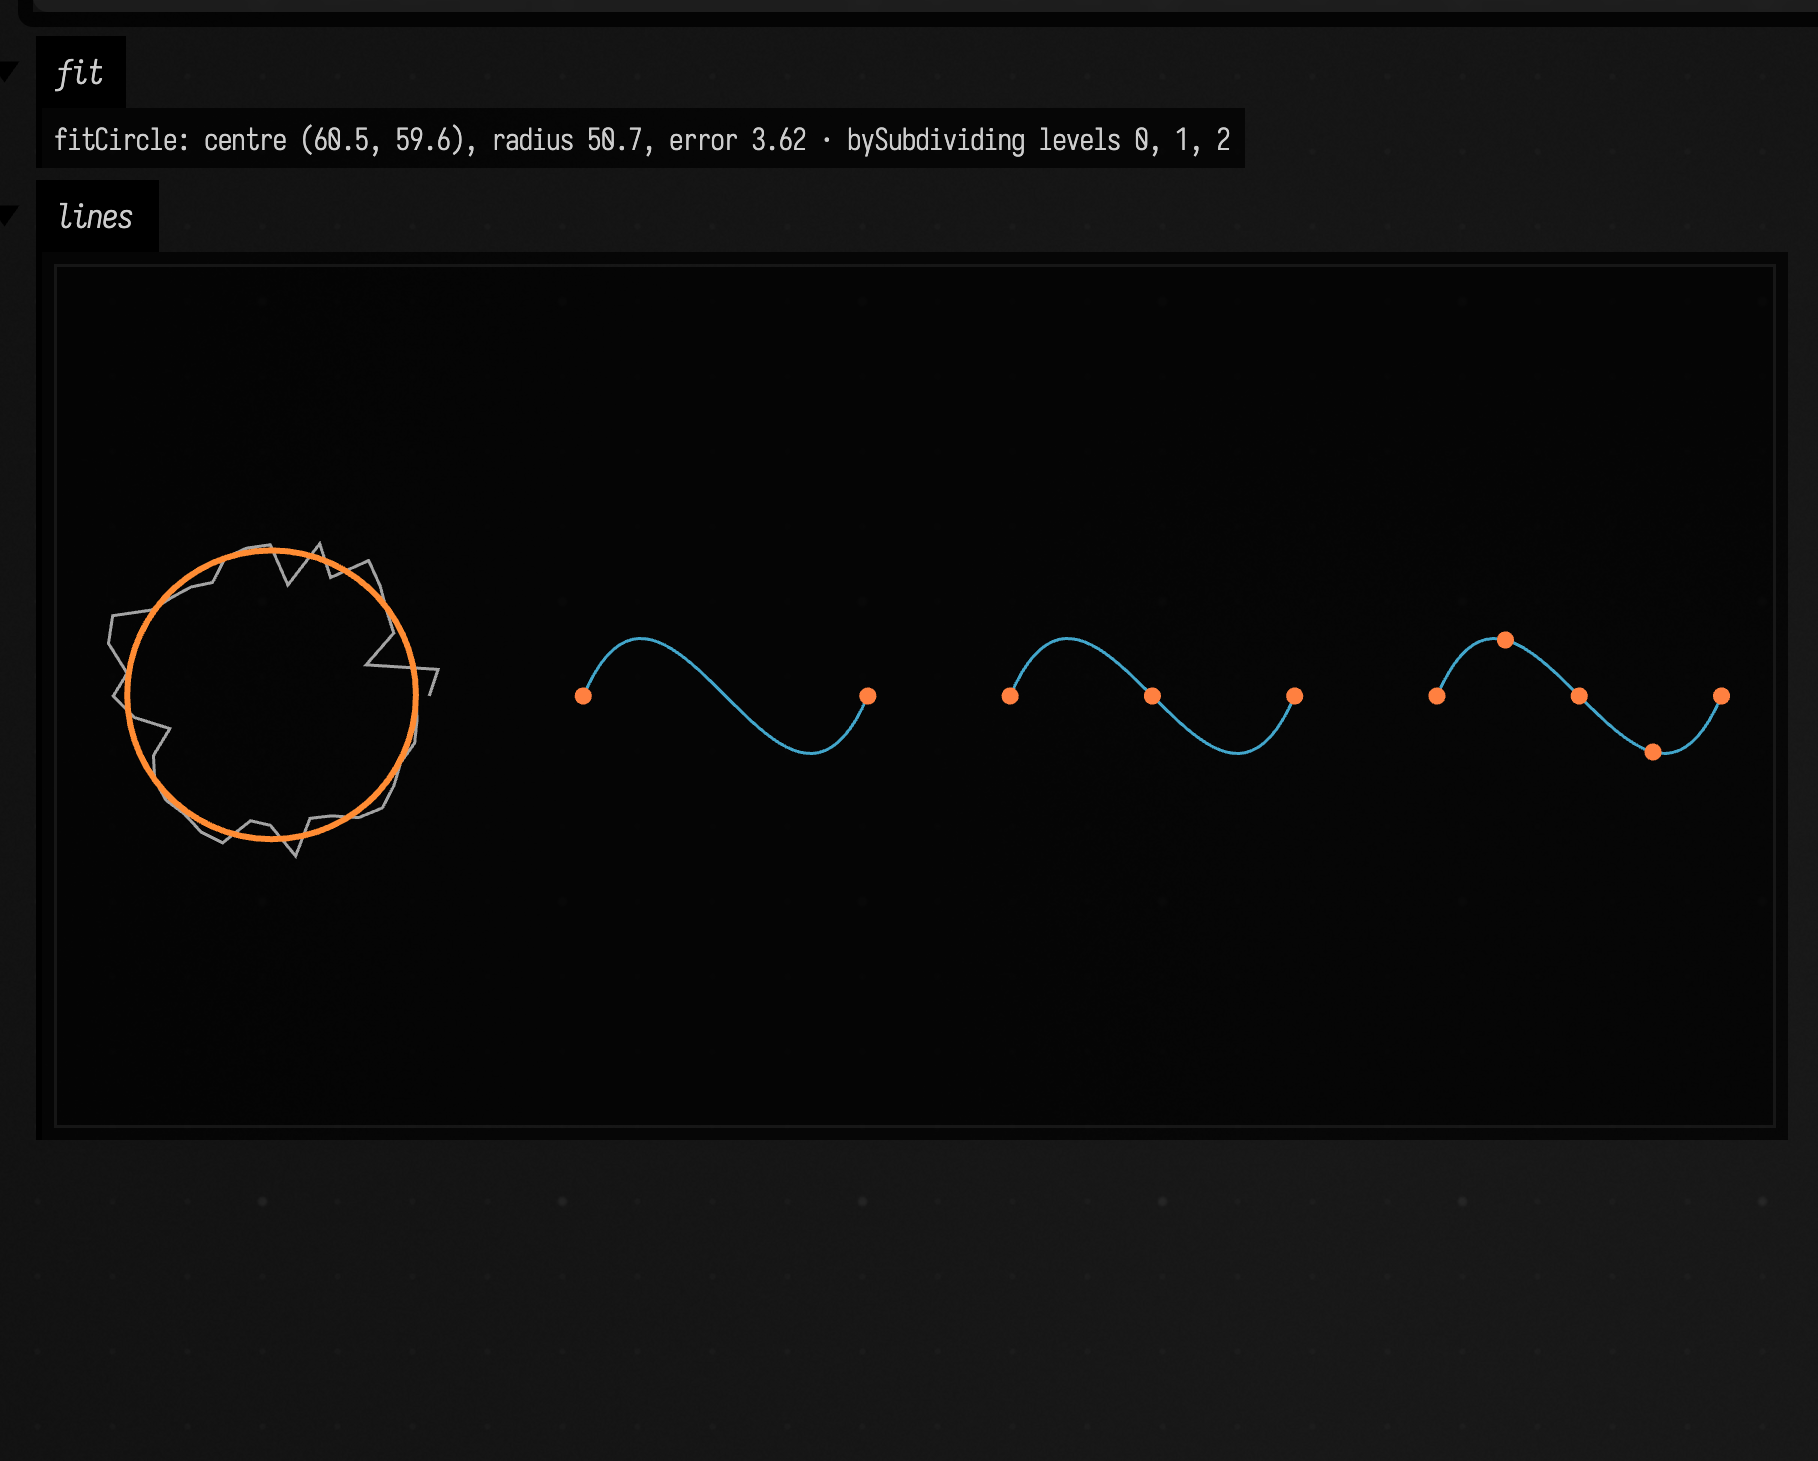
Advanced / experimental curves (FLineGeometry)
These are more specialized tools that are still extremely useful when you need them.
Euler spiral in 3D (clothoid-ish connection)
This builds the curve between two points that leaves along one direction and arrives along another, with curvature changing at a constant rate along its length. It’s good for motion paths and for joining strokes without a kink. The curve is solved in the plane of the two directions; if the end point is out of that plane, the curve climbs to it at a constant slope.
:::static
fun eulerSpiralBetween3D(
    start: Vec3,
    startDirection: Vec3,
    end: Vec3,
    endDirection: Vec3,
    samples: Int = 200,
    iterations: Int = 6,
    lengthScale: Float = 1f,
    headingScale: Float = 1f,
    turn: Float = 0f,
): FLine

fun FLine.byEulerSpiralTo(
    endPoint: Vec3,
    startDirection: Vec3? = null,
    endDirection: Vec3? = null,
    samples: Int = 200,
    iterations: Int = 6,
    lengthScale: Float = 1f,
    headingScale: Float = 1f,
    turn: Float = 0f,
): FLine

fun FLine.eulerSpiralTo(
    endPoint: Vec3,
    startDirection: Vec3? = null,
    endDirection: Vec3? = null,
    samples: Int = 200,
    iterations: Int = 6,
    lengthScale: Float = 1f,
    headingScale: Float = 1f,
    turn: Float = 0f,
): FLine.Node
This is essentially an Euler spiral / clothoid.
:::static
val start = vec(60, 180, 0)
val end = vec(360, 120, 0)

val f = fline {
    moveTo(start)
    // Start direction points right; end direction points up-left.
    eulerSpiralTo(
        endPoint = end,
        startDirection = vec(1f, 0f, 0f),
        endDirection = vec(-0.2f, -1f, 0f),
        samples = 160,
        iterations = 6,
    )
    thickness = 2.0
    color = vec(1.0, 0.7, 0.2, 1.0)
}

val endDirs = [
    seg(start.v2, (start + vec(60, 0, 0)).v2, pointed = false, color = vec(1.0, 1.0, 1.0, 0.25)).apply {
        thickness = 2.0
    },
    seg(end.v2, (end + vec(-15, -60, 0)).v2, pointed = false, color = vec(1.0, 1.0, 1.0, 0.25)).apply {
        thickness = 2.0
    },
]

val baseLine: List<FLine> = [f]
lines(endDirs + baseLine, w = 420.0, h = 260.0, fitToSize = true)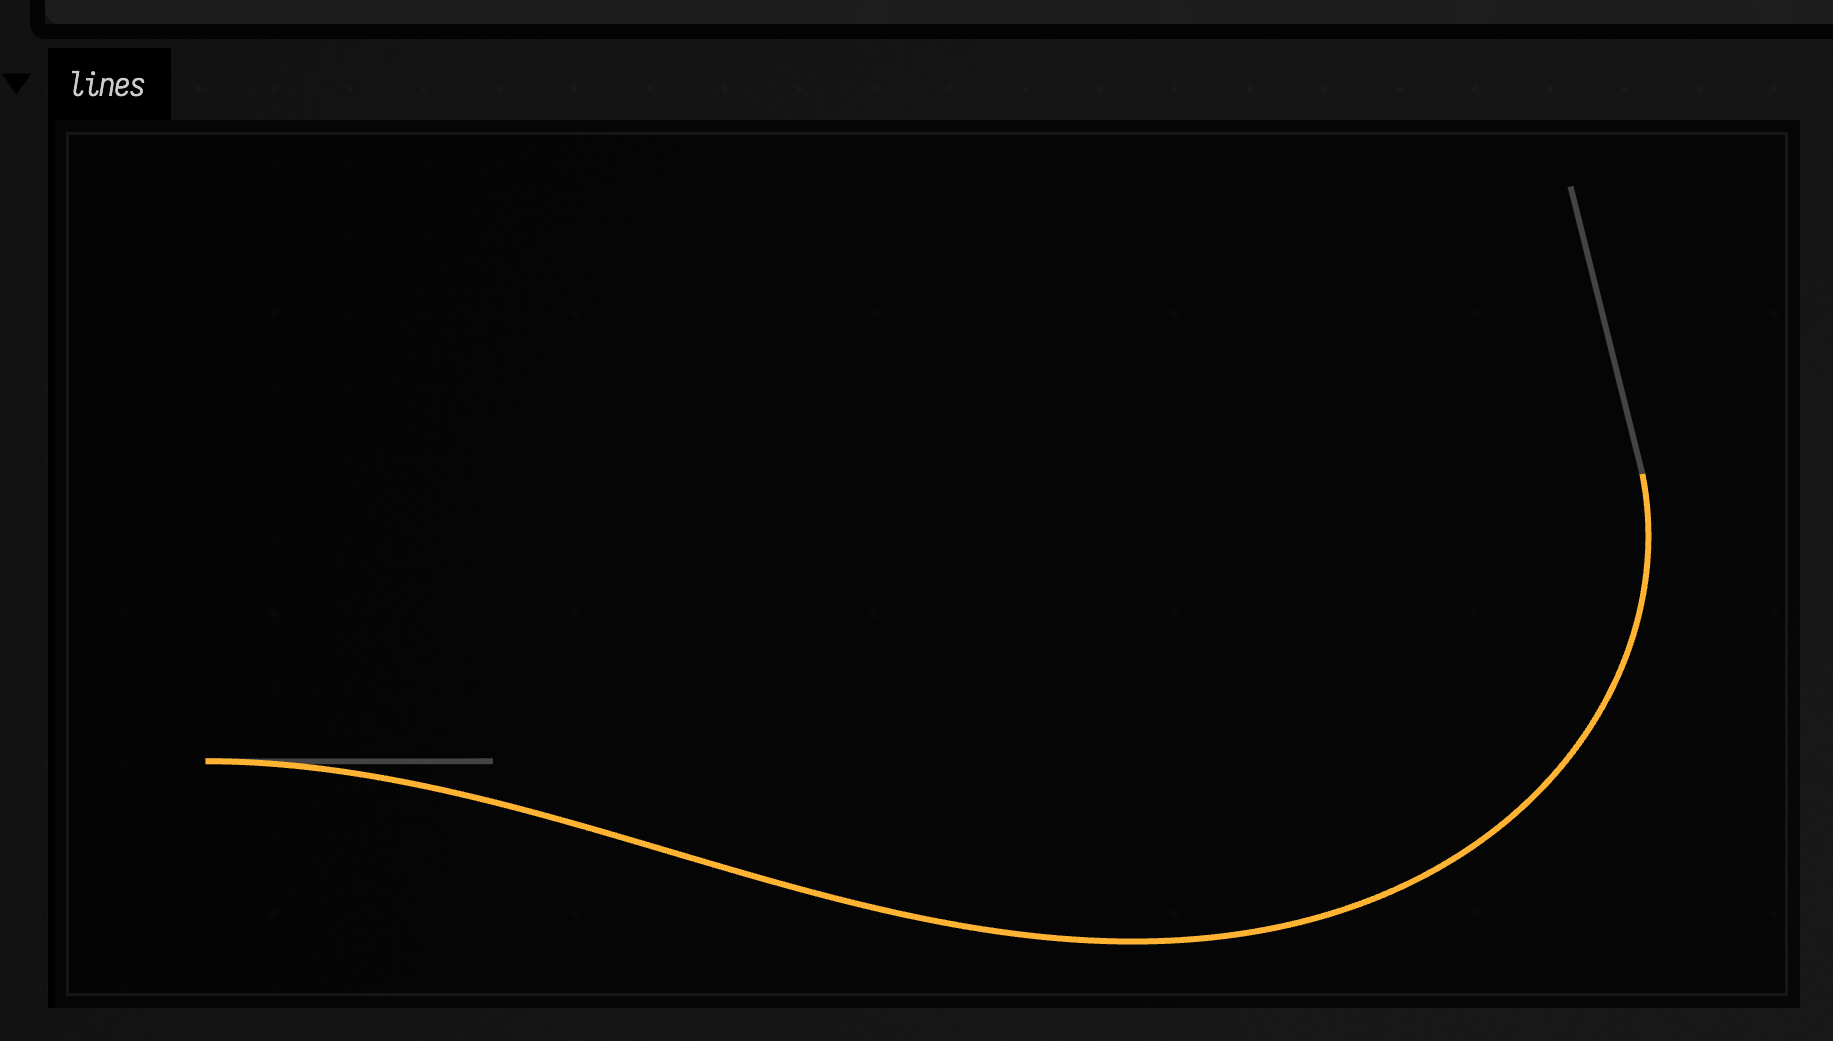
Hyperbezier (curvature-controlled stand-in for a cubic)
hyperbezierTo takes exactly the four points cubicTo takes — a start, two control points, an end — and draws a different curve through that polygon: a hyperbezier, whose curvature is a rational function of arc length rather than whatever a cubic's polynomial happens to give you. So it is a drop-in swap: change the call, keep the handles.
:::static
fun FLine.hyperbezierTo(
    control1: Vec3,
    control2: Vec3,
    endPoint: Vec3,
    tolerance: Number = 1e-4,
    maxSegments: Int = 16,
    cornerBias: Number = 1.0,
    armResponse: Number = 2.0
): FLine

fun FLine.byHyperbezierTo(control1: Vec3, control2: Vec3, endPoint: Vec3, ...): FLine

fun hyperbezierBetween(p0: Vec3, control1: Vec3, control2: Vec3, p3: Vec3, ...): FLine

fun hyperbezierThrough(
    points: List<Vec3>,
    tension: Number = 1.0,
    closed: Boolean = false,
    ...
): FLine

fun fitHyperbezierCubics(p0: Vec3, control1: Vec3, control2: Vec3, p3: Vec3, ...): HyperbezierFit

fun circleArm(angle: Double): Double
It hands back several ordinary CubicTo nodes fitted to that curve, which means nothing downstream has to know about any of it — renderers, boolean ops, offsetting and hit-testing all keep working. The joins are G1 by construction, because every one of them uses the hyperbezier's own tangent.
The interesting behaviour is what happens as the arms grow. circleArm(theta) is the arm length at which the curve is an exact circular arc — and an exact Euler spiral when the two tangent angles disagree. Push the arms out past that and a hyperbezier tightens towards a corner, where a cubic merely bulges.
:::static
// Six panels, reading left to right then top to bottom. The chord and the +/-45 degree
// end tangents are held fixed; only the arm length changes, as a multiple of circleArm.
val chord = 200.0
val theta = Math.PI / 4
val multiples = [0.4, 0.7, 1.0, 1.4, 1.9, 2.4]

val out = mutableListOf<FLine>()
multiples.forEachIndexed { i, multiple ->
    val arm = multiple * circleArm(theta)
    val ox = (i % 3) * (chord + 55.0)
    val oy = (i / 3) * 195.0
    val p0 = vec(ox, oy, 0)
    val p3 = vec(ox + chord, oy, 0)
    // y grows downwards in the 2D outputs, so the arms lift by going negative.
    val c1 = vec(ox + arm * chord * Math.cos(theta), oy - arm * chord * Math.sin(theta), 0)
    val c2 = vec(ox + chord - arm * chord * Math.cos(theta), oy - arm * chord * Math.sin(theta), 0)

    // the control polygon both curves are reading
    out += fline {
        moveTo(p0)
        lineTo(c1)
        lineTo(c2)
        lineTo(p3)
        thickness = 1.0
        color = vec(1.0, 1.0, 1.0, 0.18)
    }
    // the ordinary cubic through it
    out += fline {
        moveTo(p0)
        cubicTo(c1, c2, p3)
        thickness = 6.0
        color = vec(1.0, 1.0, 1.0, 0.22)
    }
    // the hyperbezier, as fitted cubics
    out += fline {
        moveTo(p0)
        hyperbezierTo(c1, c2, p3)
        thickness = 2.0
        color = vec(0.35, 0.66, 1.0, 1.0)
    }
}

lines(out, w = 700.0, h = 320.0, fitToSize = true)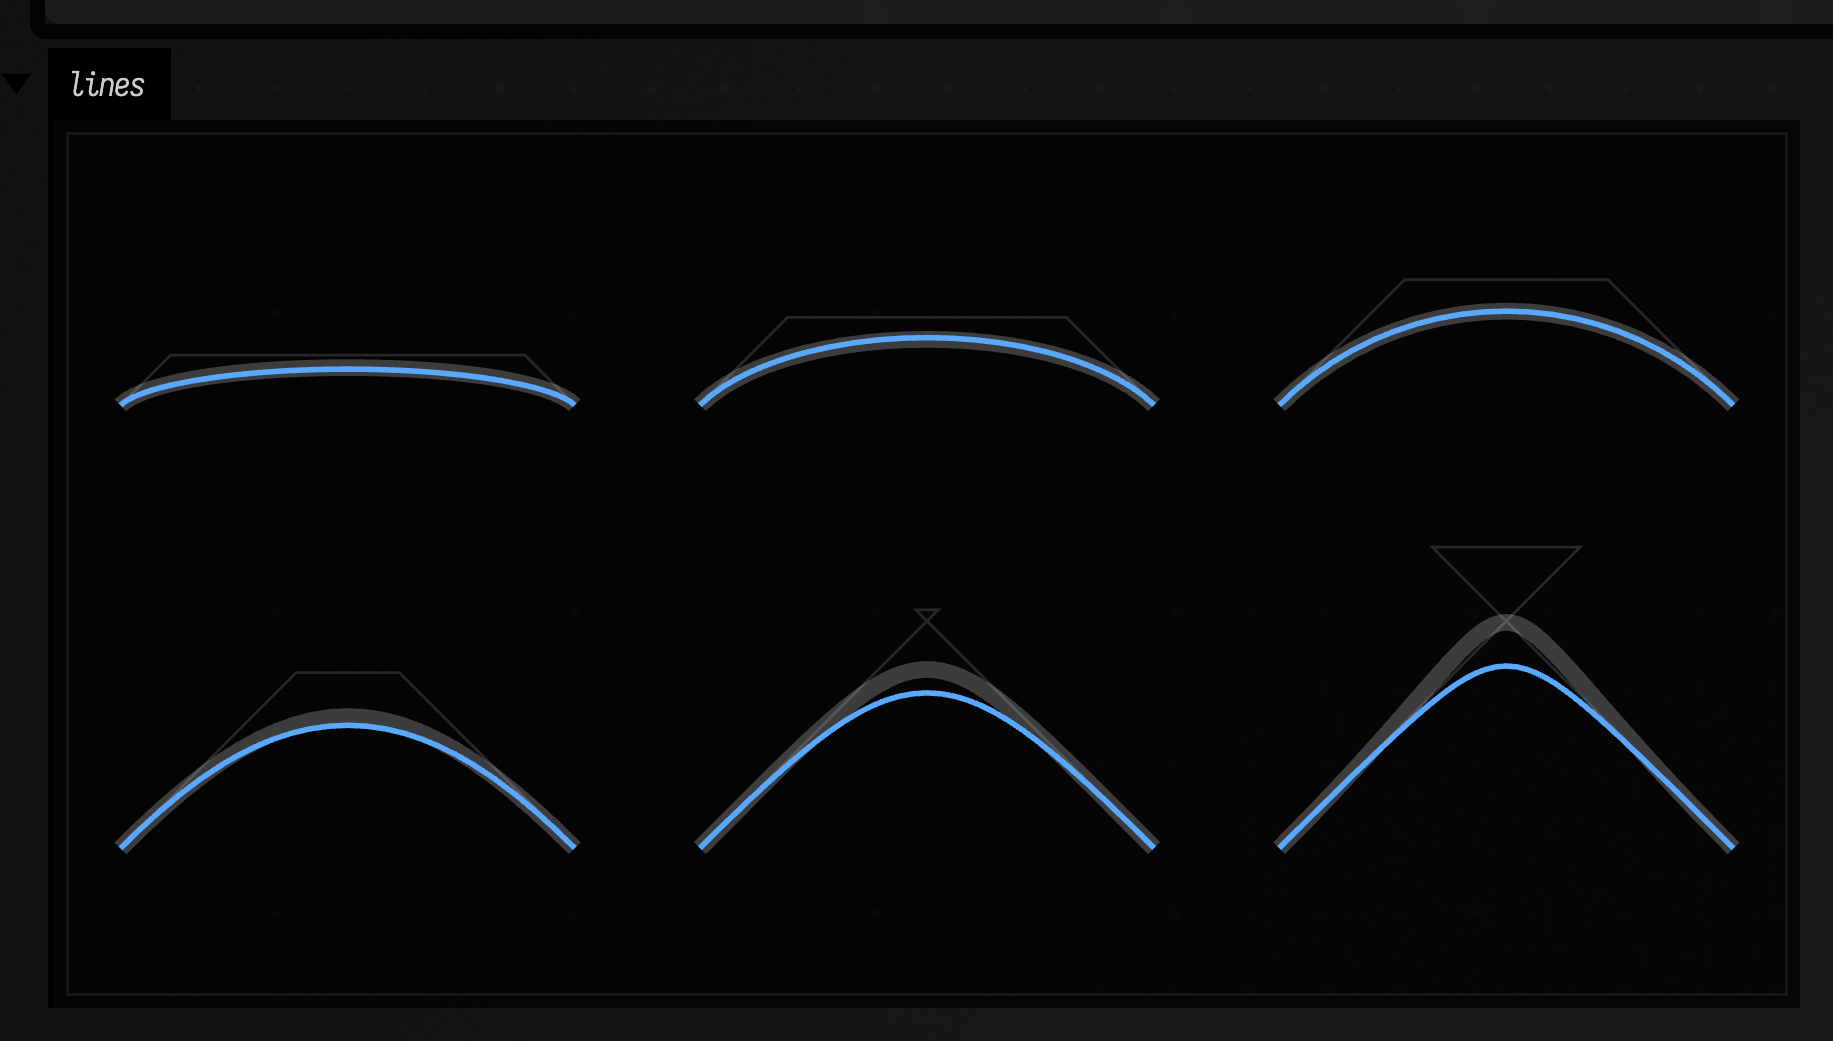
The thick pale line is the plain cubic, the blue one is the hyperbezier, and the faint outline is the control polygon they are both reading. The first two panels have short arms and the curves are nearly flat and nearly identical. The third is circleArm exactly: here the hyperbezier is a true circular arc, and the cubic — which is only ever an approximation to one — is close enough to hide underneath it. The bottom row is where they part company. At 1.4x, 1.9x and 2.4x the circle arm the cubic is pulled up into a near-point at the control polygon's apex, while the hyperbezier stays lower and keeps its curvature spread along the arc.
The one thing the family cannot do is a cubic's second inflection, so a polygon that crosses itself in an S-of-an-S is not representable. Everything else about the shape is fair game.
Use fitHyperbezierCubics directly when you want the numbers rather than the line:
:::static
val fit = fitHyperbezierCubics(p0, c1, c2, p3, tolerance = 1e-4)
fit.segmentCount // how many cubics it took
fit.maxError // worst distance from the true curve, in world units
fit.toleranceMet // false if maxSegments ran out first
fit.solved // false if the solver stalled; cubics is then your input, unchanged
fit.cubics // the (control1, control2, end) triples
tolerance is a fraction of the chord length, so a fit does not change character with scale, and maxSegments is spent on whichever piece is currently worst — which matters for short-armed shapes, where all the error lives in a tight hook at each end and none of it in the middle.
hyperbezierThrough runs the same machinery over a whole point list, estimating tangents Catmull-Rom style and fitting each span:
:::static
val pts = [
    vec(40, 70, 0),
    vec(150, 200, 0),
    vec(260, 80, 0),
    vec(370, 210, 0),
    vec(470, 60, 0),
]

val loose = hyperbezierThrough(pts, tension = 1.0).apply {
    thickness = 2.5
    color = vec(0.35, 0.66, 1.0, 1.0)
}
val tight = hyperbezierThrough(pts, tension = 0.45).apply {
    thickness = 2.0
    color = vec(1.0, 0.62, 0.25, 0.9)
}

val dots = pts.map { p ->
    rect(p.x - 3.0, p.y - 3.0, 6.0, 6.0).toFLine(color = vec(1.0, 1.0, 1.0, 0.75), filled = true, stroked = false)
}

val curves: List<FLine> = [loose, tight]
lines(dots + curves, w = 520.0, h = 260.0, fitToSize = true)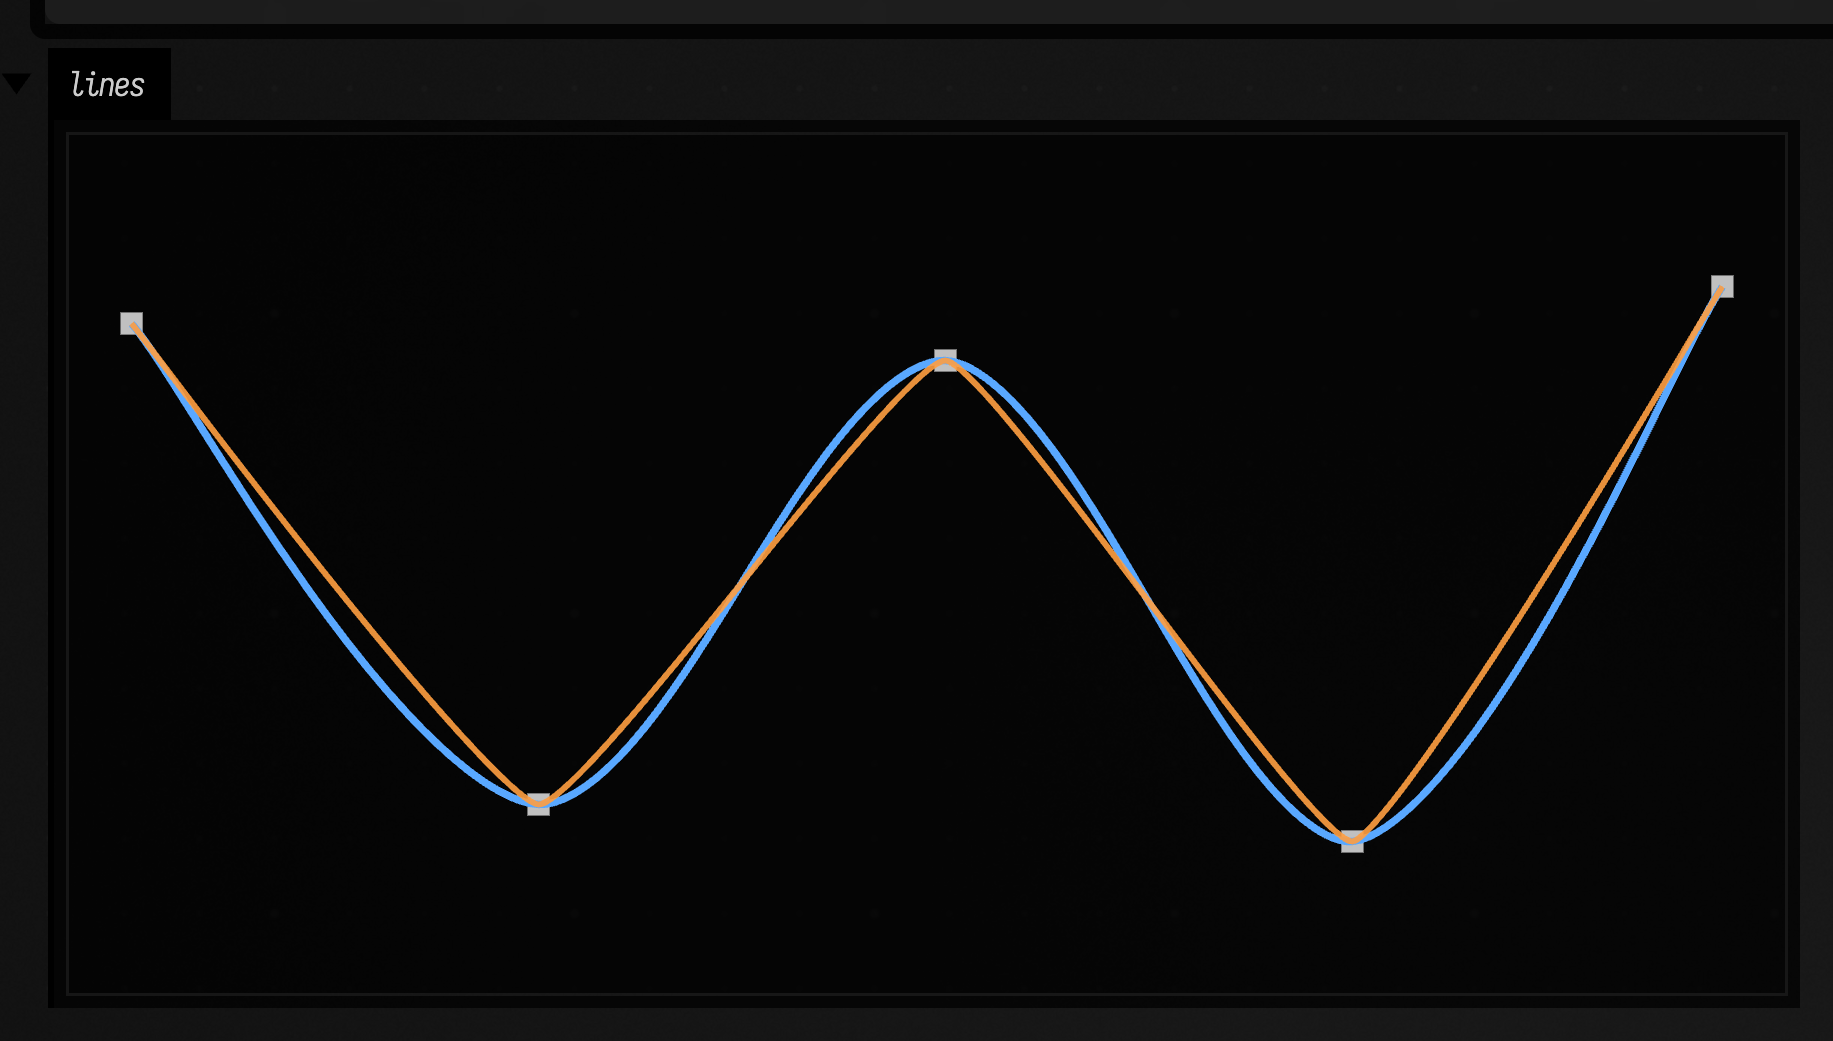
Blue is the default tension = 1.0; orange is tension = 0.45, which shortens the estimated arms and pulls the curve tighter to the polyline. Raising tension past circleArm territory is what turns the corners sharp rather than round — the same dial as the panels above, applied to every span at once.
Boolean ops (2D)
| Operation | Behavior |
|---|---|
fun FLine.byUnionWith(other: FLine, exact: Boolean = false): FLine |
Returns the union of the two filled XY regions using Java2D Area. The resulting boundary includes all regions covered by either input. |
fun FLine.byDifferenceWith(other: FLine, exact: Boolean = false): FLine |
Subtracts the other filled XY region from this one, returning a new boundary. Swapping the two inputs changes which region is cut away. |
fun FLine.byIntersectionWith(other: FLine, exact: Boolean = false): FLine |
Returns the filled XY region shared by both inputs. Disjoint regions produce an empty result. |
fun FLine.byExclusiveOrWith(other: FLine, exact: Boolean = false): FLine |
Returns the XY regions covered by exactly one input. Overlap is removed from the result. |
fun FLine.booleanExact(other: FLine, op: FLineBooleanOp): FLineBooleanResult |
The curve-preserving boolean (Union, Intersect, Subtract, Xor): line is the result, exact says whether it came from the exact engine or from the Area fallback, and fallbackReason says why. |
By default these use Java2D Area (via FLinesAndJavaShapes). Both inputs are read as filled regions under the non-zero rule, whatever their thickness, and an open line is closed with a straight segment; pass stroke = true to use a styled input's stroke outline instead. Pass exact = true to get the curve-preserving engine described under Exact booleans and offsets below.
:::static
// The inputs' style does not enter the boolean; the results are styled below.
val a = fline {
    moveTo(80, 80)
    lineTo(260, 80)
    lineTo(260, 220)
    lineTo(80, 220)
    close()
}

val b = fline {
    moveTo(170, 40)
    lineTo(340, 140)
    lineTo(170, 240)
    lineTo(40, 140)
    close()
}

val u = a.byUnionWith(b).apply {
    color = vec(0.4, 1.0, 0.6, 0.40)
    filled = true
    stroked = true
    thickness = 3.0
}
val i = a.byIntersectionWith(b).apply {
    color = vec(1.0, 0.5, 0.2, 0.55)
    filled = true
    stroked = true
    thickness = 3.0
}

// Faint copies of the inputs to draw underneath.
fun ghost(f: FLine, offset: Vec2) = (f + offset).apply {
    filled = true
    stroked = true
    thickness = 1.0
    color = vec(1.0, 1.0, 1.0, 0.15)
}

// inputs on the left, then the union, then the intersection, each over faint copies of the inputs
val dx = vec(340.0, 0.0)
val dx2 = vec(680.0, 0.0)
val none = vec(0.0, 0.0)
lines(
    ghost(a, none),
    ghost(b, none),
    ghost(a, dx),
    ghost(b, dx),
    u + dx,
    ghost(a, dx2),
    ghost(b, dx2),
    i + dx2,
    w = 720.0,
    h = 220.0,
    fitToSize = true,
)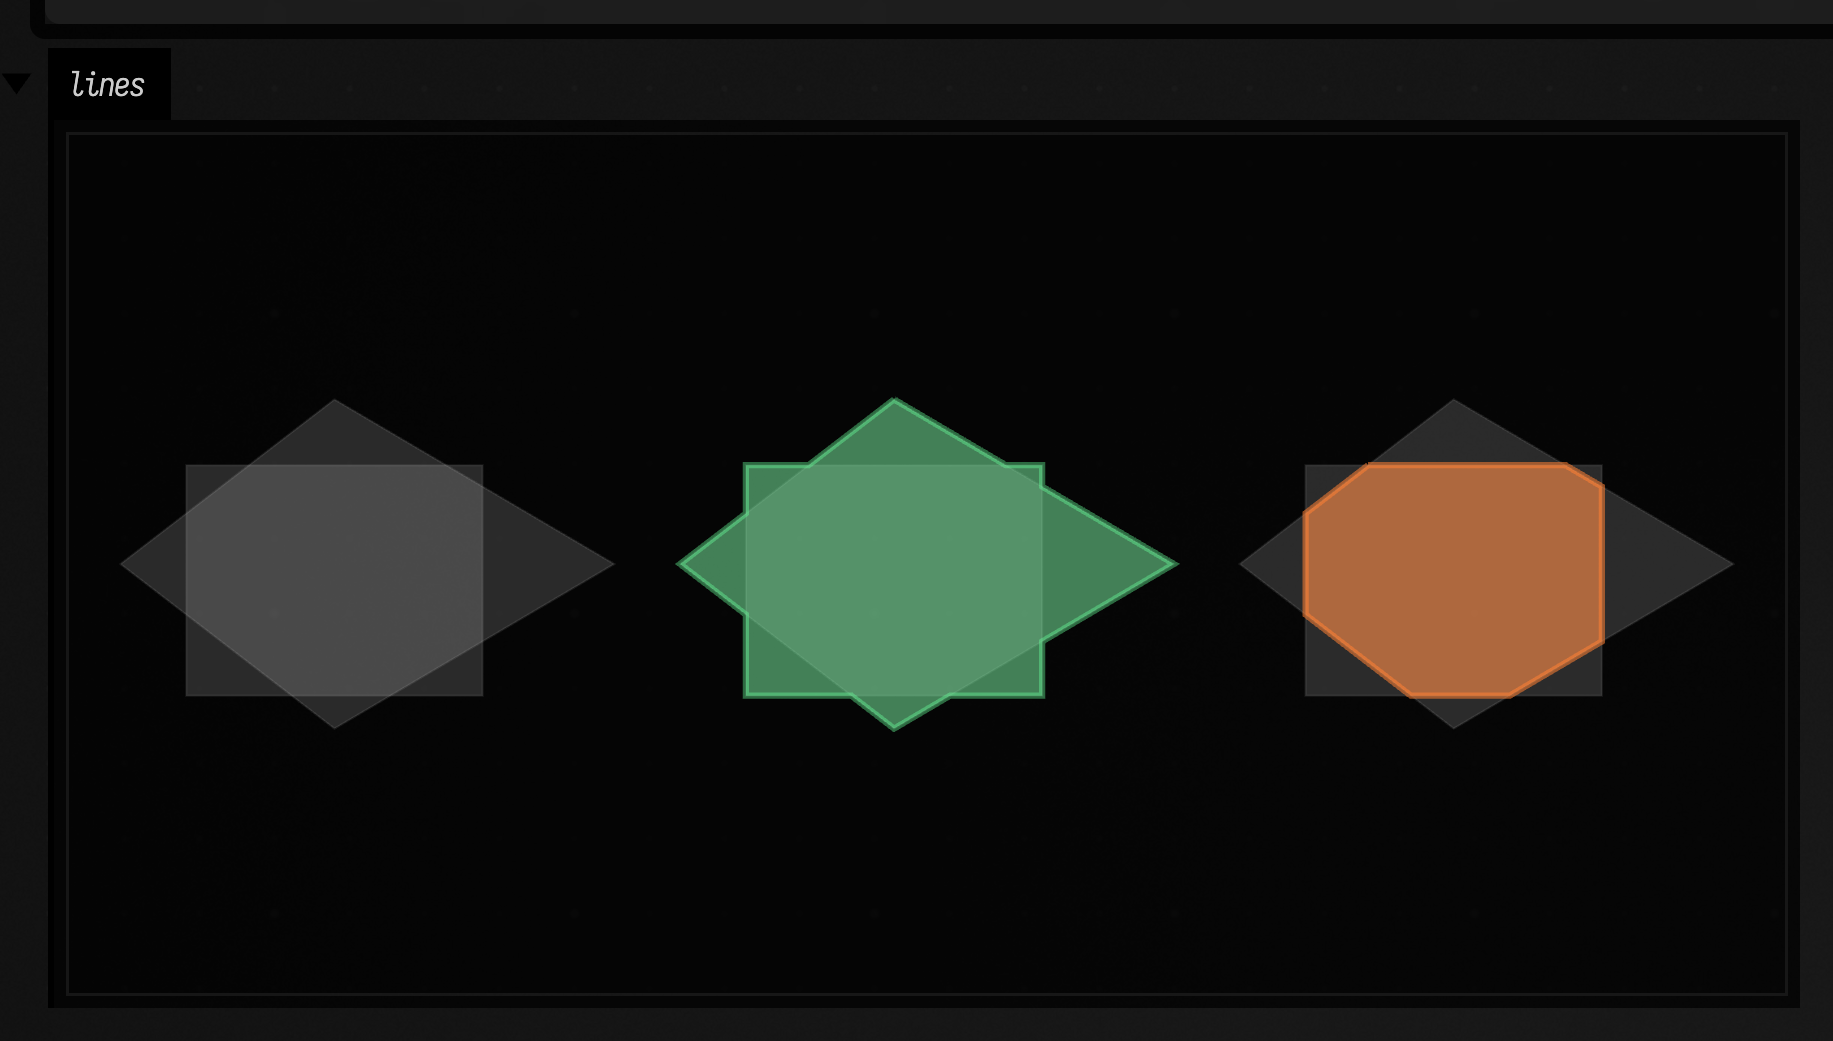
Left: the square and the diamond. Middle: their union (green). Right: their intersection (orange).
Exact booleans and offsets
booleanExact cuts both outlines exactly where they cross and keeps the pieces of the original curves. A cubic in the result is a piece of a cubic you drew, and a straight edge stays a LineTo. Area also keeps cubics, and it is just as accurate, but it splits every curve at its highest and lowest points, so its answers have more segments than they need. Each dot below is a node: the Area union of the blob and the circle has 9 segments and the exact one has 7. Before returning, the exact engine checks its answer's area against the Area answer. If they disagree, or the outline will not close into loops, you get the Area answer, and exact = false tells you so.
:::static
fun circle(cx: Double, cy: Double, r: Double) = FLine().circle(cx, cy, r)

fun blob(x: Double, y: Double) = fline {
    moveTo(x, y)
    cubicTo(x + 40, y - 30, x + 90, y + 10, x + 100, y + 50)
    cubicTo(x + 110, y + 90, x + 60, y + 70, x + 50, y + 110)
    cubicTo(x + 40, y + 150, x - 20, y + 120, x - 10, y + 80)
    cubicTo(x, y + 50, x - 30, y + 30, x, y)
    close()
}

fun dot(x: Float, y: Float, c: Vec4) = fline {
    circle(x, y, 2.5)
    filled = true
    stroked = false
    color = c
}

val out = mutableListOf<FLine>()
for ((row, op) in [FLineBooleanOp.Union, FLineBooleanOp.Subtract].withIndex()) {
    for (col in 0..1) {
        val x = 40.0 + col * 260
        val y = 40.0 + row * 190
        val a = blob(x + 20, y)
        val b = circle(x + 90, y + 60, 45.0)
        val r =
            if (col == 1) a.booleanExact(b, op).line
            else if (op == FLineBooleanOp.Union) a.byUnionWith(b) else a.byDifferenceWith(b)
        val c = if (col == 0) vec(1.0, 0.45, 0.25, 1.0) else vec(0.3, 0.8, 1.0, 1.0)
        r.filled = true
        r.stroked = true
        r.thickness = 1.5
        r.color = vec(c.x, c.y, c.z, 0.35)
        out.add(r)
        r.nodes.mapNotNull { it.toOrNull }.forEach { out.add(dot(it.x, it.y, c)) }
    }
}

lines(out, w = 460.0, h = 380.0, fitToSize = true)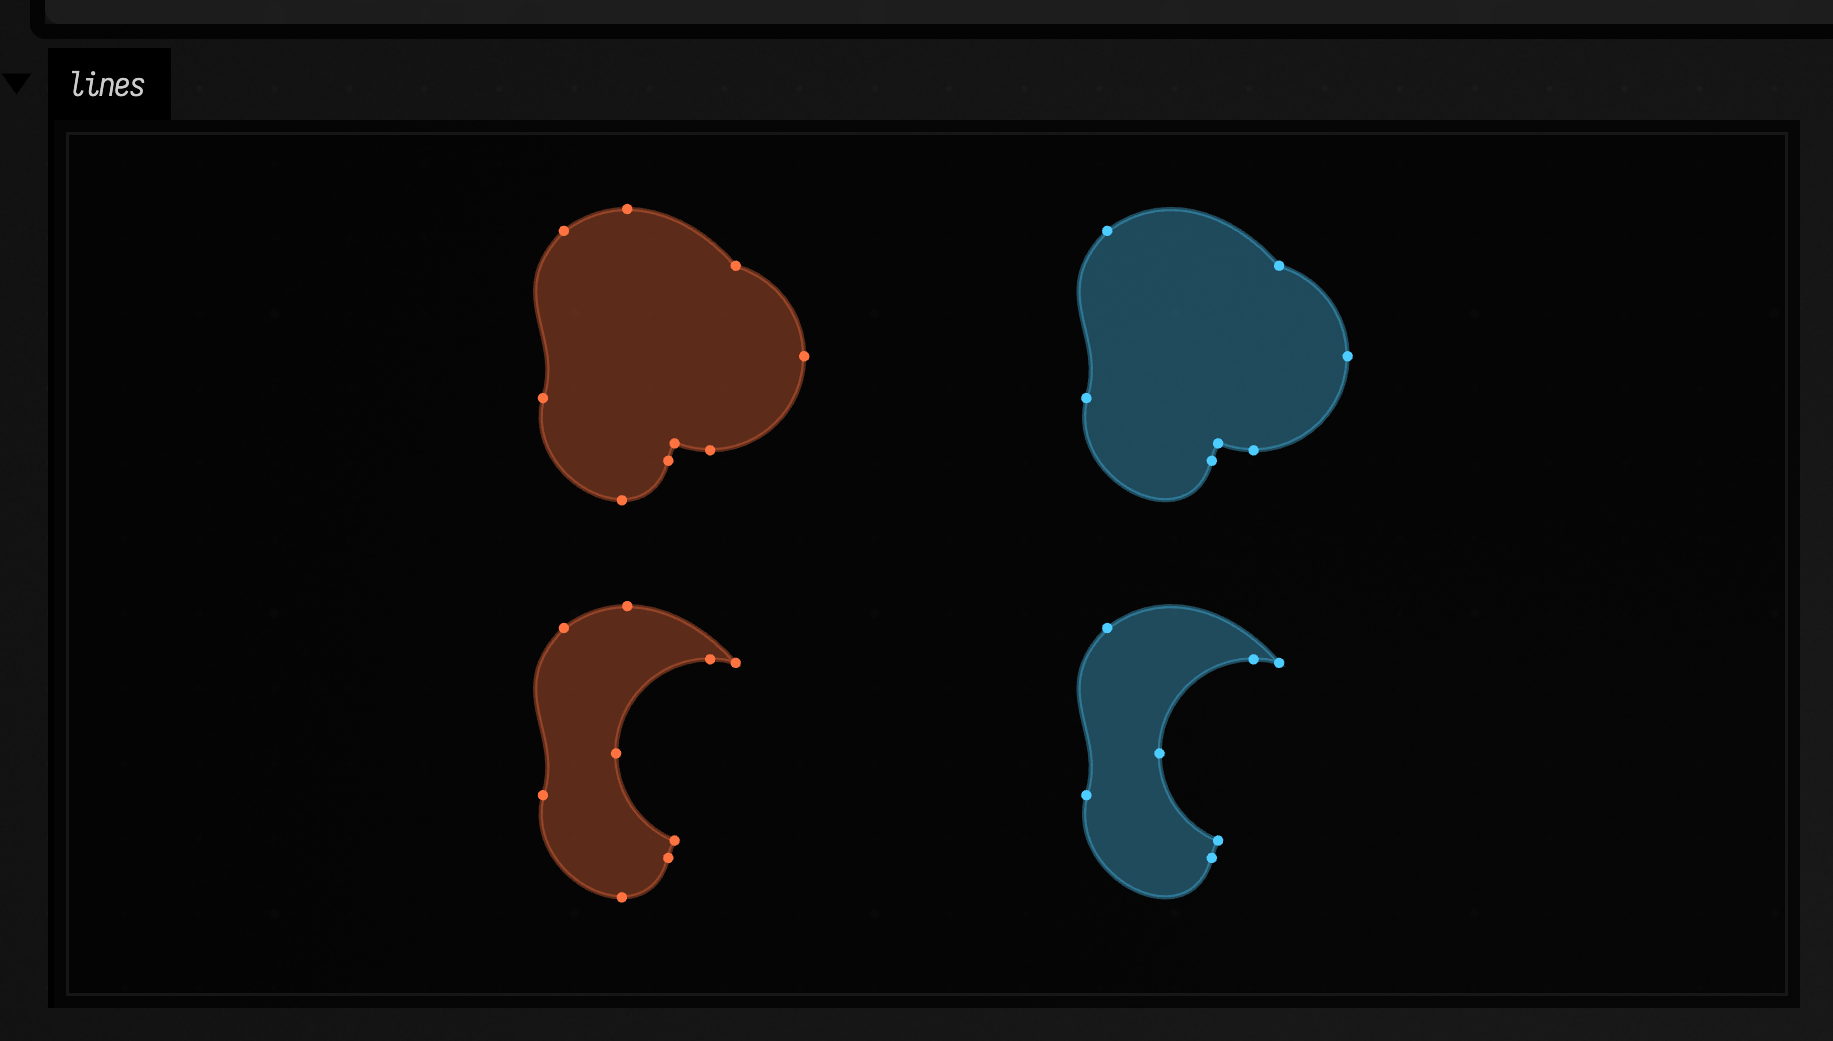
Offsets are where the difference shows. byOffsetting samples the curve and joins the samples with straight lines, 50 per node, and leaves the corners open. byOffsettingExact returns cubics, typically one to four per input cubic, within tolerance of the true offset. It gives corners a join (FLineStrokeJoin.ROUND, MITER or BEVEL, with miterLimit). On a closed outline it removes the loops that form at concave corners and the parts that collapse when you shrink a shape. On an open line it trims the inner corners and cuts out the loops that form where the line bends tighter than the offset distance. Positive distances go the same way as in byOffsetting, towards normal2D.
| Operation | Behavior |
|---|---|
fun FLine.byOffsettingExact(distance: Float, tolerance: Float = 0.01f, join: FLineStrokeJoin = FLineStrokeJoin.ROUND, miterLimit: Float = 4f): FLine |
Offsets every subpath by distance with cubic output, held within tolerance of the true offset, with join at corners. Closed subpaths come back as clean outlines; open ones as a single run each. |
fun FLine.segmentCount2D(): Int |
The number of drawn, non-degenerate segments, the count the comparisons on this page use. |
:::static
fun star(cx: Double, cy: Double) = fline {
    breakNext()
    for (i in 0 until 10) {
        val r = if (i % 2 == 0) 70.0 else 32.0
        val a = kotlin.math.PI * i / 5
        lineTo(cx + r * kotlin.math.cos(a), cy + r * kotlin.math.sin(a))
    }
    close()
}

fun sCurve(x: Double, y: Double) = fline {
    moveTo(x, y)
    cubicTo(x + 40, y - 55, x + 70, y + 55, x + 110, y)
    cubicTo(x + 140, y - 35, x + 170, y + 30, x + 200, y + 5)
    lineTo(x + 215, y + 55)
}

fun dot(x: Float, y: Float, c: Vec4) = fline {
    circle(x, y, 2.0)
    filled = true
    stroked = false
    color = c
}

val out = mutableListOf<FLine>()
for (col in 0..1) {
    val x = 30.0 + col * 280
    for (s in [star(x + 110, 100.0), sCurve(x, 270.0)]) {
        s.thickness = 1.0
        s.color = vec(1.0, 1.0, 1.0, 0.6)
        out.add(s)
        for (d in [12f, -12f]) {
            val o = if (col == 0) s.byOffsetting(d) else s.byOffsettingExact(d)
            val c = if (col == 0) vec(1.0, 0.45, 0.25, 1.0) else vec(0.3, 0.8, 1.0, 1.0)
            o.thickness = 1.5
            o.color = c
            out.add(o)
            o.nodes.mapNotNull { it.toOrNull }.forEach { out.add(dot(it.x, it.y, c)) }
        }
    }
}

lines(out, w = 560.0, h = 360.0, fitToSize = true)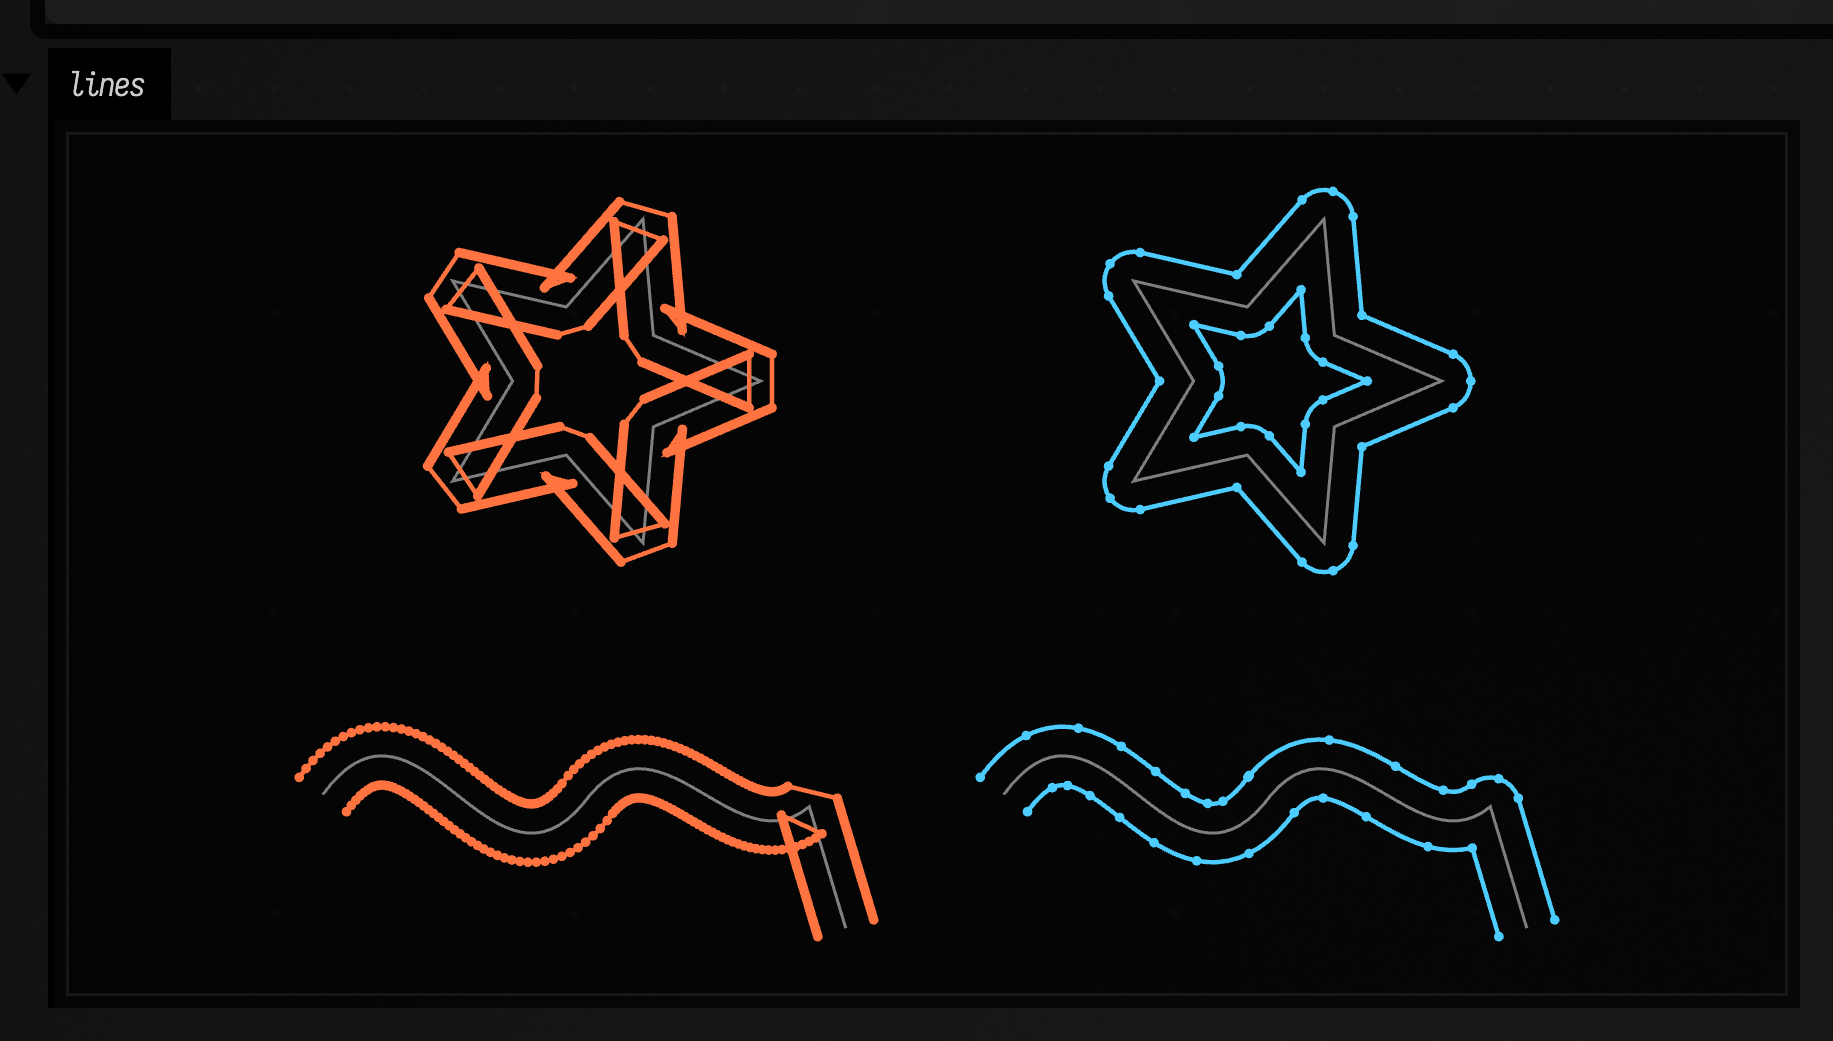
The star's offsets have 20 and 15 segments here, against 501 each from byOffsetting, and the S-curve's have 16 and 13 against 150. FLineExactOffsetTest measures sixteen cases, including a star shrunk until its points vanish and a glyph-like ring. At the default tolerance the largest distance error is under 0.01, where byOffsetting is off by 0.002 to 30 units. The closed results' areas are within 1e-4 of the shape grown or shrunk by a round brush.
How these numbers were measured
FLineExactBooleanTest builds a corpus of circles, overlapping rounded rectangles, a ring with a bar, a blob, and the hard cases (tangent circles, a shared edge, a shape with itself, nested circles), plus 60 seeded random blob pairs, under all four operations. For each result it measures how far points on the result's own segments stray from the nearest input curve (Area and exact both stay within about 1e-8 of the size, which is float storage), and the Hausdorff distance to the operation applied to polygons flattened to 1e-5 of the size. Exact answers came back for all 240 random cases, with 2141 segments against Area's 3020. The first plan assumed Area flattened its output to polylines; the measurements showed it does not, and that its only cost is the extra splits. The working notes are in dev_docs/fline_exact_booleans.md.
Queries and analysis
These don’t change geometry — they help you measure it. Use them for picking (nearest location), hit-testing (contains2D), and computing basic shape properties like area and centroid.
Measuring along a line
Ask for a point by how far along the line it is, and you get its whole local frame back: position, unit tangent, normal and curvature. This is what you want for placing things evenly along a path, orienting them to it, or reading off how tightly it bends.
| Operation | Behavior |
|---|---|
fun FLine.length(): Float |
Total drawn length. Jumps between subpaths do not count; close() segments do. |
fun FLine.locationAt(distance: Float): FLineLocation? |
The location distance units along the line, clamped to the line. null if nothing is drawn. |
fun FLine.locationAtFraction(fraction: Float): FLineLocation? |
The same by fraction of the length: 0.5f is half way by distance, not by node. |
fun FLine.nearestLocation(point: Vec3): FLineLocation? |
The location on the line nearest to point. |
fun Cursor.location(): FLineLocation? |
The same answer from a cursor you are already walking with setD / setT / setNearest. |
An FLineLocation has point, tangent (unit length), distance along the line and t, the same parameter cursor().setT(...) takes. It carries two kinds of normal:
normal,binormalandcurvatureare the 3D frame:normalpoints towards the centre of the bend in whatever plane the line is turning, andcurvatureis one over the radius. On a straight run there is no bend, sonormalandbinormalarenullandcurvatureis 0.normal2DandsignedCurvature2Dare for drawings in the xy plane.normal2Dis the tangent turned a quarter turn,(tangent.y, -tangent.x), which on Field's canvas is to the left of the direction of travel; it exists on straight runs too.signedCurvature2Dis positive when the line bends towardsnormal2D, so the centre of the bend is atpoint + normal2D / signedCurvature2D.
The example places thirteen locations evenly along a two-piece curve, draws each normal2D, and at three of them draws the circle with the curve's radius of curvature.
:::static
val curve = fline {
    moveTo(40, 210)
    cubicTo(90, 30, 230, 30, 260, 140)
    cubicTo(280, 220, 360, 230, 390, 90)
    thickness = 2.0
    color = vec(1.0, 1.0, 1.0, 1.0)
}

// thirteen locations, evenly spaced by distance
val stops = (0..12).mapNotNull { curve.locationAtFraction(it / 12f) }

val normals = stops.map { loc ->
    fline {
        moveTo(loc.point.x, loc.point.y)
        lineTo(loc.point.x + loc.normal2D.x * 22, loc.point.y + loc.normal2D.y * 22)
        thickness = 1.5
        color = vec(0.4, 0.9, 1.0, 1.0)
    }
}

// the circle that matches the bend, at three of them
val bends =
    [stops[3], stops[7], stops[10]].map { loc ->
        val r = 1.0 / loc.signedCurvature2D
        fline {
            circle(loc.point.x + loc.normal2D.x * r, loc.point.y + loc.normal2D.y * r, kotlin.math.abs(r))
            thickness = 1.0
            color = vec(1.0, 0.6, 0.2, 0.8)
        }
    }

lines([curve] + normals + bends, w = 420.0, h = 260.0, fitToSize = true)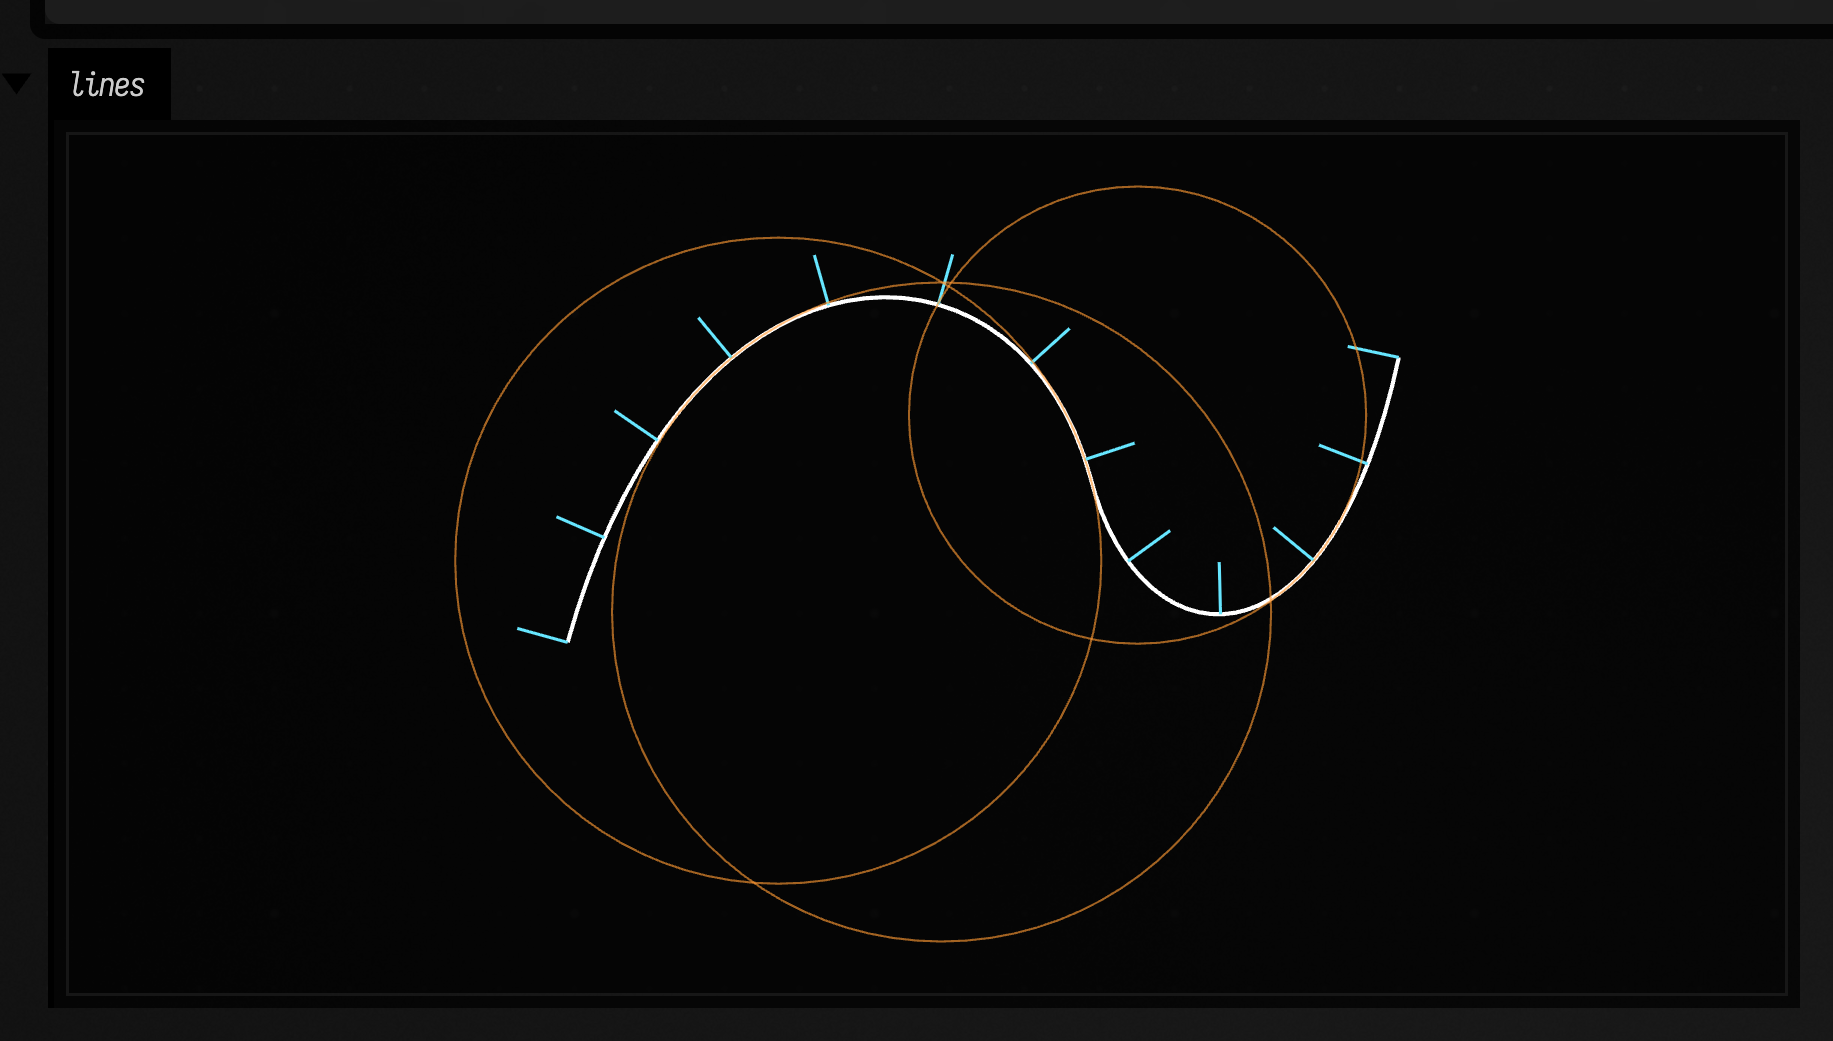
The 3D frame is for lines that leave the xy plane. On a helix the principal normal points straight at the axis, the binormal tilts with the rise, and the curvature is the same everywhere. This one is built from cubics, a quarter turn each, so its curvature comes out within a few percent of a true helix's:
:::static
// a helix of radius 80 rising 30 units per turn, one cubic per quarter turn
val r = 80.0
val rise = 30.0
val k = 0.5522847 * r
val helix = fline {
    moveTo(r, 0, 0)
    for (q in 0 until 12) {
        val a0 = q * PI / 2
        val a1 = a0 + PI / 2
        val z0 = rise * q / 4
        val z1 = rise * (q + 1) / 4
        cubicTo(
            r * cos(a0) - k * sin(a0),
            r * sin(a0) + k * cos(a0),
            z0 + (z1 - z0) / 3,
            r * cos(a1) + k * sin(a1),
            r * sin(a1) - k * cos(a1),
            z0 + 2 * (z1 - z0) / 3,
            r * cos(a1),
            r * sin(a1),
            z1,
        )
    }
}

// look at it from the side and a little above: x across, z up, y into the page
fun view(p: Vec3) = vec(p.x + 0.35 * p.y, -p.z - 0.35 * p.y)

val drawn = fline {
    breakNext()
    helix.sampleByNumber(400).forEach { p -> lineTo(view(p)) }
    thickness = 1.5
    color = vec(1.0, 1.0, 1.0, 1.0)
}

// the 3D frame at 16 evenly spaced places: tangent orange, normal blue, binormal green
fun tick(p: Vec3, d: Vec3?, c: Vec4) = fline {
    if (d != null) {
        moveTo(view(p))
        lineTo(view(p + d * 18.0))
    }
    thickness = 2.0
    color = c
}
val frames =
    (0..15).flatMap { i ->
        val loc = helix.locationAtFraction(i / 15f)!!
        [
            tick(loc.point, loc.tangent, vec(1.0, 0.6, 0.2, 1.0)),
            tick(loc.point, loc.normal, vec(0.4, 0.8, 1.0, 1.0)),
            tick(loc.point, loc.binormal, vec(0.5, 1.0, 0.5, 1.0)),
        ]
    }

// a helix has constant curvature r / (r^2 + c^2), with c the rise per radian
val c = rise / (2 * PI)
val mid = helix.locationAtFraction(0.5f)!!
println("curvature %.5f, a true helix %.5f".format(mid.curvature, r / (r * r + c * c)))
println("normal points at the axis: %.3f".format(mid.normal!!.dot(vec(-mid.point.x, -mid.point.y, 0.0).normalize())))

lines([drawn] + frames, w = 420.0, h = 260.0, fitToSize = true)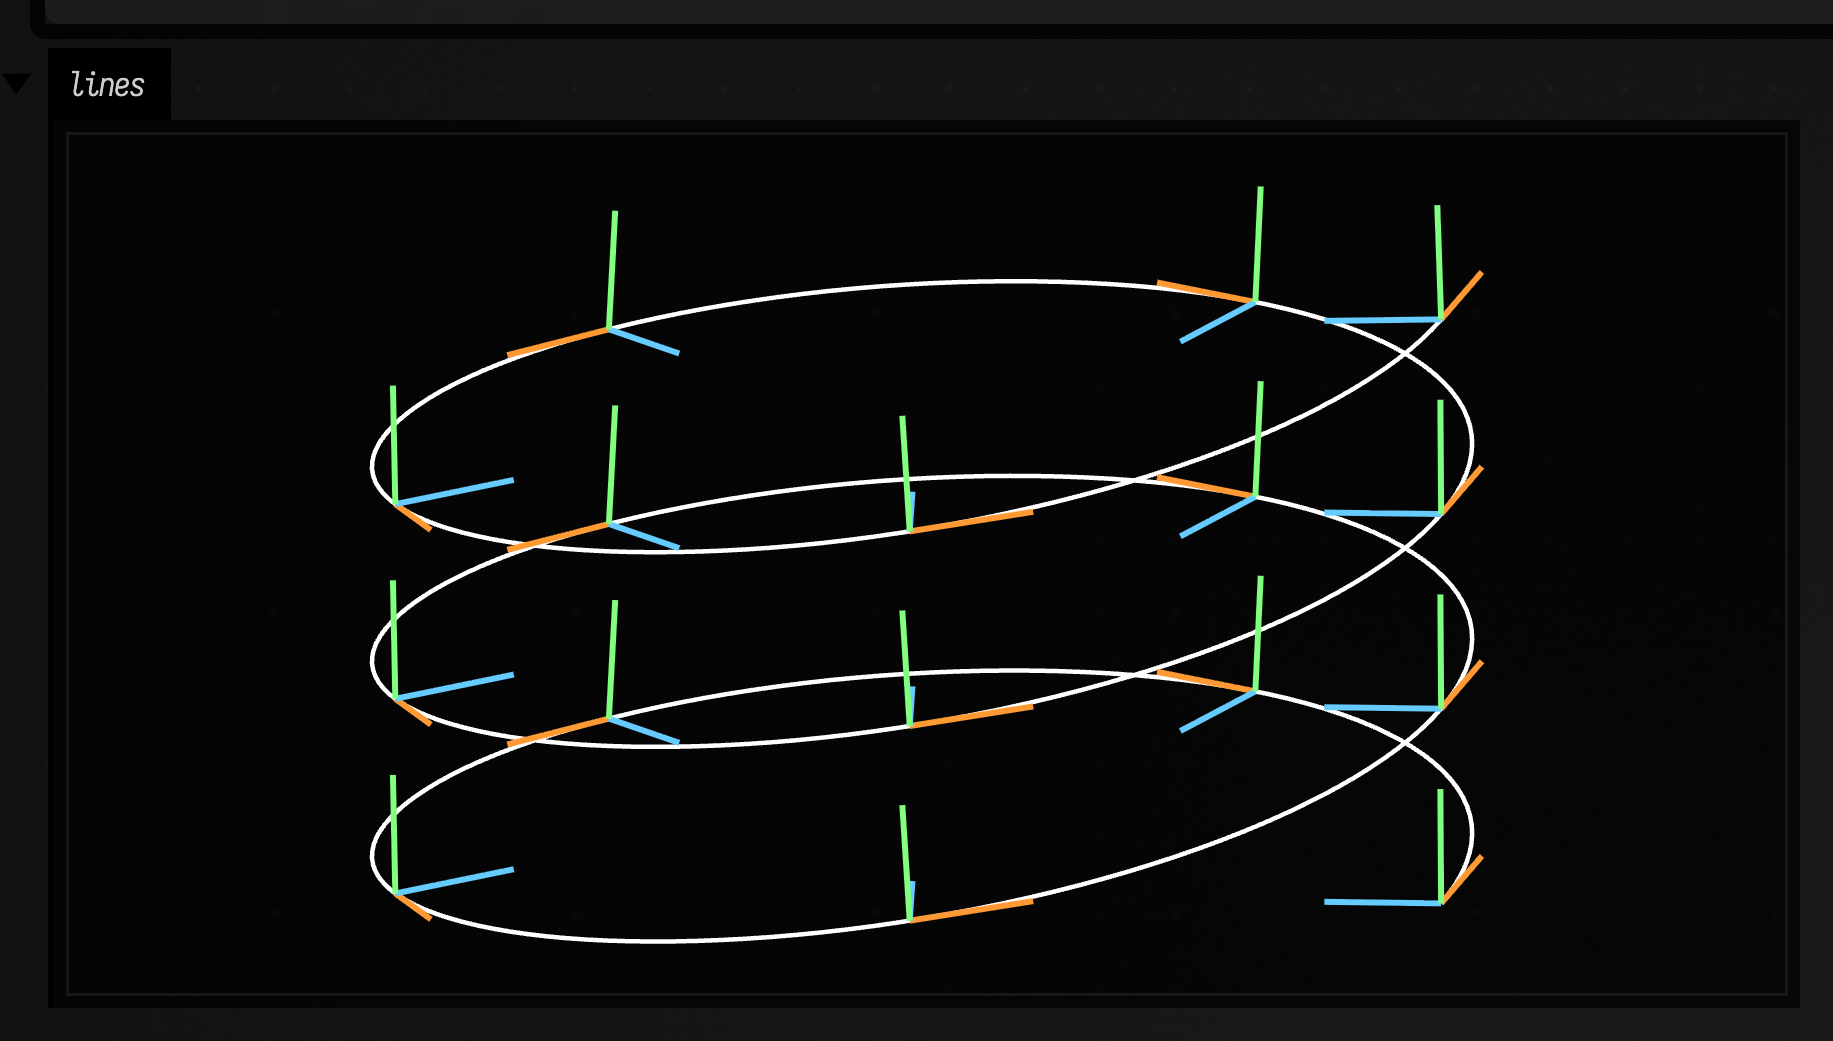
Trimming and splitting by distance
trim keeps the part of a line between two distances, and splitAt cuts it in two. Curves are cut exactly, so the pieces sit on top of the original.
| Operation | Behavior |
|---|---|
fun FLine.trim(from: Float, to: Float): FLine |
The piece from from to to units along the line. Both are clamped, and swapped if to < from. |
fun FLine.splitAt(distance: Float): Pair<FLine, FLine> |
The line before and after distance. The two lengths add up to length(). |
Animate the second argument of trim to draw a line on over time. Here the thick blue run is the stretch from a quarter of the way to 60%, and the orange start is the first half of splitAt(100f):
:::static
val curve = fline {
    moveTo(40, 200)
    cubicTo(100, 20, 220, 20, 250, 130)
    lineTo(380, 60)
    thickness = 1.0
    color = vec(1.0, 1.0, 1.0, 0.35)
}

val total = curve.length()

// from a quarter to 60% of the way, by distance, drawn over the original
val middle = curve.trim(0.25f * total, 0.6f * total).apply {
    thickness = 5.0
    color = vec(0.4, 0.9, 1.0, 1.0)
}

// cut at 100 units: two pieces whose lengths add up to the whole
val (head, tail) = curve.splitAt(100f)
head.apply {
    thickness = 2.0
    color = vec(1.0, 0.6, 0.2, 1.0)
}

print("total ${total.f1} = ${head.length().f1} + ${tail.length().f1}")

lines(curve, head, middle, w = 420.0, h = 260.0, fitToSize = true)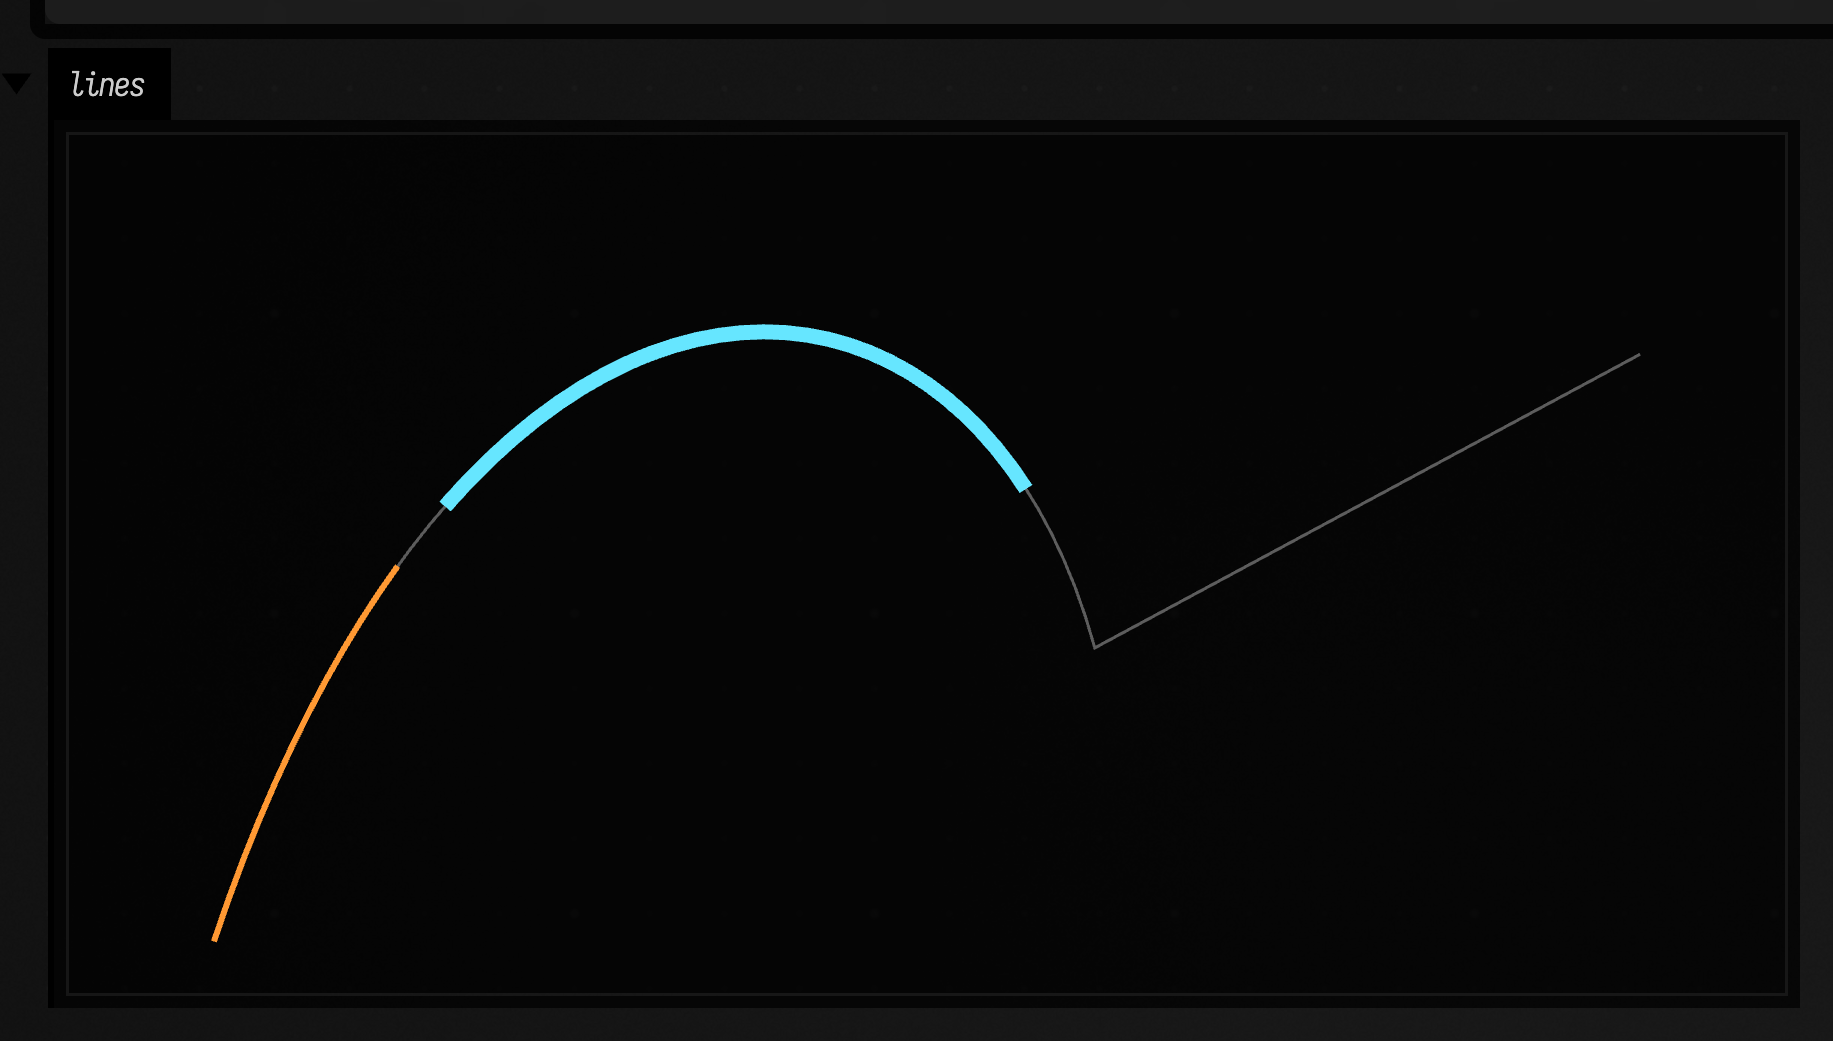
Crossings, bounds and orientation
crossings2D finds where two lines cross in the xy plane and selfCrossings2D where one crosses itself, including the loop inside a single cubic. Each hit carries the point and its t on both lines, so you can cut there with cursor().setT(t).split().
| Operation | Behavior |
|---|---|
fun FLine.crossings2D(other: FLine, tolerance: Float = 0.01f): List<FLineCrossing> |
Every crossing with other, sorted along this line. Each has point, t (on this line) and otherT. |
fun FLine.selfCrossings2D(tolerance: Float = 0.01f): List<FLineCrossing> |
Every place the line crosses itself, with t < otherT. Corners where one segment meets the next are not crossings. |
fun FLine.tightBounds2D(): Rect |
Bounds of what is drawn, hugging the curves. fast2DBounds() encloses the control points instead. |
fun FLine.area2D(): Float |
Signed area, exact on curves. Each subpath adds its own; a counter wound the other way subtracts. |
fun FLine.isClockwise2D(): Boolean |
Whether the line winds clockwise on screen, with y pointing down. |
fun FLine.contains2D(point: Vec2, rule: FLineFillRule = FLineFillRule.NonZero): Boolean |
Point-in-shape that follows the curves, with FLineFillRule.NonZero or FLineFillRule.EvenOdd. Every subpath counts as closed. |
fun FLine.windingNumber2D(point: Vec2): Int |
The winding number about point, following the curves; non-zero is inside. |
The example finds where a looping curve crosses a ring and itself, and draws its tight bounds in green over the control-point bounds in grey:
:::static
val loop = fline {
    moveTo(60, 200)
    cubicTo(420, 40, 0, 40, 340, 210)
    thickness = 2.0
    color = vec(1.0, 1.0, 1.0, 1.0)
}

val ring = fline {
    circle(200, 130, 70)
    thickness = 2.0
    color = vec(0.6, 0.8, 1.0, 1.0)
}

// where the loop crosses the ring, and where it crosses itself
val hits = [loop.crossings2D(ring), loop.selfCrossings2D()].flatten().map { it.point }
val dots = polylineFrom(hits.map { it.v2 }).apply {
    pointed = true
    pointSize = 3.0
    stroked = false
    color = vec(1.0, 0.5, 0.2, 1.0)
}

// bounds that hug the curve, against the control-point bounds
val tight = fline {
    rect(loop.tightBounds2D())
    thickness = 1.0
    color = vec(0.4, 1.0, 0.6, 1.0)
}
val loose = fline {
    rect(loop.fast2DBounds())
    thickness = 1.0
    color = vec(1.0, 1.0, 1.0, 0.25)
}

print("${hits.size} crossings; clockwise on screen: ${ring.isClockwise2D()}")

lines(loose, tight, ring, loop, dots, w = 420.0, h = 260.0, fitToSize = true)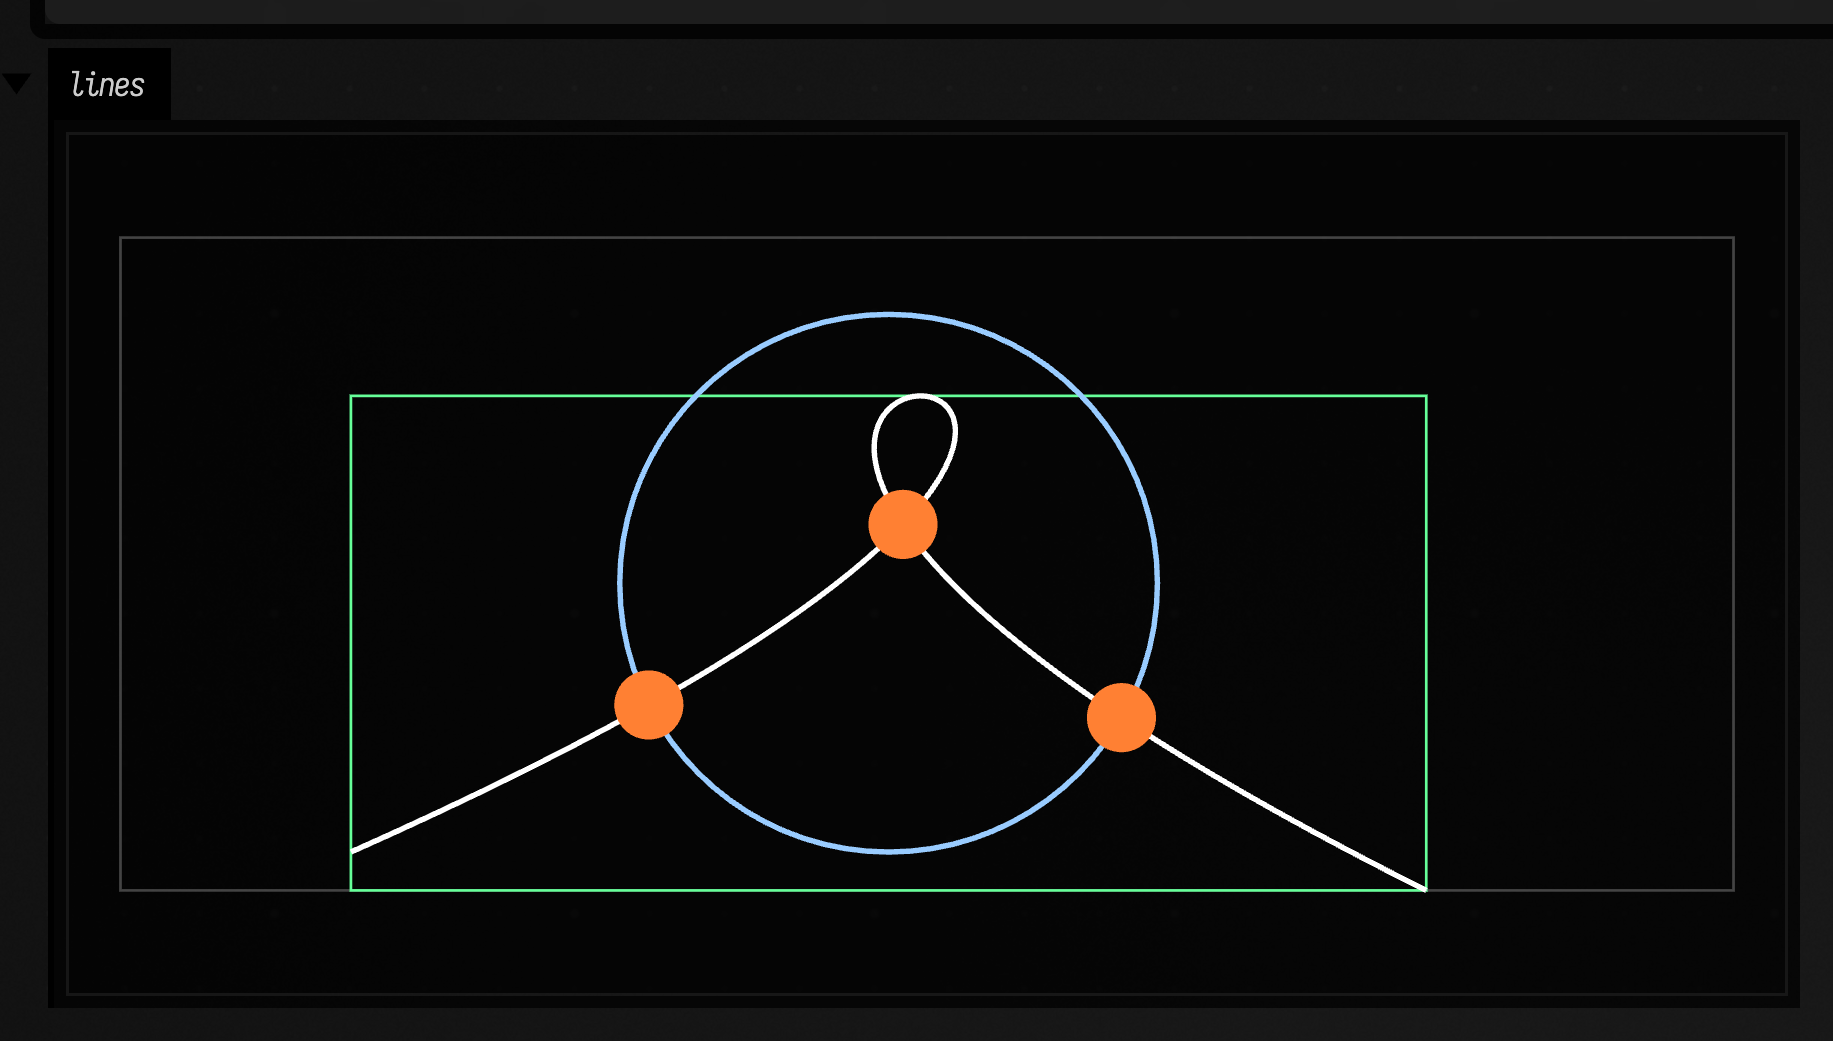
Nearest location
| Operation | Behavior |
|---|---|
fun FLine.nearestLocation(point: Vec3): FLineLocation? |
The location on the curve nearest to point, by 3D distance, with its frame, distance and t. |
fun FLine.cursor(closestTo: Vec3): Cursor |
A cursor parked there, to walk on from. |
Finds the point on the curve nearest a query position.
:::static
val curve = fline {
    moveTo(50, 180)
    cubicTo(120, 20, 300, 280, 350, 120)
    thickness = 2.0
    color = vec(1.0, 1.0, 1.0, 1.0)
}

val query = vec(260, 60, 0)
val closest = curve.nearestLocation(query)!!.point

val marker = polylineFrom([query.v2, closest.v2]).apply {
    thickness = 2.0
    color = vec(1.0, 0.4, 0.4, 1.0)
    pointed = true
    pointSize = 3.0
}

lines(curve, marker, w = 420.0, h = 260.0, fitToSize = true)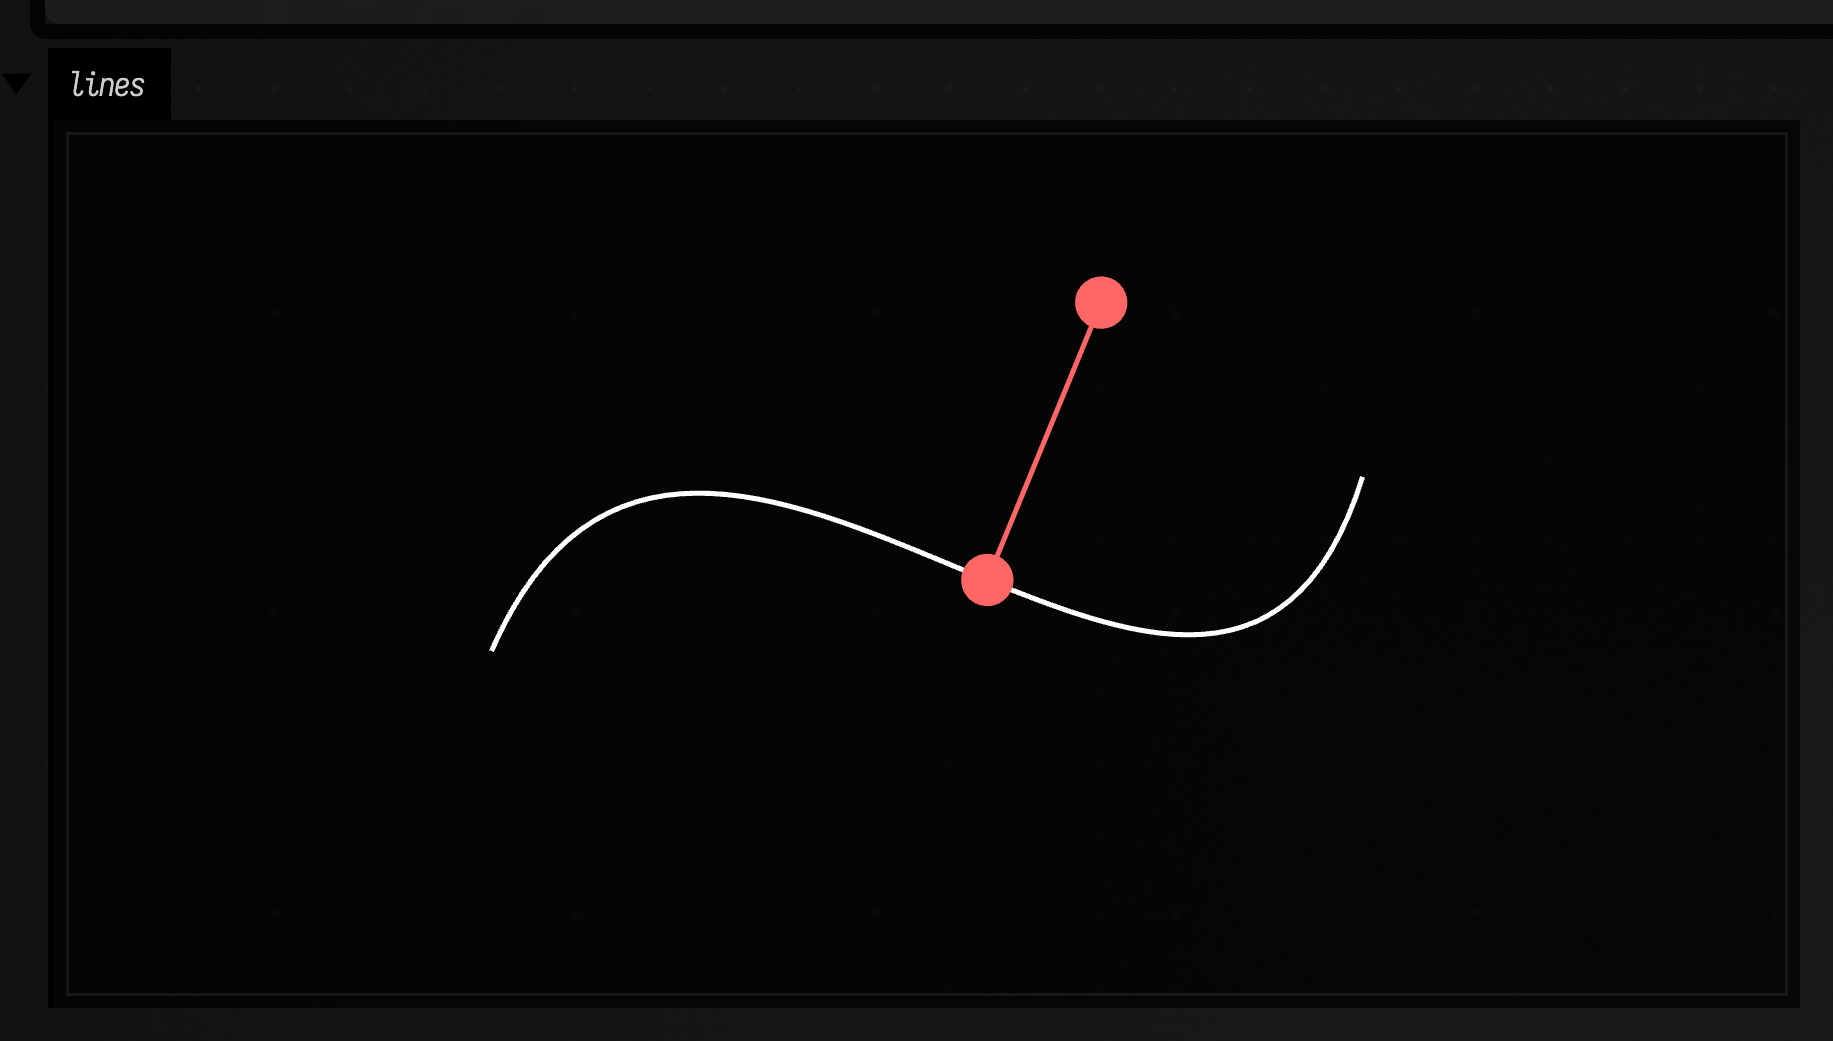
Containment and area
| Operation | Behavior |
|---|---|
fun FLine.contains2D(point: Vec2, rule: FLineFillRule = FLineFillRule.NonZero): Boolean |
Whether an xy point is inside, following the curves. Each open subpath is implicitly closed; jumps between subpaths do not form edges. |
fun FLine.area2D(): Float |
Signed area in the xy plane, exact on cubics, subpaths adding. |
fun FLine.centroid2D(): Vec2 |
The centroid of the polygon through the node end points. Near zero area it returns the average endpoint position, or the origin for an empty line. |
Containment respects separate subpaths. centroid2D uses the end-point polygon, so on a curved outline it is approximate.
:::static
val poly = fline {
    moveTo(60, 60)
    lineTo(360, 80)
    lineTo(320, 220)
    lineTo(80, 200)
    close()

    filled = true
    stroked = true
    thickness = 3.0
    color = vec(0.7, 0.9, 1.0, 0.25)
}

val c = poly.centroid2D()
val center = fline {
    moveTo(c.x, c.y)
    lineTo(c.x + 0.001, c.y + 0.001) // tiny segment so it shows
    pointed = true
    pointSize = 5.0
    stroked = false
    filled = true
    color = vec(1.0, 0.5, 0.2, 1.0)
}

lines(poly, center, w = 420.0, h = 260.0, fitToSize = true)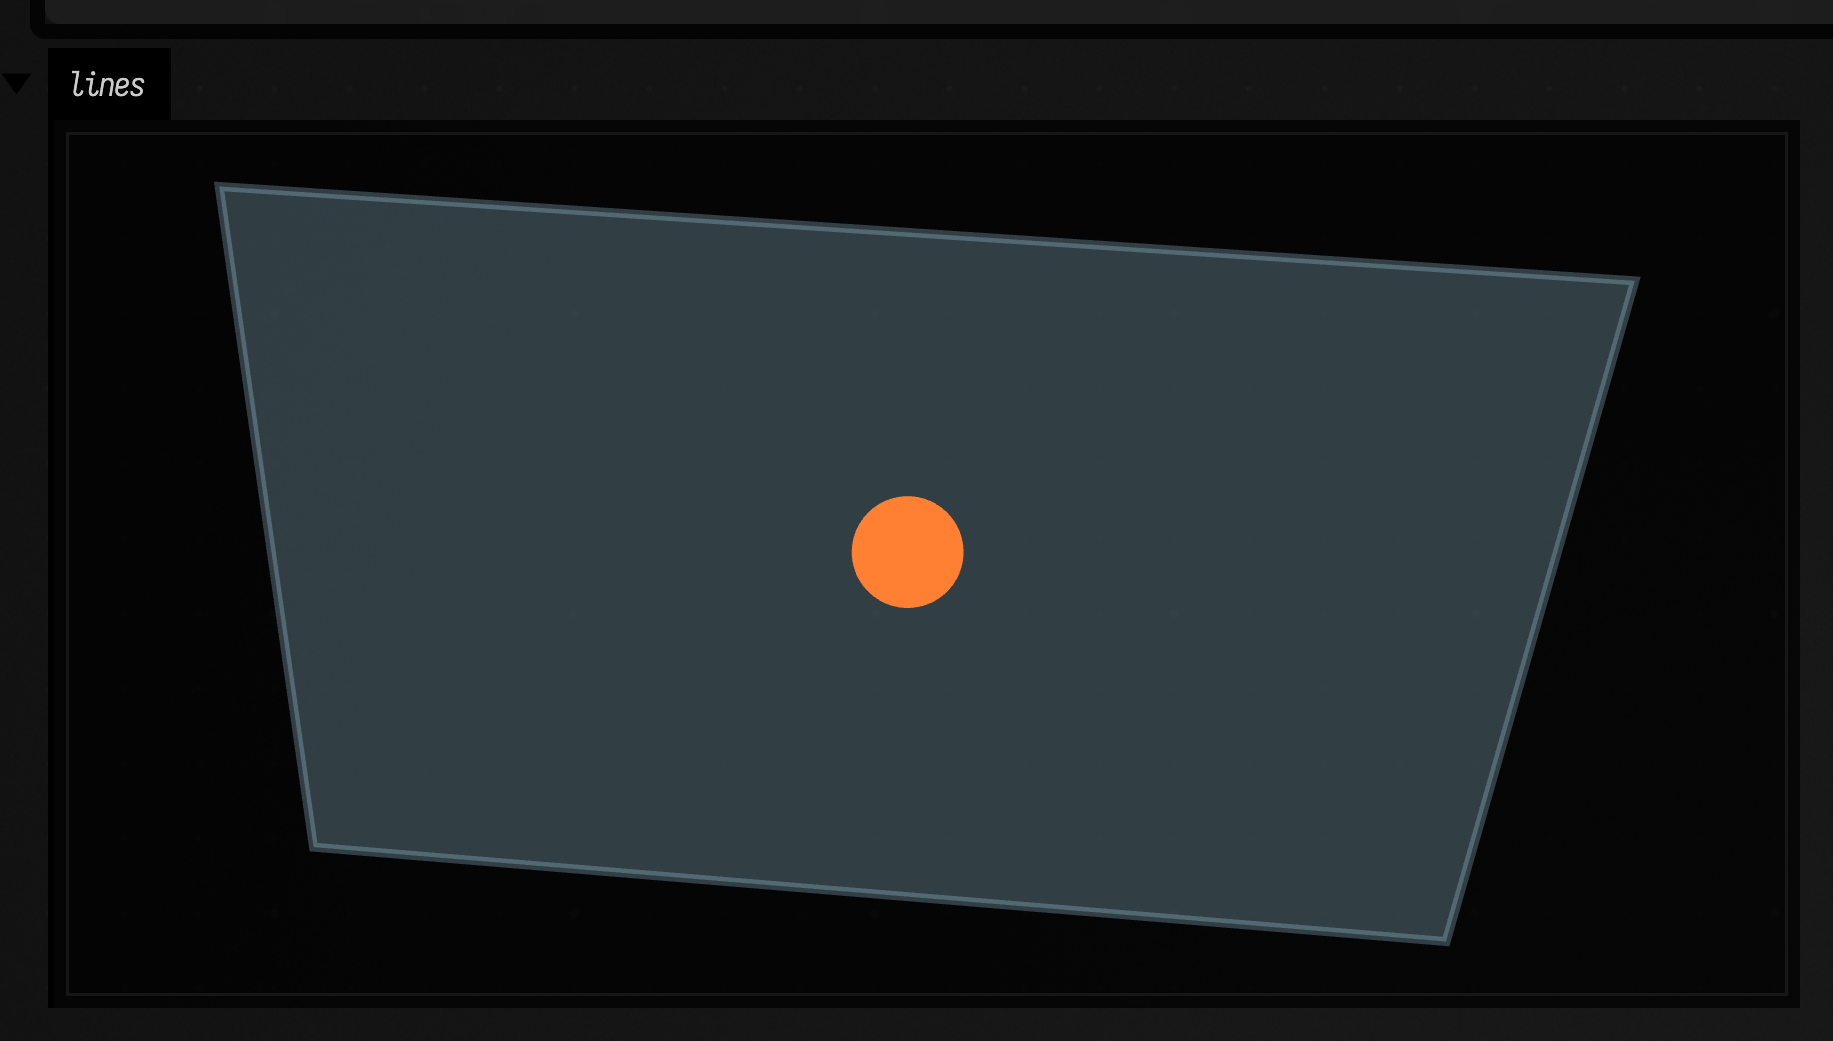
Java2D bridge
Java's standard 2D library (java.awt.geom) already has shapes such as ellipses, rounded rectangles and arcs, and operations on them. These functions turn a Java2D Shape into an FLine and back, so you can draw any of them, or run an FLine through a Java2D operation. intersect returns the points where two lines cross.
:::static
// In afield.geometry.path.java2d.FLinesAndJavaShapes.Companion
fun flineToJavaShape(f: FLine): java.awt.Shape
fun flineToJavaShape(f: Collection<FLine>): java.awt.Shape
fun javaShapeToFLine(f: java.awt.Shape): FLine

fun intersect(a: FLine, b: FLine): List<Vec3>
:::static
import afield.geometry.path.java2d.FLinesAndJavaShapes
import java.awt.geom.Ellipse2D
val circleShape = Ellipse2D.Double(80.0, 60.0, 220.0, 220.0)
val circle = FLinesAndJavaShapes.javaShapeToFLine(circleShape).apply {
thickness = 5.0
color = vec(1.0, 1.0, 1.0, 1.0)
}
val diag = fline {
moveTo(40, 260)
lineTo(380, 40)
thickness = 3.0
color = vec(1.0, 0.4, 0.4, 1.0)
}
val hits = FLinesAndJavaShapes.intersect(circle, diag)
val hitPts = polylineFrom(hits.map { it.v2 }).apply {
pointed = true
pointSize = 4.0
stroked = false
filled = true
color = vec(0.4, 1.0, 0.6, 1.0)
}
lines(circle, diag, hitPts, w = 420.0, h = 320.0, fitToSize = true)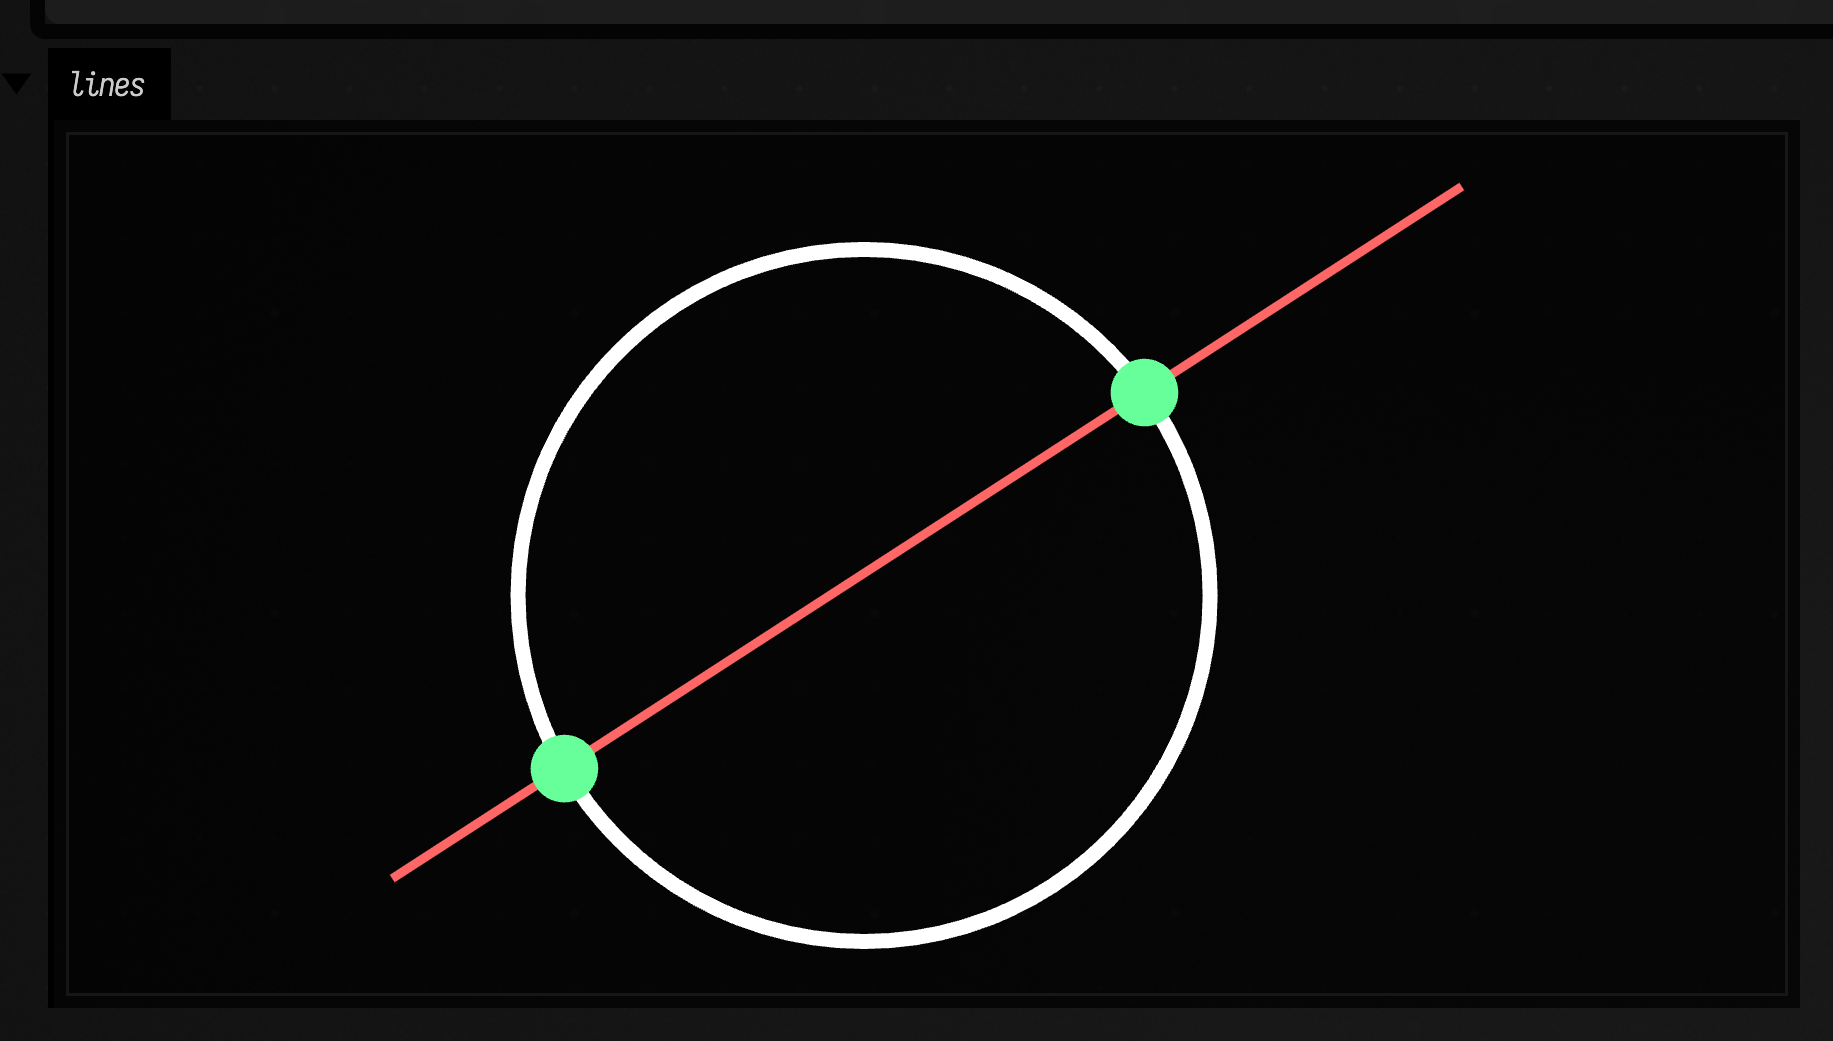
Reference
Every public declaration used on this page is listed, with its KDoc, in the codebase reference under StandardDrawing.kt. The rest of the standard library is in what's already in the box.
Next on the Tour, Drawing and Notation draws by hand on the canvas and has a box read each stroke back as an FLine.