Fabricate Renderer
StandardRenderer is the quick path into the fabricated renderer: a scene you have only registered geometry into comes back lit, shadowed and ambient-occluded by the stock setup. Metalness changes the material, shadows land where objects touch the ground, and ambient occlusion darkens contacts. Tone mapping is the one thing you have to ask for (see Tone mapping and bloom).
This page shows the renderer in use. For experimental area lights, Vulkan ray-query shadows and optional RTXDI resampling, see Direct lighting. The Renderers reference page lists every public declaration in the fabricated package with its KDoc, including the scene graph and pass classes the examples below use, and the two renderers this page does not cover: the progressive path tracer and the Gaussian splat renderer.
The most demanding scene on the page is assets/fabricate_demo/ToyCar.glb, paired with the venice_sunset_1k.exr environment. ToyCar carries transmission, clearcoat, sheen, tangent-space normal maps, texture transforms, and multiple texture semantics. Venice Sunset drives the image-based-lighting path through LoadedTexture.fromExrFile(...), which decodes EXR channels into RGBA32F, can build GGX-prefiltered radiance mips, and samples that mip chain by roughness.
How the captures on this page are made
The docs runner drives StandardRendererDocsHarness: it builds FabricateNode and FabricateMaterial
state, binds renderer meshes to node world transforms, asks FabricateScenePlanner for the draw and
material queues, then attaches the FabricateFrameGraph for capture.
The common pattern is:
val bundle = StandardRenderer.build(renderer)

val material = FabricateMaterial(
    baseColor = Vector4f(0.83f, 0.58f, 0.28f, 1f),
    metallic = 0.18f,
    roughness = 0.36f,
)

val node = bundle.sceneGraph.mesh(name = "torus", material = material) {
    transform.set(Matrix4f().translate(0f, -0.18f, 0f))
    renderable?.userData = "torus"
}

val mesh = bundle.registerTestTorus(name = "torus", slices = 64, stacks = 64, renderer = renderer)
mesh.bindNode(node)
mesh.applyFabricateMaterial(material)

val plan = bundle.applyScenePlan()
println(plan.opaque.map { it.node.name })
println(plan.materials.first())

bundle.attachTo(renderer)
bundle.present(renderer = renderer)
StandardRenderer.Bundle is the object to keep around. It owns the off-screen render targets, the modules that draw into them, the scene defaults, the scene graph, and the post stack. Most sketches should build one bundle, register geometry into it, attach its frame graph to a window, then present the post-stack output.
Use the high-level layer for:
bundle.sceneGraph: hierarchy, transforms, animation samples, visibility, material intent, and glTF import.bundle.registerCube(...),registerSphere(...),registerPullingMesh(...): geometry that should render through both the g-buffer and shadow pass.bundle.registerTransparentPullingMesh(...): blended geometry that should draw after deferred lighting.bundle.addLight(...)+bundle.syncLights(): directional/point/spot lights;bundle.showEnvironmentBackground()draws the environment map as the backdrop.bundle.postStack,bundle.addShaderEffect(...),bundle.setToneMapping(...),bundle.addBloom(...): fullscreen image effects, tone mapping, and bloom after opaque and transparent composition.
Drop down to raw Module, Mesh, RenderToTexture, or push constants when you need a shader or buffer layout that the bundle does not know about yet. Keep transform/material intent in the scene graph even then, and let the planner classify it before the module maps are committed.
The current built-in frame graph is:
std - gbuffer
std - shadow
std - ao
std - lighting
std - transparency
std - motion - blur
std - aa
Inspect or edit that order before attaching it:
val graph = bundle.frameGraph()
println(graph.passNames())

// Insert custom utility passes around the named built-ins.
graph.insertBefore("my-pre-light-pass", FabricateFrameGraph.PASS_LIGHTING, myTarget)
graph.attachTo(renderer)
bundle.attachTo(renderer) is the convenience form for bundle.frameGraph().attachTo(renderer). bundle.present(...) presents bundle.postStack.output(), so any effect you append after the stock stack becomes the final image automatically.
Editing the built-in shaders
Fabricate's own passes are ordinary Modules carrying GLSL source, so they can be bound to boxes and edited/hot-reloaded exactly like a shader you write yourself. bundle.bindShadersToBoxes() creates one box per pass — g-buffer, shadow, AO, lighting, transparency, motion blur, FXAA, plus any post effects (tone map, bloom, your own) and textured g-buffer variants from glTF import. Each box shows the pass's vertex/fragment GLSL in editable tabs; alt r reloads it, alt shift enter does an ABI-preserving live pipeline swap.
val bundle = StandardRenderer.build(renderer)
bundle.setToneMapping(FabricateToneMap.ACES)
bundle.addBloom()

// Bind every built-in pass (and the post effects above) to editable boxes.
val boxes = bundle.bindShadersToBoxes()
println(
    boxes.keys,
) // std-gbuffer, std-shadow, std-ao, std-lighting, std-transparency, std-motion-blur, std-aa, std-post/bloom-composite,

// std-post/tonemap, ...

// Or hack on a single pass:
bundle.bindShaderToBox("std-lighting", bundle.lightingModule)
Reloads reuse the pass's existing Parameters, so the renderer's texture bindings, attachment formats, and push-constant seeding are preserved — only the GLSL changes. Edit the lighting fragment to try a different BRDF, or the FXAA pass to swap in a different AA, and the change is live on the next frame. bundle.shaderModules() returns the same name → ModulePointer map for programmatic access, and bundle.shaderSources() returns the raw vertex/fragment text for inspection without a session.
Scene graph and transforms
Fabricate has a small scene layer on top of Field 4: nodes, local transforms, world transforms, render intent, animation samples, and draw-list ordering. The scene graph is pure Kotlin; renderer modules consume it through bound model matrices.
val bundle = StandardRenderer.build(renderer)
bundle.attachTo(renderer)

val parent = bundle.sceneGraph.node("pivot") {
    transform.position.set(0f, -0.2f, 0f)
}

val glass = bundle.sceneGraph.mesh(
    name = "glass",
    parent = parent,
    material = FabricateMaterial(Vector4f(0.45f, 0.70f, 1.0f, 0.35f)).transparent(0.35f),
) {
        transform.position.set(0.4f, 0f, -0.45f)
        transform.scale.set(0.7f, 0.7f, 0.7f)
    }

bundle.sceneGraph.updateWorldTransforms()
val worldMatrix = Matrix4f(glass.worldMatrix)
Draw lists are computed from the same tree. Opaque items are sorted front-to-back, transparent items back-to-front, and shadow casters are separated:
val lists = bundle.sceneDrawLists()
println(lists.opaque.map { it.node.name })
println(lists.transparent.map { it.node.name })
println(lists.shadowCasters.map { it.node.name })
Once the bundle is attached, it re-sorts transparent meshes for the camera every frame, so moving transparent objects stay in order without a call.
Render planning
The scene graph answers "what exists?" and the render plan answers "what order should it draw in?" FabricateScenePlanner walks the current scene, resolves material records into a compact table, and splits draw items into opaque, alpha-mask, transparent, and shadow-caster queues.
val planner = FabricateScenePlanner()
val plan = planner.plan(bundle.sceneGraph, cameraPosition = Vector3f(bundle.scene.camera.at))

println(plan.opaque.map { it.node.name })
println(plan.alphaMask.map { it.node.name })
println(plan.transparent.map { it.node.name }) // back-to-front
println(plan.materials.size)
The planner is pure Kotlin. Because it allocates no Vulkan objects, you can run it in tests and harnesses. A FabricateRenderItem carries the node, renderable, material id, queue, current world matrix, previous world matrix, and camera distance. A FabricateMaterialRecord is the CPU-side handoff shape for material buffers: base color, metalness, roughness, alpha mode, cutoff, double-sided state, and a texture mask placeholder.
Style rule: keep user intent on FabricateMaterial and FabricateRenderable; let the planner classify it. Prefer FabricateAlphaMode.OPAQUE, .MASK, and .BLEND over ad hoc booleans, and use material.sortOrder only when a stable override matters.
Default scene
The default scene is a plain one: three colored torii, the standard camera, and the stock lighting setup. It is what StandardRenderer.build(...) gives you before you have chosen anything, so it is also the shortest route to a picture.
The scene is node/material creation plus mesh binding, and nothing else:
fun torusNode(name: String, x: Float, color: Vector4f) {
    val material = FabricateMaterial(baseColor = color)
    val node = bundle.sceneGraph.mesh(name = name, material = material) {
        transform.set(Matrix4f().translate(x, 0f, 0f))
        renderable?.userData = name
    }
    val mesh = bundle.registerTestTorus(name = name, slices = 48, stacks = 48, renderer = renderer)
    mesh.bindNode(node)
    mesh.applyFabricateMaterial(material)
}

torusNode("left", -0.95f, Vector4f(0.17f, 0.98f, 0.24f, 1f))
torusNode("middle", 0f, Vector4f(0.98f, 0.92f, 0.22f, 1f))
torusNode("right", 0.95f, Vector4f(0.98f, 0.30f, 0.32f, 1f))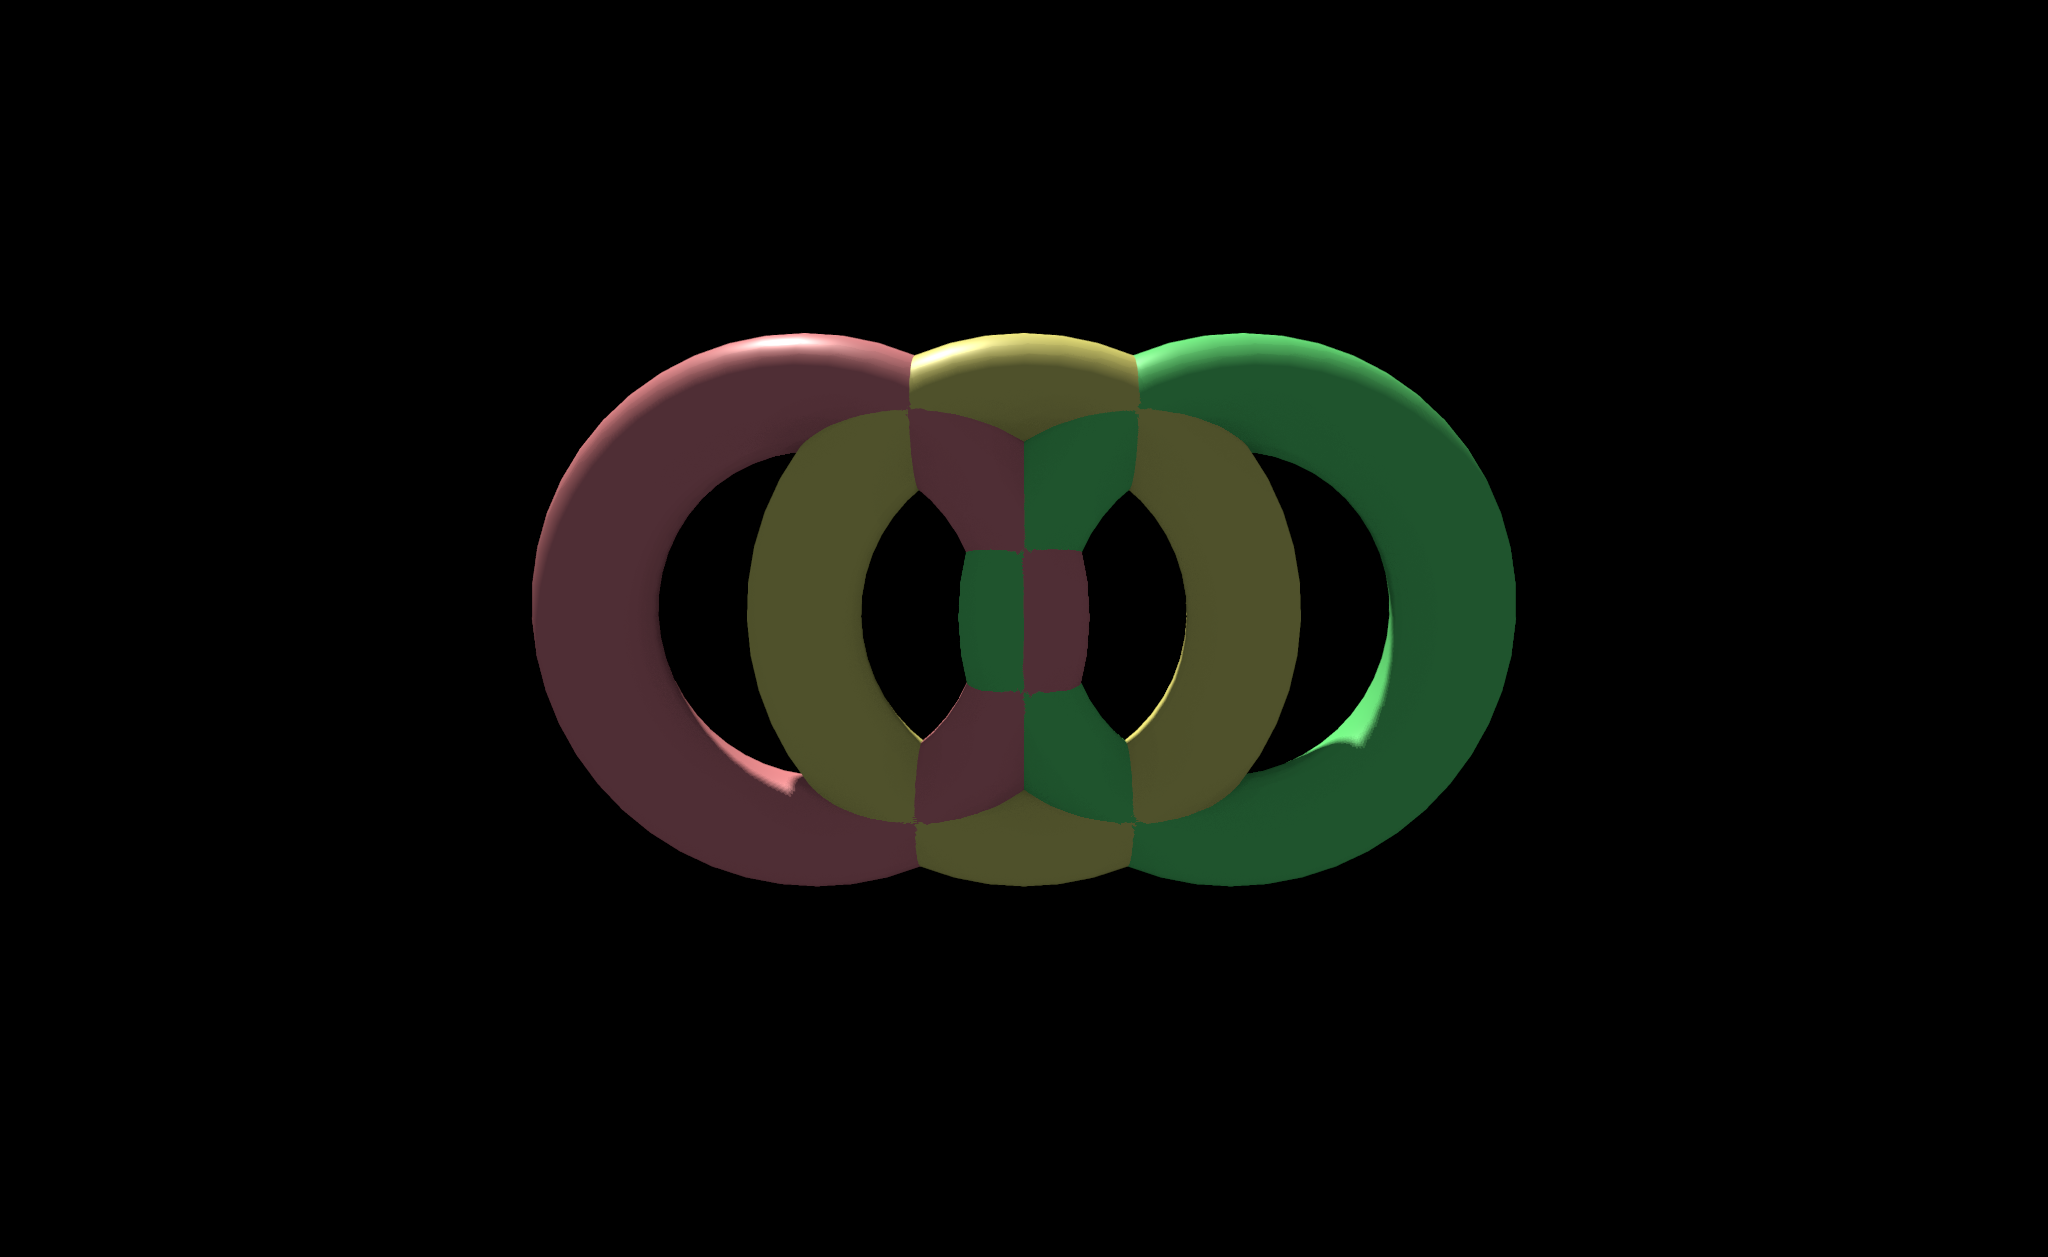
Shiny torii on checkerboard planes
Reflective torii over a checkerboard floor: specular highlights, contact shadows where an object meets the ground, and shading that stays stable as the geometry gets denser.
The checkerboard here is mesh-side: alternating tile geometry receives alternating FabricateMaterial values. The harness packs the two parities into pulling meshes for fewer draw items; conceptually, the scene logic is this:
bundle.scene.camera.at.set(0f, 0.78f, -3.75f)
bundle.scene.camera.target.set(0f, -0.25f, 0f)
bundle.scene.lightDirection.set(Vector3f(-0.55f, -1.0f, -0.20f).normalize())
bundle.scene.lightIntensity = 1.55f
bundle.scene.shadowStrength = 1f
bundle.scene.aoStrength = 1f

for (row in 0 until 10) {
    for (col in 0 until 10) {
        val light = (row + col) % 2 == 0
        val material = FabricateMaterial(
            baseColor = if (light) Vector4f(0.57f, 0.57f, 0.61f, 1f) else Vector4f(0.22f, 0.22f, 0.24f, 1f),
            roughness = 0.9f,
        )
        val node = bundle.sceneGraph.mesh(name = "tile-$row-$col", material = material) {
            transform.set(
                Matrix4f().translate((col - 4.5f) * 0.52f, -1.0f, (row - 4.5f) * 0.52f).scale(0.26f, 0.02f, 0.26f),
            )
            renderable?.userData = "tile-$row-$col"
        }
        val tile = bundle.registerCube(name = "tile-$row-$col", size = 1f, renderer = renderer)
        tile.bindNode(node)
        tile.applyFabricateMaterial(material)
    }
}

val torusMaterial = FabricateMaterial(Vector4f(0.28f, 0.86f, 0.96f, 1f), metallic = 1.0f, roughness = 0.07f)
val torusNode = bundle.sceneGraph.mesh(name = "torus", material = torusMaterial) {
    transform.set(Matrix4f().translate(0f, -0.16f, 0f).rotateX(0.24f).rotateY(-0.25f))
    renderable?.userData = "torus"
}
val torus = bundle.registerTestTorus(name = "torus", slices = 72, stacks = 72, renderer = renderer)
torus.bindNode(torusNode)
torus.applyFabricateMaterial(torusMaterial)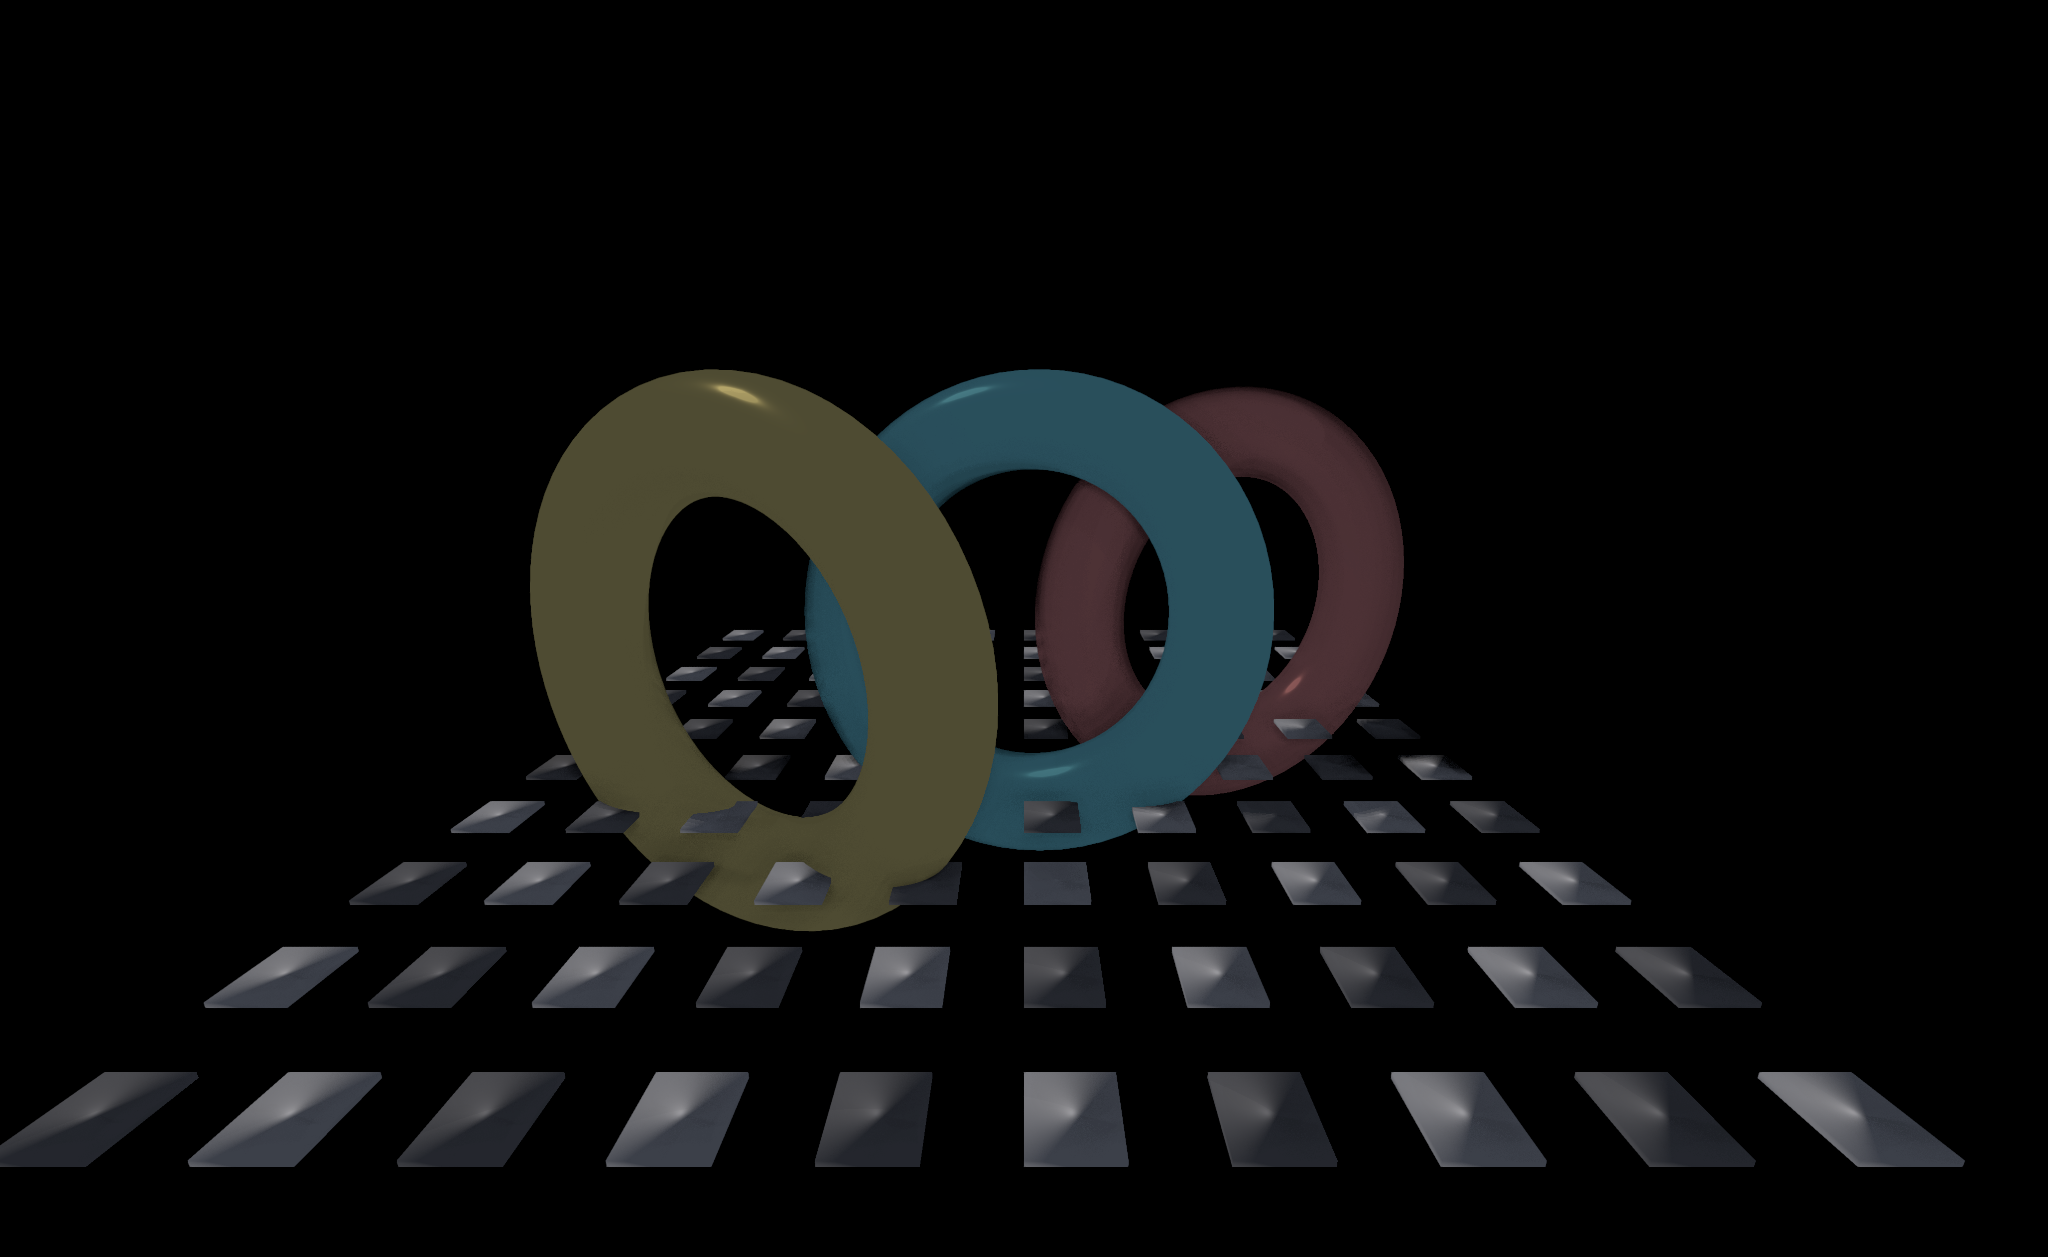
Two camera framings over one scene
The same checkerboard setup, geometry unchanged, seen from two cameras: a near framing and a far one, so the depth layering reads off one image.
Nothing changes between the two halves except camera.at and camera.target:
bundle.scene.camera.at.set(-1.55f, 0.72f, -1.75f)
bundle.scene.camera.target.set(-0.95f, -0.2f, 0.95f)

// capture the near framing

bundle.scene.camera.at.set(1.45f, 0.78f, -3.35f)
bundle.scene.camera.target.set(0.95f, -0.15f, -1.35f)

// capture the far framing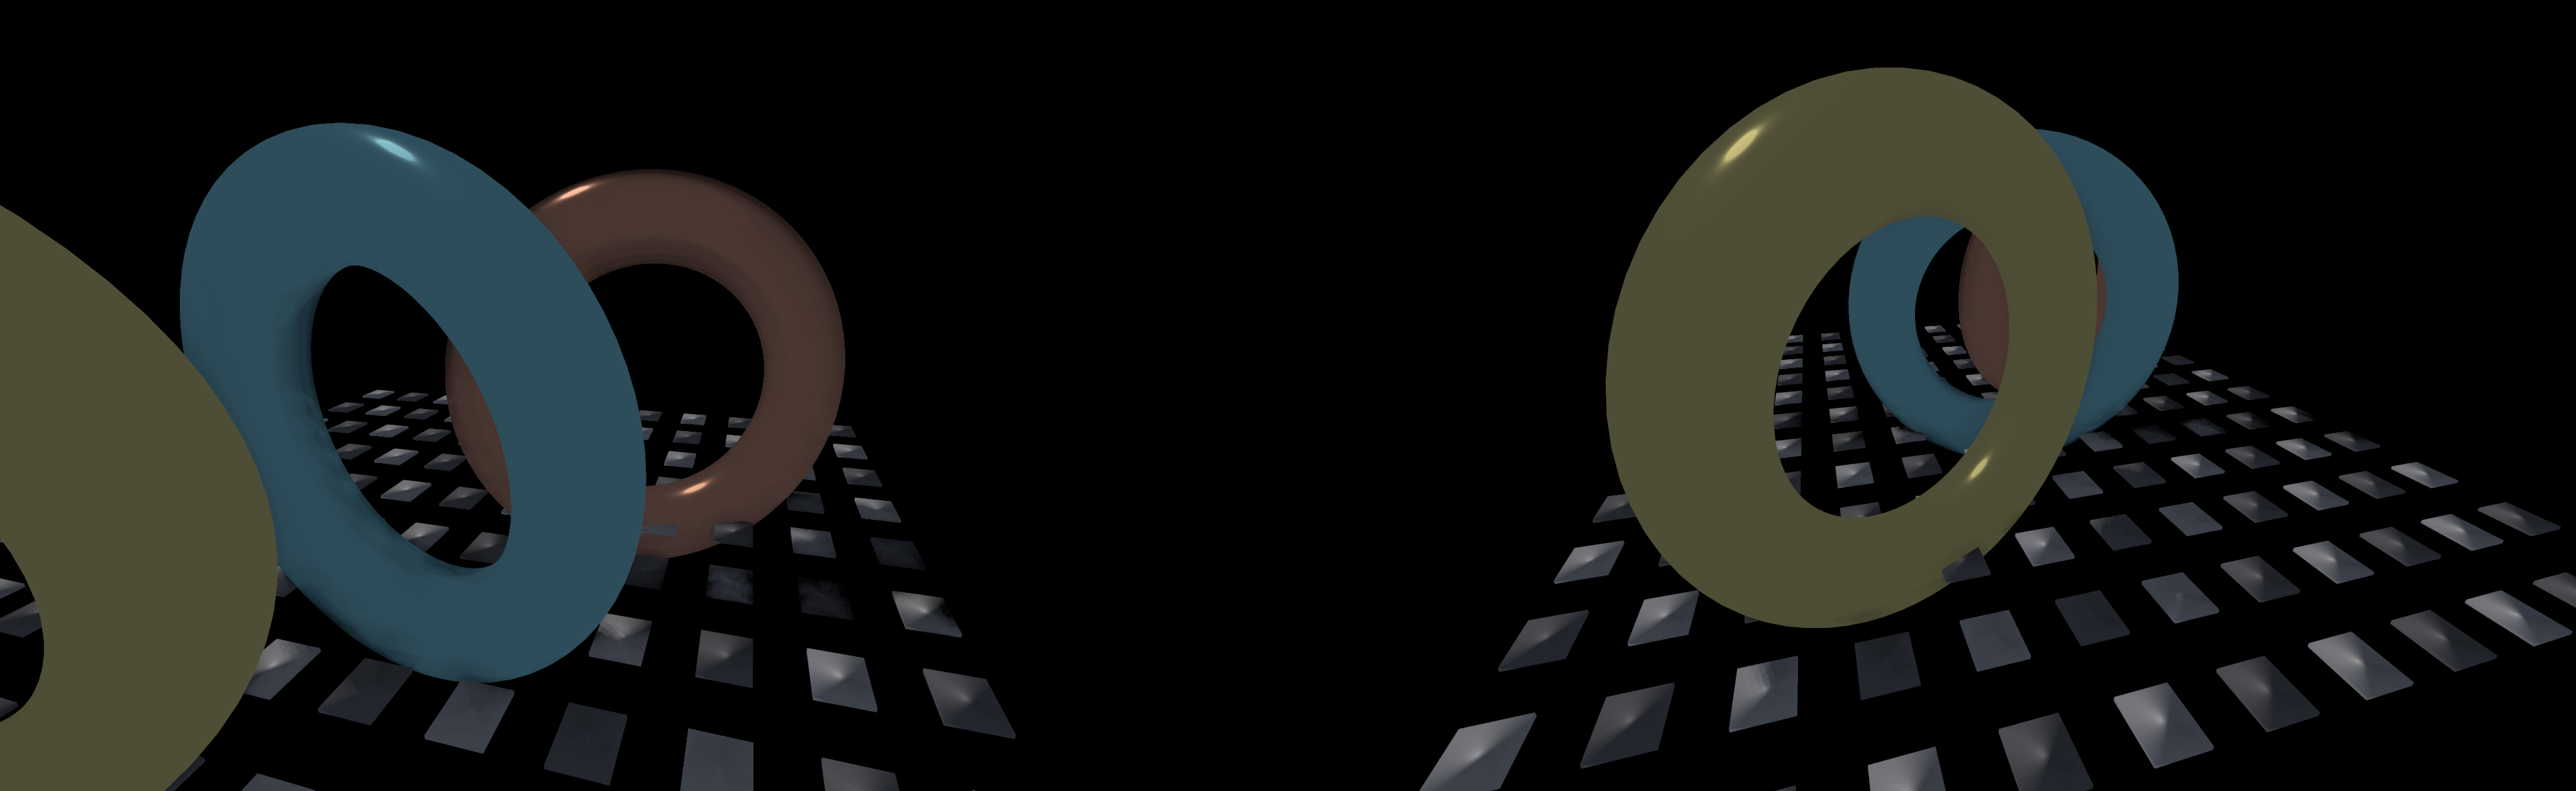
Shader-generated checkerboard
This variant keeps floor geometry to a single scaled cube and generates the checker tiles procedurally in the g-buffer fragment shader. Use shader-generated tiles when you want lower mesh/buffer overhead; use mesh-split tiles when you need per-tile transforms or per-tile material control. The checker pattern is evaluated in world space, so model scaling directly affects tile density.
Limitations:
- No per-tile transforms or per-tile material edits (all tiles share one mesh/material state)
- World-space scale dependency for checker density
- Shader-only pattern can alias at grazing angles compared with textured/filtered approaches
The mesh is one scaled cube. Fabricate owns the transform/material intent; the checker controls are extra shader parameters on the g-buffer mesh:
val material = FabricateMaterial(
    baseColor = Vector4f(0.58f, 0.58f, 0.62f, 1f),
    roughness = 0.9f,
)
val node = bundle.sceneGraph.mesh(name = "shader-floor", material = material) {
    transform.set(
        Matrix4f().translate(0f, -1.0f, 0f).scale(3.2f, 0.02f, 3.2f),
    )
    renderable?.userData = "shader-floor"
}
val floor = bundle.registerCube(name = "shader-floor", size = 1f, renderer = renderer)
floor.bindNode(node)
floor.applyFabricateMaterial(material)

floor.gBuffer.mesh.push["checkerScale"] = 3.0f
floor.gBuffer.mesh.push["checkerColor"] = Vector4f(0.20f, 0.20f, 0.22f, 1f)
floor.gBuffer.mesh.push["checkerMix"] = 1f

bundle.applyScenePlan()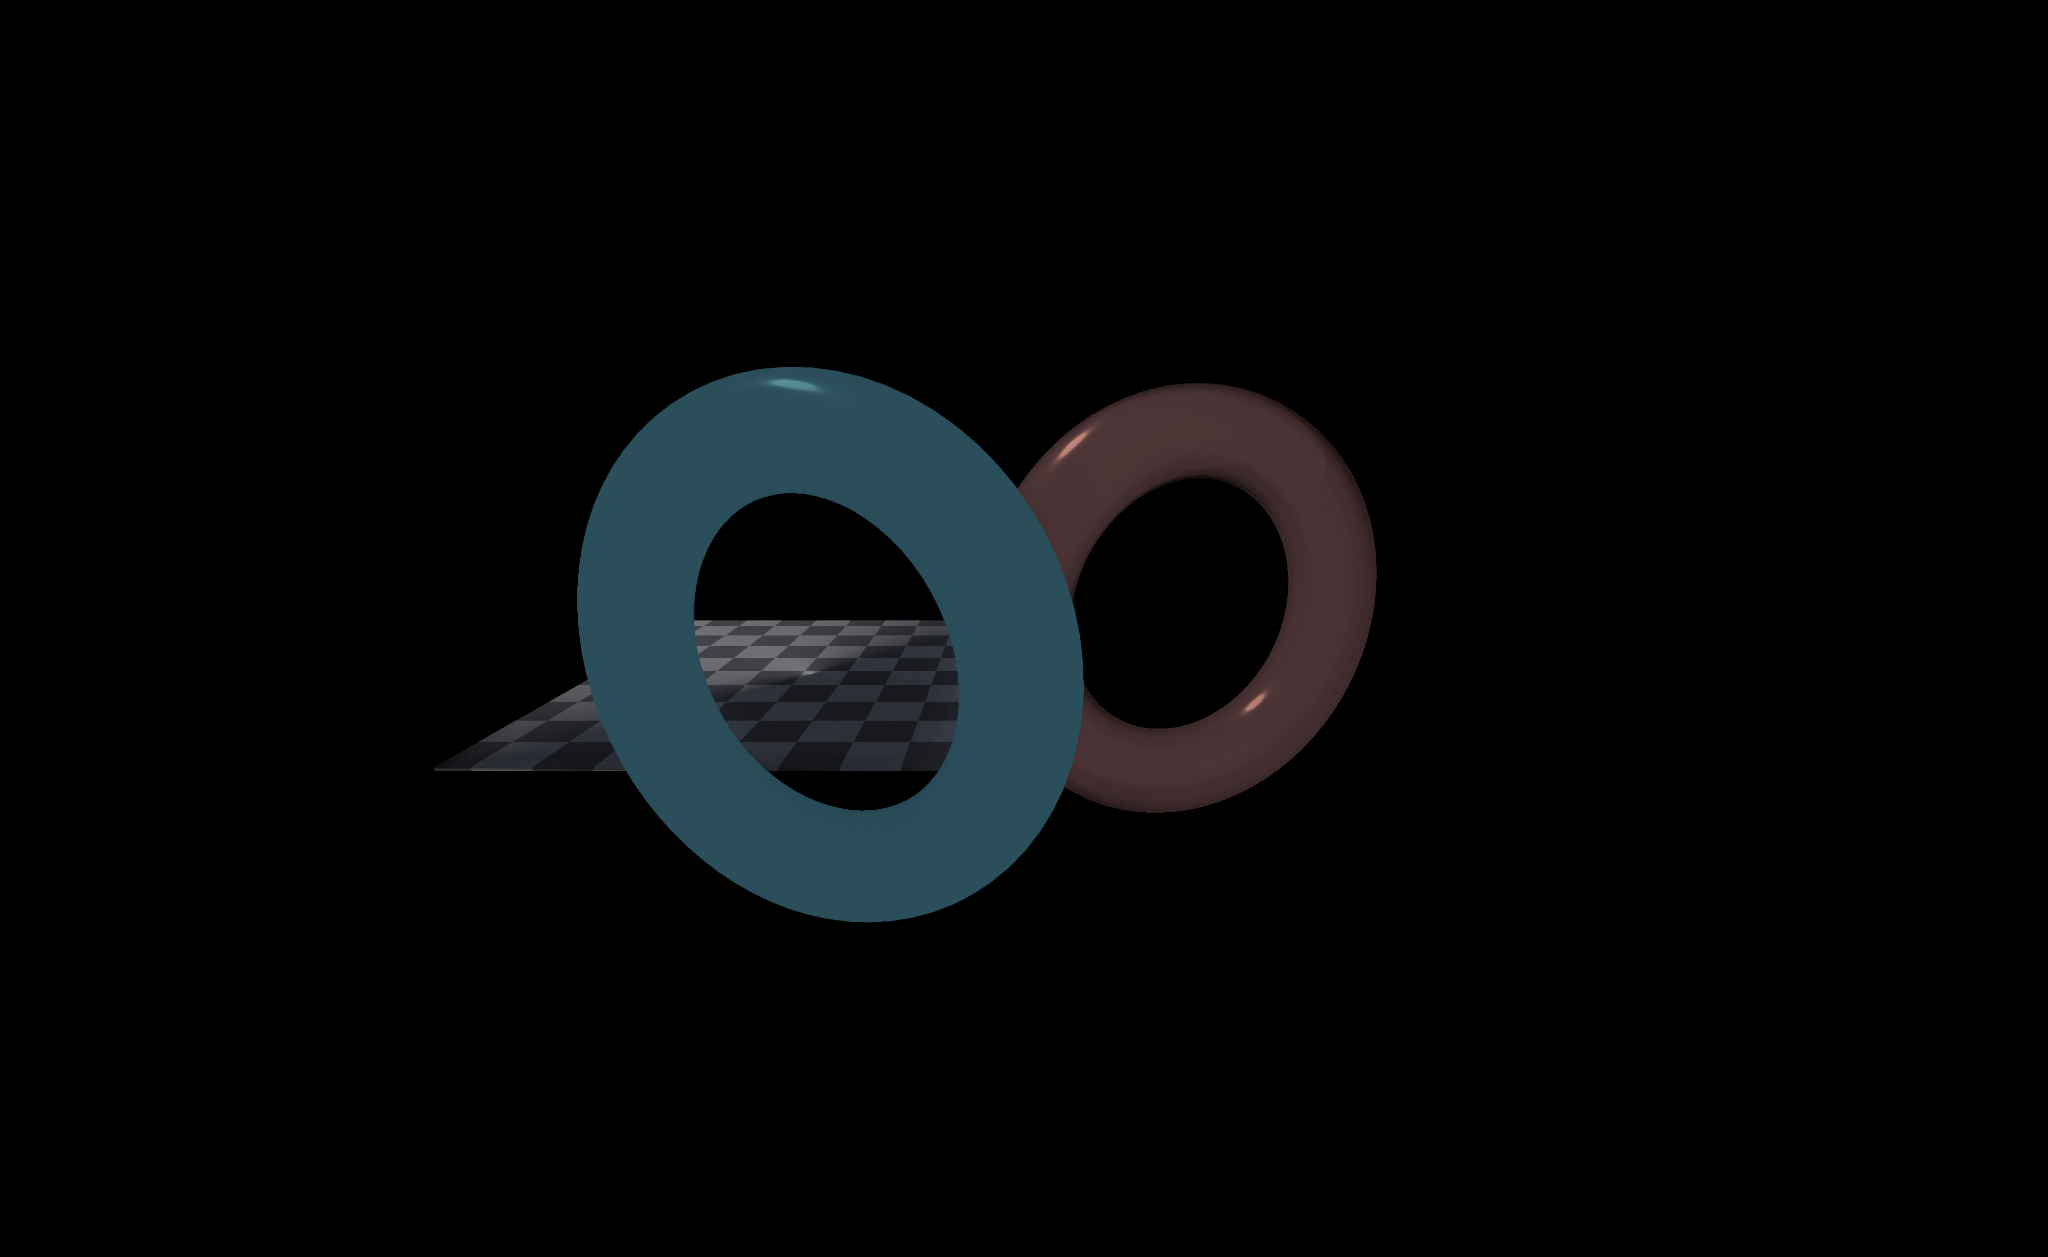
Blended transparency
Transparent meshes render after the deferred lighting pass. Fabricate copies the lit opaque scene into transparentComposite, then draws transparent pulling meshes with alpha blending while sampling opaque g-buffer depth to discard hidden fragments.
The scene graph supplies the ordering; the transparency pass supplies the blending:
val node = bundle.sceneGraph.mesh(
    name = "near-glass",
    material = FabricateMaterial(Vector4f(1.0f, 0.78f, 0.38f, 0.38f)).transparent(0.38f),
) {
        transform.set(Matrix4f().translate(0.42f, -0.28f, -0.38f).scale(0.66f))
        renderable?.userData = "near-glass"
    }

val glass = bundle.registerTransparentPullingMesh(
    name = "near-glass",
    maxVertices = 32 * 32 * 6,
    renderer = renderer,
)

StandardShapes.sphere(
        positions = glass.position,
        normals = glass.normal,
        radius = 1f,
        slices = 32,
        stacks = 32,
        config = StandardShapes.WriteConfig(append = false),
    )
    .also { glass.setVertexCount(it.writtenVertices) }

glass.bindModel { Matrix4f(node.worldMatrix) }
glass.applyFabricateMaterial(node.renderable!!.material)

bundle.sceneGraph.updateWorldTransforms()
bundle.sortTransparentMeshes()
bundle.present(renderer = renderer)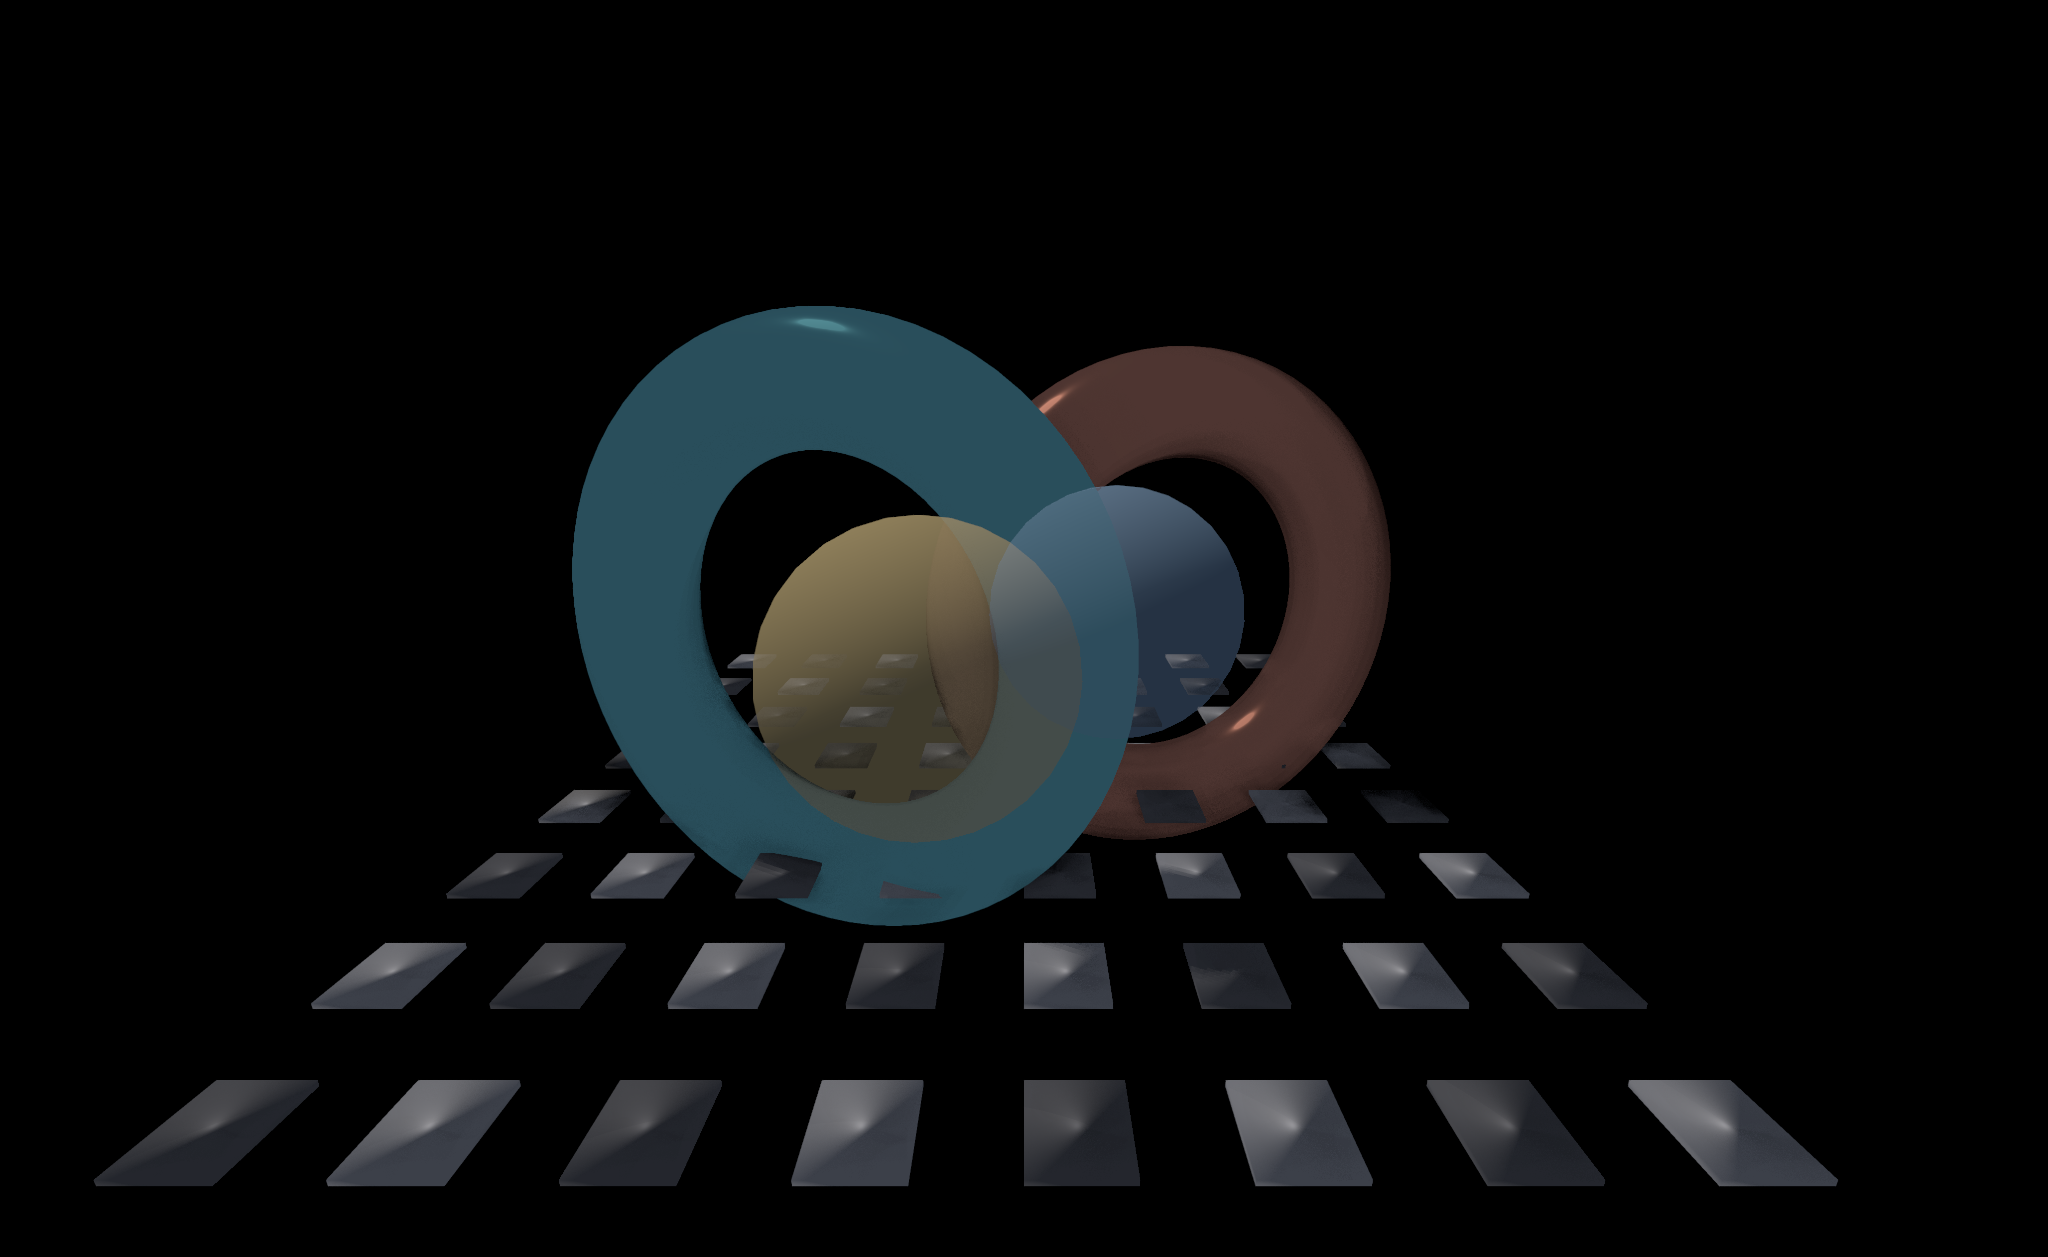
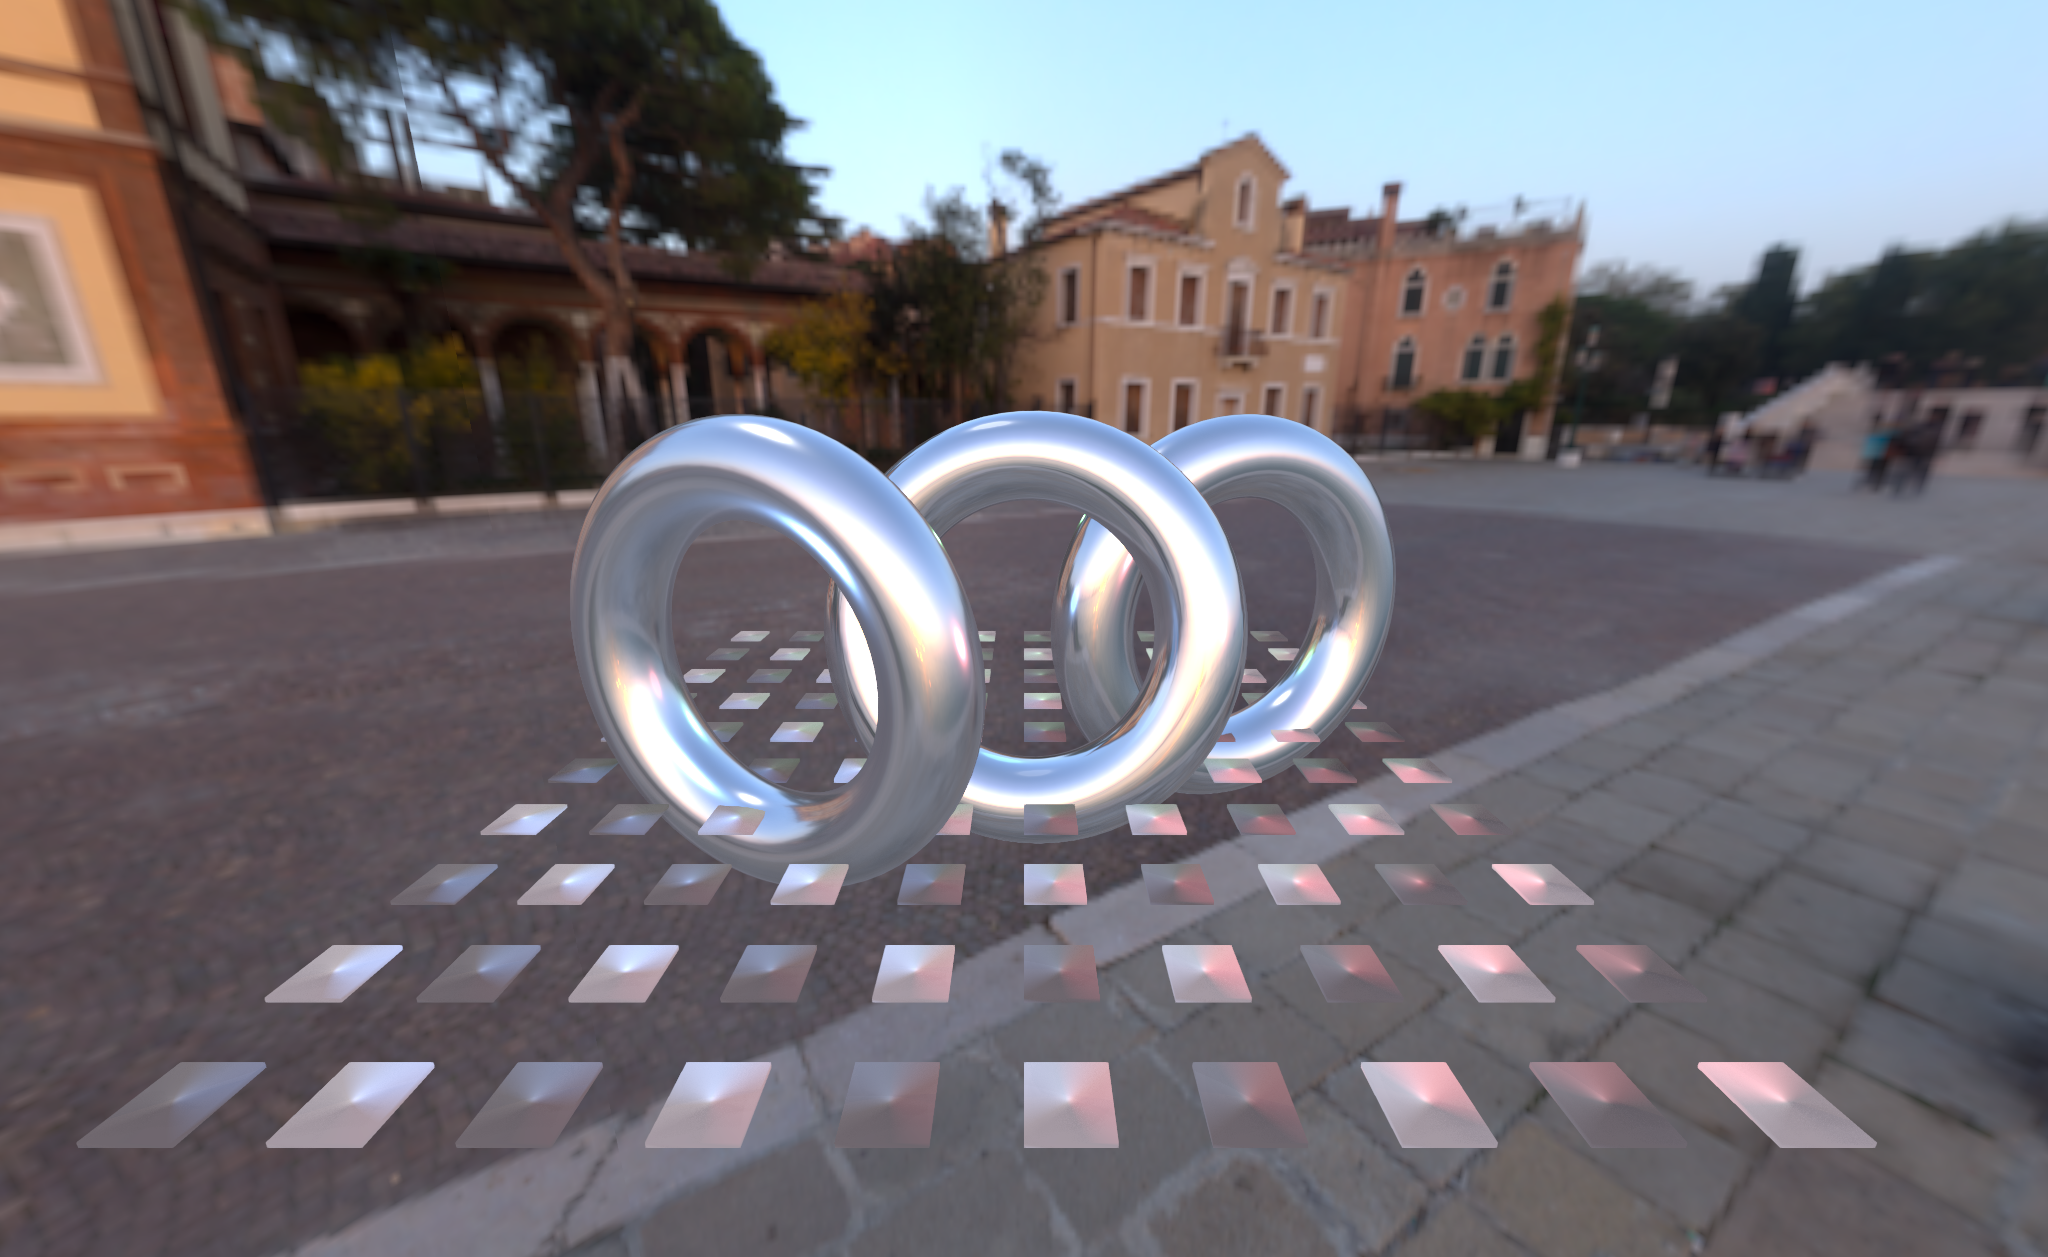
Lights and skybox
The scene graph carries a Three.js-style light list: one shadow-casting directional key light, plus point and spot lights up to bundle.maxLights, which is 64, all evaluated in the deferred lighting pass. It can also draw the loaded environment map as the scene background instead of a flat colour.
Lights are pure scene state; an attached bundle uploads them to the lighting pass on the next frame after any change (bundle.syncLights() does it at once). The first shadow-casting directional light becomes the key light that drives the shadow map, or the first directional light of any kind if none of them cast shadows; every other light is shaded without shadows, and syncLights() takes only the first maxLights of them. bundle.showEnvironmentBackground() turns the equirect environment into the backdrop.
val bundle = StandardRenderer.build(
    renderer,
    StandardRenderer.Config(environmentTexture = environment, environmentStrength = 0.85f),
)

// Environment as backdrop (Three.js scene.background = envMap).
bundle.showEnvironmentBackground(true)

// One shadowed key light + coloured point lights that pool on the floor.
bundle.addLight(FabricateLight.directional(Vector3f(-0.4f, -1f, -0.3f), intensity = 1.7f, castShadow = true))
bundle.addLight(
    FabricateLight.point(
        Vector3f(-1.7f, 0.15f, -1.2f),
        color = Vector3f(1f, 0.22f, 0.25f),
        intensity = 10f,
        range = 5.5f,
    ),
)
bundle.addLight(
    FabricateLight.point(Vector3f(1.7f, 0.1f, -1.0f), color = Vector3f(0.25f, 0.5f, 1f), intensity = 10f, range = 5.5f),
)
bundle.addLight(FabricateLight.spot(Vector3f(0f, 2f, 0f), Vector3f(0f, -1f, 0f), intensity = 12f, range = 8f))
bundle.syncLights()
Point lights use inverse-square falloff clamped by range; spot lights add an inner/outer cone. Metals show these as sharp coloured highlights (they have no diffuse term); dielectrics such as the checkerboard floor catch the coloured pools.
Post stack
The post stack is Fabricate's small EffectComposer equivalent. It starts with the transparent composite and, by default, runs motion blur then FXAA:
println(bundle.postStack.names()) // [motion-blur, aa]
println(bundle.postStack.output()) // the texture bundle.present(...) will use
Append a fullscreen shader effect with addShaderEffect. The fragment shader receives the previous stack output as sourceTex; the new pass becomes the stack output.
bundle.addShaderEffect(
    "vignette-warmth",
    """
    #version 450
    layout(location = 0) in vec2 vUv;
    layout(set = 0, binding = 0) uniform sampler2D sourceTex;
    layout(location = 0) out vec4 outColor;

    void main() {
        vec4 c = texture(sourceTex, vUv);
        vec2 p = vUv * 2.0 - 1.0;
        float vignette = 1.0 - smoothstep(0.18, 1.05, dot(p, p));
        vec3 warm = c.rgb * vec3(1.18, 1.04, 0.84);
        vec3 lifted = pow(max(warm, vec3(0.0)), vec3(0.88));
        vec3 graded = mix(c.rgb, lifted, 0.72) * mix(0.38, 1.22, vignette);
        outColor = vec4(graded, c.a);
    }
    """
        .trimIndent(),
    renderer = renderer,
)

bundle.present(renderer = renderer)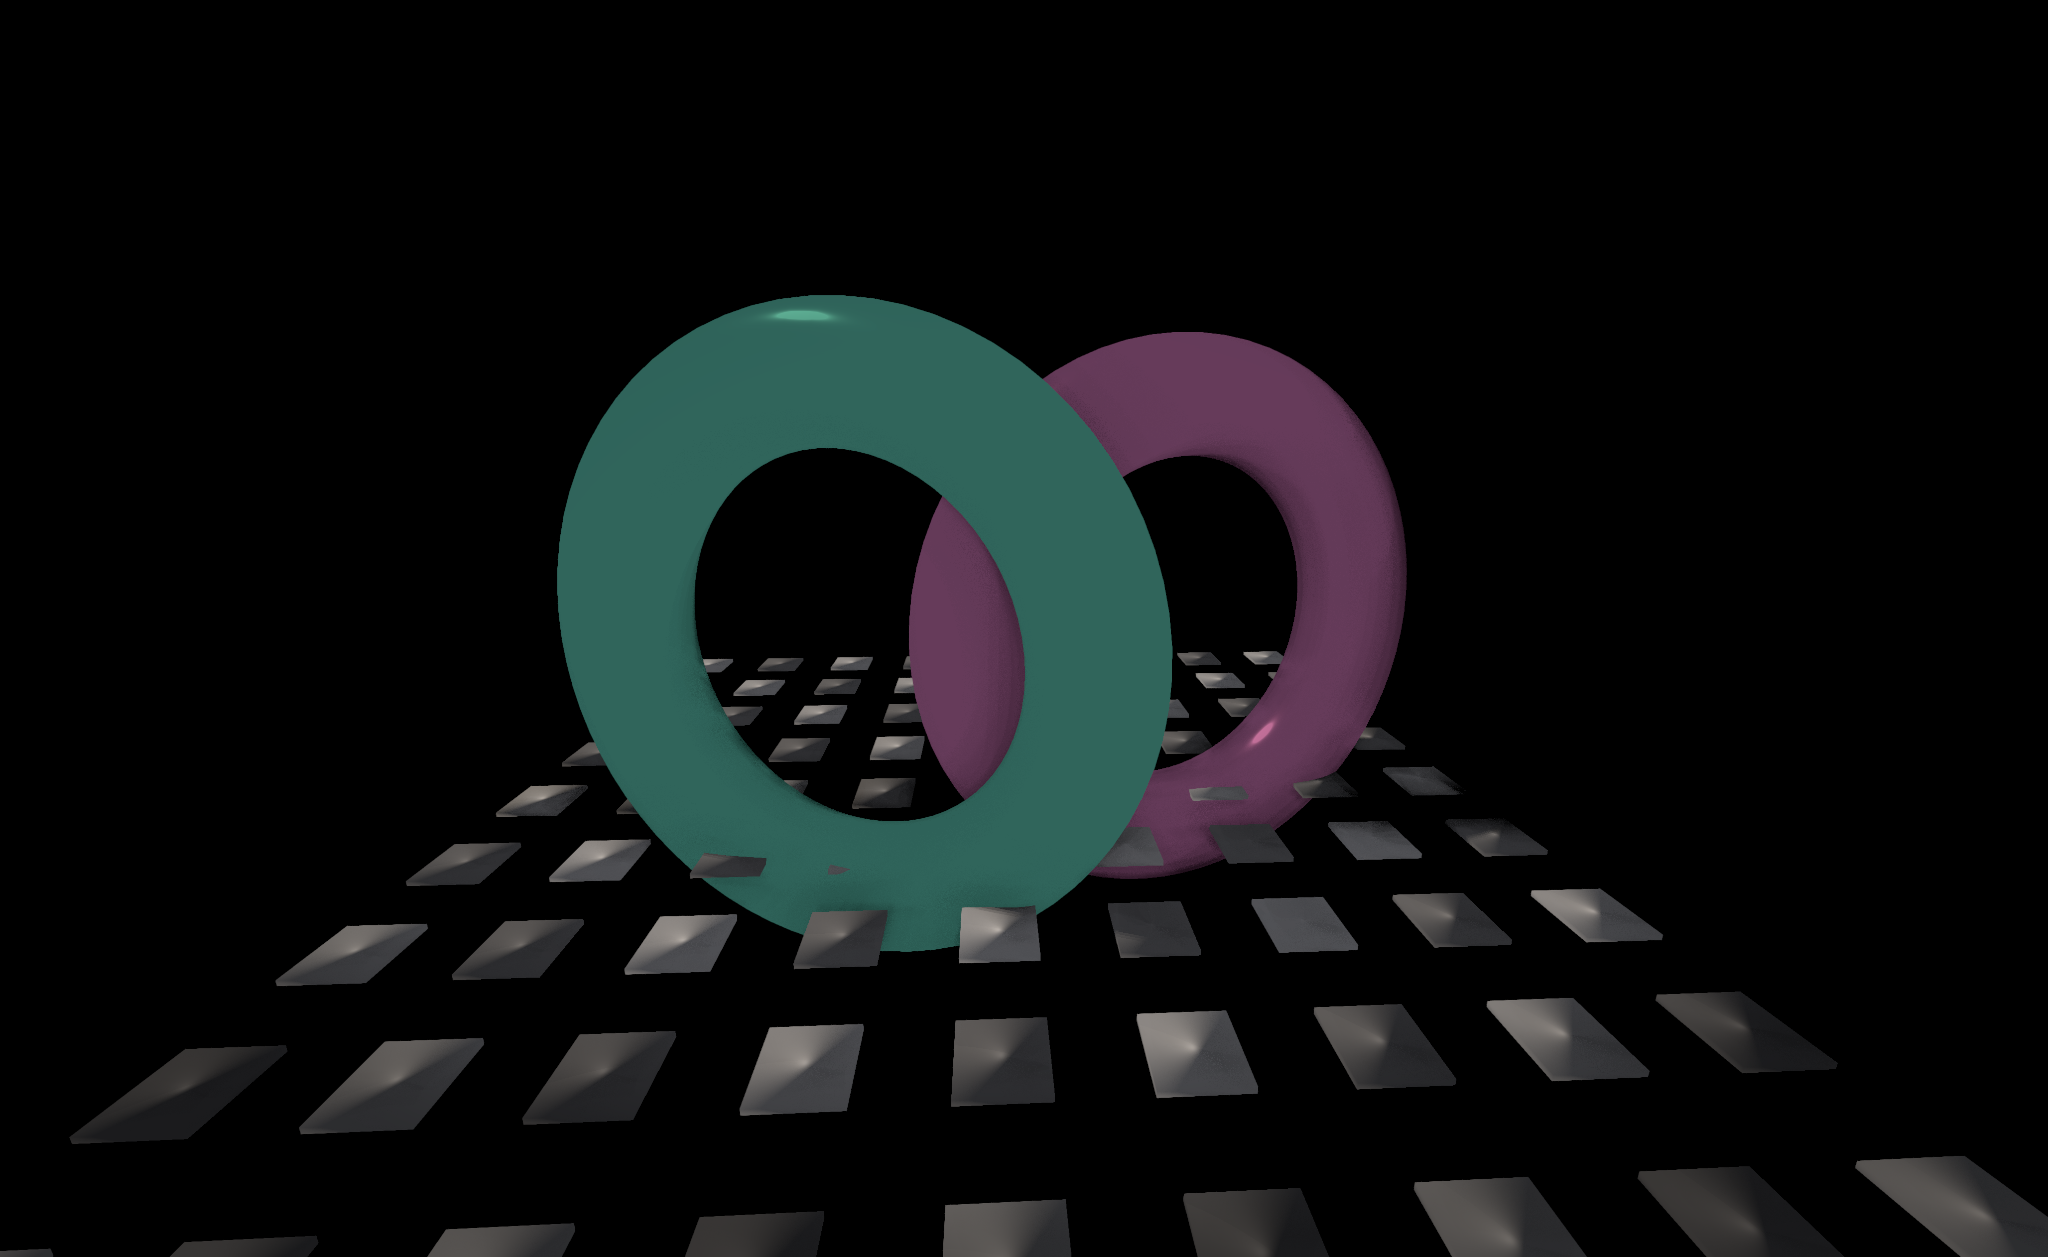
Tone mapping and bloom
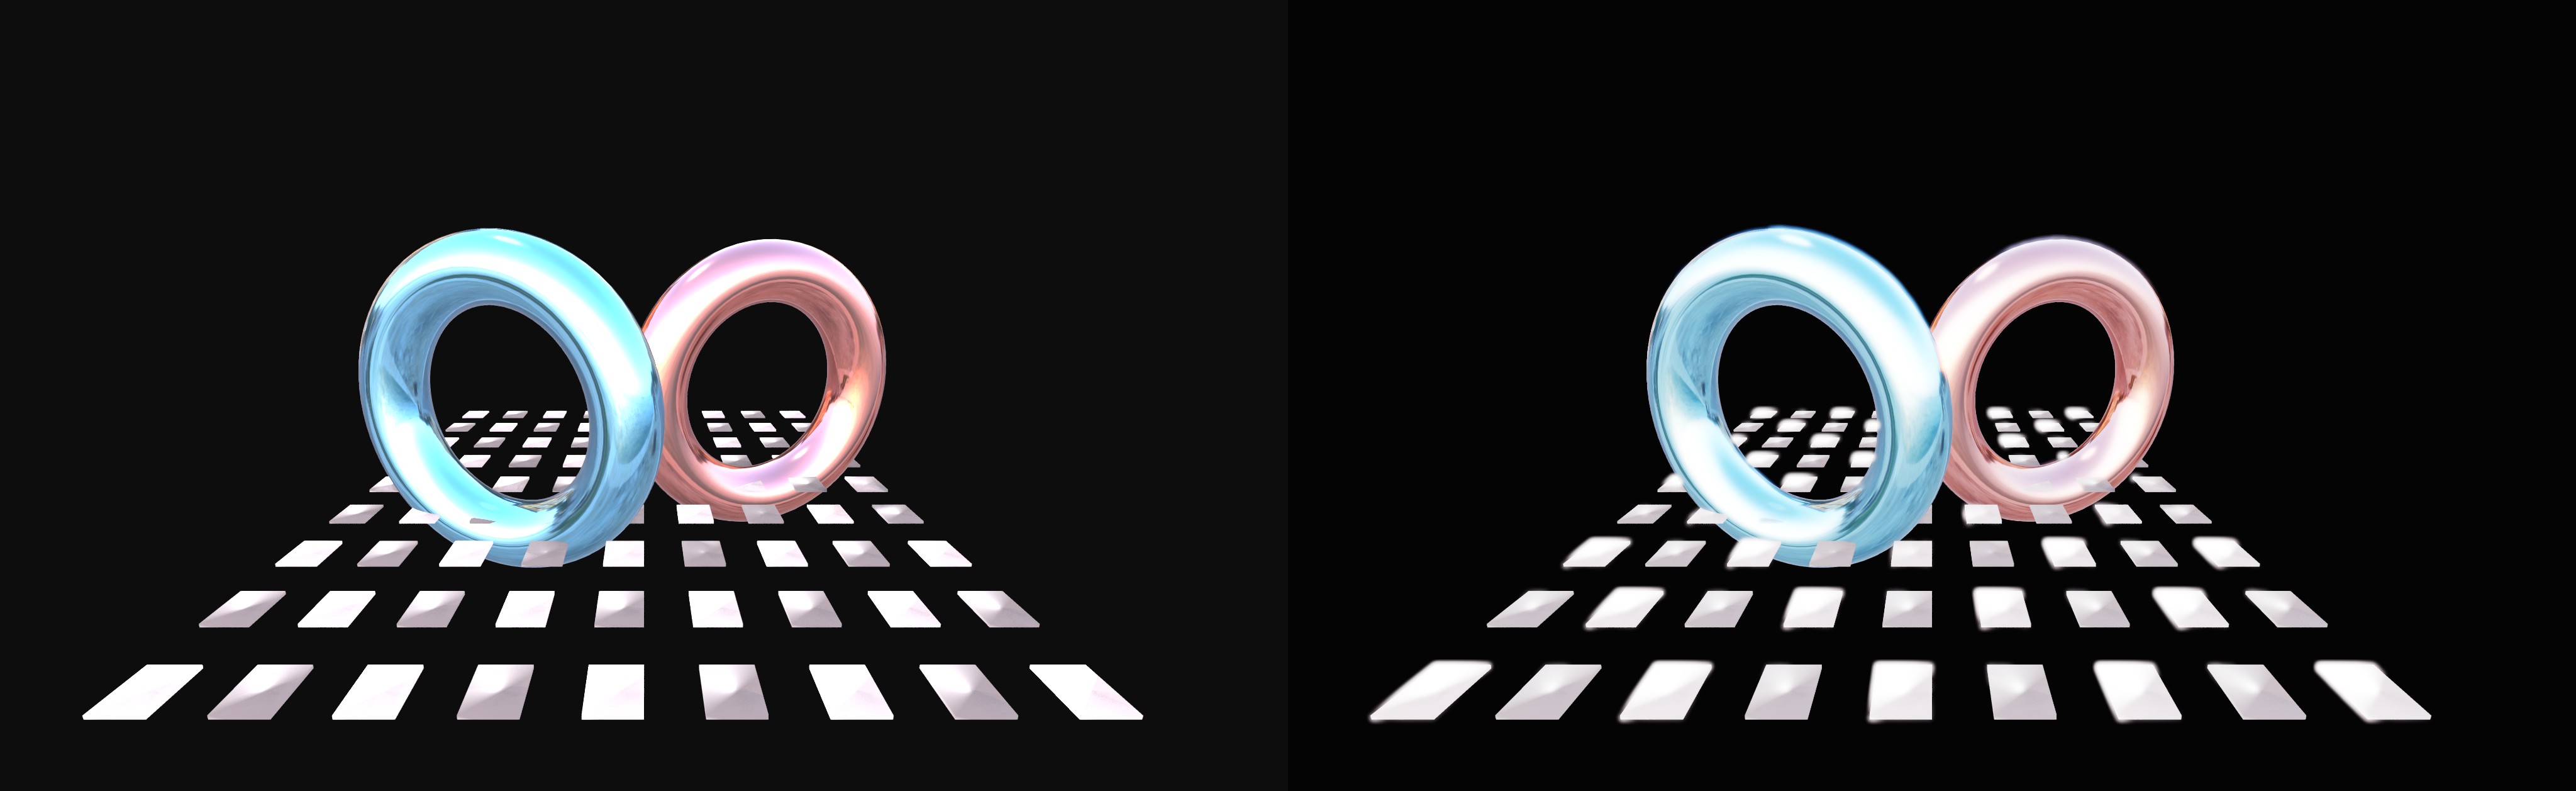
Deferred lighting runs in HDR, so raw output clips bright highlights to white. Tone mapping compresses HDR into a displayable range, and bloom bleeds the brightest regions into a soft glow.
bundle.setToneMapping(...) appends a tone-map pass that always runs last (options: NONE, REINHARD, FILMIC, ACES, AGX, plus an exposure multiplier). bundle.addBloom(...) inserts a bright-pass, separable blur, and additive composite ahead of the tone-map pass, so bloom accumulates on HDR values before they are compressed. Both modify the post stack, and a bundle already attached to a renderer picks the change up itself.
bundle.addBloom(threshold = 1.0f, intensity = 0.85f, radius = 3.2f)
bundle.setToneMapping(FabricateToneMap.ACES, exposure = 1.0f)
bundle.attachTo(renderer)
bundle.present(renderer = renderer)
The comparison below is the same strongly lit scene captured twice. On the left is the raw HDR output with no tone mapping: every floor tile clips to flat white, and the brightest parts of the rings go white too. On the right, with bloom and ACES, the tiles keep a little shading, each one carries a soft halo, and the rings hold more of their colour.
glTF loading and animation
The GLTF path uses the existing Assimp-backed loader, then imports mesh instances into the Fabricate scene graph. Opaque meshes go to the g-buffer/shadow pair. Alpha materials go to the blended transparency pass.
The example below loads the Khronos ToyCar sample: three mesh/material buckets, 77k vertices, 326k indices, and texture slots for base/diffuse, normal, emissive, packed occlusion/roughness/metalness, and clearcoat inputs. The StandardRenderer material bridge consumes base-color textures, UVs, glTF tangent frames, alpha/transmission classification, metalness, roughness, tangent-space normal maps, packed metal/roughness maps, occlusion, emissive maps, clearcoat factors/maps, shadows, AO, and equirectangular image-based lighting from float EXR environments with GGX-prefiltered radiance mips. The headlamp lens ridges depend on the normal map being sampled in the model's tangent basis. Texture transforms (KHR_texture_transform) are applied as one offset and scale per material: the cloth's base colour and normal map repeat three times while its occlusion map does not, as the file specifies. A rotated transform, or two different ones in one material, is logged and sampled with the first. It does not yet handle physical transmission/refraction, sheen, BRDF LUT integration, cubemap PMREM, or clearcoat roughness/normal texture variants. registerGltf logs which of a file's glTF extensions it did not evaluate; for ToyCar that is transmission and sheen.
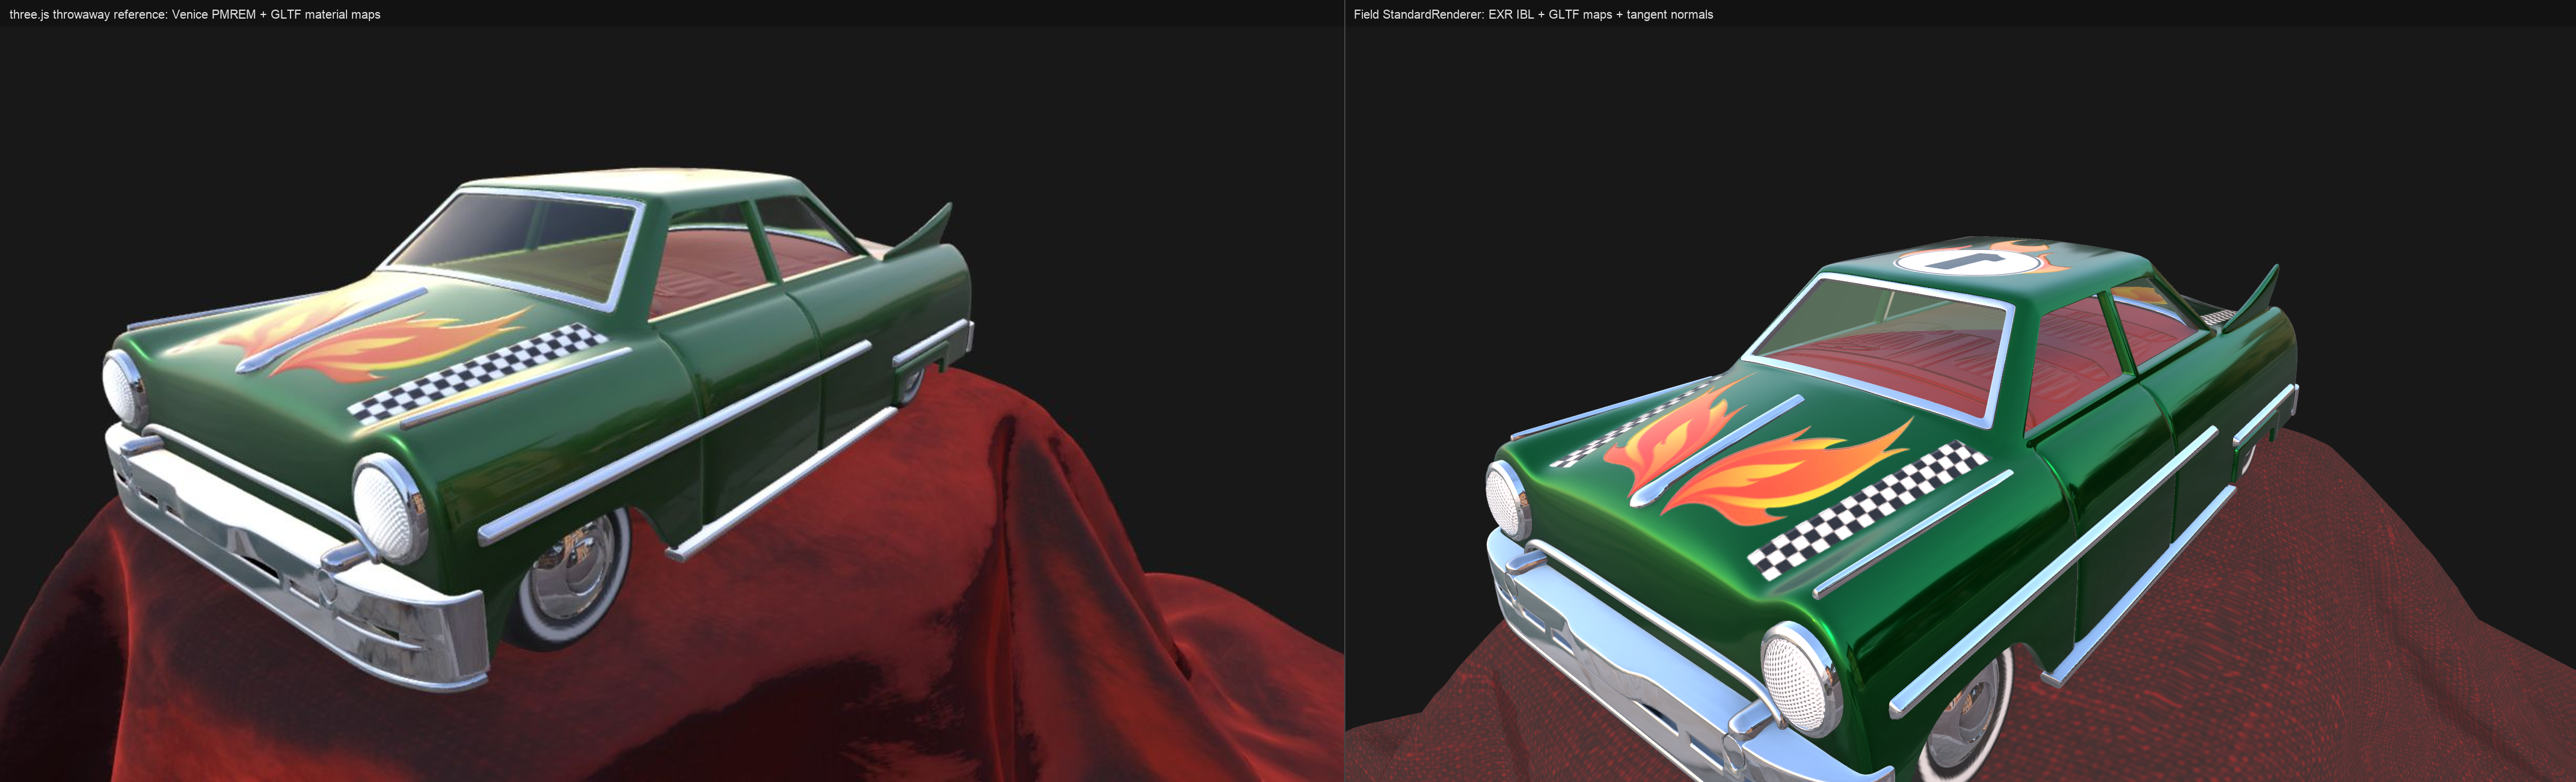
Comparing the ToyCar capture with three.js
The reference for this capture is Don McCurdy's glTF Viewer with the same ToyCar model and Venice Sunset environment, used for exposure, contrast, fabric detail, and material readability. Its baseline settings are:
- Environment: Venice Sunset EXR
- Environment processing: Three.js
PMREMGenerator.fromEquirectangular(...) - Tone mapping: Linear
- Exposure:
0 - Punctual lights: on
- Ambient intensity:
0.3 - Direct intensity:
0.8 * PI - Background:
#191919
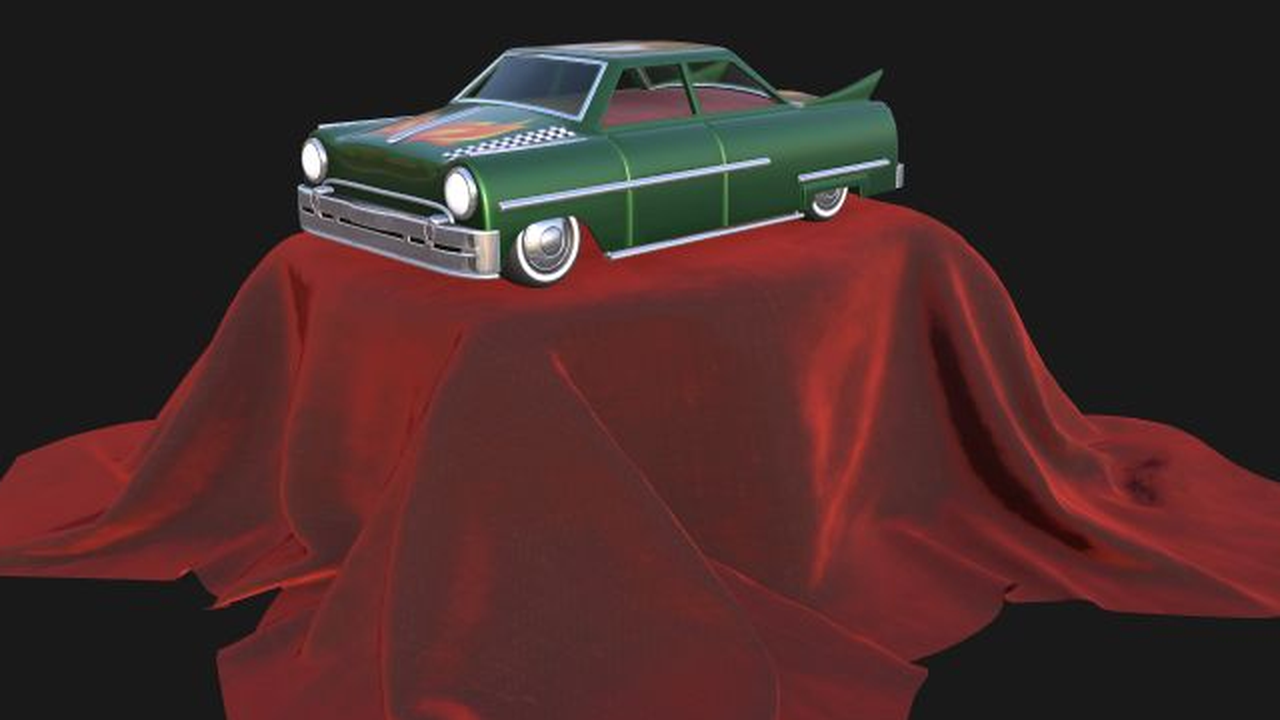
The grime and surface variation are in the GLB's own texture maps; neither viewer adds procedural dirt. StandardRendererDocsHarness renders the ToyCar capture at the reference's 50-degree field of view, from the same flatter near-roofline vantage, so the two framings match.
Loading it into a bundle:
/*
A repository-relative path, because this page's asset ships with the docs and the capture runs
from the repository root. In a document of your own, name the asset and let Field resolve it:
    val toyCarPath = "ToyCar.glb".absolutePath
which looks inside the document folder first and the workspace project second. See
"Where Field looks for a file" under Working in a Document.
*/
val toyCarPath = File("public/docs/assets/fabricate_demo/ToyCar.glb").absolutePath
val loaded = bundle.registerGltf(
    path = toyCarPath,
    namePrefix = "robot",
    renderer = renderer,
)

// The imported nodes carry bind-pose transforms and any sampled TRS animation.
bundle.sceneGraph.updateWorldTransforms(time = 0f)

// Advance sampled node animation and keep transparent draw order current.
loaded.animate(time = 1.25f)
bundle.sortTransparentMeshes()

println("opaque meshes: ${loaded.opaqueMeshes.size}")
println("transparent meshes: ${loaded.transparentMeshes.size}")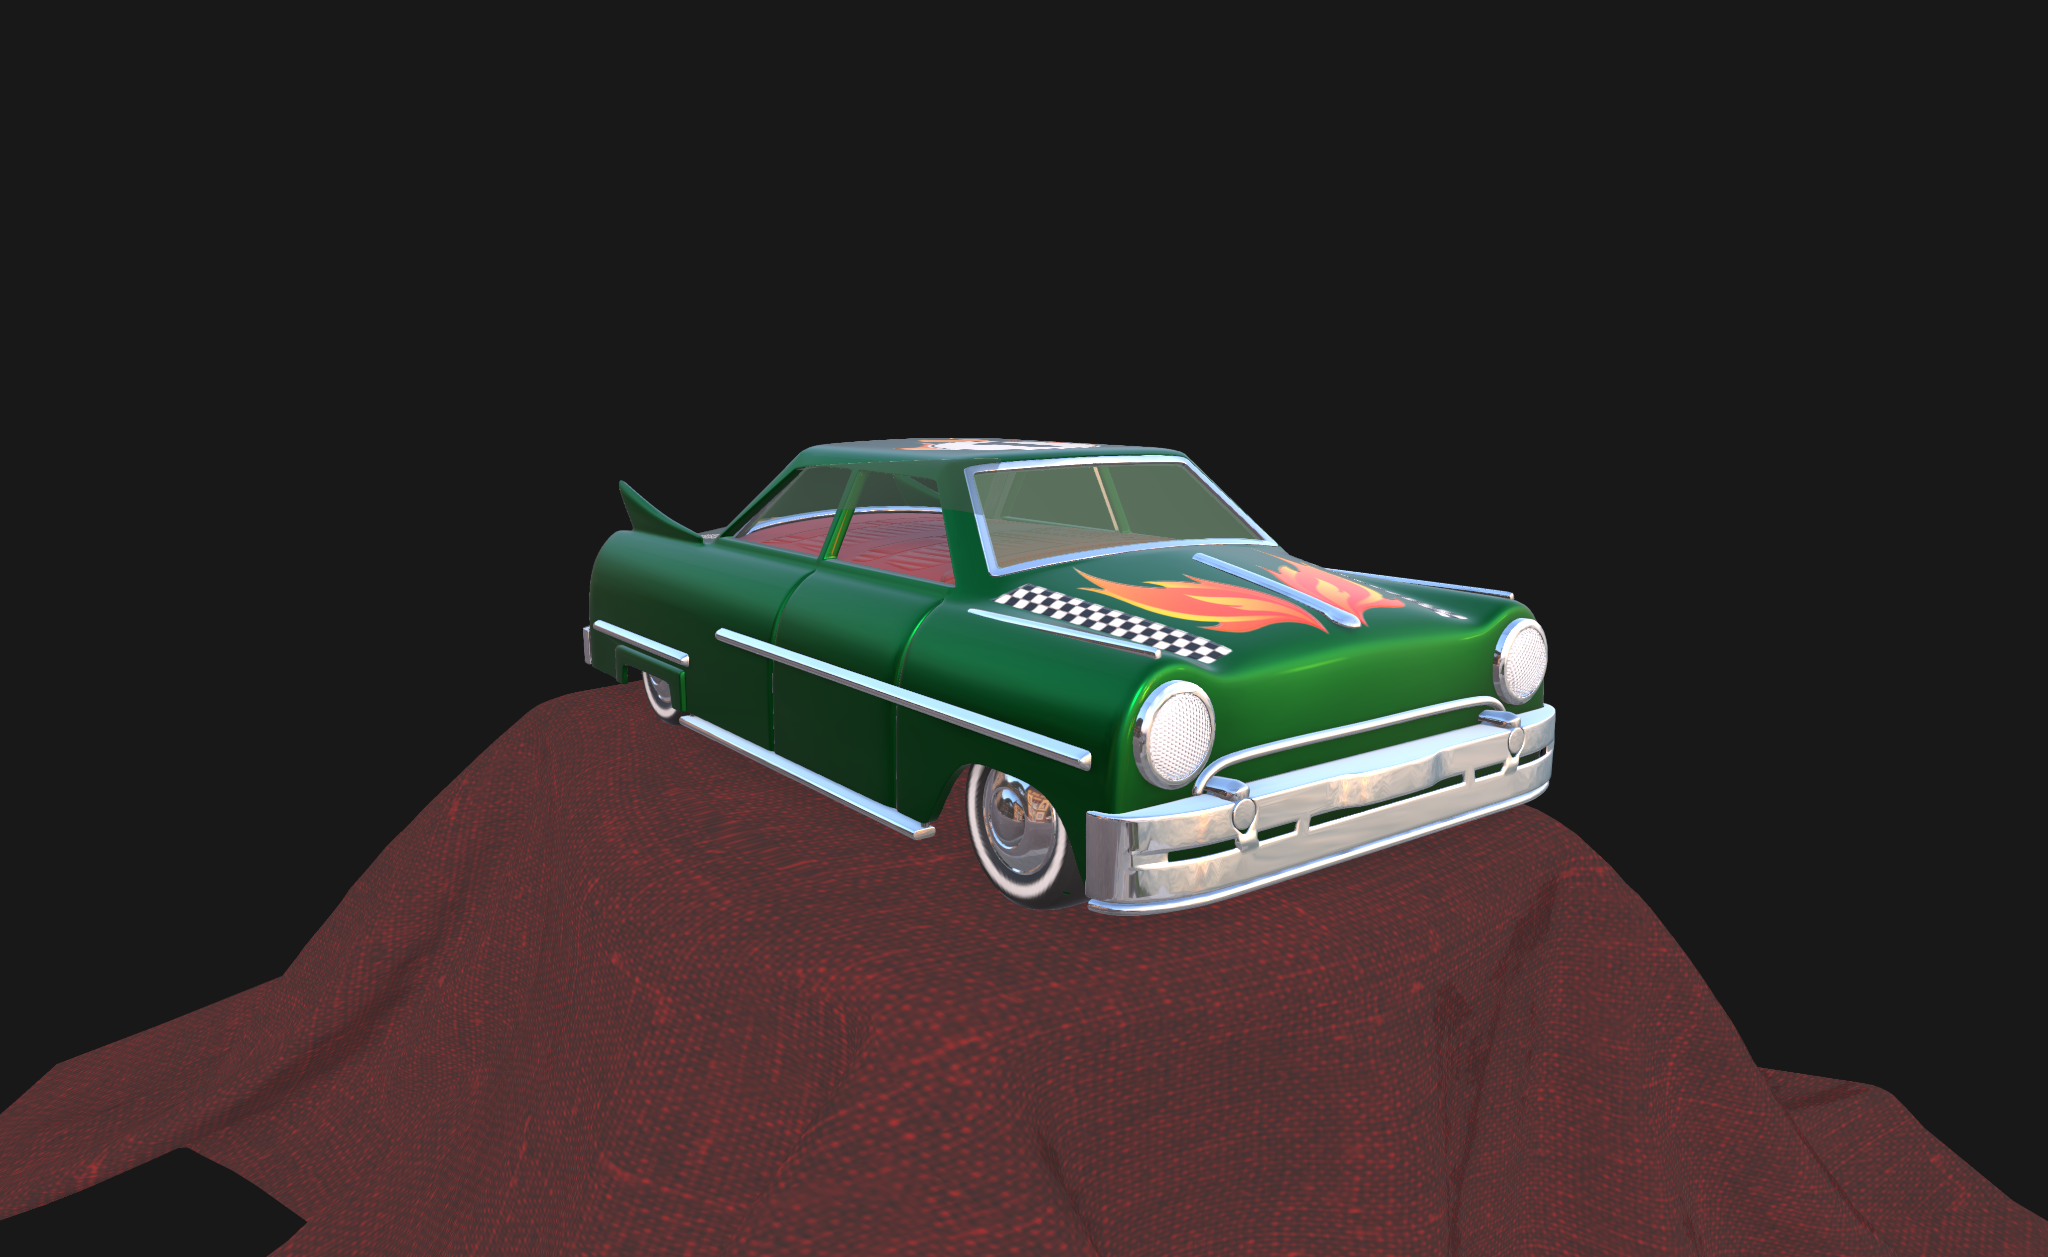
You can override material classification on import:
val model = GltfSupport.loadGltfBasic(toyCarPath)
bundle.sceneGraph.importGltf(model, namePrefix = "ghost") { mesh ->
    FabricateMaterial.fromGltf(mesh.material).transparent(0.42f)
}
For tooling that wants only the pure scene representation, FabricateGltfBridge.fromModel(model) returns a FabricateScene without registering renderer meshes. Use bundle.registerGltf(...) when you want GPU draw resources and FabricateGltfBridge when you want to inspect or plan imported nodes first.
The environment asset is already local. Load the EXR directly when the environment should participate in roughness-aware IBL. Ask the texture loader for prefiltered radiance mips so glossy materials can sample lower LODs as roughness rises. The PNG companion is a debug/preview fallback.
// Again a docs-repository path. In a document of your own, drop the EXR into the document folder
// and ask for it by name: "venice_sunset_1k.exr".absolutePath.
val veniceExr = File("public/docs/assets/fabricate_demo/venice_sunset_1k.exr").absolutePath

val environment =
    LoadedTexture.fromExrFile(
            veniceExr,
            renderer,
            requestedMipLevels = 0,
            prefilterEnvironment = true,
        )
        .also {
            it.setDefaultSampler()
            it.transferNow()
        }

val bundle = StandardRenderer.build(
    renderer,
    StandardRenderer.Config(
        environmentTexture = environment,
        environmentStrength = 1.35f,
        environmentRotation = 0.42f,
        // Linear renderer input for a #191919-style sRGB background.
        backgroundColor = Vector3f(0.0093f, 0.0093f, 0.0093f),
    ),
)
Metalness
The two torii use the same base color and roughness. The left one is dielectric; the right one is metallic. Keeping the geometry fixed makes the material response visible.
baseColor and roughness stay fixed; only metallic changes:
left.gBuffer.mesh.push["baseColor"] = Vector4f(0.78f, 0.80f, 0.84f, 1f)
left.gBuffer.mesh.push["metallic"] = 0.0f
left.gBuffer.mesh.push["roughness"] = 0.16f

right.gBuffer.mesh.push["baseColor"] = Vector4f(0.78f, 0.80f, 0.84f, 1f)
right.gBuffer.mesh.push["metallic"] = 1.0f
right.gBuffer.mesh.push["roughness"] = 0.16f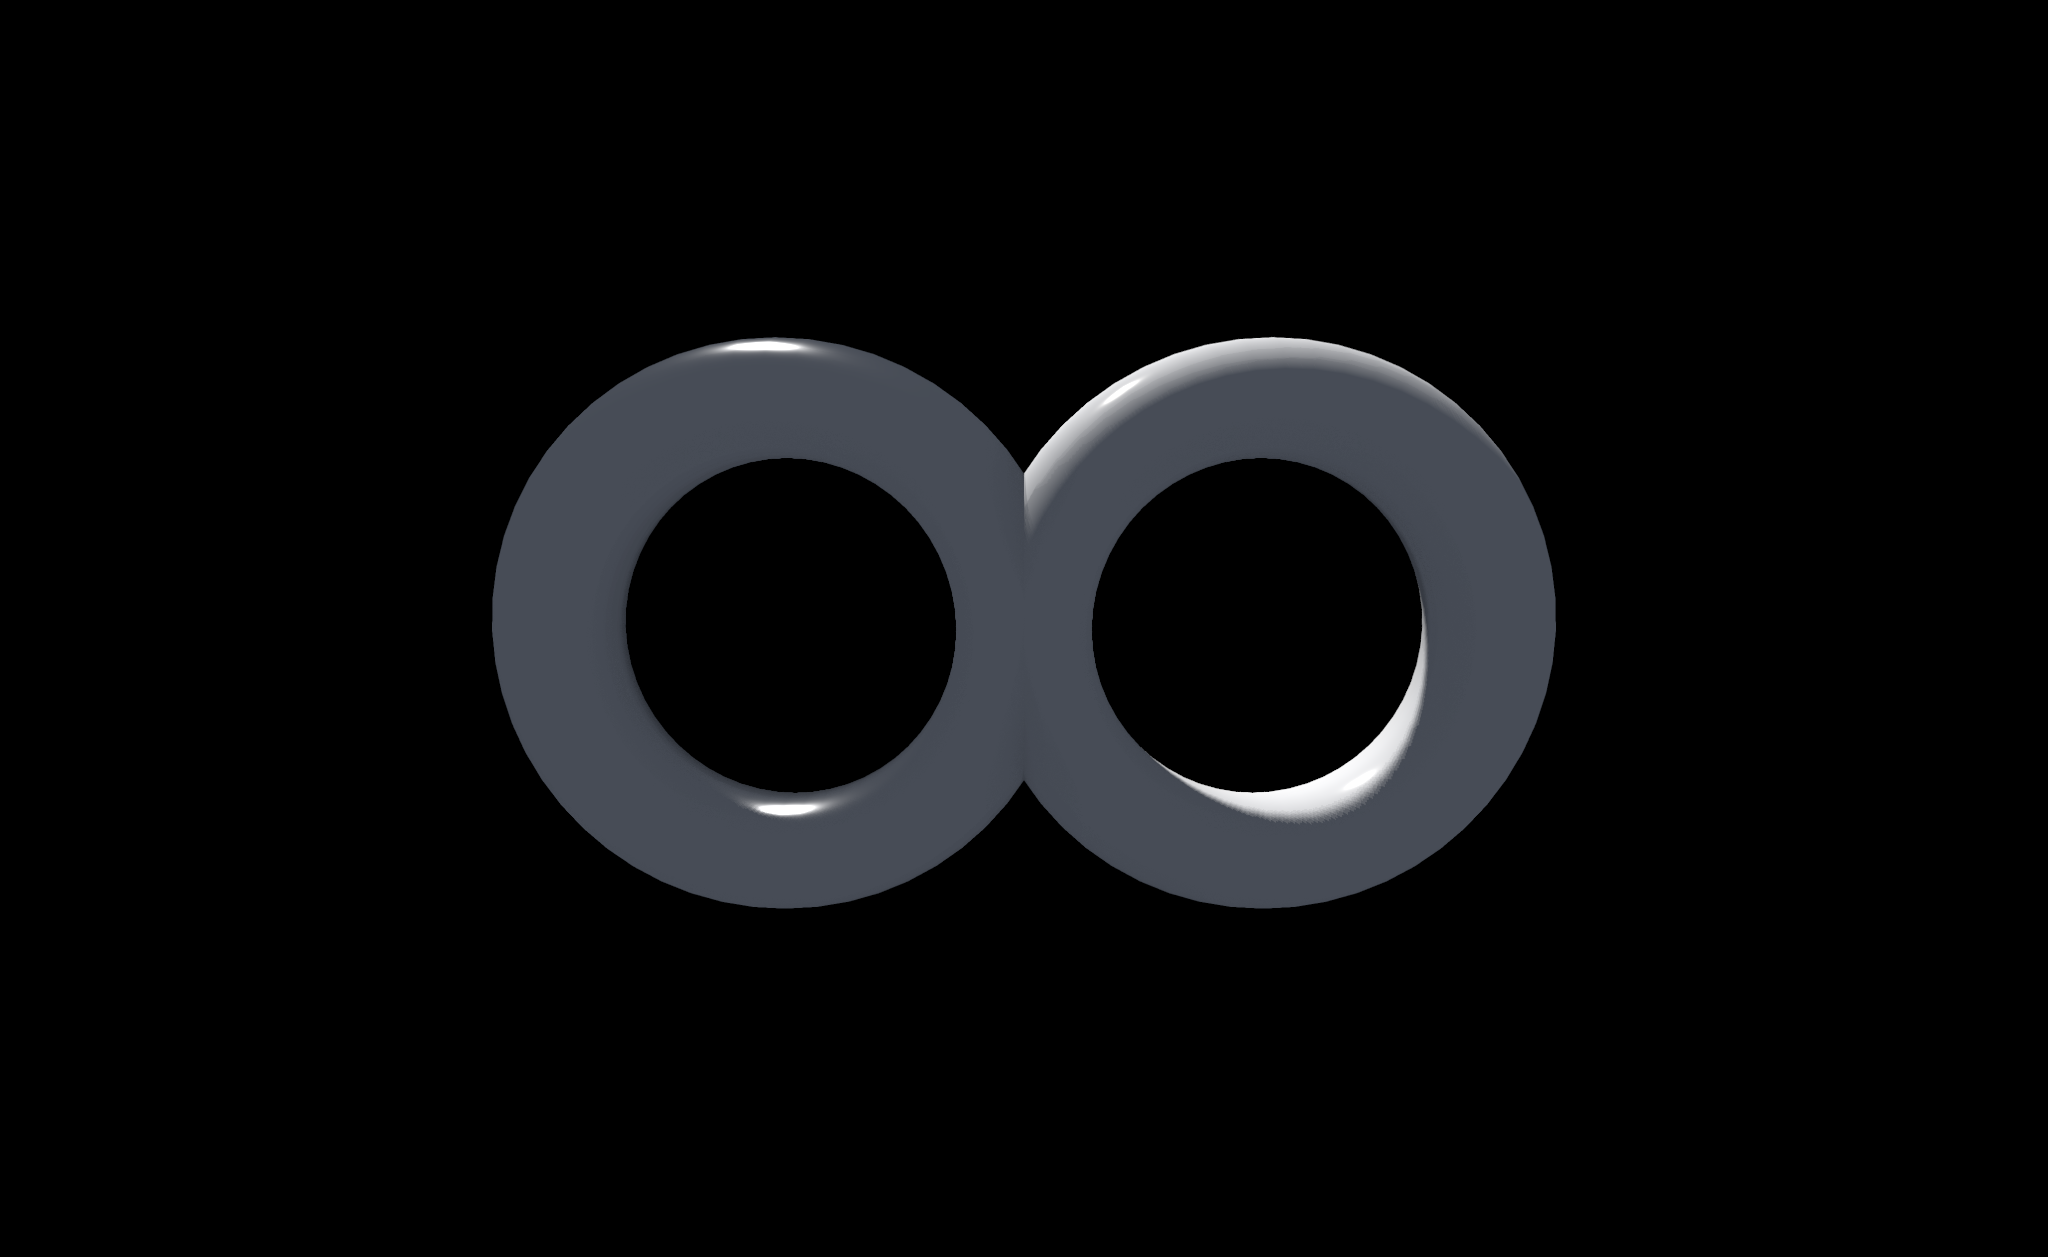
Shadows
The left side disables shadowing. The right side uses the default shadowed scene. Look for the contact shadow under the object, not for a dramatic lighting change.
The comparison is a single scene captured twice:
bundle.scene.aoStrength = 0f
bundle.scene.ambientColor.set(0.015f, 0.015f, 0.018f)
bundle.scene.lightIntensity = 1.35f

bundle.scene.shadowStrength = 0f

// capture the unshadowed scene

bundle.scene.shadowStrength = 1f

// capture the shadowed scene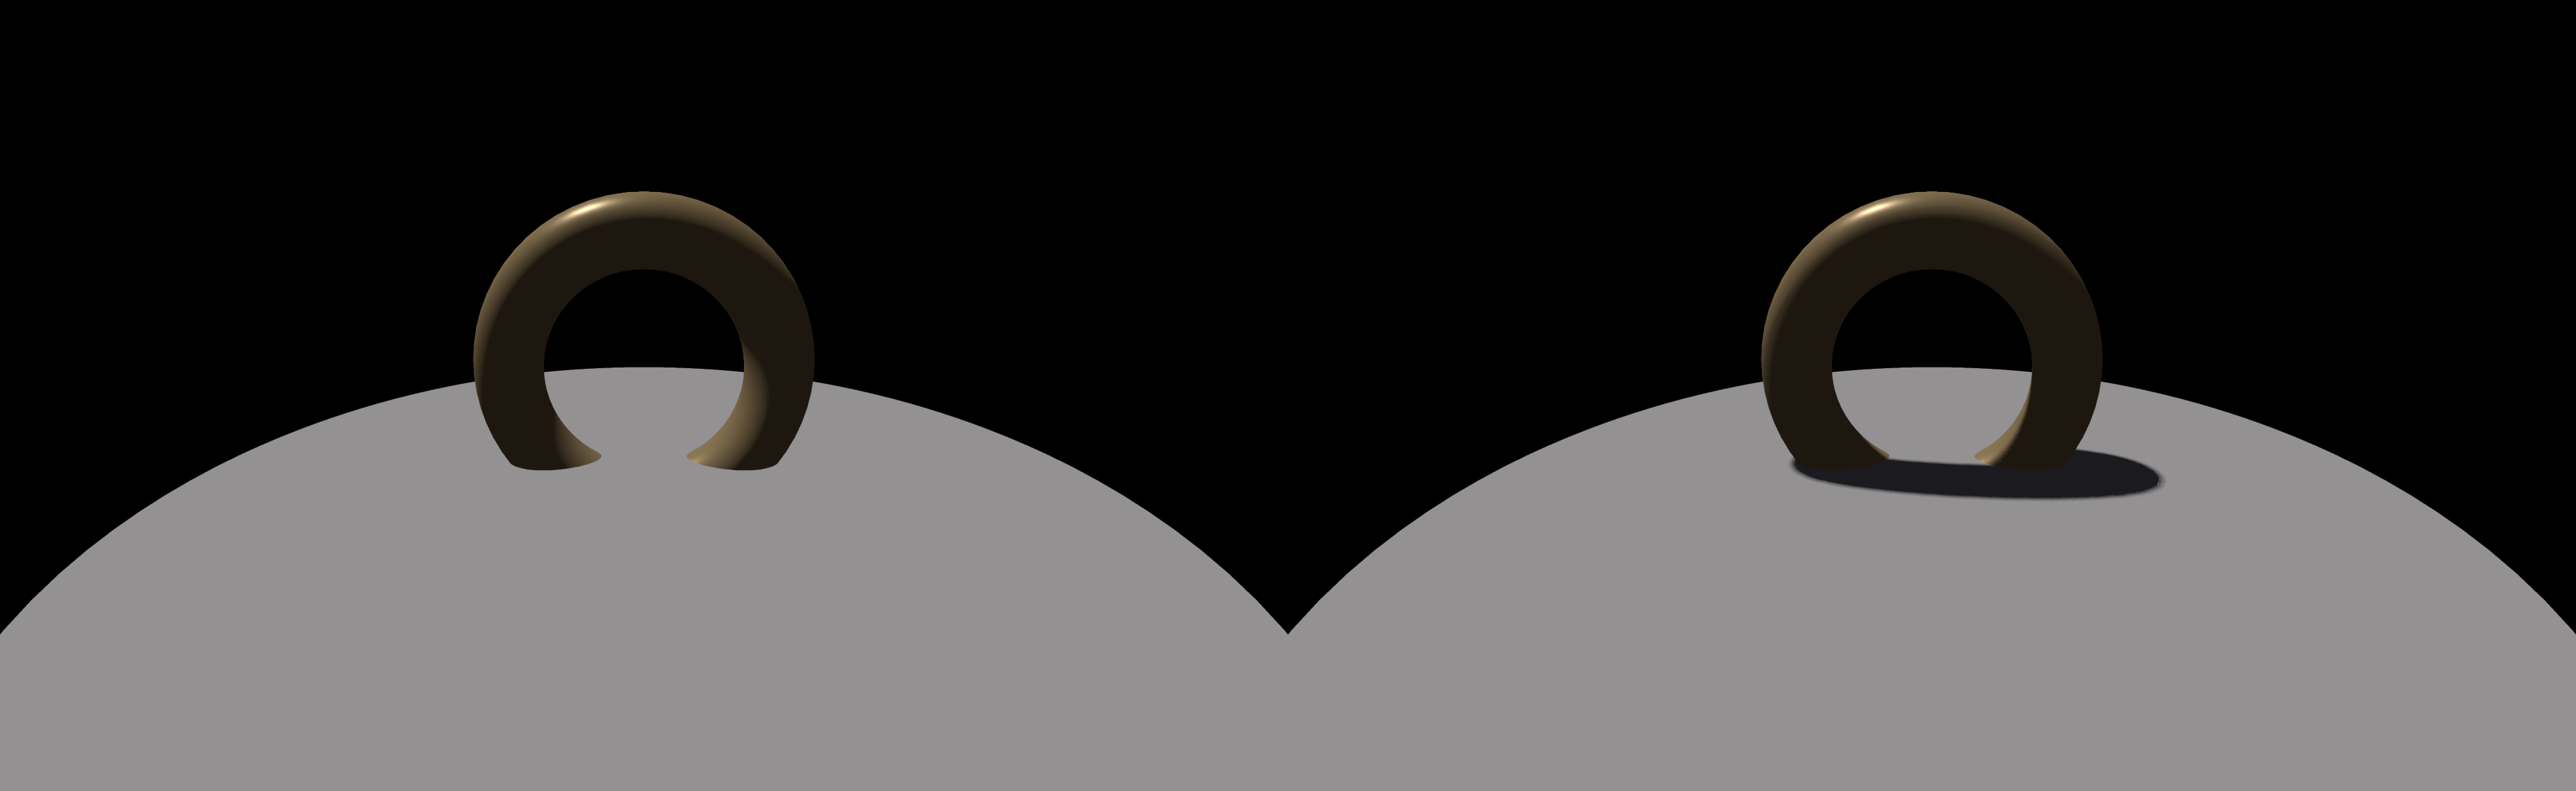
Ambient occlusion
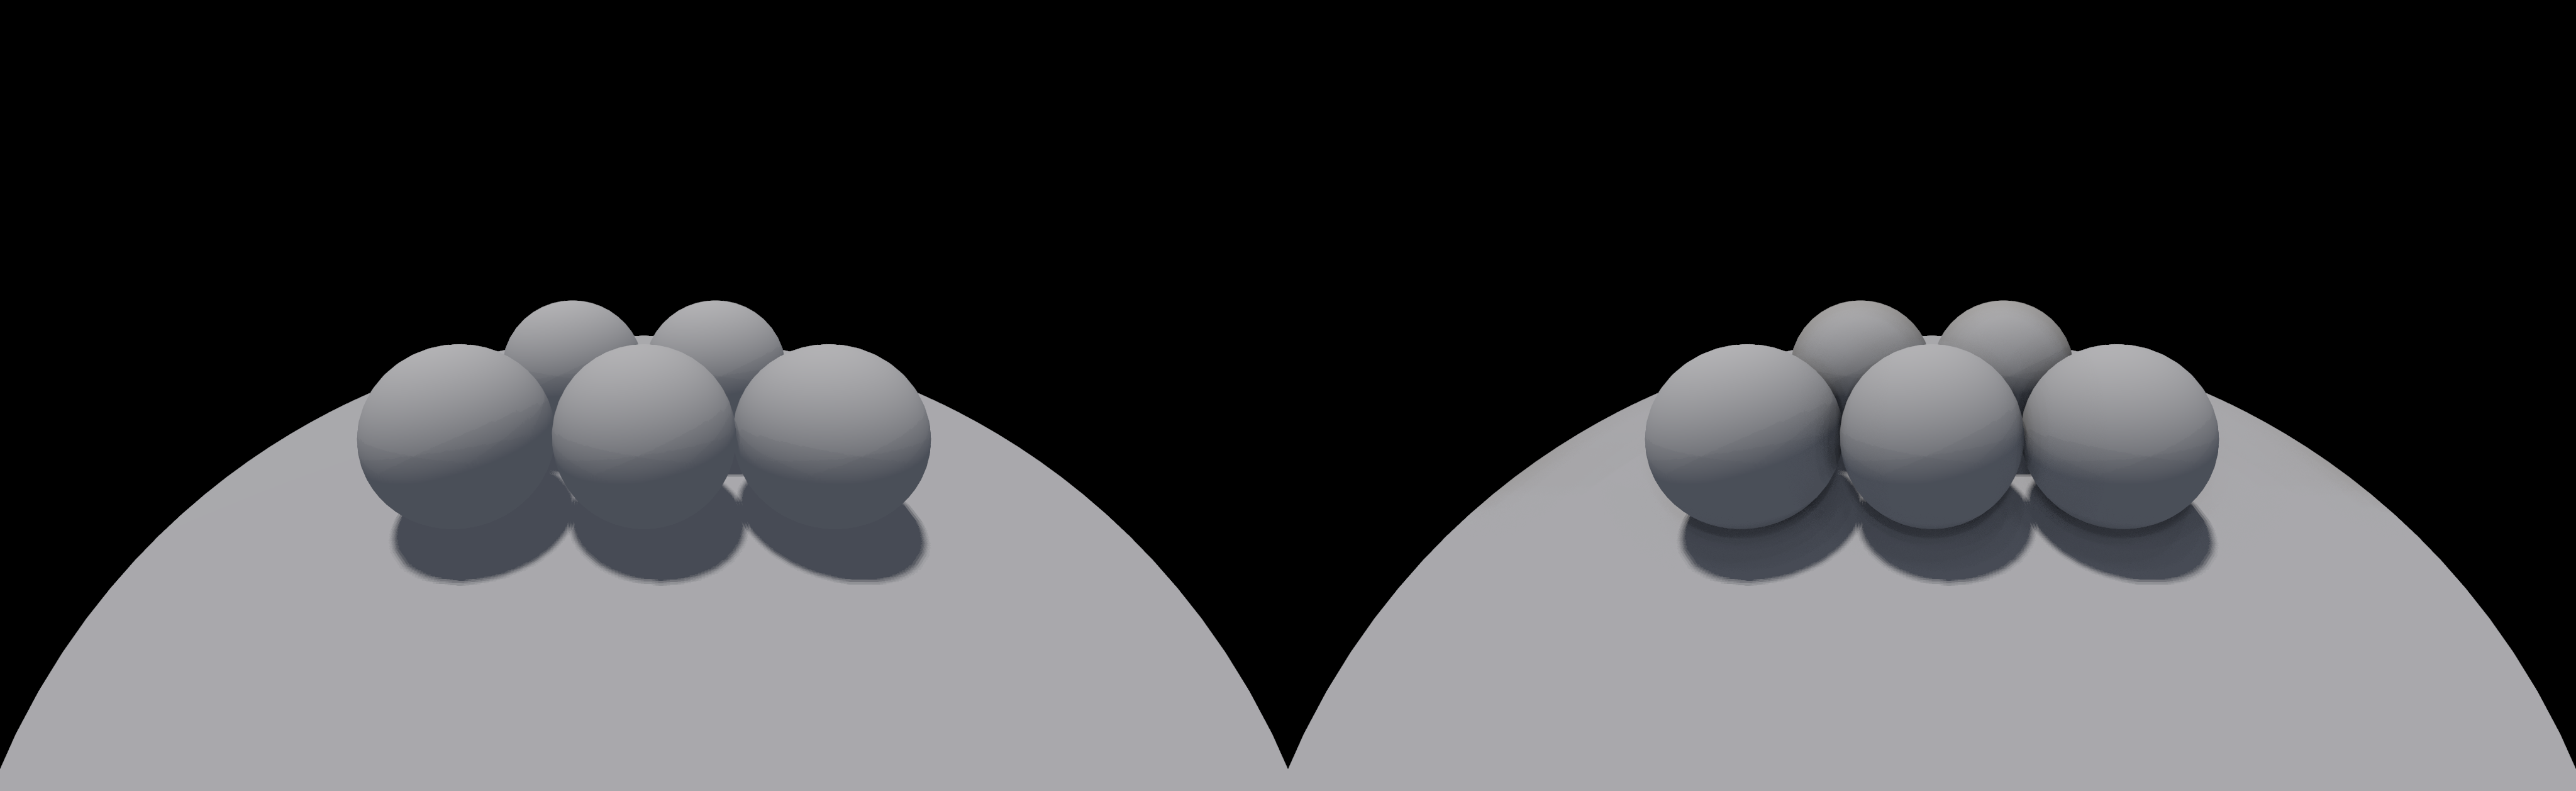
The left side disables ambient occlusion; the right side turns it on. Both show the same cluster of matte spheres resting together on the floor. AO only modulates the ambient term here (direct light is never occluded), so its effect is clearest in the contact valleys between touching spheres, where the surfaces are starved of direct light and lit mostly by ambient. Turning AO on darkens those valleys from a soft grey to a firm crease.
AO is also just a scene parameter in this harness:
val originalAoStrength = bundle.scene.aoStrength

bundle.scene.aoStrength = 0f

// capture the AO-off scene

bundle.scene.aoStrength = originalAoStrength

// capture the AO-on scene