Textures in BaseGraphicsSystem
(This page assumes you've digested BaseGraphicsSystem, which tells you how to make geometry, This page tells you how to texture it).
Texture mapping is a a perennial and important piece of 3d computer graphics technique; and, like any other graphics system worth using, Field's graphics system allows you to map image data onto objects.
This is one of the areas that, to really understand what's going on, you need to understand GLSLang shaders. Because, in contemporary OpenGL, the graphics system only gets the texture to the graphics card — it's really up to the shader to determine what the GPU actually does with this data. So, if you're GLSLang is rusty, go grab a tutorial.
In fact, because texturing is right about the point where shaders get interesting, we're going to use this page as an excuse to demonstrate some of the more sophisticated things you can do with Field's graphics system. This isn't, still, a general purpose graphics tutorial — you won't learn how to do self-shadowing bump-mapping from this page. But Field, in conjunction with other tutorials, certainly would make a good place to learn this. You certainly could do self-shadowing, bump-mapping, ambient occlusion, toon-thingmy-shader in Field.
- The .field sheet that contains the code for this page can be downloaded here.
The simplest thing — a bitmap on a square
Let's put a image, loaded off of disk, onto a piece of geometry that we've created by hand, from scratch.
To get started, we'll need a place to draw:
canvas = getFullscreenCanvas()
shader = makeShaderFromElement(_self)
canvas << shader
That gets us a full screen canvas and a shader to draw with. The default shader that Field creates for you doesn't know anything about texture mapping. So we're going to have to edit it. Shaders created from visual elements (here _self) have their GLSLang code placed into extra properties associated with the element. You can get to these properties using the drop-down box at the top of the text editor.
First, we'll edit the vertex shader:
attribute vec2 s_Five;
varying vec2 textureCoordinates;

void main()
{
    gl_Position = gl_ModelViewProjectionMatrix * gl_Vertex;
    textureCoordinates = s_Five;
}
This does a couple of tedious things. First it tells OpenGL that we are going to have a per-vertex attribute (an input) called s_Five. Field automatically maps this to the aux buffer number 5. We'll see that number appear below. There's nothing special about five; I could have picked anything between 1 and 15. Secondly it says that the vertex shader is going to have an output (to the fragment shader) called "textureCoordinates". And, it just copies one to the other.
Next, we need to do some actual texturing — that's the job of the fragment shader:
uniform sampler2DRect theTexture;
varying vec2 textureCoordinates;

void main()
{
    gl_FragColor = texture2DRect(theTexture, textureCoordinates.xy);
    gl_FragColor.a = 1.0;
}
This fragment shader does three things. Firstly it says that there's going to be a texture called theTexture (and it's going to be a 2D rectangular texture, as opposed to a square one, see below). Secondly it samples from this texture map using coordinates given by textureCoordinates. Finally it sets
the alpha channel of the output color (gl_FragColor is the color of the pixel that we're going to end up drawing) to be completely opaque. Just for the sake of safety — we want to actually see this thing.
Now we have a shader that we like (don't forget to hit the button on the top of the text editor to refresh these things), we need some geometry to get shaded.
In another box, let's have:
mesh = dynamicMesh()
shader << mesh

with mesh:
    mesh ** Vector3(0,0,0)
    mesh ** Vector3(1,0,0)
    mesh ** Vector3(1,1,0)
    mesh ** Vector3(0,1,0)
    mesh ** [0,1,2, 0,2,3]
This draws a square at z=0, one unit along each side. It also attaches the mesh to the shader. We now have a structure that has one main branch. The mesh is attached to the shader and the shader is attached to the canvas. In simple terms, whenever the canvas wants to draw itself it draws the shader which draws the mesh. Remember, we're setting up a structure that knows how to draw itself without any further execution of code in Field.
We need two more things. A texture and some texture coordinates.
First the texture:
anImage = textureFromFile("/Developer/Examples/OpenGL/Cocoa/GLSLShowpiece/Textures/Abstract.jpg")
shader << anImage
shader.theTexture = anImage
Three lines, three things:
- I'm just pulling some random tiff off of my hard drive. You'll need to replace that with some random image from your own drive.
- It should come as no surprise that we use
<<to attach the texture to that tree of things that we are drawing. In this example we could attach the texture to theshaderor to themeshor even to thecanvas. But theshaderis really the right spot for the examples below. - The last line needs a little explaining. Since we can have multiple textures associated with shaders and meshes at the same time we need to bind OpenGL's idea of what
theTextureis to something.We'll see below how to supply multiple textures to shaders.
We're almost there. Now for some texture coordinates:
aux = mesh.aux(5, 2)
aux.put([0,0,  512,0, 512,512, 0,512])
.aux is covered here, and you can look at here for an additional syntax for specifying aux information. All we've done here is associate a Vector2 with each vertex in our mesh. That turns up in the shader as s_Five. Note, my random image happens to be 512x512 square (again, see below for more on texture types and coordinates) hence those 512.
Putting all these things together gets us:
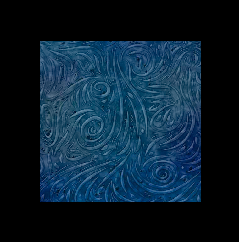
A home-made textured plane.
Let's review how some of these things — shader, aux and texture map — are coupled together:
* aux(5, 2) — that 5 turns up in the shader as s_Five. that 2 turns up in the shader as the 2 in vec2 s_Five.
* shader.theTexture — theTexture is a uniform parameter in the shader, specifically the one in the fragment shader declared as sampler2d theTexture. You set uniforms in shaders just by setting myShader.myUnform = something;.
* aux.put([512,0, 512,512, 0,512](0,0,.html)) — those 512s come from the dimensions of the image I've just loaded. If I want a crop or a zoom or a distorted mapping I'd use different numbers or a different shader.
And we end up with a graph that has canvas connected to a shader which is connected to anImage and mesh. Everything connected to shader gets textured with anImage. (We can get tricky with this, we can add another mesh, let's call it mesh2 and add someOtherImage to mesh2. Now we have mesh textured with anImage and mesh2 textured with someOtherImage.) The general rule is that things should go as "high" as sensible — as close to canvas as sensible — but no higher.
Why was that such hard work?
That seems like a lot of work for a textured plane. And it was. If all you wanted was a textured plane you are at least better off looking at how to put PLine based graphics on other canvases. Or if you just want to display and image, just keep it on the main Field window. Perhaps you'd be better off with a different environment altogether.
But how often do you want just a textured plane? The reason that it was a lot of typing is that what we've made is pretty general — in fact probably about as general as the "fast path" on graphics cards can get. At your fingertips is everything: the geometry for the plane — you can texture map anything you can make or load the geometry for; the shader for the texture mapping — if you can write the shaders for it you can do projective texture mapping, odd-ball color correction, bump mapping etc.
Thus, we can play with the vertex shader:
attribute vec2 s_Five;
varying vec2 textureCoordinates;

uniform vec4 offset;

void main()
{
    gl_Position = gl_ModelViewProjectionMatrix * gl_Vertex;
    textureCoordinates = s_Five+offset.zw+1000.0*gl_Position.yx/gl_Position.w*offset.xy;
}
and the fragment shader:
uniform sampler2DRect theTexture;
varying vec2 textureCoordinates;

void main()
{
    gl_FragColor = texture2DRect(theTexture, exp2(textureCoordinates.xy*vec2(0.01, 0.01))*vec2(100.0, 100.0));
    gl_FragColor *= texture2DRect(theTexture, log2(textureCoordinates.xy*vec2(0.01, 0.01))*vec2(100.0, 100.0));
    gl_FragColor *= 4.0;
    gl_FragColor.a = 1.0;
}
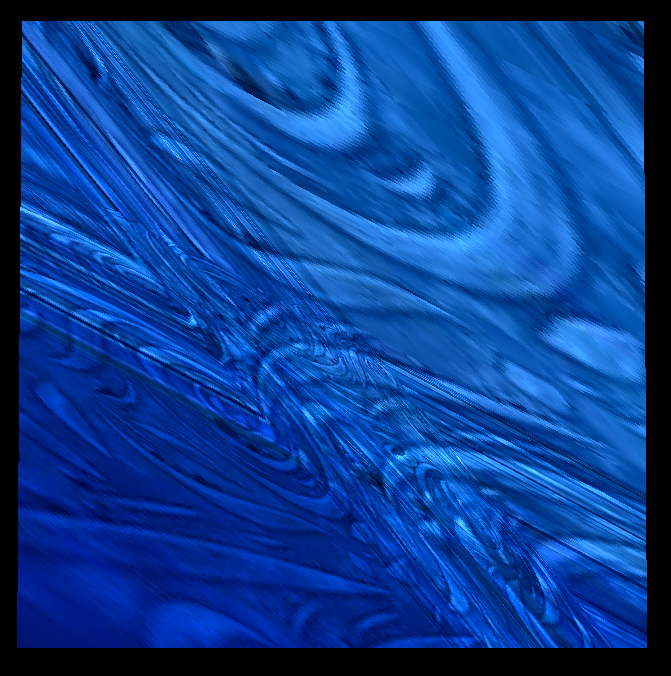
We're just "doodling". We've introduced a parameter (in GLSLang parlance another uniform, since it's a parameter on the shader that's uniform across the whole mesh) called "offset". We've messed with the texture mapping; we've introduced two warped texture lookups which we multiply together. Just because we can.
By animating shader.offset we can animate our texture mapping:
So, in a new box:
n=0
def upd():
    global n
    n+=1
    shader.offset = Vector4(n/10.0,Math.random(),Math.random(),Math.random())

_r = upd
Gets us a random flickering texture square:
By putting all of the computation inside the shader we a running at this point with very little CPU load.
More on shader parameters
That shader.offset should have piqued your interest. You essentially have two ways of sending numbers to shaders — per vertex through aux (these appear as varying in the vertex shader) and these uniforms.
Now that we are actually beginning to do semi-interesting things with shaders, you might want to know more about what uniform means. GLSLang's uniform means constant per-mesh, yet Field's ultra-convenient syntax shader.something = Vector4(1,1,1,1) for setting uniforms suggests that its constant per-shader or at least constant per-frame-of-animation. How can we set uniforms per mesh? Easy, just set it in python.
Using the same messed-up texture mapping shader as above:
allMeshes = []

shader.offset = Vector4(0,0,1, 1)

for d in range(0, 10):
        mesh = dynamicMesh()
        shader << mesh
        with mesh:
                mesh ** mesh ** [Vector3(0,0,d), Vector3(1,0,d), Vector3(1,1,d)]
                mesh ** mesh ** [Vector3(0,0,d), Vector3(1,1,d), Vector3(0,1,d)]

        allMeshes.append(mesh)

        aa = mesh.aux(5, 2)
    aa.put([0,0,  320,0, 320,215, 0,0, 320, 215, 0, 215])

    mesh.offset = Vector4(0,0, m*40.0, m*40.0)
The first two thirds of this code creates 10 texture mapped meshes in a stack along the z axis — these are just like the squares we were making above. After you run this, try moving the camera around a bit (shift-cursor keys).
Isn't Python magic? The result:
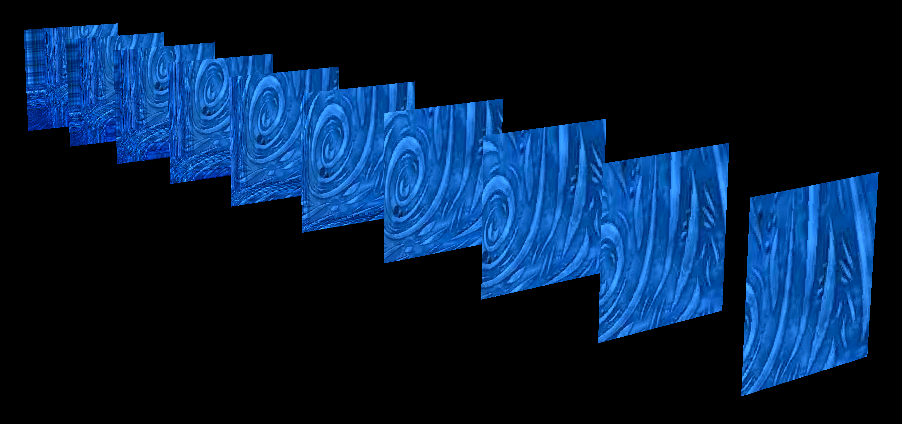
This is a stack of meshes with a gradation of shader.offset across it.
Changing the texture contents — Integration with CoreImage
Of course, what we aren't doing in the examples above is changing the actual contents of the texture. We are twisting it and manipulating it's color, but the image itself remains constant.
Field already comes with a (GPU accelerated) image processing "system" — by wrapping Apple's CoreImage framework. Clearly, the two of these things — CoreImage and Field's graphics system ought to be able to talk to each other.
First, let's switch to a more sensible shader for a moment. Vertex:
varying vec2 textureCoords;
attribute vec2 s_Five;

void main()
{
    gl_Position = gl_ModelViewProjectionMatrix * gl_Vertex;
    textureCoords = s_Five;
}
And fragment:
varying vec2 textureCoords;
uniform sampler2D texture;

void main()
{
    gl_FragColor = texture2D(texture, textureCoords.xy*vec2(1.0, 1.0));
    gl_FragColor.w = 1.0;
}
Now we can attach a CoreGraphicsExtensions image to Field's graphics system:
from CoreGraphics import *

# load an image via Field's CoreGraphics
i = image("file:///Developer/Examples/OpenGL/Cocoa/GLSLShowpiece/Textures/Abstract.jpg")

#if we wanted it on the canvas we'd write
#i.show()

#but we want it as a texture
tt = textureFromImage(canvas, i)

#now we can write:
shader << tt
textureFromImage() gets us a (non-rectangular, see below) texture map that we can attach to shaders and meshes just like the texture we get from textureFromFile.
This is basically equivalent to the static texture case that we did above. In CoreImage images are immutable, so they aren't really suitable for texture animation, there's no way to manipulate their contents after they've been set.
CoreImage Accumulators (see CoreGraphicsExtensions#Makinganaccumulator) on the other hand are just that — modifiable.
So:
from CoreGraphics import *

# load an image via Field's CoreGraphics
i = image("file:///Developer/Examples/OpenGL/Cocoa/GLSLShowpiece/Textures/Abstract.jpg")

acc = accumulator(0,0, 512,512, 1)

#initialize the accumulator with the contents of the image
acc <<= i
tt = textureFromAccumulator(canvas, acc)

#now we can write:
shader << tt
textureFromAccumulator is just like textureFromImage. But we can update the accumulator. A new box with the following code in it:
def update():
    global acc
    acc <<= i
    acc <<= blur(Math.random()*40)
    tt.dirty()

_r = update
And there we have a flickering, randomly blurring texture map (going into the start of whatever craziness your geometry, vertex attributes and shaders cook up).
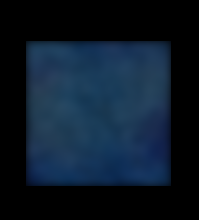
Again, with very little CPU usage, considering that the Gaussian blur used to be used as a CPU benchmark. Obviously we are free to use any Core Image filter (not just blur) and we're also free to make our own in Field.
The sorry tale of rectangular and square textures
And now a section that we've been postponing. A long, long time ago in OpenGL (indeed, in just GL, before such things were even Open) texture maps were square. Not only that, but they were square and their dimensions were powers of 2. You had a texture that was 64x64, but not 64x32 or 70x70 and certainly not 293x156. This was what a 2D texture map meant; specifically this was what GL_TEXTURE_2D implied. The power of two thing made texture access and filtering fast. And, back then, fast was very important.
Then people wanted to do all kinds of things with OpenGL, including making their window managers out of it. Clearly if, for example, all windows had to be square with sides equal to powers of two you wouldn't have much of a desktop environment. Even non-square but with power-of-two sides would be a real waste of video memory. Thus, truly rectangular textures were added. GL_RECTANGLE_EXT was added. Rectangular textures could have any dimensions they like, in exchange for having limited filtering modes — in order to keep the speed up.
Fast forward through years of explosive computer-gaming growth. Now we have programmable hardware these compromises — square power of two textures with nice filtering modes and rectangular textures with not-nice filtering modes — become unsustainable. On contemporary hardware the limitations are erased. "Square" texture maps can be non-square and have any sides, rectangular texture maps can have nice filtering modes.
But we are left with a small hiccup, both modes are still around and they are different. "Square" texture maps have texture coordinates that go from 0 to 1 — (0,0) is the top left of the texture (1,1) is the bottom right. "Square" texture maps are declared in GLSLang as sampler2D foo; and sampled with texture2D(foo, myNormalizedCoordinates.xy);
Rectangular texture maps have texture coordinates that go from 0 to the width or height of the texture in pixels. Rectangular texture maps are declared in GLSLang as sampler2DRect foo; and sampled with texture2DRect(foo, myUnNormalizedCoordinates.xy);.
Attach a "square" texture to a shader sampling a rectangular texture and you'll get nothing (or a random part of your desktop copied and corrupted). And vice versa. Sample a rectangular texture with normalized coordinates and you'll get only the top left pixel (spread smoothly across your geometry). Sample a square texture with unnormalized coordinates and you'll get a million tiny copies of it (if it's set to repeat).
The short answer is that, images that come over from CoreGraphicsExtensions are "square". Textures created by textureFromFile are rectangular but there's a parameter isRectangular that defaults to 1. If you look closely, we start with rectangular and switch over from rectangular to square in the last, CoreGraphicsExtensions example.
Video texture maps
Give the ground we've covered so far, you'll be pleased to note that video texture maps are straightfroward in Field.
Here's all you need to know:
from field.graphics.core import QTKitPlayer
player = QTKitPlayer("/Users/marc/Movies/05c_red_vault_3.mov", 1366, 342)
shader << player

#tell it to go at normal speed
player.video.setRate(1.0)

#tell it to skip to the middle
player.video.setPosition(player.getDuration()/2)
QTKitPlayer needs to know the dimensions of your QuickTime movie — here I have a rather strange 1366 wide by 342 one, pulled at random of my hard-drive. This player can be attached to a shader just like any other texture giving thing. And it binds a rectangular texture so your shader should be prepared for that.
Coupled with our previous strange-shader on a stack-of-meshes example, we get:
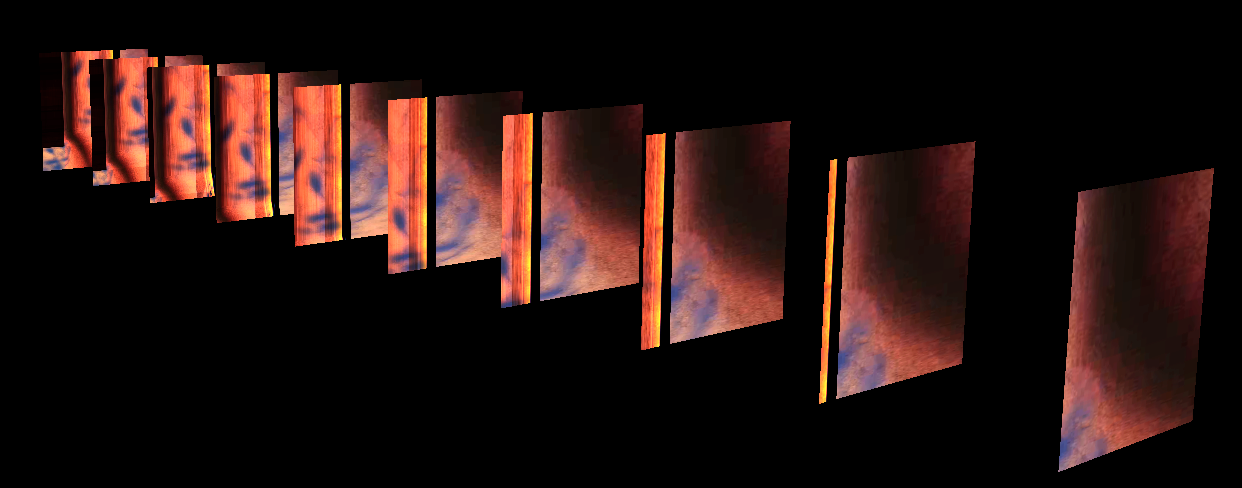
Finally, one note. Use QTKitPlayer and you need to run Field under old 32-bit Java 1.5 (change this in the Plugin Manager) rather than new 64-bit Java 1.6 the default.
Where next ?
We're missing two things right now: firstly some documentation on how to originate texture data yourself (not off of a file, but out of byte arrays, Processing PImage, random ByteBuffers you get off of Gigabit Ethernet cameras, and libraries like OpenCV). You can certainly do that, but we haven't written about it yet.
If you want more things on texturing, and more advanced rendering techniques, take a look at BaseGraphicsSystem_FBO.