FLine Drawing Canvases
Field's new "FLine" object offers a unified interface for drawing in 2d and 3d to the sheet or to a fullscreen canvas in ways that can be optimized for quality or speed (or even saved as a PDF). An FLine is just a container for geometry, to cause it to appear on the screen, you actually need to put it somewhere. Field offers a number of different "somewheres", and this page lists them all.
A Field sheet with all the code in this page can be downloaded here.
Basic 2d drawing box
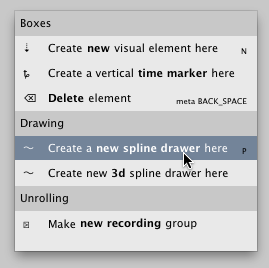
If you are hacking on 2d drawings — be it artwork, or charts, or graphs for debugging things — this is by far the most common way of mixing some custom graphics directly in with Field's UI. Right-click on the canvas and select "Create new spline drawer here" or hit 'P' for sPline:
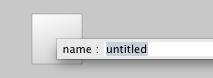
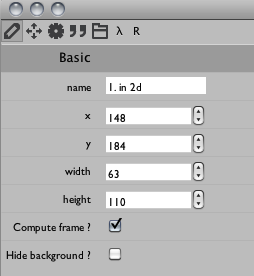
After that you'll be asked for a name:
And then you'll have a very plain box:

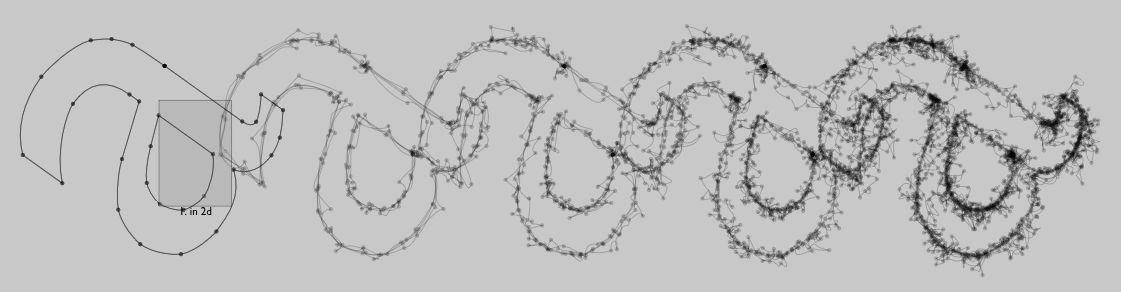
Now we can draw things to this box. Conceptually these boxes have a property called lines that is a list of all geometry that needs to be drawn. Put something (and FLine) in this list and it will be drawn until you take it out again.
_self.lines.clear()
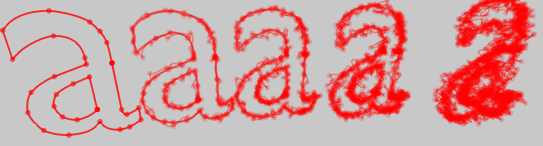
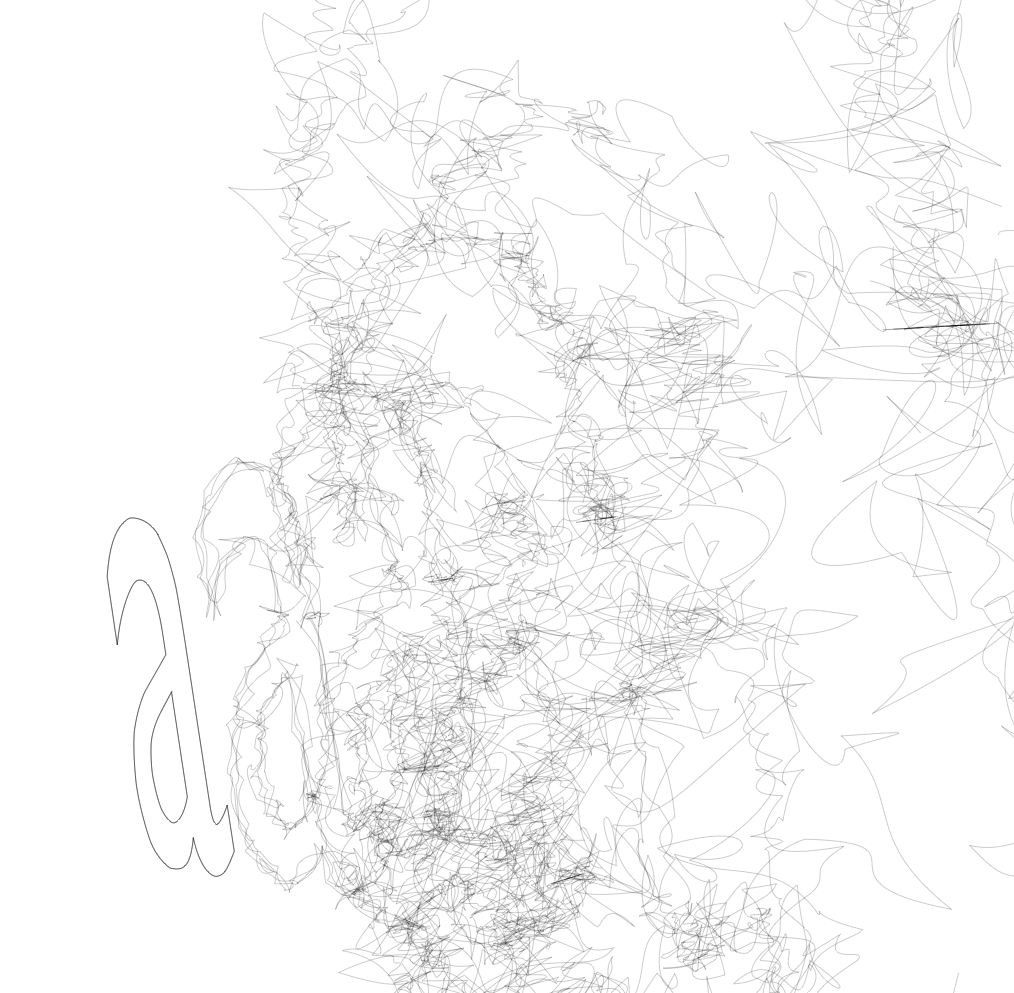
for noise in [0, 5, 10, 20]:
f = FLine().appendVectorText2("a", 30, 330, size=500)
f(color=Color4(0,0,0,0.2), derived=1)
_self.lines.add(f)
f.pointed=1
for n in range(0, 4):
f = f.newLineBySubdivision()
f.filterPositions2(lambda x,y : Vector2(x,y).noise(noise))
f += Vector2(200,0)
_self.lines.add(f)
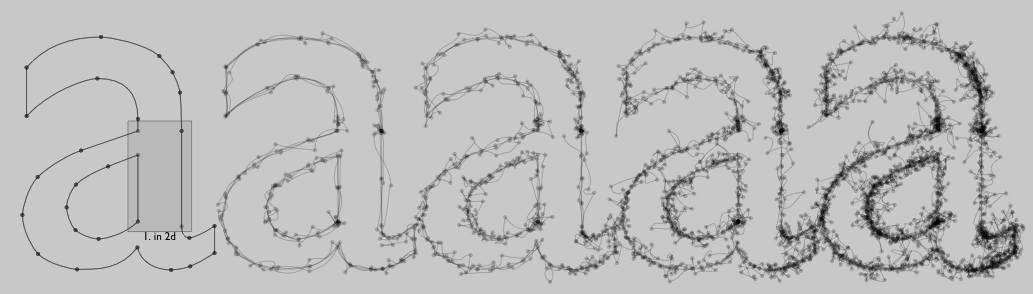
Two things to note. First is that Field's UI canvas is an infinite plane — you can drag around it with the middle mouse button (or a drag gesture if you have a trackpad), and zoom in and out using shift-middle mouse button. Secondly, Spline drawer boxes automatically move to be "near" their contents:
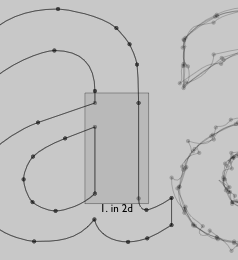
If you don't want this, turn it off:
To animate things inside this, you need an animation loop:
def animate():
    _self.lines.clear()
    for noise in [0, 5, 10, 20]:
        f = FLine().appendVectorText2("a", 30, 330, size=500)
        f(color=Color4(0,0,0,0.2), derived=1)
        _self.lines.add(f)
        f.pointed=1

        for n in range(0, 4):
            f = f.newLineBySubdivision()
            f.filterPositions2(lambda x,y : Vector2(x,y).noise(noise))
            f += Vector2(200,0)
            _self.lines.add(f)

    while 1:
        for n in _self.lines:
            n += CFrame(r=0.1, center=n)
        _self.dirty=1
        yield 1

_r = animate()
Note the call to _self.dirty=1 — this tells Field that you are serious about redrawing the canvas. Field otherwise only redraws the canvas lazily.
There's more to these 2d drawing boxes that's documented elsewhere — including mouse editing, interaction and using them for "notation" in general — but these docs above should get you drawing in 2d in Field.
Basic 3d drawing box
That's it for 2d. How about 3d? 3d in Field can be as easy as 2d. Again from the contextual menu on the canvas:
Now we can draw in 3d:
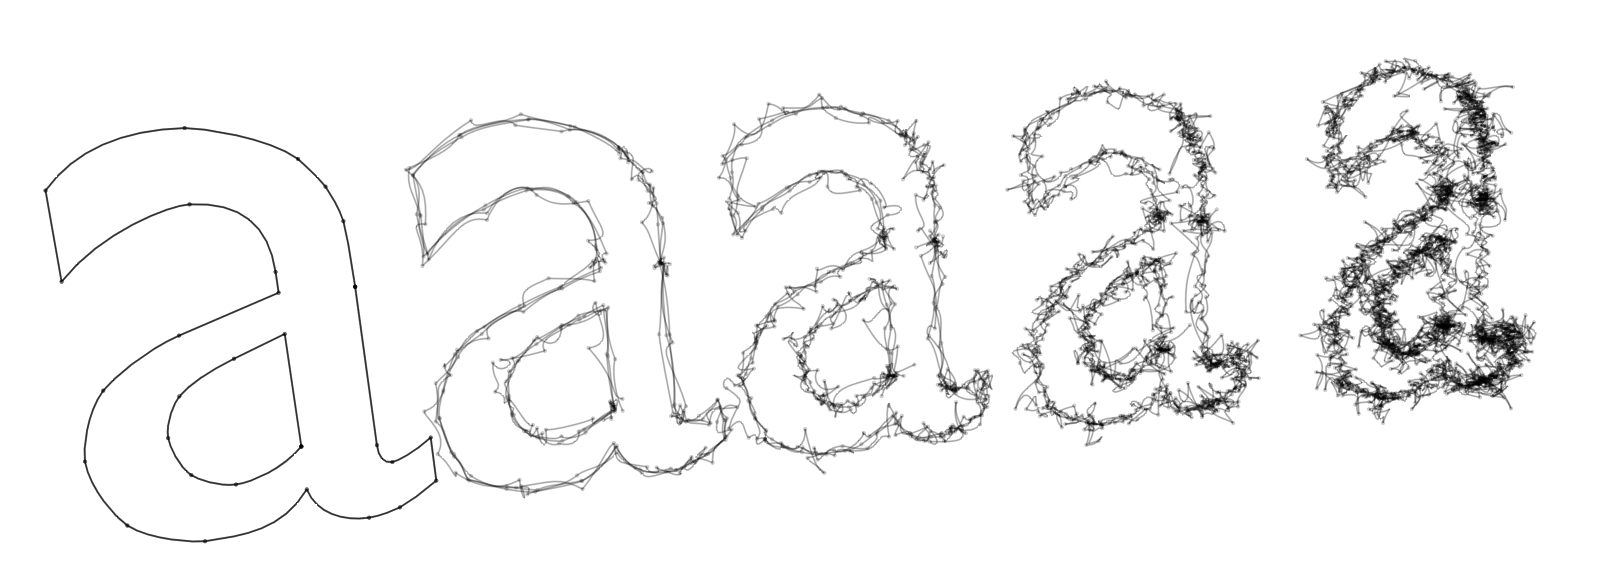
_self.lines.clear()
for noise in [0, 5, 10, 20]:
    f = FLine().appendVectorText2("a", 30, -30, size=500)
    f(color=Color4(0,0,0,0.2), derived=1)
    _self.lines.add(f)
    f.pointed=1

    for n in range(0, 4):
        f = f.newLineBySubdivision()
        f.filterPositions(lambda x,y,z : Vector3(x,y,z-n*30+Math.random()*10).noise(noise*1))
        f(containsDepth=1)
        f += Vector2(200,0)
        _self.lines.add(f)

_self.camera.target = Vector3(500,0, 0)
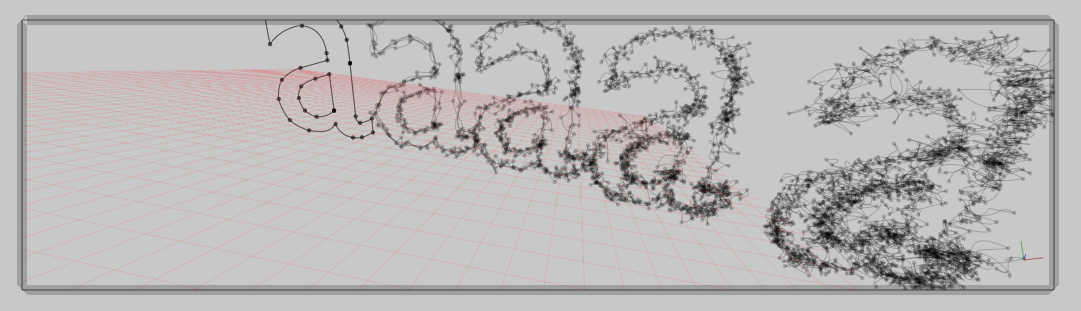
The way we get FLines onto the canvas (and off again) hasn't changed from the 2d case — it's still _self.lines, a list of geometry to draw. One thing that has changed is that we have a 3d camera called _self.camera. Autocompletion on _self.camera. suggests things that you can do with it:
but by far the most important thing is to have the camera look roughly in the direction of what it was that you drew (hence the _self.camera.target code above). Otherwise, you simply wont see it: unlike the 2d drawers Field crops 3d views to their boundaries.
You can also move the camera about with the mouse: having selected the box, hold down command and mouse around.
Advanced 3d drawing in a box
_self.lines in a 3d box gives you the convenience of of the 2d drawing system but in 3d. But what about Field's advanced 3d graphics system? We can have that on the canvas as well. This gives us a little more flexibility than _self.lines because we get to explicitly write and control the GLSLang shader that renders the geometry. We can also introduce other OpenGL drawing commands directly into the pipeline.
Here's the complete code:
shader = makeShaderFromElement(_self)
_self.canvas << shader
shadedLines = OnCanvasLines(shader, _self)
lines = shadedLines.submit
lines.clear()
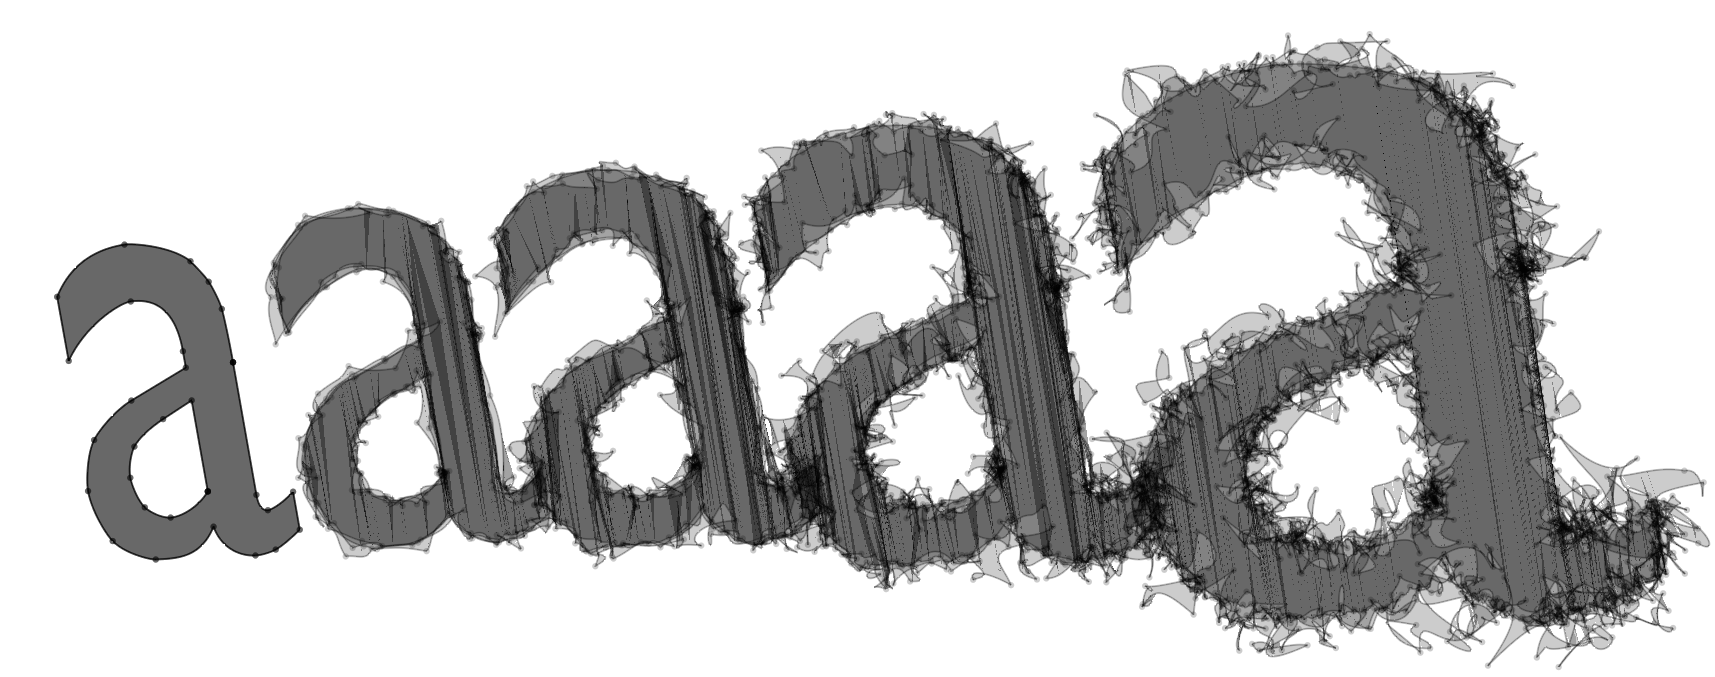
for noise in [0, 5, 10, 20]:
f = FLine().appendVectorText2("a", 30, 330, size=500)
f(color=Color4(0,0,0,0.2), derived=1)
lines.add(f)
f.pointed=1
for n in range(0, 4):
f = f.newLineBySubdivision()
f.filterPositions(lambda x,y,z : Vector3(x,y,z-n*30+Math.random()*10).noise(noise*1))
f(containsDepth=1)
f += Vector2(200,0)
lines.add(f)
_self.camera.target = Vector3(500,400, 0)
The first three lines are the key:
* shader = makeShaderFromElement(_self) — tells Field that this code box will also have a shader associated with it, and sets up "vanilla" Vertex and Fragment programs — see BaseGraphicsSystem#Ashader. This is the shader that we'll use to draw our lines.
* _self.canvas << shader — _self.canvas refers to the main UI window and the << operator attaches our shader to it.
* OnCanvasLines(shader, _self) — OnCanvasLines is the object that acts as a bridge between the FLine drawing system and Field's OpenGL graphics system. The most important thing it has in it is a list .submit which is a list of lines that will be submitted to the graphics system for drawing. It acts exactly like _self.lines would; but everything will get "shaded" by our shader.
The rest of the code is unchanged. But if we update our fragment shader (use the drop down box at the top of the text editor, and the refresh button to the right):
varying vec4 vertexColor;
void main()
{
    gl_FragColor = vertexColor+vec4(1,0,0,0);
}
Take a look at the rest of the documentation for the graphics system — BaseGraphicsSystem, BaseGraphicsSystem_Texturing, BaseGraphicsSystem_FBO for ideas of where to go now.
Drawing into a Fullscreen window
Drawing into Field's UI canvas makes sense in many situations — when you are creating something where your code and your UI blur into one. But just as often you need to use Field's fullscreen canvas — perhaps to present work to an audience. Here's the kind of boilerplate fullscreen renderer startup code:
canvas = makeFullscreenCanvas()
canvas << Clear(Vector3(1,1,1)) # -- white background

shader = makeShaderFromElement(_self)
canvas << shader

shader << DisableDepthTest()
shader << LineSmooth()

# we need to do some texturing for the purposes of drawing text. Field's FLine system uses texture ID 1 for the text texturemaps
shader.tex = 1
Now we can essentially follow the instructions from the previous box, only we are drawing in a fullscreen window not Field's main UI:
1. canvas.getOnCanvasLines()
canvas.getOnCanvasLines() get's us an OnCanvasLines object with a default shader (one that does everything that the normal UI canvas one does). Ideal if we just want to draw a little diagram over some complicated thing that we're rendering.
shadedLines = canvas.getOnCanvasLines()
lines = shadedLines.submit

lines.clear()
for noise in [0, 5, 10, 20]:
    f = FLine().appendVectorText2("a", 30, 330, size=500)
    f(color=Color4(0,0,0,0.2), derived=1)
    lines.add(f)
    f.pointed=1

    for n in range(0, 4):
        f = f.newLineBySubdivision()
        f.filterPositions(lambda x,y,z : Vector3(x,y,z-n*30+Math.random()*10).noise(noise*1))
        f(containsDepth=1)
        f += Vector2(200,0)
        lines.add(f)

canvas.camera.setLookAt(Vector3(500,400, 0))
2. shader.getOnCanvasLines(canvas)
shader.getOnCanvasLines(canvas) gets us an OnCanvasLines instance that's associated just with that particular shader. No point giving the code again, it's exactly the same!
Optimized drawing — Direct layers
The FLine system (and the original PLine system) was designed with flexibility and quality in mind, not speed. But it's become so useful we want to use it to draw and animate things at a sensible speed. Field 14 has a new feature that lets us do this: direct layers. These layers optimize the cacheing strategy for geometry a little and trim back some of the bells and whistles of of the FLine system in favor of drawing speed. All we need to do to get one is this:
shadedLines = canvas.getOnCanvasLines() # (or you could get it from a shader)
layer1 = shadedLines.getDirectLayer("myLayer")
layer1.submit.clear()

for noise in [0, 5, 10, 20]:
    f = FLine().appendVectorText2("a", 30, 570, size=500)
    f(color=Color4(0,0,0,0.2), derived=1)
    layer1.submit.add(f)
    f(pointed=1, pointSize=6, filled=1)

    for n in range(0, 4):
        f = f.newLineBySubdivision()
        f.filterPositions(lambda x,y,z : Vector3(x,y,z-n*30+Math.random()*10).noise(noise*1))
        f(containsDepth=1)
        f += Vector2(200,0)
        layer1.submit.add(f)
As you can see, not much has changed here. Rather than putting things in the list shadededLines.submit we put them into layer.submit and we get a layer from shadededLines.getDirectLayer(nameOfLayer). Layers are created on demand. You might be able to perceive some differences in the ways that lines are tessellated and points are drawn between direct layers and the default rendering paths, but for most uses you'll find them to be quite close. Group your layers together — layers that do not contain any lines that change are generally very inexpensive (in terms of CPU usage) to draw.
Direct drawing
Finally, one last way of getting an FLine onto the screen — injecting it directly into the scene graph using <<
container = lineContainer()
shader << container

for noise in [0, 5, 10, 20]:
    f = FLine().appendVectorText2("a", 30, 800, size=500)
    f(color=Color4(0,0,0,0.2), derived=1)
    container << f
    f.pointed=1

    for n in range(0, 4):
        f = f.newLineBySubdivision()
        f.filterPositions(lambda x,y,z : Vector3(x,y,z-n*30+Math.random()*10).noise(noise*1))
        f(containsDepth=1)
        f += Vector2(200,0)
        container << f
FLine supports the addition of FLine into containers (not shaders, but actual containers) using the << operator. You can remove FLine from containers using | the operator that Field overloads for "break".
These lines are thinner than the lines above, because this geometry is going directly into a new lineContainer. It's up to you to call .setWidth() on it to set the thickness globally on the whole line. You'll also note that there are no points (nor would there be any fill if we had marked this line as filled). Only the line part of the FLine fits into lineContainer. To display the fill you need to attach it to a meshContainer() likewise pointContainer() for points.