
Installing the 2d analysis tool
For sketch 2 we’re distributing some code that analyses videos, webcams and other camera sources and produces a range of analysis products in a range of formats and protocols. This page will go over how to install it, how to run it, and (hopefully) give those of you without any command line experience just enough knowledge to survive the terminal. The goal here is twofold:
- get state-of-the art, historically important image and video analysis codes into your hands, onto computers that you can use.
- make the codes simple and small so that you can look at them and figure out some things about how they work.
Since this code consists of nice little pieces of a programing language called python, this package is called pythonhead. A lot of this stuff is (supposed) to be kept strictly to ‘the priesthood’ — let’s try to break that down a bit.
Installation, part 1 — Python
First we’re going to make sure that you have a recent installation of python on your machine. Python is a popular, and very well designed, programming language that lets you write code that runs on both Windows and Mac (and Linux).
If you are on a UChicago Lab mac, for example, it’s likely that python3 is already a thing. Skip to part 2 below
You might have a version of Python already installed. To check, type python3 on a Mac (in a Terminal) or python on a Windows machine (in a cmd window). If you do, skip the installation instructions and proceed to part 2.
Windows
Go download and install the latest and greatest version of Python 3 from here. It’s probably something like version 3.7.3 or so. Once you are done, you should be able to open up a command prompt (by running cmd from the start menu) and type python without getting an error.
Mac
Install Homebrew from here — you’ll need the root password of the machine you are on (for the Logan center lab machines just ask). Then ask Homebrew, in a terminal, to go install the latest version of python for you:
brew install python3Installation, part 2 — Dependancies
Now ask Python to go install almost everything that we’ll be needing for our computer vision work:
pip3 install opencv-contrib-python numpy python-osc scikit-image scipy pylsd --user(for windows you’ll write pip rather than pip3)
Installation, part 3 — pythonhead
Finally, we’ll install our code, which is a tiny little thing called pythonhead sitting atop of all of this other code! It’s available here. Decompress that and put it somewhere that’s easy to get to (like your desktop).
Running pythonhead
To run this code you are going to have to issue a command like:
python3 process.py --help (for windows you’ll write python rather than python3)
Which might give you something like:
usage: process.py [-h] [--video VIDEO] [--do_flow] [--do_background]
                  [--do_lines] [--do_circles]
                  [--output_directory OUTPUT_DIRECTORY] [--hide]
                  [--compute_contours]

Process a video or a webcam input and extract motion and foreground statistics

optional arguments:
  -h, --help            show this help message and exit
  --video VIDEO         the name of the video file, if this is missing then
                        we'll try to open a webcam instead
  --do_flow             compute optic flow?
  --do_background       do background subtract?
  --do_lines            do LSD line detector
  --do_circles          do Hough circle detector
  --output_directory OUTPUT_DIRECTORY
                        if you set this then we'll write intermediate files to
                        a directory
  --hide                if you set this then we won't open windows to show you
                        how the video is playing
  --compute_contours    if --do_background then, additionally, trace the
                        outline of foreground areas
  --shrink SHRINK       scale the camera by this much
But it very much probably wont! It will much more likely complain that it can’t find process.py. Why?
To survive in the command line we need to be very precise about what we want to do and much of that precision comes about from specifying what files we want to do things to. We want to “run” a file called process.py which is part of that .zip file you decompressed, so we need to specify where that file is precisely. It might be something like:
python3 /Users/marc/Desktop/pythonhead/process.py --help If you that file ended up in a folder called pythonhead on your desktop and you are called marc on a mac. On Windows it would be c:\Users\marc\Desktop\pythonhead\process.py (note the ‘slashes’ occasionally go the other way on Windows). Likely, you are called something else, so what you need to type will vary. That goes for every command on this page.
Four tips to make this easier.
- You can drag files from the Finder / Explorer into the terminal / cmd prompt to have the computer spell out what they are actually called.
- If you are half way through typing a filename you can press tab to finish it (if there’s only one file or folder that starts that way) or press tab twice to see alternatives. If it doesn’t autocomplete the way you expect (or at all) consider that you might have a typo.
- the up and down arrows move through things you have already typed so you don’t have to keep typing them over and over.
- every terminal or cmd prompt has a notion of a ‘current directory’ which is where it looks for files if you don’t type their complete ‘name’. You can ‘change directory’ by typing
cd name/of/directory(in both Windows and Mac). This can save (a lot) on typing.
Really running pythonhead this time.
Now that we know how to run this code, what to do with it? Pay attention to the --help description. It tells you the kinds of things you can say after the python3 process.py. For example:
python3 /Users/marc/Desktop/pythonhead/process.py --video /Users/marc/Desktop/Movies/great_movie.mov --do_flow --do_lines[remember, for windows it’s python not python3]
Will run the analysis on a movie called ‘great_movie.mov’ inside my Movies directory (see tip 1 above) while doing the optical flow analysis and the line detector. If everything works then you’ll see something that looks like:
Accompanied by some windows:
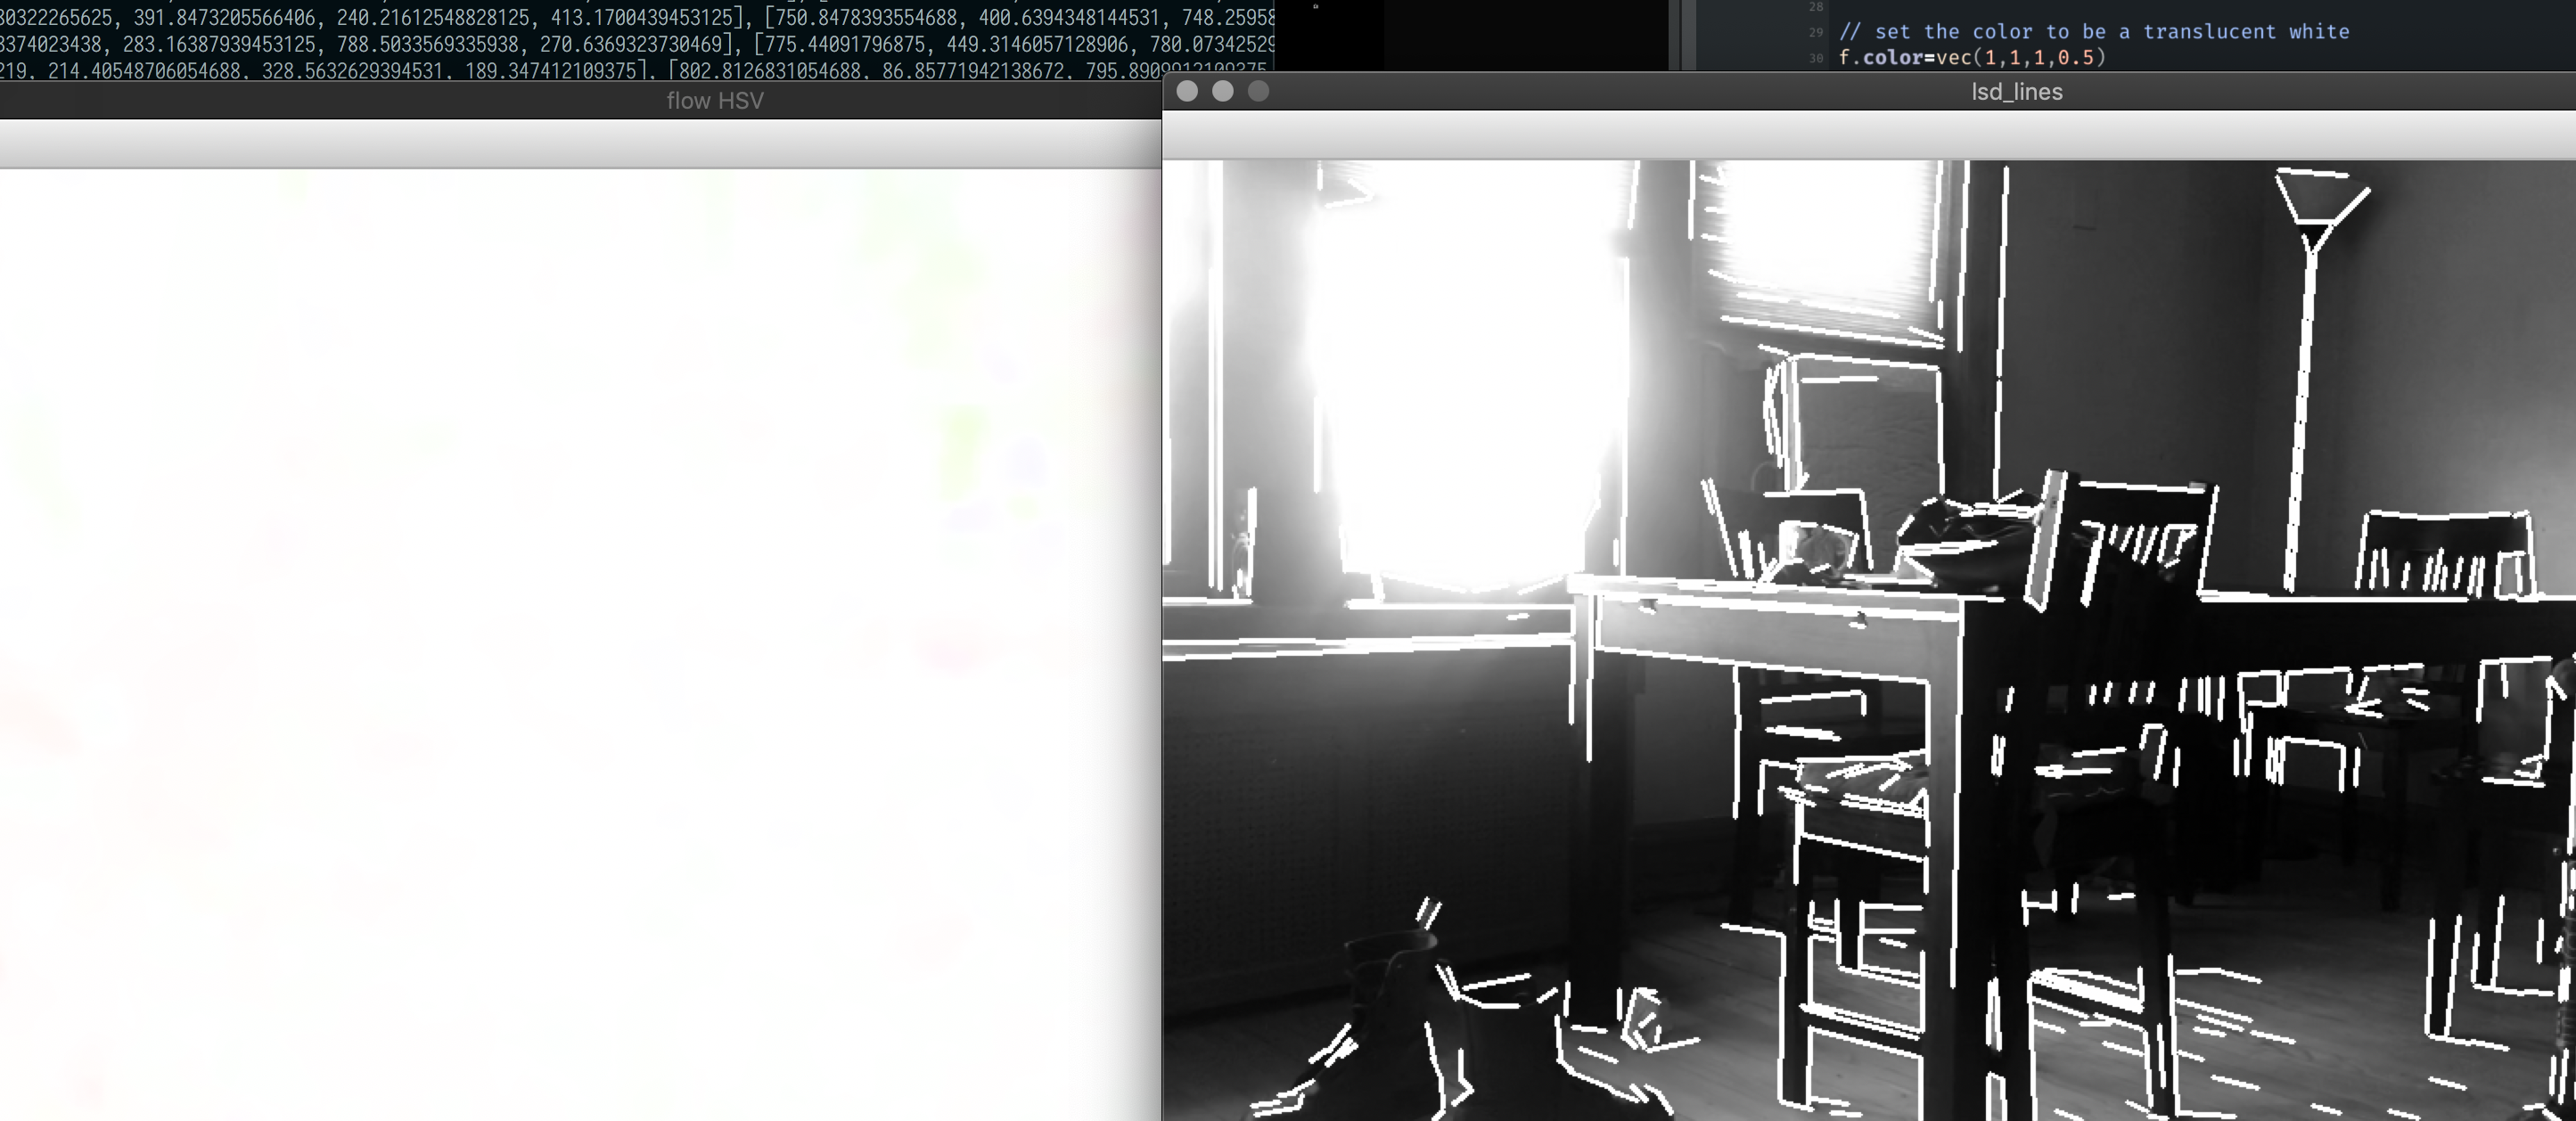
All those numbers scrolling by (which are mostly the results of do_lines) are the data. While we might enjoy being awash in data, we’d really like to save it. We can do this using some more syntax in the terminal:
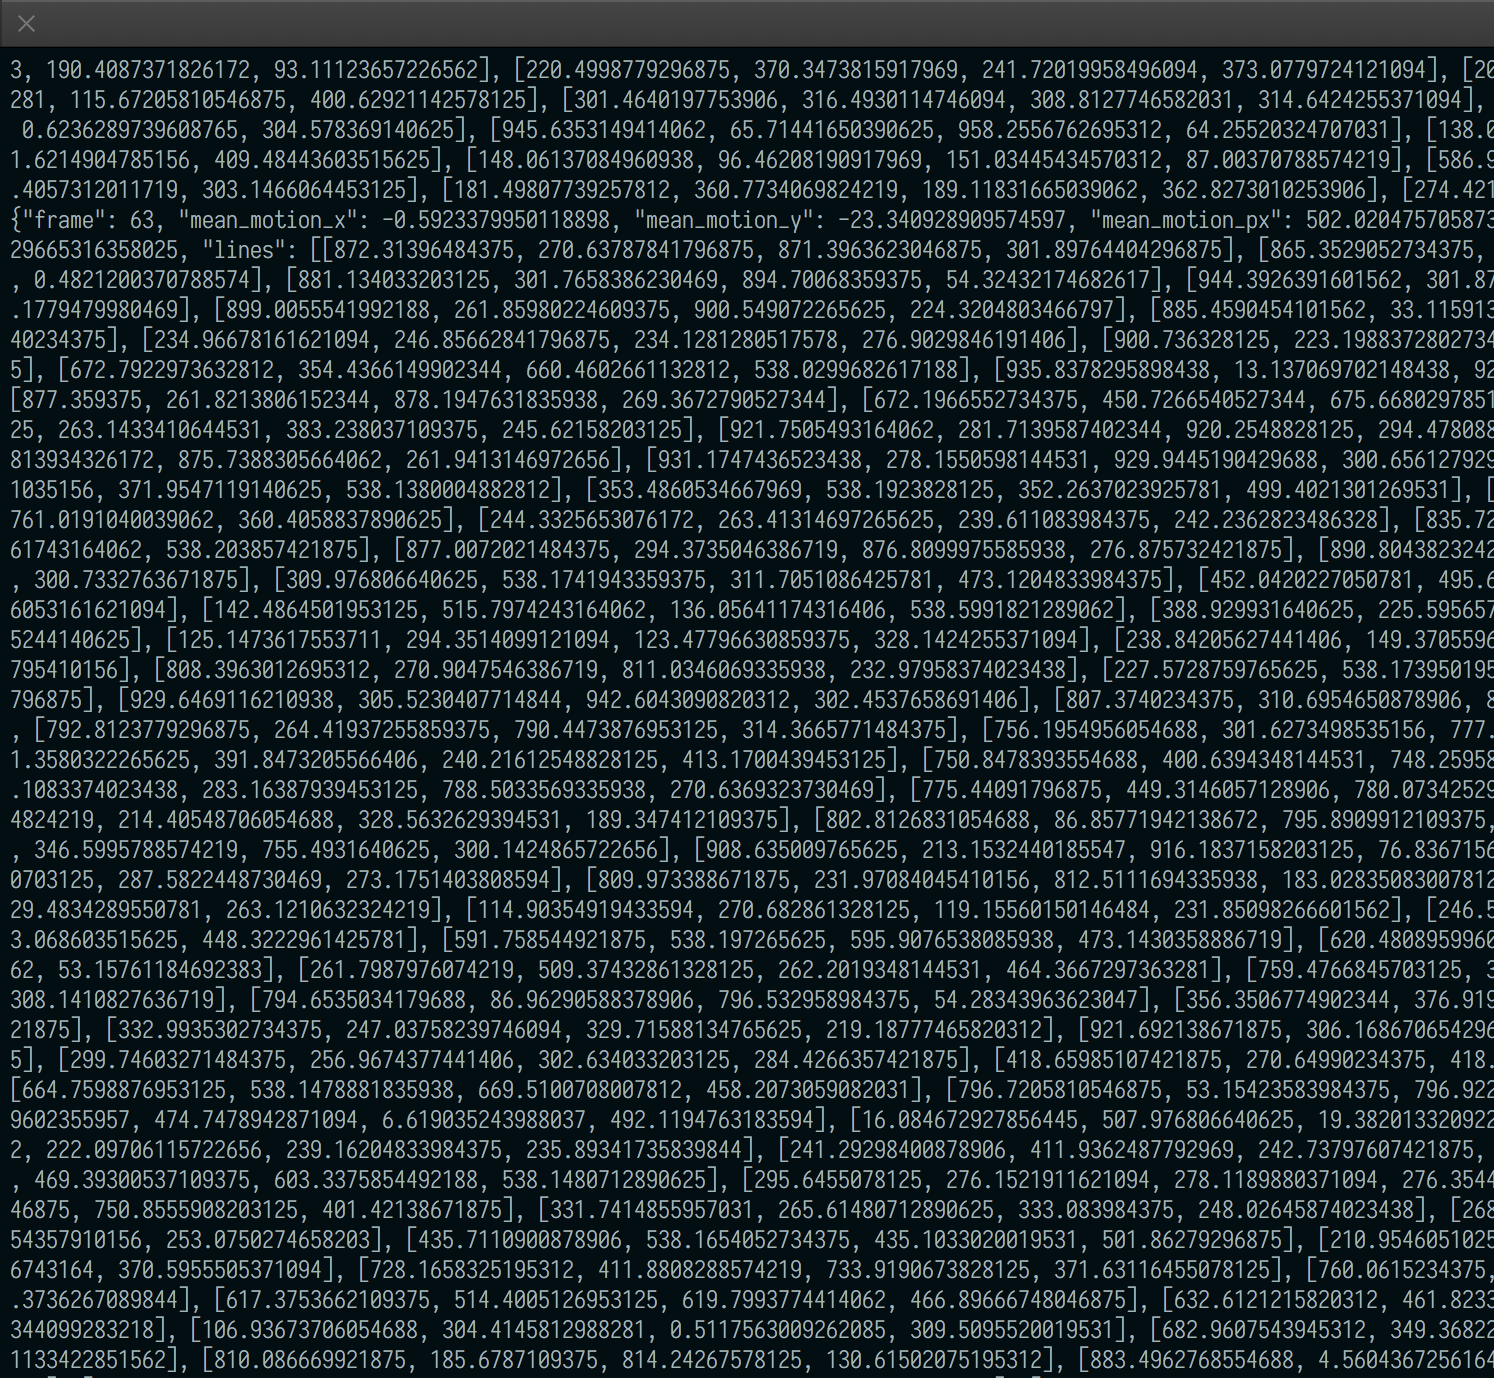
python3 /Users/marc/Desktop/pythonhead/process.py --video /Users/marc/Desktop/Movies/great_movie.mov --do_flow --do_lines > /Users/marc/Desktop/ourGreatData.jsonThat will create a file on your (my?) desktop called ourGreateData.json. We’ve stuck .json on the end because that’s the kind of file it is. Although the nice thing about .json files is that they are “human readable” (as well as machine readable). It starts something like this:
{
  "frame": 0,
  "mean_motion_x": 0,
  "mean_motion_y": 0,
  "mean_motion_px": 0,
  "mean_motion_py": 0,
  "mean_bright_px": 418.19005193559485,
  "mean_bright_py": 331.3210696938903,
  "mean_red": 100.12921875,
  "mean_green": 113.36769675925926,
  "mean_blue": 130.32241319444444,
  "width": 960,
  "height": 540
It’s well worth hacking your way through the file to find out what it contains. Things to try:
- The various
do_xxxoptions turn on various analyses. --compute_contourswill add to the--do_backgroundoption the ‘geometry’ of the foreground / background interface.- skipping the
--videooption means that we’ll try to use a built-in camera instead (and, if you have two such ‘webcams’, you can write--video 0and--video 1to tell them apart) --output_directory /name/of/directorywill cause the creation of that directory (and some sub-directories) that save the input and output of all of the analysis. This can be handy if you just want to use the video ‘products’- [Field] opens those json files and video product directories directly.
- If everything is running a bit too slow, try passing in a
--shrinkparameter. It defaults to--shrink 0.5, so try--shrink 0.25? Remember: due to the debayering that cameras do, half those pixels are fake anyway.
Transforming the data further
Along with process.py there are two other python files that might interest you. The first tocsv.py converts json to CSV (stands for comma separated values — i.e a file with rows of numbers separated by commas). You can load these files into After Effects and lots of other things (for example, Excel, R and so on).
You can run tocsv.py on an existing json file using another piece of terminal / cmd syntax. For Mac:
cat something.json | python3 tocsv.py > something.csv
For the CSIL lab macs:
cat something.json | python3.7m tocsv.py > something.csv
For Windows:
type something.json | python tocsv.py > something.csv
(remember that you might need the full/path/to/tocsv.py and these other files).
cat or type ‘prints’ the contents of a file, the | symbol pipes the output of one command to the input of another and the > symbol sends output to a file (as before).
There’s also tosca.py which sends the contents of aa json file to an OSC port:
python3 -u process.py --video /Users/marc/Desktop/Movies/great_movie.mov --do_flow --do_line | python3 tocsv.py
Lots of programs can read OSC.
Live connection to Field
Field alpha.27 contains support for running and connecting to the pythonhead process directly. Alas, digging into theses datastructures that pythonhead produces isn’t the most beginner-friendly thing to think about (think about this: a set of ‘tracks’ for a frame is a list-of-lists-of-lists. Yikes! Unpacking that a little: the set of ‘tracks’ for a frame is a list (over all of the ongoing tracks) of tracks which consist of a list of points (going backwards throught time) where each point is a list of two numbers (the x and y position of the point). We made it!).
Here’s some example code, a ‘cookbook’ if you will, for a few of the things that pythonhead produces; for actually figuring out how to draw lines in Field, you’ll want to start with the documentation. There’s a command in each snippet of code that points Field to pythonhead — you’ll want to change this line to point to where you put pythonhead, which is unlikely to be exactly where I put it. So, if you put it on the desktop on a mac it will be something like:
PythonHead.start(_, "/usr/local/bin/python3", "/Users/yournamehere/Desktop/pythonhead", ["--do_lines"])On the UChicago CSIL Lab Macs its:
PythonHead.start(_, "/usr/local/opt/python3/bin/python3", "/Users/yournamehere/Desktop/pythonhead", ["--do_lines"])On windows it’s a little more involved:
PythonHead.start(_, "C:/Users/yournamehere/AppData/Local/Programs/Python/Python37/python.exe", "/Users/yournamehere/Desktop/pythonhead", ["--do_lines"])You can ask Windows where ‘python’ is by typing where python in the cmd window. Watch the slashes though~ (they are always / in JavaScript not \, sigh).
Gross Motion
The simplest set of numbers to grab from pythonhead is the bulk statistics over the motion.
// start pythonhead running, with the do_lines option
var PythonHead = Java.type("trace.video.PythonHead")
// **change this according to your OS and according to where you put pythonhead**
PythonHead.start(_, "/usr/local/opt/python3/bin/python3", "/Users/marcdownie/Desktop/pythonhead", ["--do_lines", "--shrink", "0.2", "--do_flow"])

// do this every frame
_r = () => {
	var fx = PythonHead.now.mean_motion_x*10000
	var fy = PythonHead.now.mean_motion_y*10000

	var b = PythonHead.now.mean_red /255
	var g = PythonHead.now.mean_green /255
	var r = PythonHead.now.mean_blue /255

	var px = PythonHead.now.mean_motion_px*960
	var py = PythonHead.now.mean_motion_py*540

	var f = new FLine()

	f.moveTo(px, py)
	f.lineTo(px+fx, py+fy)

	f.thicken=10
	f.color = vec(r,g,b,1)

	_.lines.f = f
}
This is just drawing a line from the position of the “average moving thing” (mean_motion_px, py) in the direction of motion (mean_motion_x,y):

Its very wobbly, let’s smooth it:
// start pythonhead running, with the do_lines option
var PythonHead = Java.type("trace.video.PythonHead")
// **change this according to your OS and according to where you put pythonhead**
PythonHead.start(_, "/usr/local/opt/python3/bin/python3", "/Users/marcdownie/Desktop/pythonhead", ["--do_lines", "--shrink", "0.2", "--do_flow"])
var lfx = 0
var lfy = 0
var lpx = 0
var lpy = 0


_r = () => {
	var fx = PythonHead.now.mean_motion_x*10000
	var fy = PythonHead.now.mean_motion_y*10000

	var b = PythonHead.now.mean_red /255
	var g = PythonHead.now.mean_green /255
	var r = PythonHead.now.mean_blue /255

	var px = PythonHead.now.mean_motion_px*960
	var py = PythonHead.now.mean_motion_py*540

	alpha = 0.95

	// the worlds simplest smoothing filter
	// every frame lfx moves only 5% of the way towards whatever pythonhead says
	// it should be
	lfx = lfx*alpha + (1-alpha)*fx
	lfy = lfy*alpha + (1-alpha)*fy

	lpx = lpx*alpha + (1-alpha)*px
	lpy = lpy*alpha + (1-alpha)*py

	var f = new FLine()

	f.moveTo(lpx, lpy)
	f.lineTo(lpx+lfx, lpy+lfy)

	f.thicken=10
	f.color = vec(r,g,b,1)

	_.lines.f = f
}
Much better:

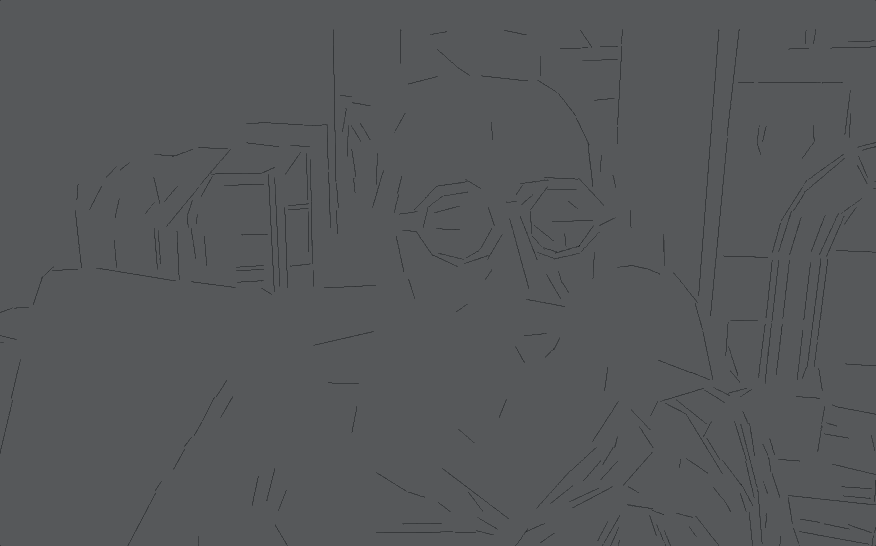
Line detector
The lines of a frame is a list (all the lines) of list (the start and the end of the line) of lists (with two numbers, x and y). We can plot them like this
// start pythonhead running, with the do_lines option
var PythonHead = Java.type("trace.video.PythonHead")
// **change this according to your OS and according to where you put pythonhead**
PythonHead.start(_, "/usr/local/bin/python3", "/Users/marc/temp/pythonhead", ["--do_lines"])

// do this every frame
_r = () => {
	// make a new line
	var f = new FLine()
	// grab the 'lines' for the current moment
	var l = PythonHead.now.lines
	// if there are any lines, then draw all of them
	if (l)
		for(var i=0;i<l.length;i++)
		{
			// list of list of lists!
			// the first point
			a = vec(l[i][0][0], l[i][0][1])
			// the second point
			b = vec(l[i][1][0], l[i][1][1])

			// scale them up so we can see them
			a = a * vec(960, 540)
			b = b * vec(960, 540)

			f.moveTo(a)
			f.lineTo(b)
		}

	// color them black
	f.color=vec(0,0,0,1)
	_.lines.f = f
}
Yields:
We can then start to refine this data and change the way that it’s drawn:
var PythonHead = Java.type("trace.video.PythonHead")
// change this according to your OS and according to where you put pythonhead
PythonHead.start(_, "/usr/local/bin/python3", "/Users/marc/temp/pythonhead", ["--do_lines"])

_r = () => {
	var f = new FLine()
	var l = PythonHead.now.lines
	if (l)
		for(var i=0;i<l.length;i++)
		{
			a = vec(l[i][0][0], l[i][0][1])
			b = vec(l[i][1][0], l[i][1][1])

			a = a * vec(960, 540)
			b = b * vec(960, 540)

			perp = a-b
			perp = vec(perp.y, -perp.x).normalize()*5

			f.moveTo( (a-b)*1+b)
			f.lineTo( (b-a)*1+a)

			f.moveTo( (a-b)*2+b+perp)
			f.lineTo( (a-b)*2+b-perp)
			f.moveTo( (b-a)*2+a+perp)
			f.lineTo( (b-a)*2+a-perp)

			f.moveTo( (a-b)*2+b)
			f.lineTo( (b-a)*2+a)
			f.moveTo( (a-b)*0.65+b)
			f.lineTo( (b-a)*0.65+a)
			f.moveTo( (a-b)*0.65+b)
			f.lineTo( (b-a)*0.65+a)
			f.moveTo( (a-b)*0.65+b)
			f.lineTo( (b-a)*0.65+a)

		}
	f.color=vec(0,0,0,0.2)
	_.lines.f = f
	f.pointed=true
	f.pointSize=1
}
Prettier…

Extending this further and further we could have:
// start pythonhead running, with the do_lines option
var PythonHead = Java.type("trace.video.PythonHead")
// **change this according to your OS and according to where you put pythonhead**
// we add shrink 0.25 to make things run faster
PythonHead.start(_, "/usr/local/bin/python3", "/Users/marc/temp/pythonhead", ["--do_lines", "--shrink", "0.25", "--do_flow"])

// we are going to filter the optical flow
var afx = 0
var afy = 0

// do this every frame
_r = () => {
	// make a new line
	var f = new FLine()
	// grab the 'lines' for the current moment
	var l = PythonHead.now.lines
	// if there are any lines, then draw all of them
	if (l)
	{
		// grab the flow amount
		var fx = PythonHead.now.mean_motion_x*200
		var fy = PythonHead.now.mean_motion_y*-200

		// and smooth out the noise in it
		afx = fx*0.1 + 0.9*afx
		afy = fy*0.1 + 0.9*afy

		for(var i=0;i<l.length;i++)
		{
			// list of list of lists!
			// the first point
			a = vec(l[i][0][0], l[i][0][1])
			// the second point
			b = vec(l[i][1][0], l[i][1][1])

			len = (a-b).length()
			// scale them up so we can see them
			a = a * vec(960, 540)
			b = b * vec(960, 540)

			// random flow-based jitter
			a.x += afx*100*Math.random()
			b.x += afx*100*Math.random()

			a.y += afy*100*Math.random()
			b.y += afy*100*Math.random()

			perp = a-b
			perp = vec(perp.y, -perp.x).normalize()*1


			f.moveTo((a-b)*2+a)
			f.last().color=vec(0,0,0,1)
			f.lineTo((b-a)*2+b)
			f.last().color=vec(0,0,0,1)

			// render as weird triangle things
			for(var n=0;n<30;n++)
			{
				a = (a-b)*(1+len*n*0.003) + b
				a.noise(3)
				b.noise(0.5)
				a = a + perp
				f.moveTo(a)
				f.last().color=vec(len*3,len*3,len*3,0.1)
				f.lineTo(b)
				f.last().color=vec(0,0,0,0.3)
			}
		}

	}
	_.lines.f = f
}
Different:
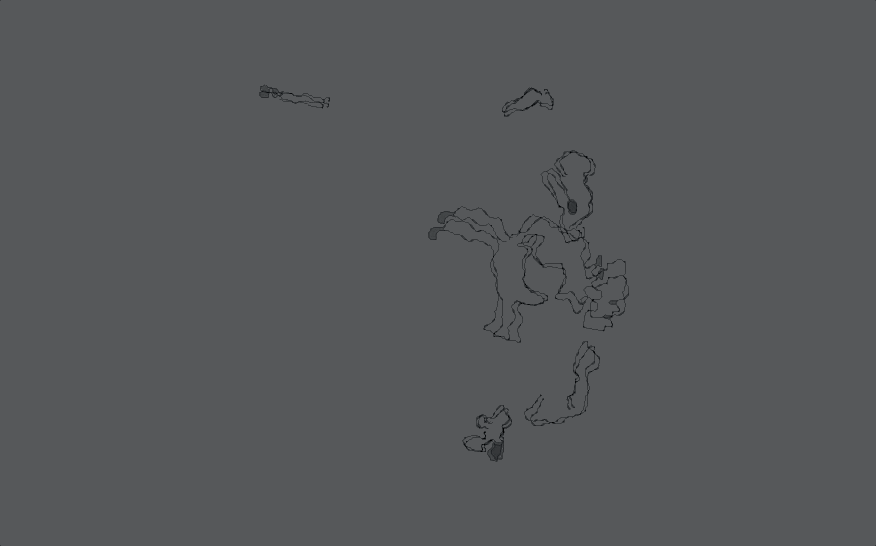
Contours and Tracks
Contours and tracks use almost exactly the same code to draw them (they are both lists of lists of lists); unlike the line detector they can consist of a variable number of points (that middle list doesn’t always have just 2 things in it).
So we can do code like this:
var PythonHead = Java.type("trace.video.PythonHead")
// change this according to your OS and according to where you put pythonhead
PythonHead.start(_, "/usr/local/bin/python3", "/Users/marc/temp/pythonhead", ["--do_background", "--compute_contours"])

_r = () => {
	var t = PythonHead.now.contours
	if (t)
	{
		_.lines.clear()
		for(var i=0;i<t.length;i++)
		{
			var f = new FLine()
			var track = t[i]

			if (track.length<40) continue

			f.moveTo(track[0][0]*960, track[0][1]*540)
			for(var j=1;j<track.length;j+=1)
			{
				f.lineTo(track[j][0]*960, track[j][1]*540)
			}

			f = f * scale(1.2).pivot(f.center())
			f.color = vec(0,0,0,0.3)
			f.strokeColor = vec(0,0,0,1)
			f.filled=true
			_.lines.add(f)
			f = f * rotate(10.2).pivot(f.center())
			f.color = vec(0,0,0,0.3)
			f.strokeColor = vec(0,0,0,1)
			f.filled=true
			_.lines.add(f)
		}
	}
}
Yielding:
Changing PythonHead.now.contours to PythonHead.now.tracks, and the launch parameters from --do_background to do_tracks and the same code will draw the motion trails.
Things to remember
- Machines, operating systems and cameras vary — there is almost certainly an instruction on this page that needs refining. Pay attention to things that look like error messages, and ask for help in the slack channel when things to awry, if in doubt, ask questions with screenshots.
- Once everything’s working, ask for changes — new analyses, new transformations.