The Stage
— a more interesting place to draw things
The introduction to FLine drawing documentation focuses on building and manipulating FLines, and drawing them on Fields ‘main window’ — in amongst all of the other things: the editor, the boxes, their connections, the time marker etc. This window is a fine place for quick hacks (and notational gestures, a theme we’ll pick up later) but it’s hardly a pristine surface for art.
A better place is a Stage either located inside a Viewport or a Window. Opening the commands (control-space) and typing ‘insert from workspace’ and then typing/selecting ‘graphics.stage’ will get you a new Stage inside a Viewport:
That Viewport is just a fancy box — you can grab it, move it around, resize it, connect to it, delete it etc. just like any other box. It comes with some code in it to set things up, although you are unlikely to need to look at it or change it (it even automatically executes the code so you don’t have to).
Rather it exports a new variable called _.stage which lets you put things into this Viewport. So, rather than putting lines into _.lines to list them as lines to be drawn by this box of code, put lines into _.stage.lines and they’ll appear in that viewport:
Draw a white diagonal line
var f = new FLine()

f.moveTo(10,10)
f.lineTo(90,90)

// make sure we can actually see the line
f.color = vec(1,1,1,1)
f.thicken = 1

_.stage.lines.f = f

// make sure that Field redraws this frame
_.stage.frame()
This yields a picture like:
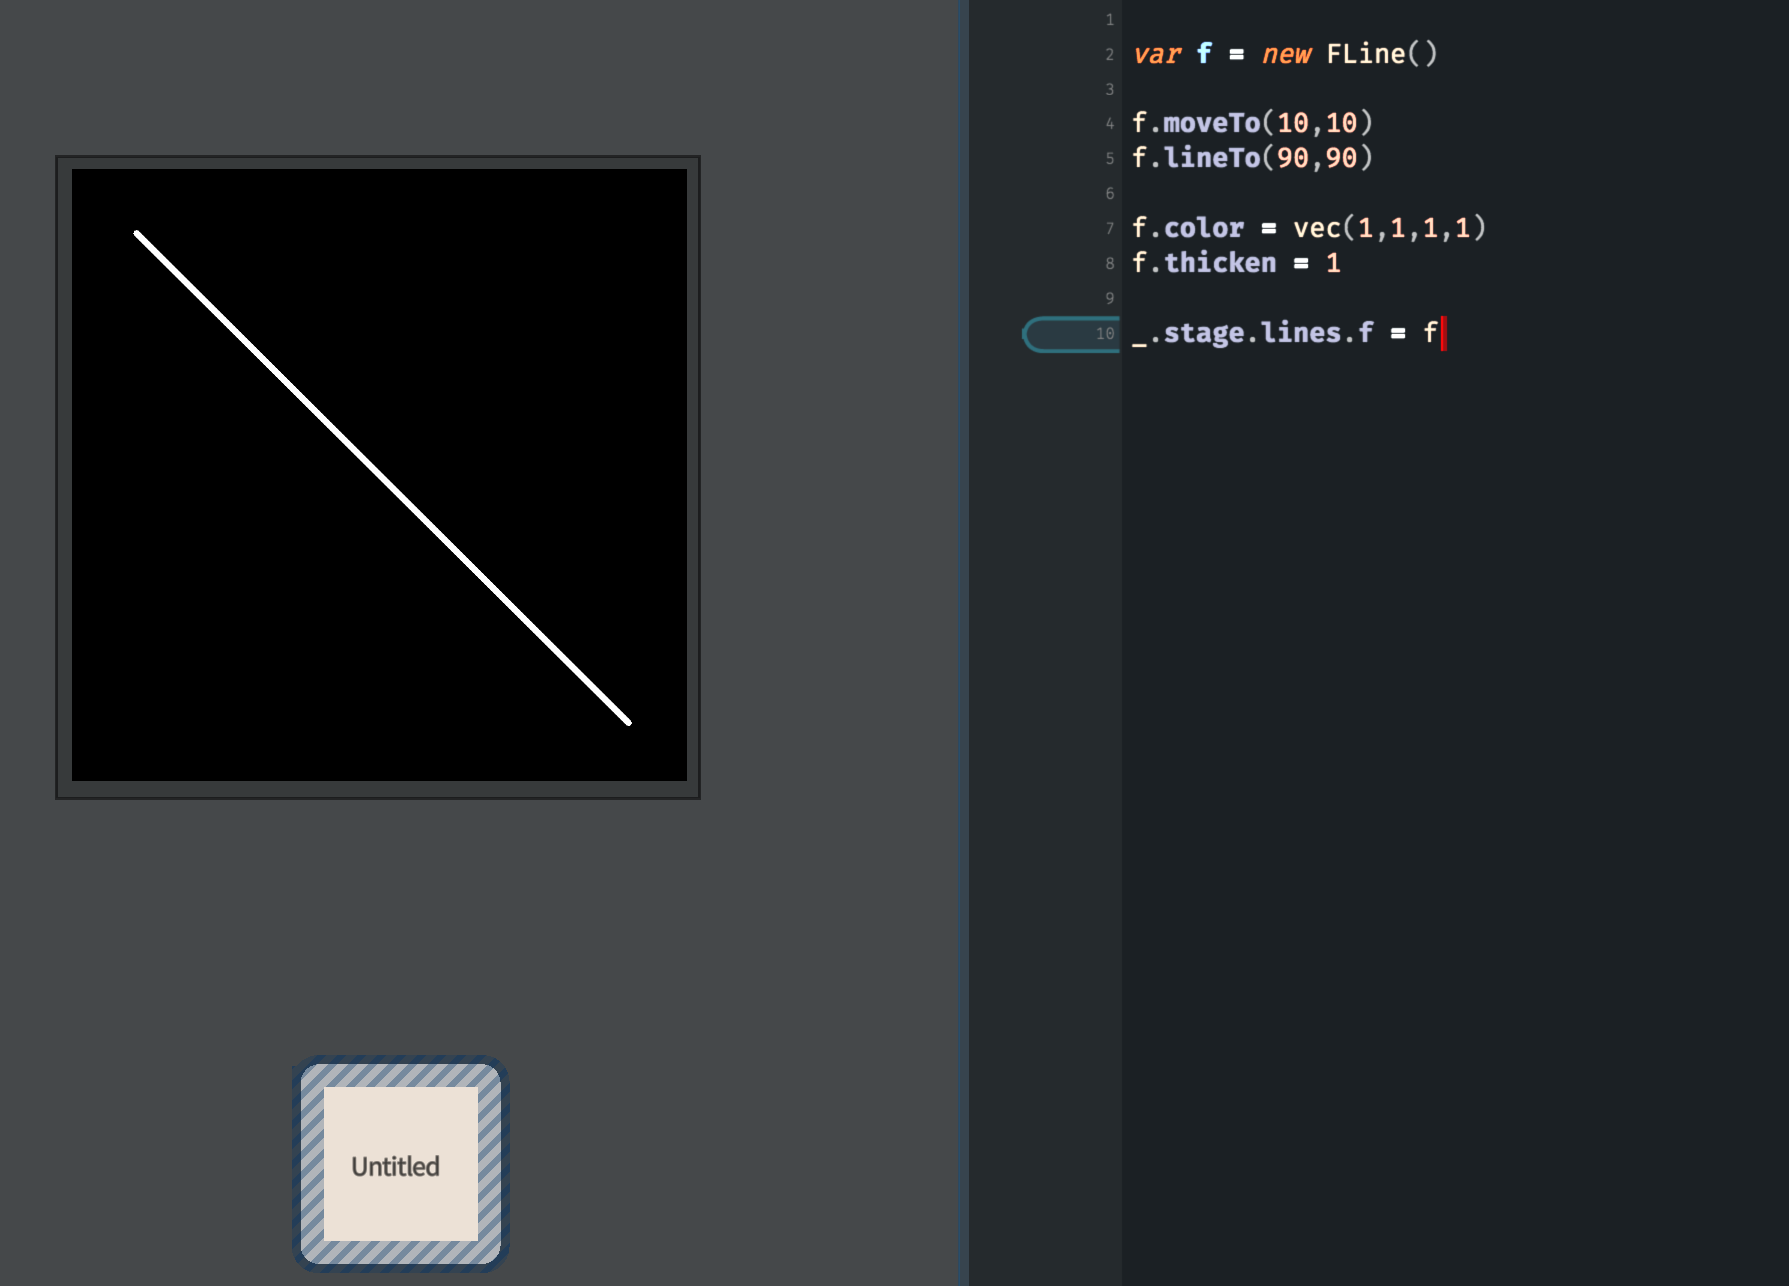
Remember to turn your lines some color other than black if you want to see them against the default black background.
Differences from _.lines
The key differences between drawing to _.stage.lines vs. _.lines are as follows:
- The coordinate system — Stages, by default, cover the area between
0,0(top left) and100,100(bottom right) no matter how big or small they are. - Better redrawing behavior: Saying
_.stage.frame()is a better way of saying_.redraw()followed by_.wait()if you want to wait until the next frame of animation and redraw the screen. - Stages can be popped out into windows all by themselves. To do this, right click on the viewport box and select ‘Pop Out’ from the menu (gesture left). This configuration, with boxes and code (and notation and timelines etc) in one window and the actual animation in another might end up being your basic setup going forward, especially if you have access to two monitors. You can pop the window back in by closing the window, and you can cycle between windows using command-tab (Mac) or control-tab (Windows).
- Stages have extra Layers. Putting things into
_.stage.linesputs material into the default layer; but a Stage will create different layers for you. Layers have their own camera, their own color and spatial transformation rules, their own opacity and their own computational cost. You can build something very complicated in one layer once and then move it around (with the layer’s camera), fade it up and down very quickly. - Layers support texturing. Possible texture sources include a .jpg file (of your own creation), a movie (that’s been ripped out into a directory full of .jpg files), and even live camera input.
- Saving — Field can easily save the contents of a Stage to disk as an jpeg image sequence.
- That background color. Not only do you now have a pristine background for your artworks you can change its color (
stage.background = vec(1,0,0,1)for bright red, for example) you can also decide just how much the frame-buffer is cleared during frames. We’ll describe the ramifications of this below.
The texture sources are really the big change, until now all of your FLine drawing has been colored a solid color. Texturing lets you change this. Successfully understand the potential here and you have much of the conceptual structure of Final Cut / Premiere / After Effects potentially connected to your code.
Simple texture
Let’s start with some texturing — that’s a computer graphics term for the application of image material onto geometry. Let’s start with applying a single .jpg image onto an FLine square:
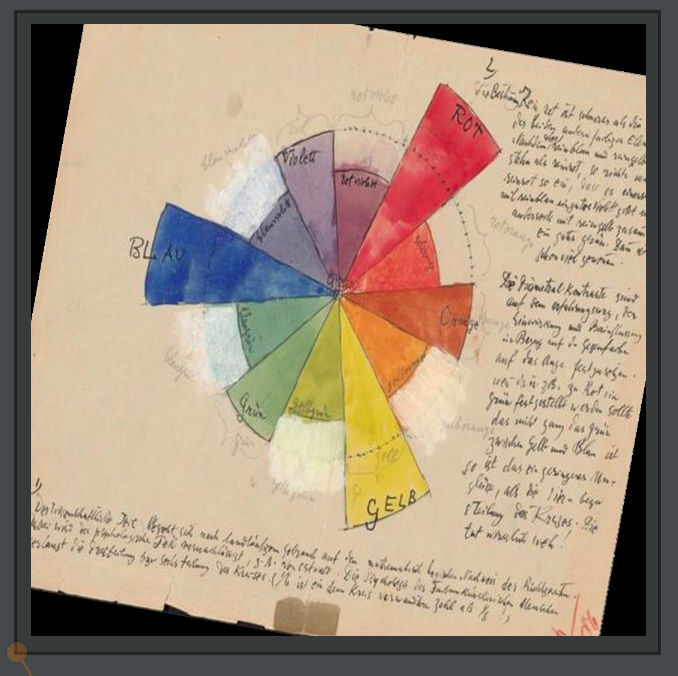
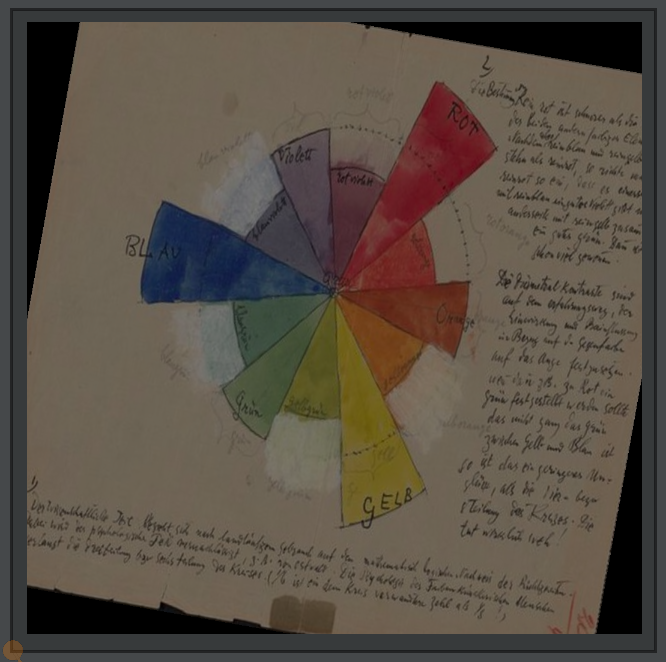
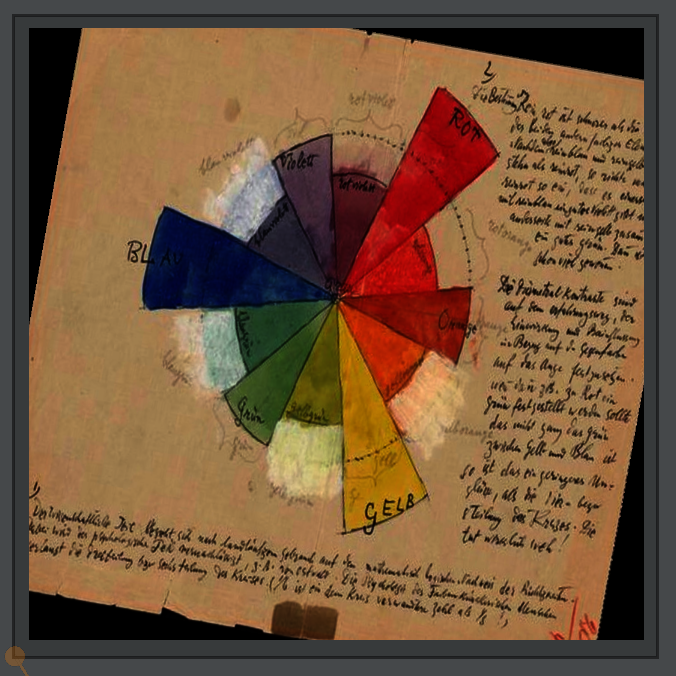
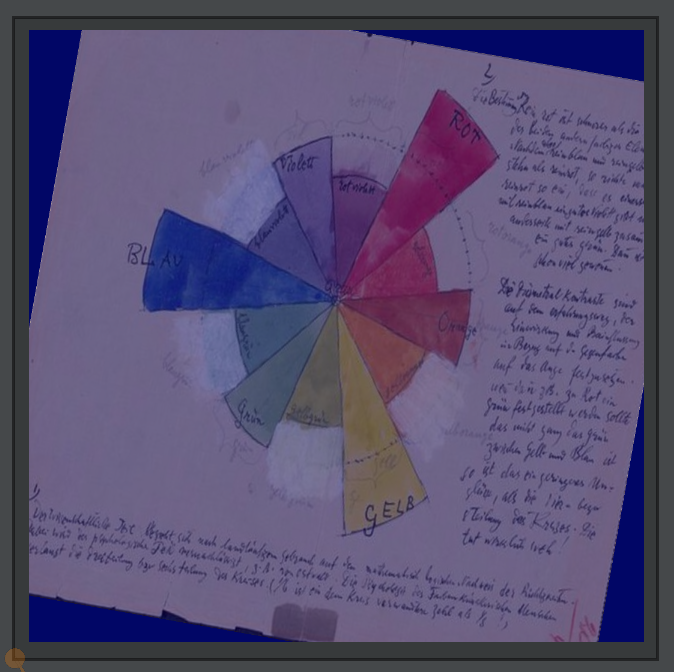
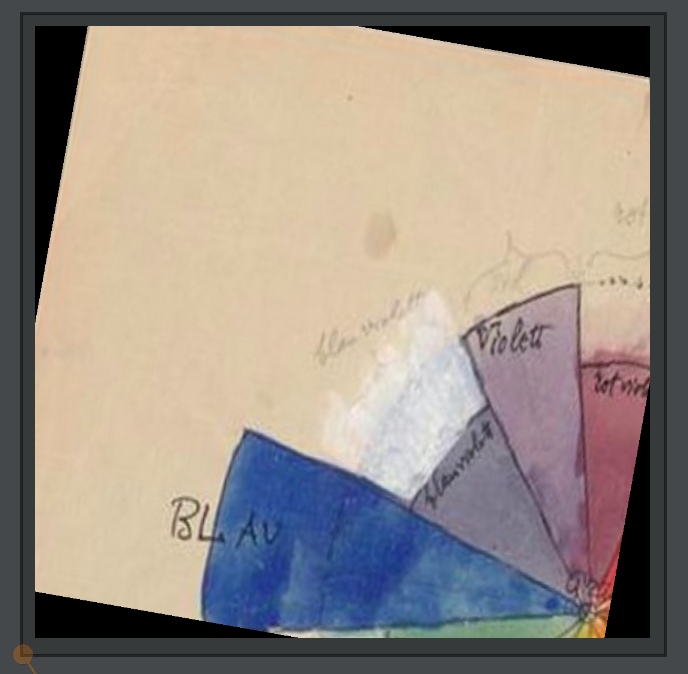
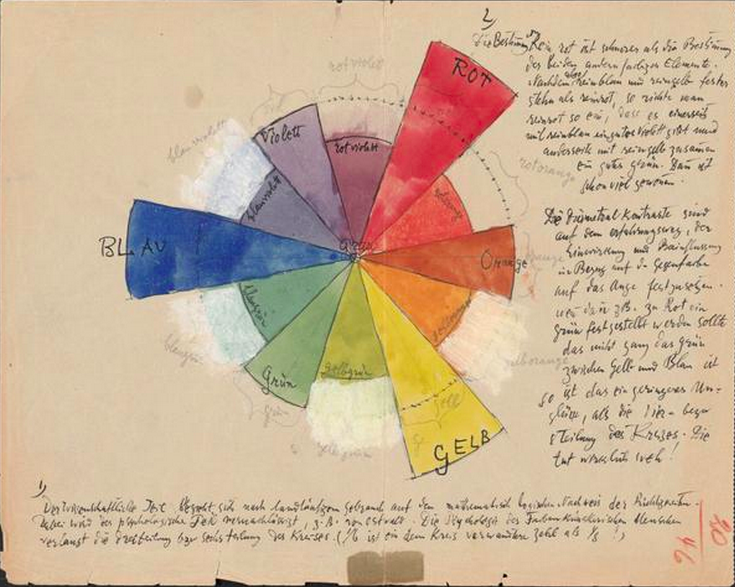 We’re using this page from the Paul Klee notebooks as our test image.
Draw an ‘image’ in a square
var layer = _.stage.withTexture("/Users/marc/Desktop/testImage1.jpg")

var f = new FLine().rect(0,0,100,100)

f.filled=true
f.color=vec(1,1,1,1)

f = f * rotate(10).pivot(f.center())
layer.lines.f = f

_.stage.frame()
The first line makes a layer with the texture inside /Users/marc/Desktop/testImage1.jpg, the rest of the code you should be able to follow: make a square that’s 100x100, fill it, color it white, rotate it around its center by 10 degrees and then add it to the list of lines in this layer. However, doing that gets us:
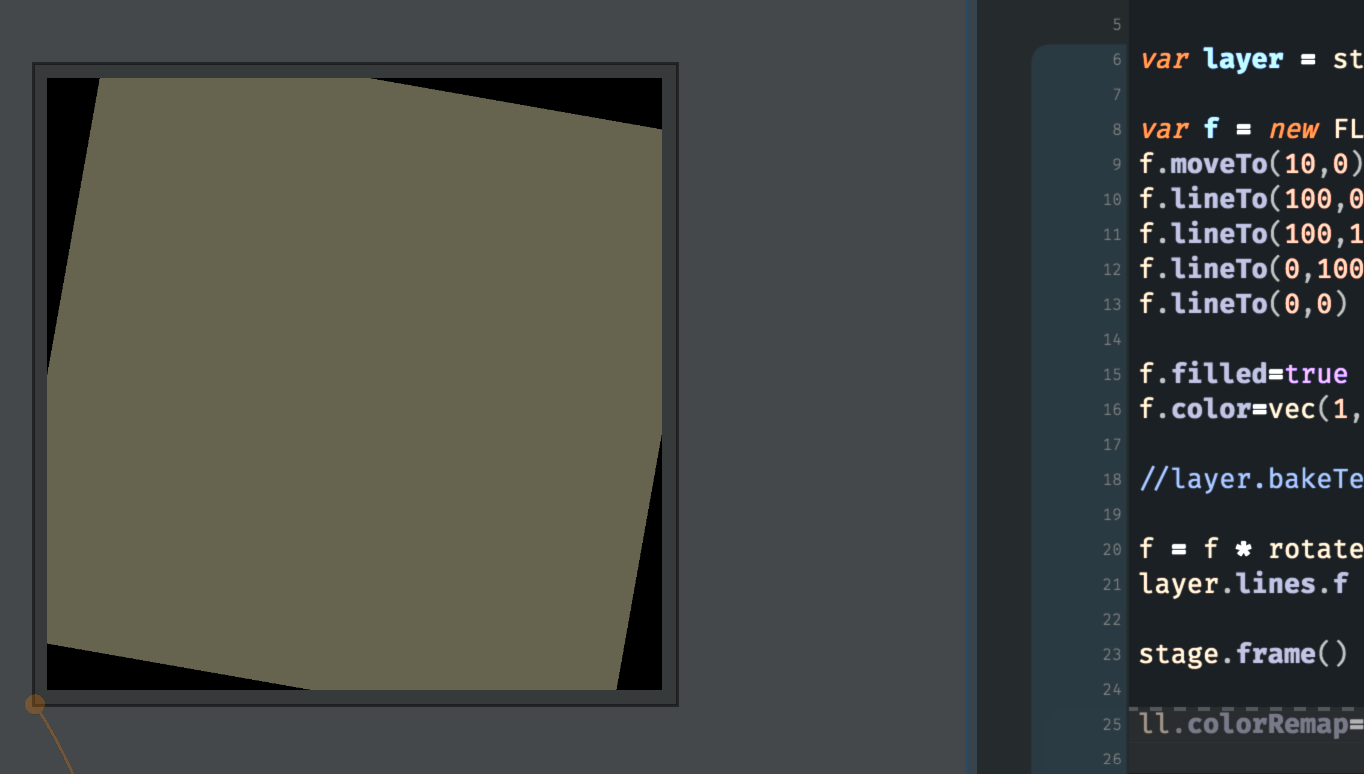
That’s rather unsatisfying, and certainly isn’t much of an image.
What’s missing is a relationship between what we are drawing (the rectangle) and the (parts of the) image that we are trying to use. There are many ways that one could imagine going about specifying this. Here’s one:
Actually draw an image in a square
var f = new FLine()
f.moveTo(0,0)
f.node().texCoord = vec(0,0)
f.lineTo(100,0)
f.node().texCoord = vec(1,0)
f.lineTo(100,100)
f.node().texCoord = vec(1,1)
f.lineTo(0,100)
f.node().texCoord = vec(0,1)
f.lineTo(0,0)
f.node().texCoord = vec(0,0)
Inserting that code into the previous code, yields the much more interesting:
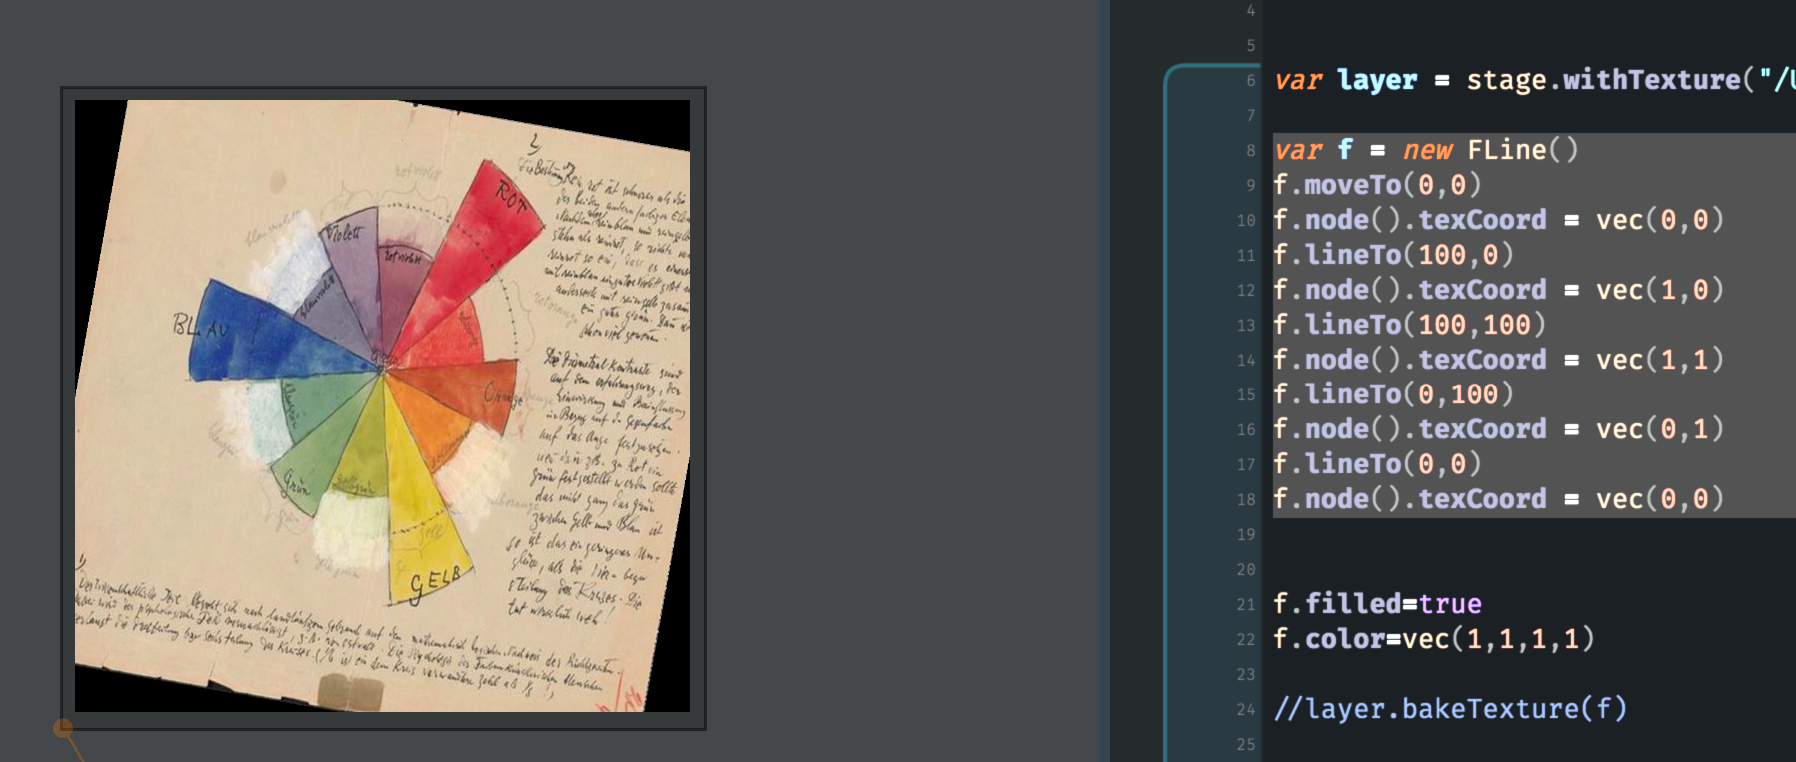
If you go carefully through it you’ll see that we’ve started at the top-right of the of our rectangle (.moveTo(0,0)) and we’ve mapped that to the top right of our test image (vec(0,0)) then we’ve taken the top left of the rectangle and mapped that to the top left of our image (vec(1,0)) and so on. Because we’ve mapped the rectangle of our image to a square the image has ended up squeezed slightly.
If we change that code to be:
Actually draw a distorted image in a square
var f = new FLine()
f.moveTo(0,0)
f.node().texCoord = vec(0,0)
f.lineTo(100,0)
f.node().texCoord = vec(0.5,0)
f.lineTo(100,100)
f.node().texCoord = vec(0.5,1)
f.lineTo(0,100)
f.node().texCoord = vec(0,1)
f.lineTo(0,0)
f.node().texCoord = vec(0,0)
We get:
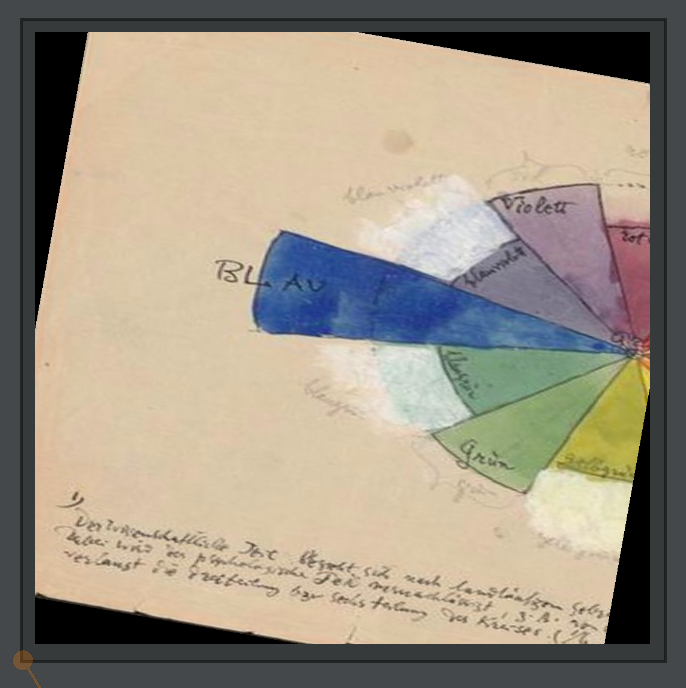
Check to see if you follow. We’ve mapped our 100x100 square onto the left half of our test image. Of course, there’s only one way to build an intuition for what’s happening here and that’s to go play with the code. In actual fact if we look back at our original image (where we didn’t have any texture coordinates) you’ll see that we actually drew a 100x100 square that was mapped to the very top left of the source image — everything came out the precise color of the top left of the image.
One additional feature. Sometimes writing all of those texture coordinates out by hand is tedious. You can do this instead:
Actually draw an image in a square with much less typing and thinking
var f = new FLine().rect(0,0,100,100)

f.filled=true
f.color=vec(1,1,1,1)

layer.bakeTexture(f)

f = f * rotate(10).pivot(f.center())
layer.lines.f = f

_.stage.frame()
That call to layer.bakeTexture(someLine) looks at the contents of the line, figures out where on the screen each part of the line would fall, uses that as a texture coordinate. Now if we transform the line (here with rotate(10), the image comes along for the ride. Think of it as stamping the image onto a piece of geometry that can later be moved around (and squashed and stretched).
For example:
Actually draw an distorted in a square
var layer = _.stage.withTexture("/Users/marc/Desktop/testImage1.jpg")
var f = new FLine().rect(0,0,100,100)
// a rectangle only has 4 sides, so we subdivide these sides into 32 pieces to give us more points to work with
f = f.bySubdividing()
f = f.bySubdividing()
f = f.bySubdividing()
f = f.bySubdividing()
f = f.bySubdividing()
// it's still a 100x100 square, but now we have more nodes in our line.
f.filled=true
f.color=vec(1,1,1,1)
// bake the texture
layer.bakeTexture(f)
// noise it up a little
f = f.byTransforming( x=> x.noise(10))
layer.lines.f = f
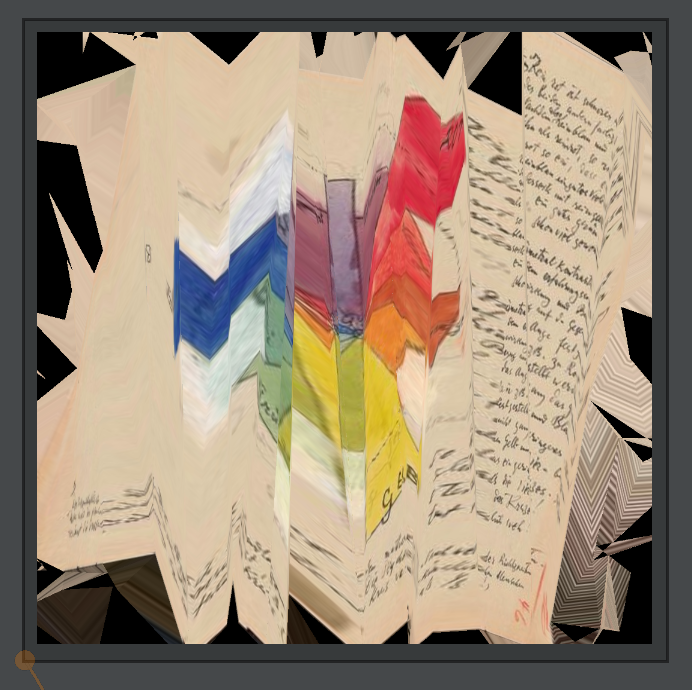
_.stage.frame()Gives a badly crumpled piece of paper:
Finally we should note that, if you edit the source image in an external editor (like Photoshop), Field will automatically reload and update the image when you save over the file. This lets you iterate inside Photoshop to get things just right.
Other texture sources:
_.stage.withTexture(filename) is one way to get a textured layer for drawing your textured FLine. There are two other texture sources of note. The first is a ‘video’. Field likes to treat video in the simplest possible way: as a directory full of sequentially numbered .jpg images. The only extra addition here is that a layer has a time variable built into it.
Draw video
var t = 0
while(true)
{
	layer = _.stage.withImageSequence("/Users/marc/Desktop/trace/symphonie_diagonale.mpg.dir/")

	var f = new FLine().rect(0,0,100,100)

	f.color=vec(1,1,1,1)

	f = f * rotate(-10).pivot(f.center())

	layer.bakeTexture(f)

	f.filled=true
	layer.lines.f = f * rotate(10)

	t = t + 1

    // start half-way through the movie, and head forward in time
	layer.time = 0.5 + t/10000.

	_.stage.frame()
}
Yields (on my computer, where I have a copy of the movie as a directory full of sequential .jpg files) Symphonie Diagonale, rotated by 10 degrees.
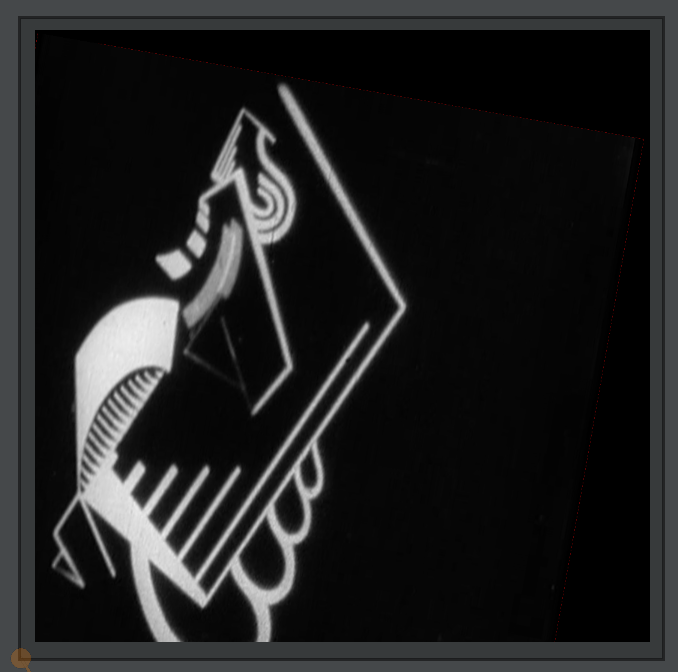
Field does prefer to play back images at around typical video frame-rates, and in order. Note: playing back video can be fairly taxing on your machine. Field tries very hard to predict what frames you might want to load so that parts of your computer can busy itself loading them while you are still watching earlier frames; but if you set layer.time to a series of random numbers you’ll experience jerky and inconsistent animation. If you decide to dedicate your project towards playing back frames in a random order let me know — we’ll come up with a video player that makes different optimizations.
The time variable goes from 0 to 1 (from the first frame of the movie to the last). Numbers bigger than 1 loop around and start from the beginning. You have complete control over which frame gets loaded when (Field will crossfade between nearby frames to sustain the illusion of variable frame-rate a little longer).
Note: Field’s fast jpeg loader (like almost all others) requires that the width of your jpeg is divisible by 4. All common video sizes do this, but if your jpeg (sequence) looks warped or weird (and that’s not because you have made it so using the tools below) check your image sequence.
Another example of a texture source is live camera input (Mac only). Ask for a layer _.stage.withWebcam() and you’ll get a live camera feed from your laptop (I’ve gone back to the crumpled paper code):
Background color
Changing the background color seems like it would be a feature that requires very little explanation. And certainly:
_.stage.background.r = 1
_.stage.background.g = 0
_.stage.background.b = 0
… does exactly what you’d expect — changes the background of the stage to a pure red. But, unlike the background of Field’s main window, a stage’s background has an alpha component. This changes how much the background is cleared. The ‘alpha’ component (the last one) of the background color controls whether the background is drawn in completely solidly at the start of the frame (thus truly clearing everything to that color) or whether some of the previous frame remains. Setting this to low values (like 0.05) will yield a long motion blur like effect. This is a time honored technique to achieve geometric complexity in a realtime scene.
Let’s consider this code here:
Falling, jittering circles
var fall = 0

layer = _.stage.withName("dots")

while(true)
{
	layer.lines.clear()
	for (var x=0;x<10;x++){
		for (var y=0;y<10;y++){
			var f = new FLine()

			f.circle(x*10+3*Math.random(), (y*10+3*Math.random()-fall)%100, 1+Math.random())

			f.filled=true
			f.strokeColor=vec(1,1,1,1)
			f.fillColor=vec(1,1,1,0.4)
			layer.lines.add(f)
		}
	}

	layer.opacity=0.5

	fall -= 1
	_.stage.frame()
}
This code produces a 10x10 grid of circles that randomly wiggle their centers and their radii while ‘falling’ down. Using the ‘mod’ (or ‘remainder’) operator circles that fall off the bottom of the canvas (which, you’ll recall, is 100x100) are warped back up to the top.
If we set _.stage.background.w = 0.2 we get this instead:
And if we set _.stage.background.w = 0.02 we get this instead:
Note how everything is getting brighter (because the translucent white dots have more change to “accumulate”), and how the traces of previous frames take longer to disappear. At a certain point our “wiggling circles” stop being perceived as wiggling and end up looking more like complex organic form. A .w of 0 will cause the screen to never clear (of course, you can draw always draw black geometry, and take complete control over the ‘negative’ space of your stage).
Camera movement
The camera controls for a layer are very simple and complete:
layer.translation = vec(0,0)— controls what, in 2d, the camera looks at.layer.rotation = 0.0— controls the rotation of the camera in degrees (that is, whether and how the ‘y’ axis is no longer down)layer.scale = vec(1,1)— controls the ‘zoom’ of the camera. Numbers bigger than1zoom in, numbers smaller zoom out.layer.opacity = 1.0— controls the overall opacity of the layer
For example:
Cricles with noisy camera
layer = _.stage.withName("dots")

var t = 0
while(true)
{
	layer.lines.clear()
	for (var x=0;x<11;x++){
		for (var y=0;y<11;y++){
			var f = new FLine()

			f.circle(x*10, y*10, 2)

			f.filled=true
			f.strokeColor=vec(1,1,1,1)
			f.fillColor=vec(1,1,1,0.6)
			layer.lines.add(f)
		}
	}

	layer.opacity=1
	layer.translation=vec(Math.sin(t)*10,Math.cos(t)*10).noise(0.1)
	layer.scale = vec(1.,1.).noise(0.1)
	layer.rotation = t

	t += 0.05
	_.stage.frame()
}
This code makes a grid of circles and then translates, scales and rotate the camera associated with the layer:
Crucially cameras are per-layer — this means you can do classic parallax scrolling (as it’s known in computer games) or multi-plane camera (as it’s known in classic animation) techniques. For example, this code scatters that dot grid into two different layers and then rotates them in opposite directions:
layer = _.stage.withName("dots")
layer2 = _.stage.withName("dots2")

var t = 0
while(true)
{
	layer.lines.clear()
	layer2.lines.clear()
	for (var x=0;x<11;x++){
		for (var y=0;y<11;y++){
			var f = new FLine()

			f.circle(x*10, y*10, 2)

			f.filled=true
			f.strokeColor=vec(1,1,1,1)
			f.fillColor=vec(1,1,1,0.6)
			if (x%2==y%2)
				layer.lines.add(f)
			else
				layer2.lines.add(f)
		}
	}

	layer.opacity=1
	layer.translation=vec(Math.sin(t)*10,Math.cos(t)*10).noise(0.1)
	layer.scale = vec(1.,1.).noise(0.1)
	layer.rotation = t

	layer2.opacity=1
	layer2.translation=vec(Math.sin(-t)*10,Math.cos(-t)*10).noise(0.1)
	layer2.scale = vec(1,1.).noise(0.1)
	layer2.rotation = -t

	t += 0.05
	_.stage.frame()
}
Yielding:
Finally, if you want to add (on top of this 2D translation / rotation and scaling) a full 3D camera, check out the documentation here
Saving a Stage to disk
Saving the contents of a Stage to disk can easily be achieved:
// start saving
_.stage.startSaving()

// stop saving
_.stage.stopSaving()
Upon the first startSaving Field builds a new directory inside field_stage_recordings on your Desktop. These directories are automatically numbered ‘00001’, ‘00002’ etc. Inside there you’ll find the contents of the Stage being quickly written out as a jpg sequence. You can turn this into a movie using any number of command line or production tools (or email for help). Field only saves a .jpg when you call _.stage.frame() unless the Stage is ‘popped out’ into it’s own window. Remember to call _.stage.stopSaving() at some point if you are using the pop-out window — Field will otherwise happily fill up your hard drive with jpgs.
Advanced: color remapping
Other than camera and background manipulation texturing is really what Stage offers. Texturing refers to the use of pixel-based digital images to color geometry in computer graphics. Texturing is possible mainly because so much of your computer is dedicated to making texturing work quickly. The technology is extremely common in computer games from today all the way back through to the early days of arcade machines; it’s also, effectively, how multiple windows get composited and layered into a single screen. This graphics hardware offers two other, obvious, interventions. The first is the ability to mathematically manipulate the color of pixels. This allows us to interpose computation after the computer has finished deciding where things are going to end up but before it is actually put on the screen. That is: this is where we can explore the mathematics of pixels. Stage offers a simple interface to this hardware (documented here) or access to the whole enchilada.
Here’s an example. Let’s go back to our test image:
var layer = _.stage.withTexture("/Users/marc/Desktop/testImage1.jpg")

var f = new FLine().rect(0,0,100,100)

f.filled=true
f.color=vec(1,1,1,1)

layer.bakeTexture(f)

f = f * rotate(10).pivot(f.center())
layer.lines.f = f

_.stage.frame()
Yielding:
Let’s add the following line to this code:
layer.colorRemap="outColor.rgb = tex.rgb / 2"We’ll get this instead:
What we’ve done is that we’ve applied that piece of math to every part of our texture. Specifically we’ve taken the color of the texturing tex.rgb and divided it by 2 and set the outColor.rgb (the color we’ll end up actually drawing to the screen).
layer.colorRemap is a piece of text that’s written in a language similar to (but frustratingly not exactly like) JavaScript. It’s different because it’s simpler, and because it actually ends up running on a completely different “computer” running inside your computer. That computer — the dedicated graphics hardware — is very good at doing the same operation (here division by 2) to many different things (here pixels) at the same time. This is exactly what you want when you are manipulating pixels. If you stop and think for a moment, this single instruction has performed a division by 2 over 2-3 million times (which is roughly how many pixels are in this image) for each of 3 channels of a pixel (red, green and blue) every time the computer draws the screen (~60 times a second). Thats 500 million divisions per second.
This layer.colorRemap is written in a language called “GL Shader Language” (which you can Google). To use it, or rather, hack your way into it you’ll need to know that:
outColoris where you are going to be writing colors to,texis the color of the texture map,coloris the color of the actualFLine(which we’ve set to be white throughout this page).tc.xyis the “texture coordinates” and goes from0,0(top left) to1,1(bottom right) across the image that’s being used to texture with.
If you don’t do anything at all you end up with layer.colorRemap effectively outColor = tex * color, that is the color of the FLine multiplies the color of the texturing image.
Other things we can set layer.colorRemap to, to give you an idea of the syntax and the potential here:
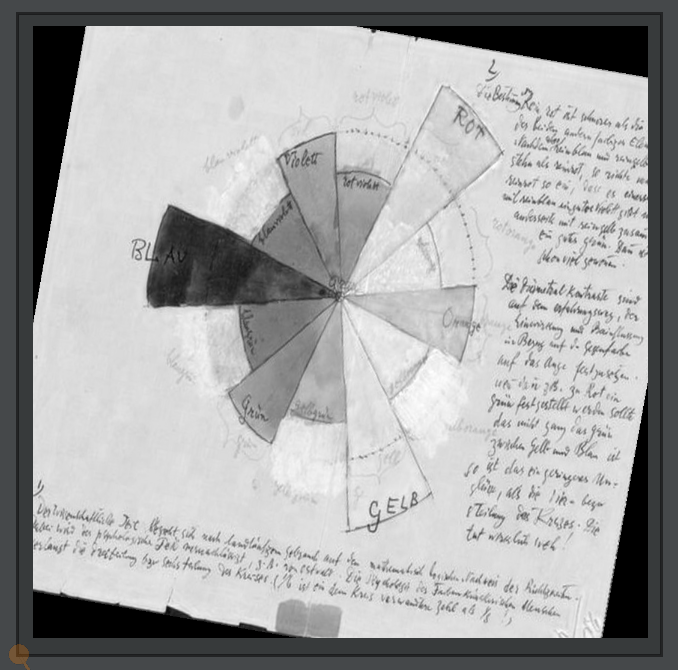
outColor.rgb = tex.rrr— sets the color to be the ‘red’ component in the source image. Since this means that the red, green and blue of the output image are all the same, this turns the image black and white →
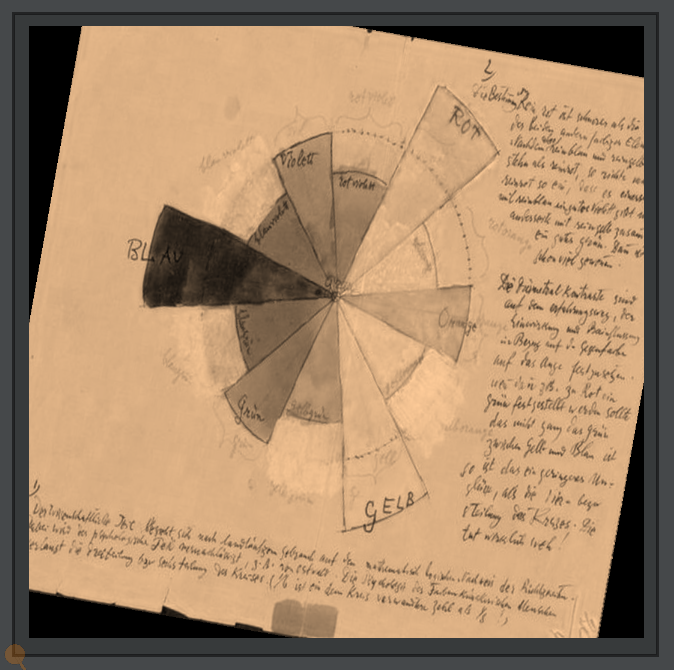
outColor.rgb = tex.rrr * vec3(1, 0.8, 0.6)— turns the image black and white and then multiplies it by a warm grey (vec3(1,0.8,0.6)). Unlike Fieldvec(1,0.8,0.6)is spelledvec3(1,0.8, 0.6). →
outColor.rgb = outColor.rgb * outColor.rgb * outColor.rgb— increases the ‘contrast’ in the image (actually, strictly, what is known in color science and Final Cut / Premier as gamma). You might want to stop and think for a moment as to why this appears to increase the contrast. If we recall that images contain the amount of red, green and blue light as numbers between0and1then, if we multiply those numbers by themselves three times, then all of the numbers less than one (less that pure saturated colors and white) will end up darker. Furthermore the closer they are to 0 the more they will end up darker (by fraction). This squeezes the color space down towards black and stretches everything towards white to cover more range. Thus, the contrast (and, indirectly, saturation) of the resulting image is generally increased →
outColor.a = 0.5— sets the opacity of an image (also known as alpha hence the.a) to be 0.5 (i.e. 50%). You’ll note that, against a black background, this is indistinguishable from having the image. But in the case of the background not being black (or not being fully opaque) this ends up being quite different. We’ve drawn this against a blue background and you can see that there is a blue cast across the whole image →
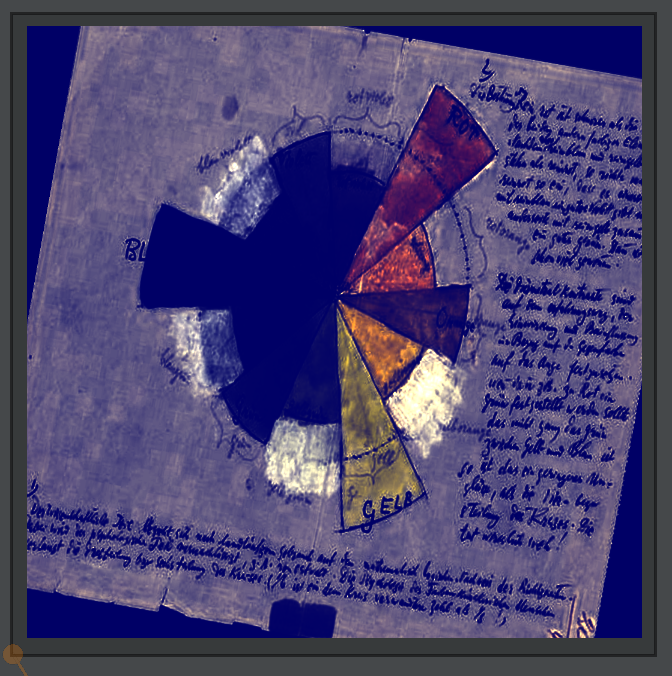
outColor.a = pow(outColor.r,10)*2— sets the opacity of an image to its red component raised to the 10th power and multiplied by 2. This means that everything that isn’t really red (or magenta or white, the two other ‘colors’ with a lot of red light in them) ends up being quite translucent. We’ve drawn this against a blue background, and you can see the dark, non-red parts of the image have taken on the color of the background →
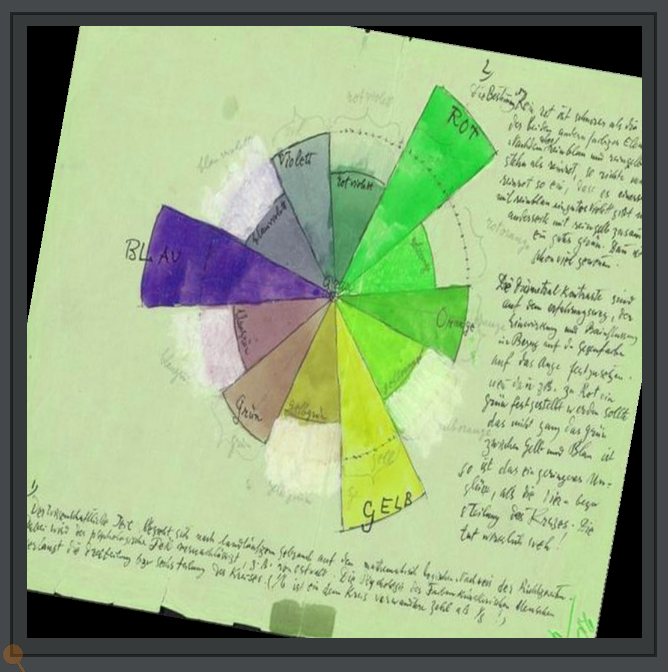
outColor.rgb = outColor.grb— sets the red, green and blue channels of the image to be the green, red and blue channels of the image. This transposition of red and green causes all of the colors to shift without (really) changing the brightness of the image →
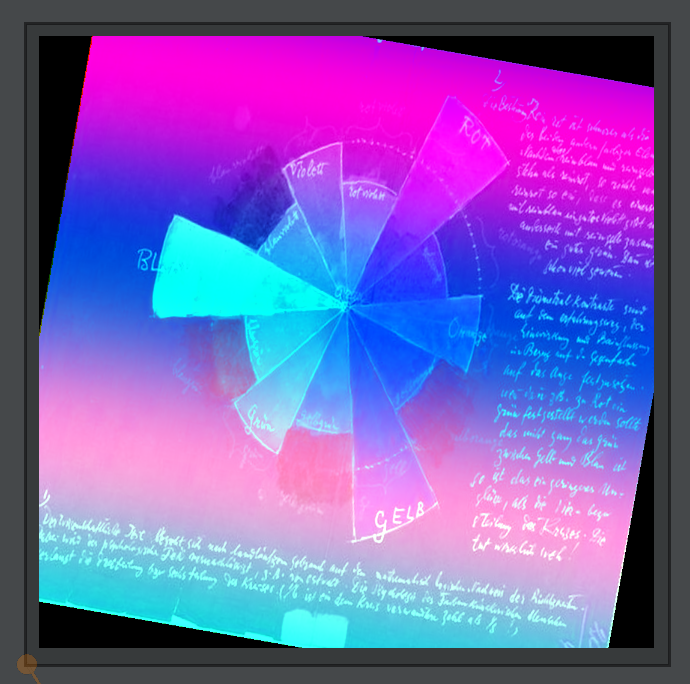
- Finally, things can get really out of control. This code here:
layer.colorRemap=`
	outColor.r = (sin(tex.g*tex.b+tc.y*10)+1)/2;
	outColor.b = cos(tex.g*tex.b);
	outColor.g = 1-1.5*sin(tex.r)+tc.y;
`
(We’ve used `` in Javascript to let us write strings of characters that are on more than one line). We’ve also incorporated tc.y which is a number that goes from 0 to 1 from the top to the bottom of the image →
And so on. The “family” of color transformations that you can perform on a per-pixel basis like this is infinite. It is also, we should note, precisely the class of transformations that every film you have ever seen (that’s been finished or remastered digitally) has undergone. Tweaking this math, perhaps with less powerful interfaces than code, is what color grading (a stage of film post-production) is.
Again, take advantage of the fact that you can try a new composition color transformation rule with a single “alt-return”, make mistakes, read the error messages and experiment.
Advanced: space remapping
All the color remapping work above can be seen as writing a small piece of code that takes a color (from the image) and maybe a few other things and yields another color. Can we do the same thing with space ? Yes.
layer.spaceRemap=`outTC.xy = tc.xy/2`This maps our shape to merely the the top right hand quarter of the image →
Just as with layer.colorRemap things can quickly get crazy from there:
outTC.xy = tc.xy*tc.xy*tc.xy— warps everything away from the top left hand corner of the image (it’s worth taking a moment to think this through in your head — the texture coordinates spend more of the range 0 to 1 closer to 0 which means that the range closer to 1 is squeezed while the range closer to 0 is stretched … ). →

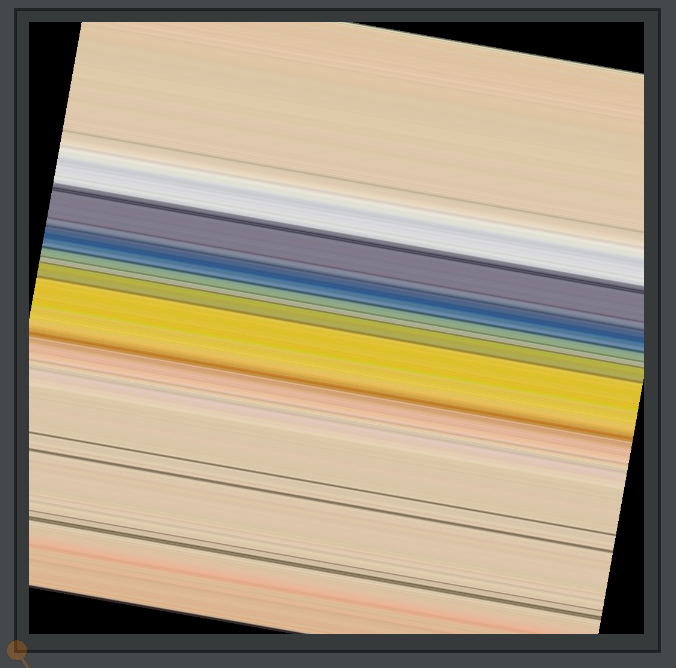
outTC.xy = tc.yy— sets the texture coordinates to just vary by ‘y’. This is actually picking out a diagonal line of the image (from the top left to the bottom right) and stretching that line to fill the whole image.
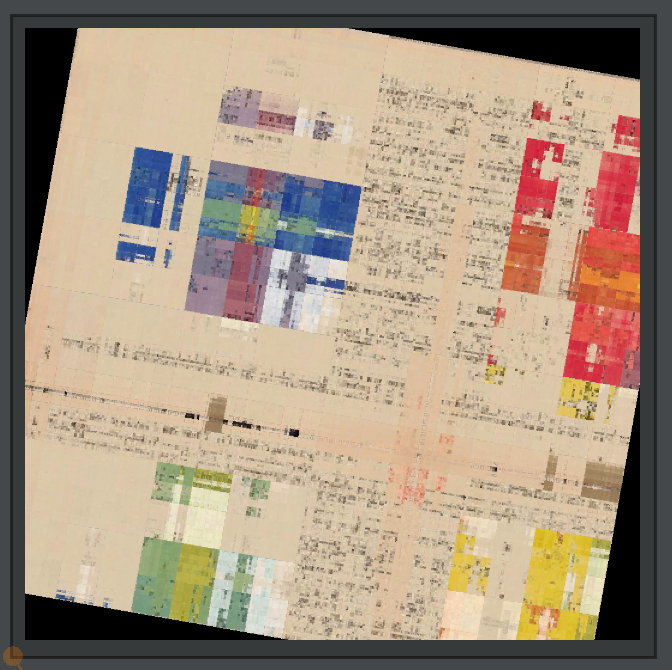
Just like color remapping, this can get out of control — and we can shred the texture map (or video or live camera input):
layer.spaceRemap=`

	int x = int(tc.x*256) %256;

	if ((x & 128)!=0) x ^= 256;
	if ((x & 64)!=0) x ^= 128;
	if ((x & 32)!=0) x ^= 64;
	if ((x & 16)!=0) x ^= 32;
	if ((x & 8)!=0) x ^= 16;
	if ((x & 4)!=0) x ^= 8;
	if ((x & 2)!=0) x ^= 4;
	if ((x & 1)!=0) x ^= 2;

	int y = int(tc.y*256) %256;
	if ((y & 128)!=0) y ^= 256;
	if ((y & 64)!=0) y ^= 128;
	if ((y & 32)!=0) y ^= 64;
	if ((y & 16)!=0) y ^= 32;
	if ((y & 8)!=0) y ^= 16;
	if ((y & 4)!=0) y ^= 8;
	if ((y & 2)!=0) y ^= 4;
	if ((y & 1)!=0) y ^= 2;

	outTC.xy = vec2(x,y)/512
`
You don’t necessarily need to follow that! That code yields this → A quasi-super-pixelated remapping of space.
One more:
layer.spaceRemap=`
	float r = length(tc.xy-vec2(0.5, 0.5));
	float angle = atan(tc.x, tc.y);
	float x = sin(r)*angle*2;
	float y = cos(r)*angle/2;
	outTC.xy = vec2(x,y);
`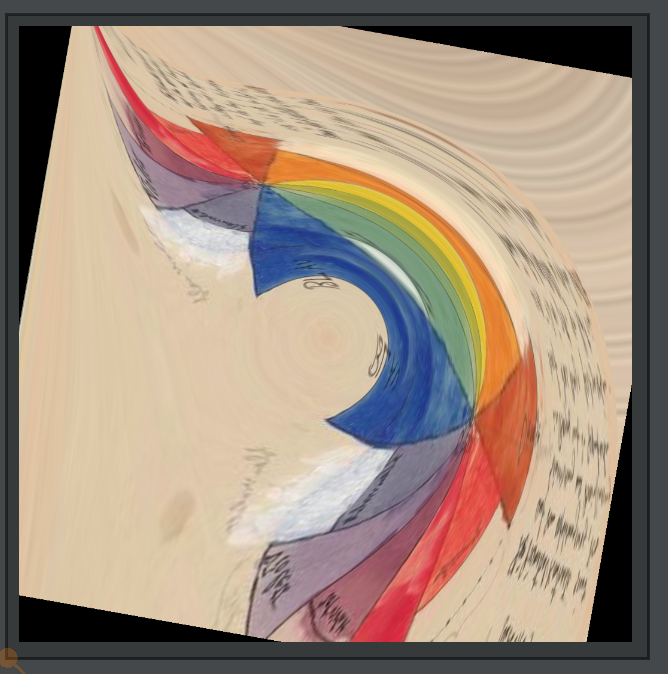
Yielding this →
Taken together space and color remapping are almost everything you need to write, say, a clone of an Instagram filter or perform color grading on a Hollywood blockbuster or a mainstream computer game. These two transformations are also the fundamental building blocks in many visual new media pieces, both for “output” (images to watch) and “input” (stages in the analysis of moving images).
Finally, a note: editing OpenGL Shader Language shaders as big strings is definitely less than ideal (and the error messages, or lack of them, are really hard to deal with) if you are ready to edit complete GLSL programs see here.